Add Paths and Styles
Current Selection Defines the Creation Context
The current selection in the Selection Overview defines where the next created Path will be added.
- If you select Path Group 1, the next Path will be added to this group
- If you select Shapes, which is the root of the Generator, the next Path will be added to a new Path Group 2
- If nothing is selected in the Layer Stack, a new layer with a new Shapes Generator will be created
The video below shows these three cases:
If the tree contains several Path Groups, always inspect the current selection in the Selection Overview before drawing a new Path.
Validating a Path
When using the Draw Bézier Curve tool, there are several ways to complete creating a Path. This is known as Path validation.
You can validate a Path in several ways:
- Click on the first point again to close the curve
- Press enter to validate and close the curve automatically
- Press esc key to validate and leave curve open
Instead of using the enter or esc keys, you can also click on one of the two buttons in the top bar of the Viewer. However, using keyboard shortcuts saves a lot of time, especially when you want to draw several open curves in a row, so it's quicker to press esc to validate a Path and restart another, as shown below.
Path Color Coding and Visibility
Each new Path has a random different color, represented by a dot located on the left of its icon. This color corresponds to the one used for Path drawing in the Viewer. Each Path can be renamed by selecting it and pressing enter, or f2, or by right-clicking and selecting Rename.
You can also click on the dot to define a new color:
Although Path Groups also have a colored dot in the Selection Overview, these colors do not appear in the Viewer and are only used for organization. For more information on how to manage Shape Overlays, please refer to this section.
The following icons appear to the right of the Path name:
- Boolean Operation: defines how to merge the current Path with previous ones
- Visibility: if this parameter is OFF, the Path isn't just invisible, it's considered non-existent
- Solo: makes all other Paths non-existent, except those also in Solo mode.
- Lock: prevents Paths from being modified and selected
The last three icons are similar to those contained in layers. You have access to the same features, such as right-clicking on a lock to “Unlock All”, or clicking on an icon and then dragging the mouse vertically over the icons in the same column.
Adding Path Groups and Paths using the Selection Overview
After selecting a layer using a Shapes Generator as Source, this Generator will be displayed in the Selection Overview.
Next to it, you'll find a "+" button to add new items to this container:

Use Add Path Group to organize your Paths and group them into these sub-containers. Simply click and drag your Path inside.
You'll also find this "+" button next to Path Groups so you can add new items to them, as well as other options.
Adding Styles
In the same "+" button next to Shapes, there are also options for adding Styles. Here again, the current selection will determine where in the tree this Style will be added, which is at the end of the current Shape Group.
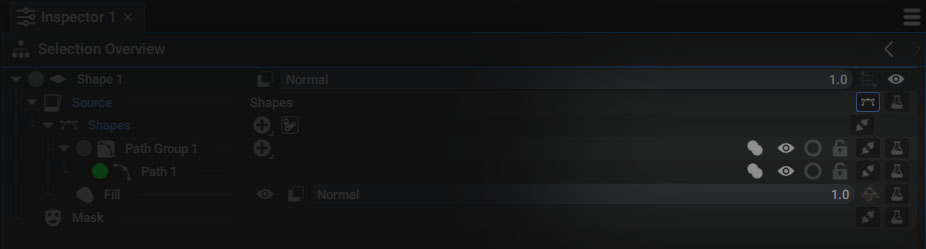
You can add multiple Styles to a single path:
In the example above, we added:
- A Path contained in a Path Group
- A Fill that draws its silhouette
- A Stroke outlining it
Remember that the operations in the tree are listed from top to bottom. The Fill is drawn first, then the Stroke is drawn on top.
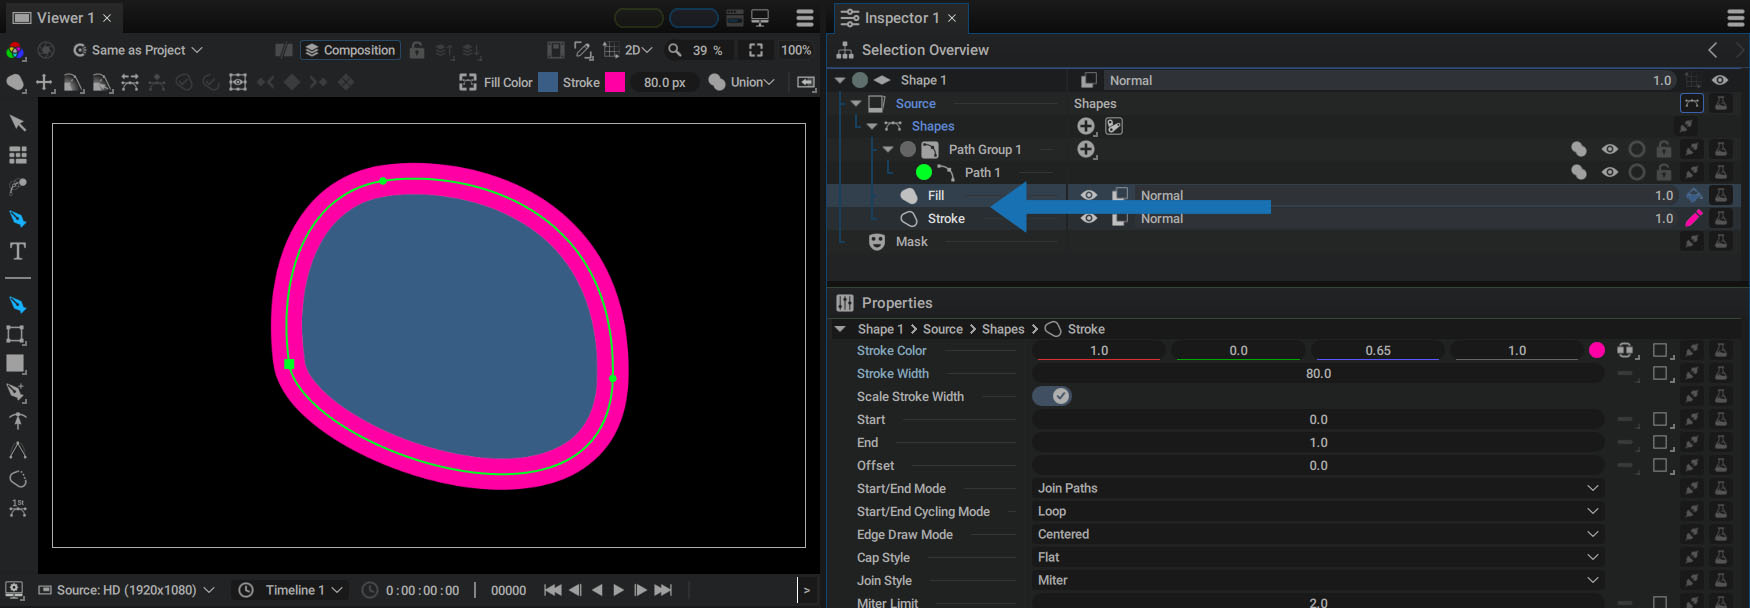
These operations can be reordered:
Now the Stroke is rendered first, then the Fill is drawn on top.
Style documentation describes numerous options for controlling the appearance of each Style, as well as Blending Modes that go far beyond simple Style stacking.
Default Style and Color when Creating a New Shape Layer
When using the Shape tool for the first time, a Style is applied by default to visualize the Path you draw.
The Style and colors used are set at the top of the Viewer:
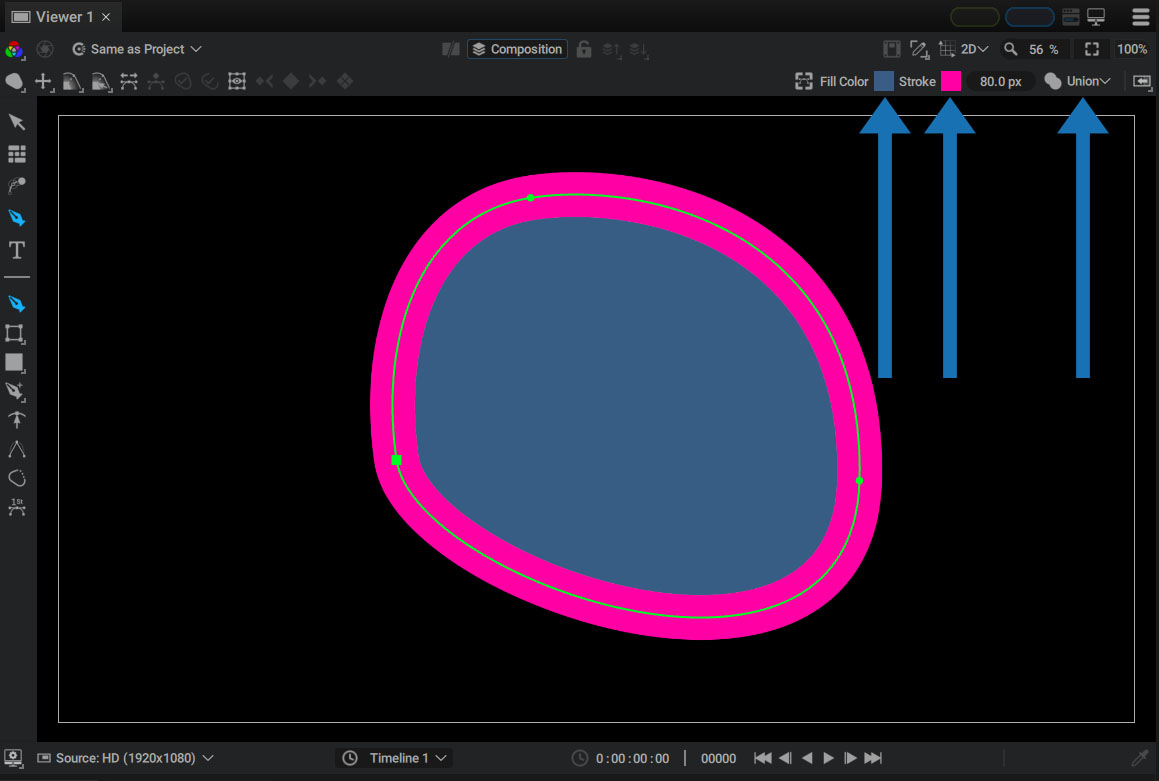
From left to right:
- Style(s) to be added by default:
- Fill
- Stroke
- Fill and Stroke
- Fill Color
- Stroke Color
- Boolean Operation set for the new created Path
When a Style is selected in the Selection Overview, the colors at the top of the Viewer will be updated according to this selection.
Selecting Fill and Stroke will add two Styles to the tree at the same time.
Automatic Style Addition Rules:
A Style will automatically be added only when a new Shape Layer is created or if the existing Shapes Generator is selected in the tree.
In the example below, we'll add a Path to an existing Path Group, followed by a Fill Style:
No new Fill style was added and the existing one was used draw the entire Path Group.
Next, we'll select the Shapes line and create a new Path:
In just one step, we have:
- A new Path Group
- The new drawn Path
- A new Style with its type and color defined by the options at the top of the Viewer
Advanced Path Creation and Editing Tools
Autograph provides a wide range of tools for creating and editing Paths. For more information, please refer to the Path Editing section.