
Maxon Autograph Installation
Here you can find information about how to install and update your copy of Maxon Autograph.
To install, update and to subscribe to any kind of Maxon application you have to use the free Maxon App that you can download here.
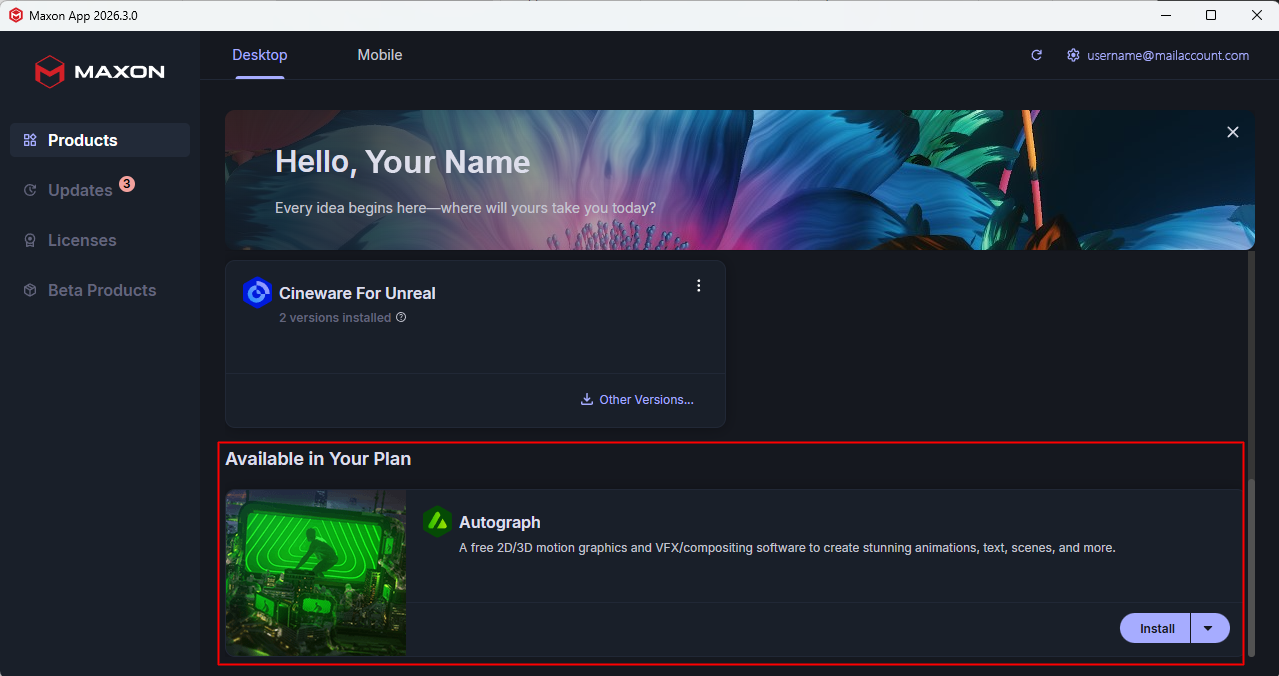
If you have never used the Maxon App before, first create your user account there (see cog icon in the upper right) and then open the Products category for Desktop to get a list of all compatible Maxon applications and tools for Windows, Linux and macOS desktop PC (also see following figure). Find the entry for "Autograph" and use the Install button next to it to start the installation process.
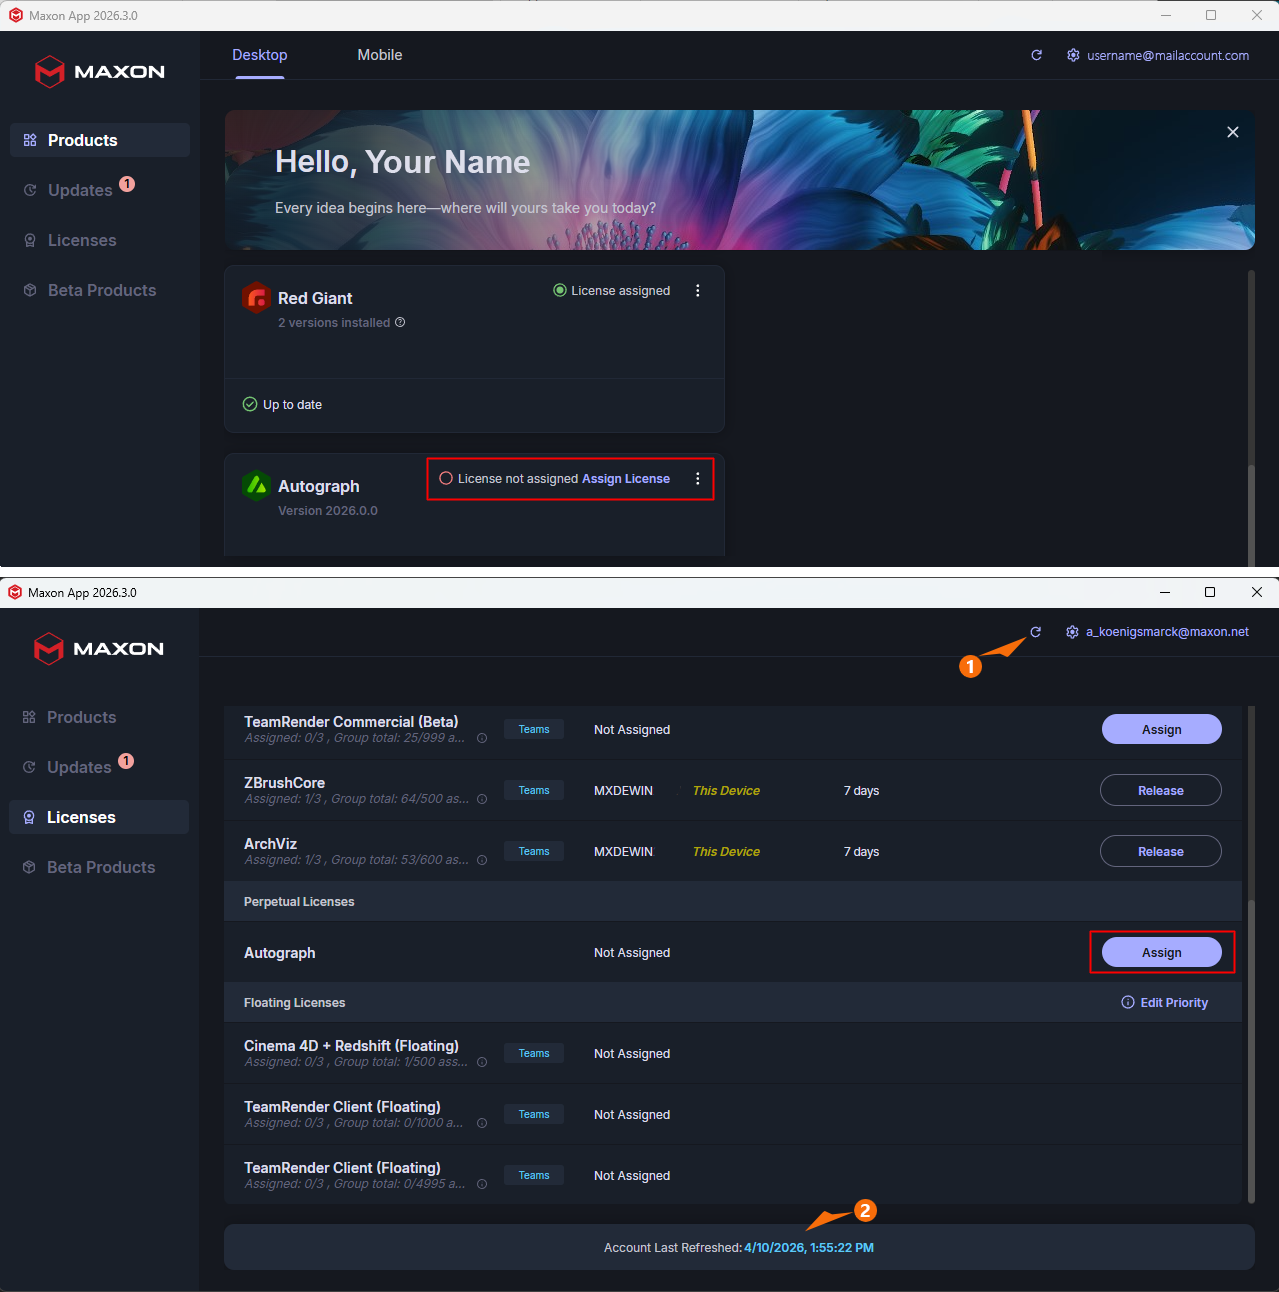
After the installation is complete, you may still need to assign a license in order to run Maxon Autograph. This is also done in the Maxon App. You can click the “Assign License” link directly, or navigate to the ‘Licenses’ tab in the Maxon App and use the “Assign” button next to the Autograph entry. In this Licenses section of the dialog box, you can also Release licenses that have already been assigned, for example, to run the same application on a different hardware.
To always have an up-to-date overview of all available or already assigned licenses, refresh the displayed list as needed by clicking the “Refresh” icon in the upper right corner (see 1 in the next figure). The date and time of the last refresh are always displayed at the bottom of the list (see 2).
As long as you're logged in to the Maxon App with your Maxon user account, you can release and reassign licenses also from another computer—for example, if you switch from a work computer to a personal PC and want to continue working on a project there.
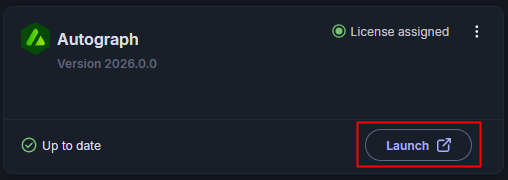
As a final step now use the Launch button from the Products tab in the Maxon App to get Autograph started.
If you'd like to learn more about the Maxon App and license management, you can find dedicated Maxon App documentation here.