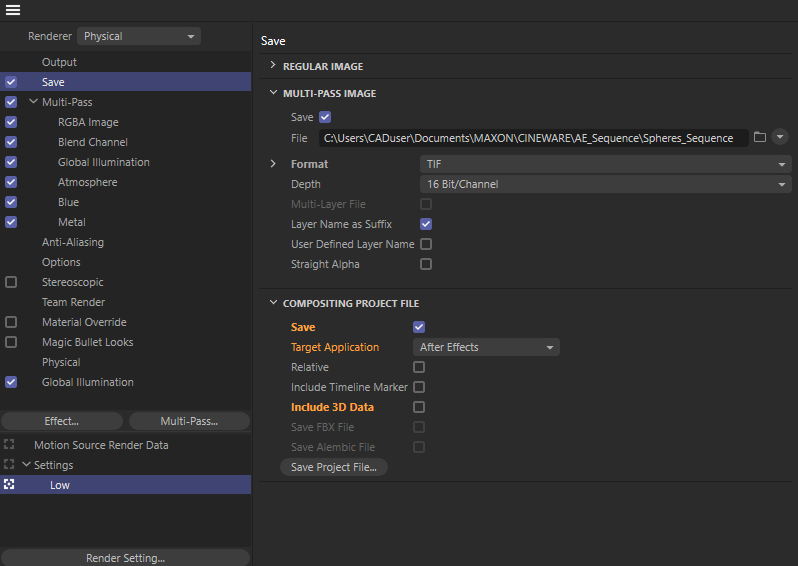
 The Save settings of the Render Settings let you save a compositing file for After Effects, among other things.
Overview
If you plan to create renders in Cinema 4D and then process them in After Effects, saving an After Effects composition file is a good idea. These files will then contain the respective save paths to the renderings, which will save you from having to load them manually, e.g., the rendered Multi-Pass image sequence in After Effects. 3D information such as 3D position, rotation or the cameras' focal width as well as the position and orientation of light sources can also be added to the composition file. Special tags can be used to mark additional objects whose position you want to pass to After Effects, e.g., to simplify tracking.
 The Save settings of the Render Settings let you save a compositing file for After Effects, among other things.
If the Save option is enabled for a compositing project file of the selected target program before starting the rendering, the composition file is automatically saved to the renderings directory. The composition file can also be created subsequently when the Save Project File... button is used. A description of all options in this Render Settings menu can be found here.
By default, the saved composition file contains only references to the image resolution, frame rate (see the output section of the render presets), and the save paths of the renderings as entered in the section for Save>Multi-Pass Image.
If the Include 3D Data option is enabled, the cameras' position and rotation information will be added to the composition file if this option was activated for the cameras and light sources.
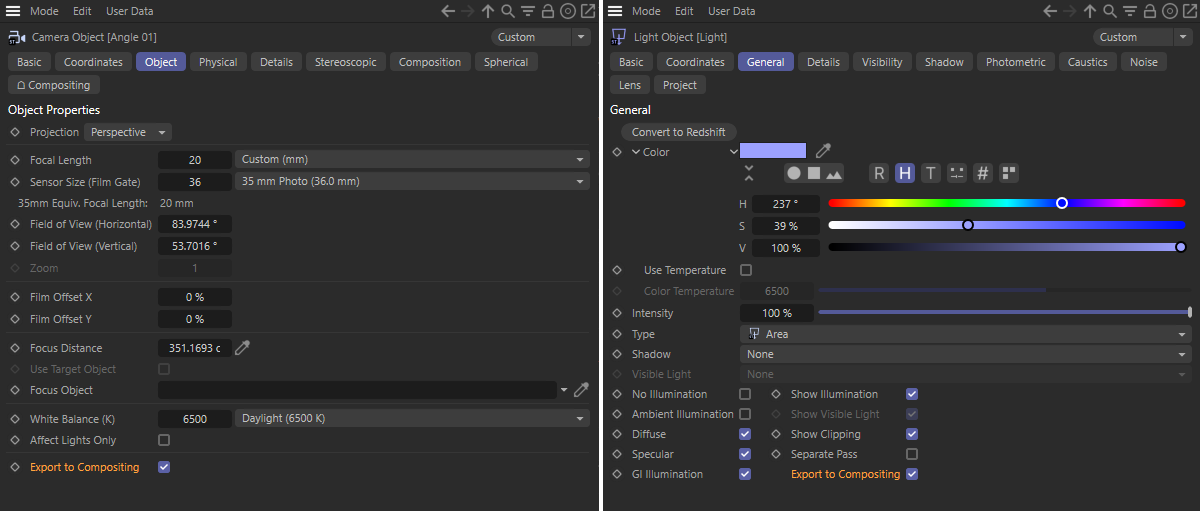 The 3D data from cameras and light sources whose Export to Composition options are active can be included in the After Effects composition file.
In addition, any other objects in the scene can be marked with a Cineware tag (or External Composition tag). This tag can be found in the Object Manager under Tags>Render Tags.
These objects will then be interpreted as Null objects, which makes it possible to pass on position and rotation information. Optionally, individually colored surfaces can also be passed to the positions of the marked objects. However, this only works if the Include 3D Data option is enabled in the Render Settings.
In order for After Effects to read the Cinema 4D composition file, the appropriate plug-in must be installed. To do so, open the Cinema 4D installation directory. There you will find a folder named Exchange Plug-ins. Navigate to the After Effects directory where you will find a folder named Importer. Copy this folder to the Support Files>Plug-Ins directory in your Adobe After Effects installation directory. After starting After Effects, select New Project and execute the File>Import>File ... command to load the *.aec file. Alternatively you can use the File>Open Project... command. For this, the file filter has to be set to All Formats(*.*) so the composition files are made visible for selection.
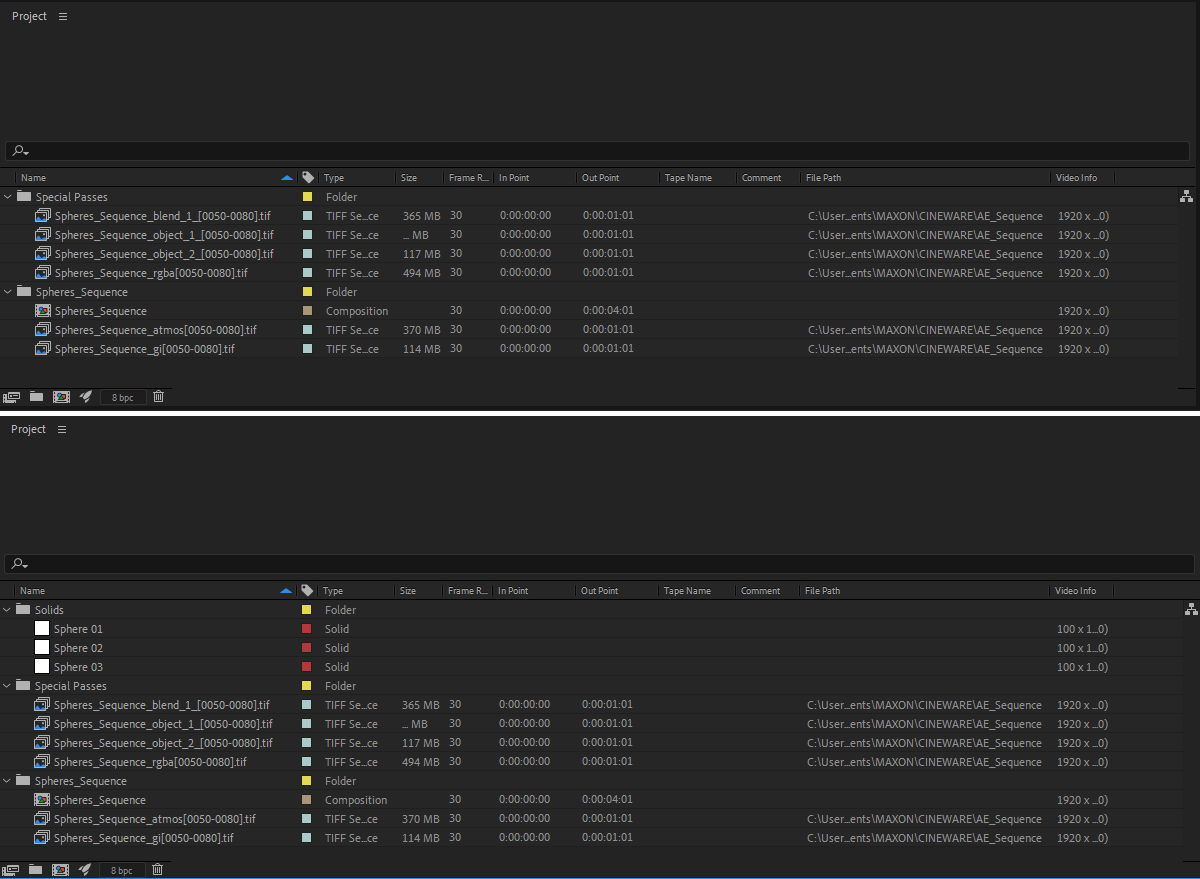 The top half of the image shows an example of a composition file imported into After Effects with no 3D data saved. The bottom half of the image shows an example of a composition file that also contains Cineware tags and exported 3D data for the camera and light source.
After a successful import, the Project panel in After Effects displays several categories where you can find the composition and the rendered image sequences or videos. If 3D object data was also embedded in Cinema 4D by using Cineware tags, it will appear in a separate color surface folder, as shown in the figure above. The 3D data contained in the cameras and light sources will not be displayed separately here. The will be a direct part of the composition.
For more information about the Cineware tag, click here.
Double-clicking the composition loads the components it contains into the After Effects Timeline. Alternatively, the composition can also be retrieved from the Project menu of the Timeline. Finally, if may be necessary to complete the loaded Multi-Pass sequences by dragging entries from the Project area. This is necessary if separate Object ID Masks were rendered that will then have to be assigned within a sub-composition.
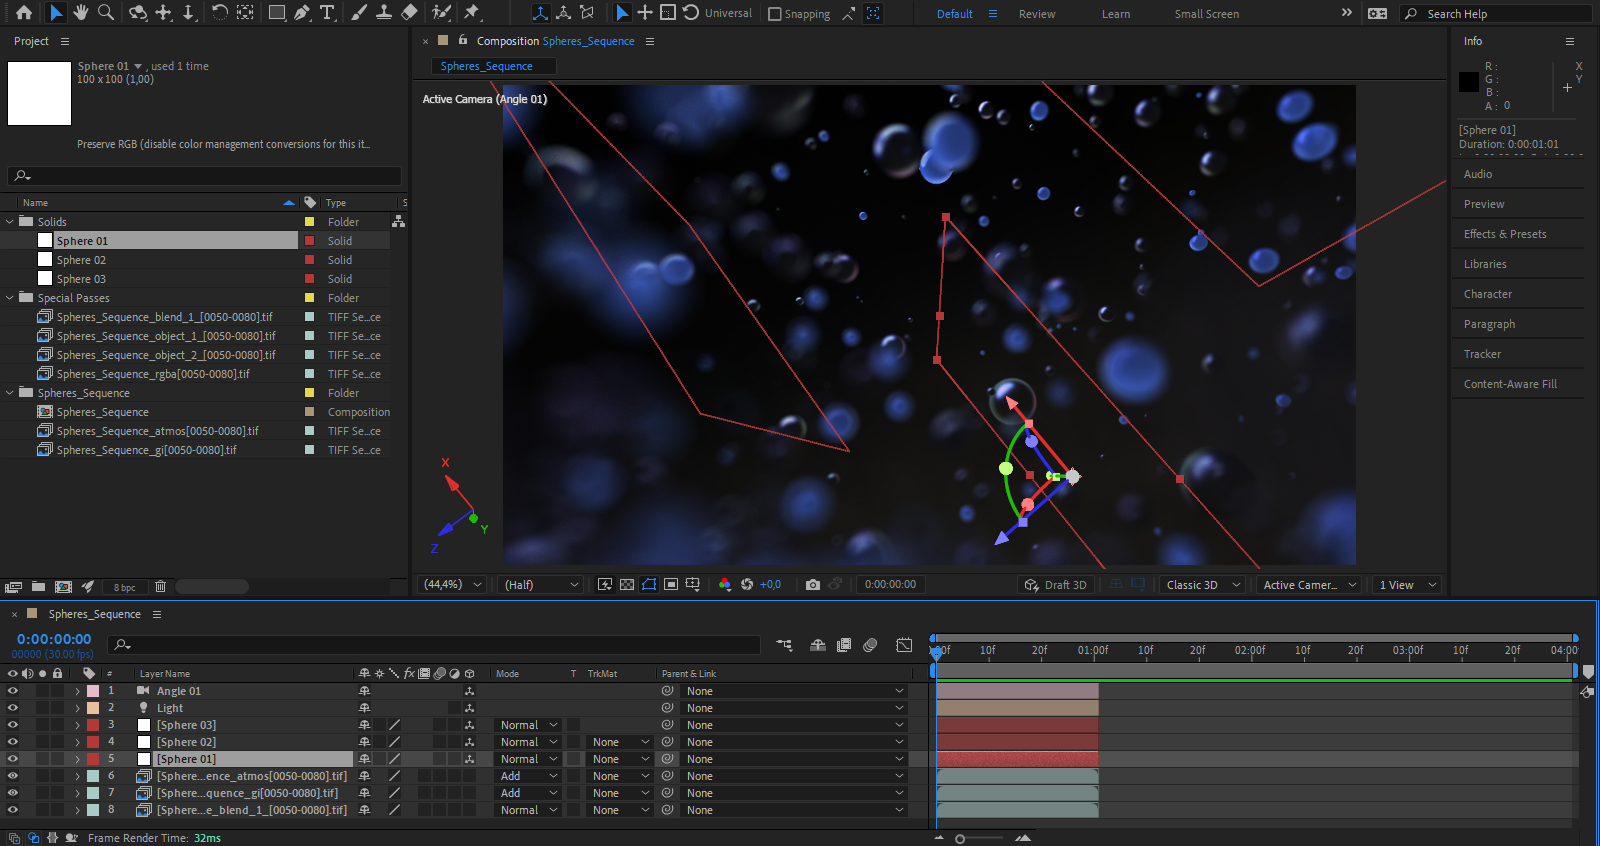 View the fully loaded composition in Adobe After Effects. In the Timeline you can also see Tracks for the camera and a light source.
In general, when viewing Multi-Passes, keep in mind that these are images in linear color space. For viewing in other color spaces, the Color Workspace in the After Effects Project Settings can be switched.