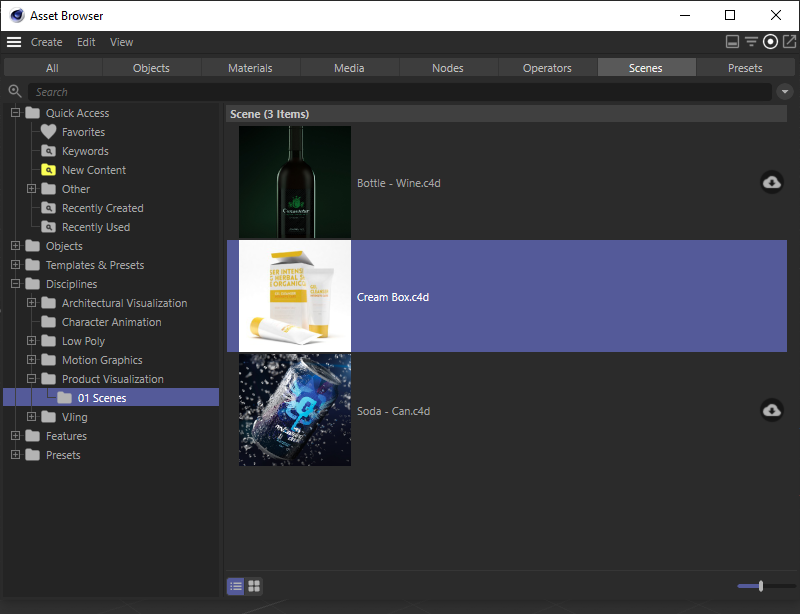
 We will use one of the included projects from Cinema 4D's Asset Browser as the basis for the following steps.
Overview
In order to process 3D elements optimally in Adobe Illustrator, some preliminary work must be done in Cinema 4D. Possible options for this are explained in the following sections using an example.
To do this, we'll use a project provided in Cinema 4D's Asset Browser, which we'd like to pass to Adobe Illustrator. To do so, open the Asset Browser in Cinema 4D and select the projectDisciplines>Product Visualisation>01 Scenes>Cream Box.c4d, which can be found in the Scenes tab. Double-click on the preview images to load and open the project.
 We will use one of the included projects from Cinema 4D's Asset Browser as the basis for the following steps.
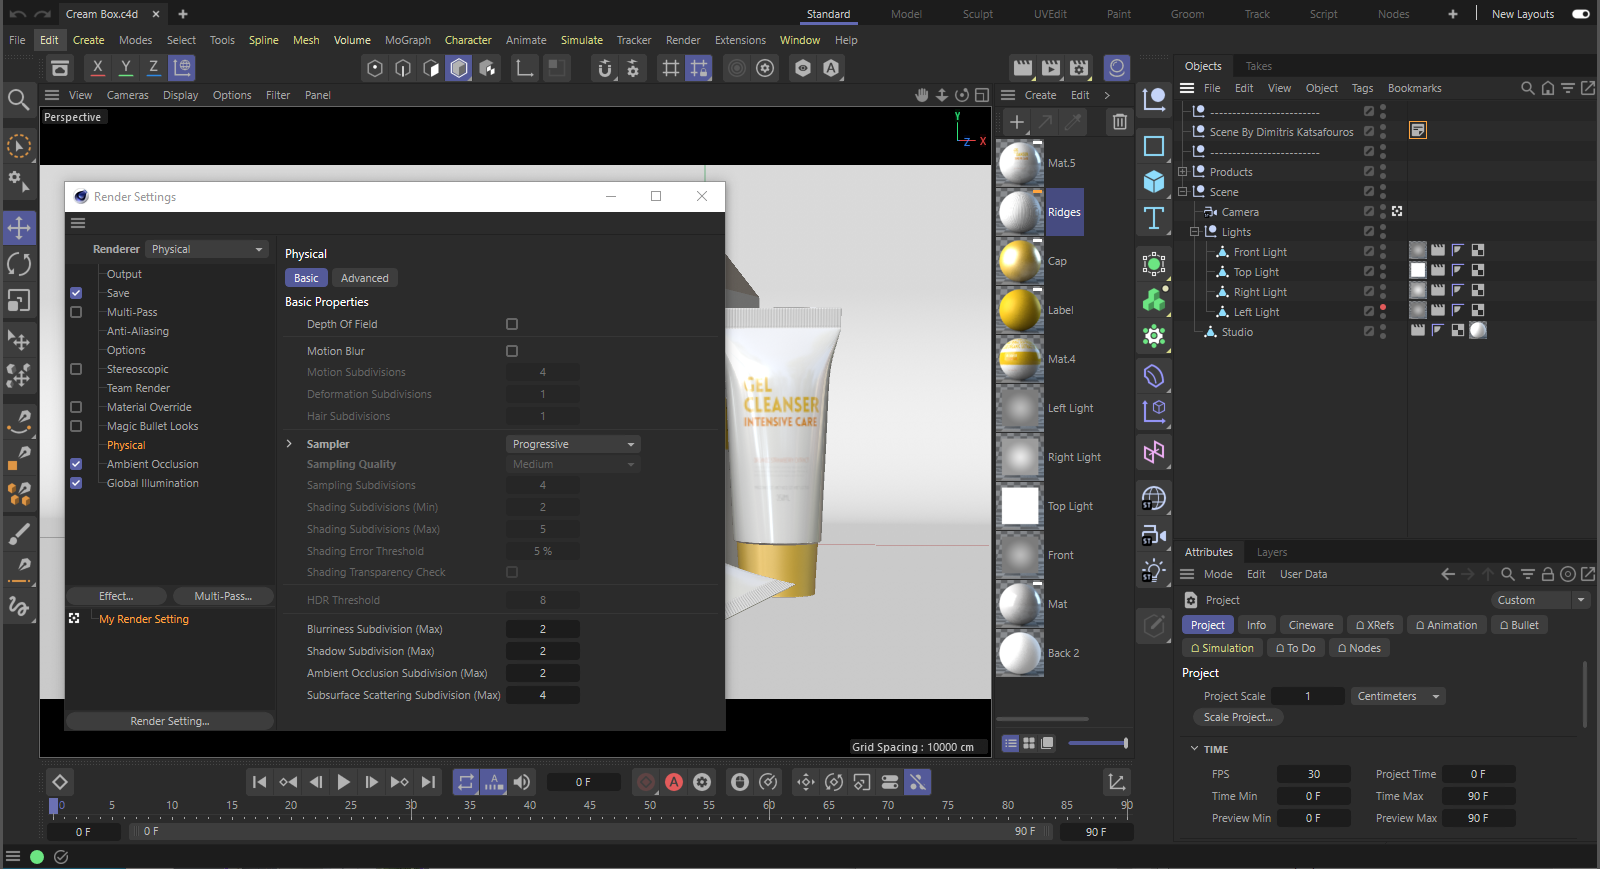 After opening the project, you should first take a look at the render presets.
Within Adobe Illustrator, the 3D project can be calculated and displayed at different quality levels. One of these display levels reflects precisely the one we defined in the Render Settings, even regarding the quality and the calculation methods. Also, the resolution within the output menu is assumed and defines, for example, the aspect ratio of the content displayed in Adobe Illustrator. It therefore makes sense to define everything here as if you were rendering the final image in Cinema 4D.
In our example scene, we see that the Physical Sampler is set to Progressive (with a time limit of 1.5 minutes). This bears the advantage in Cinema 4D that a rough impression of the image can be gained during rendering, which becomes progressively more clear as the rendering progresses. However, this is not an advantage when rendering within Adobe Illustrator since the content there is first displayed after rendering has been completed. In this case we can obtain a comparable quality in a short time by switching to Middle.
Furthermore, we see that Global Illumination and Ambient Occlusion are active. The scene uses self-illuminating textures on simple surfaces for lighting. This would also work in Adobe Illustrator but using a real light source would bear the advantage that this could be adjusted much more easily with regard to color, intensity and shadows cast. To give it a try we will replace the self-illuminating layer within the Lights group in the scene and instead place two Area lights on the left and right in front of the packaging, as shown in the image below.
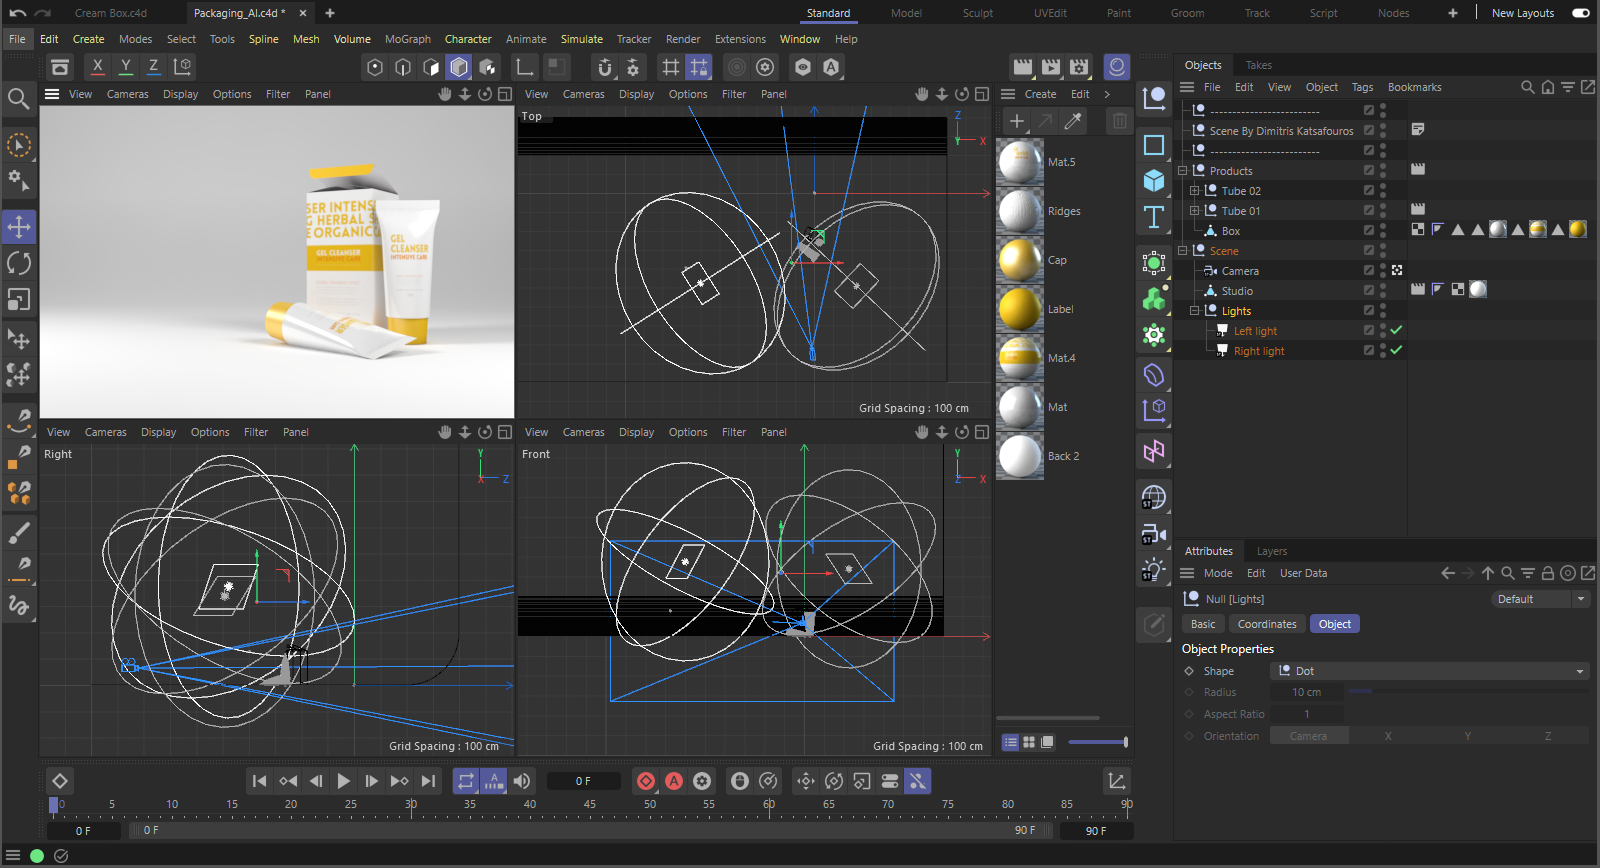 Two Area lights replace the self-luminous areas for scene illumination.
The materials for the self-luminous surfaces that are now no longer needed and can be deleted by usingEdit>Delete Unused Materials in the Material Manager.
This is then also the right time to think about which clipping masks can be helpful for the objects within Adobe Illustrator. In any case, an alpha mask will be calculated for the entire scene. In our example, however, this is not very useful since no empty 3D space can be seen in the selected camera view. A fillet seals the floor and the background completely. In order to obtain a mask for individual objects or object groups for these types of scenes you have to useCompositing tags. To do so, select the group's Parent object whose elements you want to include in a mask. In our example this can be the Products object under which the Products and both tubes are grouped. Such a mask makes it possible to later display the products separate and masked out from the background.
Using the Tags menu in the Object Manager, you can now add a Compositing tag to the Products object, which you can find in the Render Tags group. Within the Compositing tag in the Attribute-Manager you will find the Channel tab in which you will find a list. If one of the Activate options is selected you can define a numeric Channel value next to it. Since any number of Compositing tags can be used, the same mask will be applied to all objects and groups for which the same Channel number is defined. In this example we will assign the Channel 1 to the Products object. This setting will automatically be applied to all of the object's Child objects in as far as they don't have their own Compositing tag.
In addition, the standing tube should have a separate mask in order to be able to separate this shape in Adobe Illustrator.
To do so we will also add a Compositing tag to the Tube 01 object and activate Channels 1 and 2. This will make the standing tube appear in the products' overall mask as well as in it own mask.
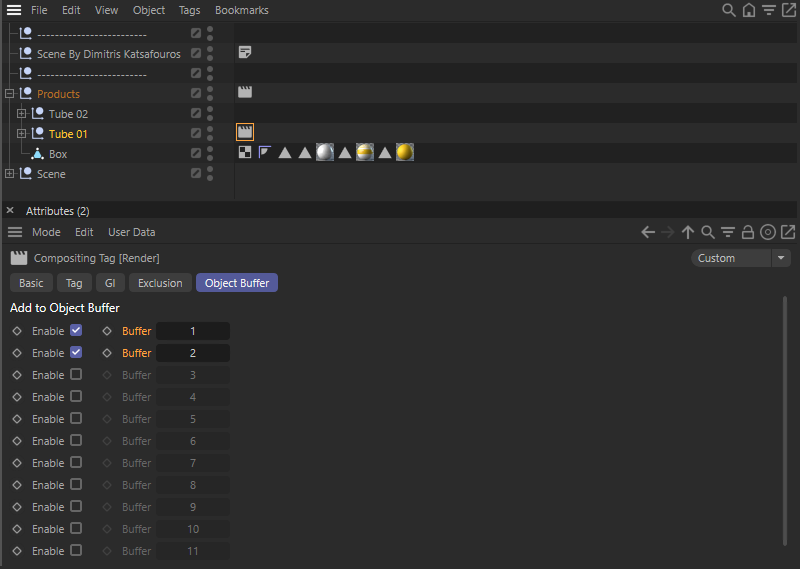 The objects in the Tube 01 group should appear in both Mask 1 and Mask 2.
In order for these two masks to actually be calculated, they must also be added as multi-passes. The Multi-Pass option must also be activated.
To do so, open the Render Settings and click on Multi-Pass... on the left. A list will appear from which you can select an entry for Object Channel. Repeat this step to obtain a second object channel. Both channels created will be displayed in the left column of the Render Settings under Multi-Pass. Double-click on the names to change the name. Rename the first channel "Packages" and the second "Tube".
By clicking on the channels in the left column, a field for the Group ID will be displayed on the right. This is the channel number that we assigned via the Compositing tags. Therefore, assign the number 1 for Packages and the number 2 for Tube, as shown in the image below.
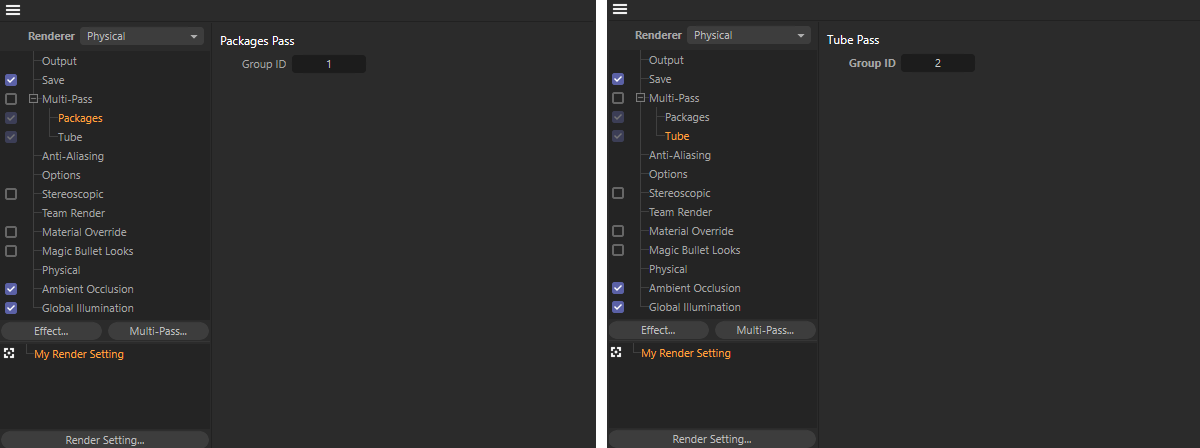 Configuration of the two object masks in the multi-pass group in the Render Setting.
Programs compatible with Cineware are able to read the native Cinema 4D data format and material and object descriptions contained therein. In principle you can simply save your scene with the Save Project or Save Project As ...commands in the File menu.
However, there are scene components, such as some of the generators or even Deformers, that are not converted to pure geometry by default during this save operation. In order for these scene components to be interpreted in their entirety in another application, conversions of this object type can be integrated automatically into Cinema 4D. For this you can use the Cineware options in the Project Settings menu. A detailed description of the available options can be found here.
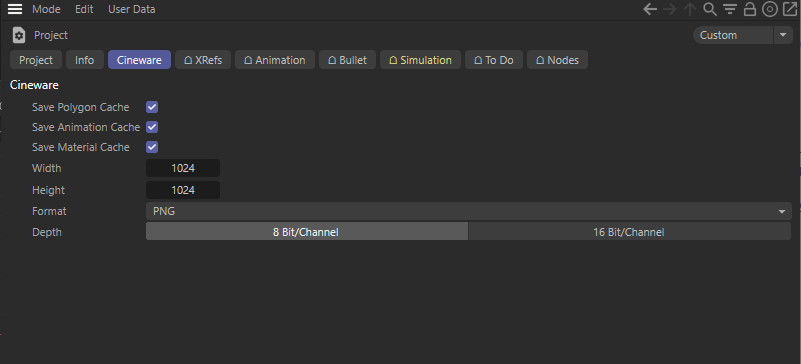 The project presets for Cineware.
In these Cineware presets, which only apply to the currently opened project, some auxiliary functions can be activated that extend the standard saving format of Cinema 4D.
In our example, only the option for Save Polygon Cache would be relevant, so that the shapes created via Loft and Subdivision Surface objects would also be readable by Adobe Illustrator.
As an alternative to this approach, the Save Project for Cineware ... command in the File menu can also be used for saving. Here, the scene will always be saved as if all options for the Cineware preferences are activated, even if these are disabled in the Project Settings.
This completes our preparation and we can now save the scene. To do so we will select the Cinema 4DFile menu and select Save Project for Cineware ... or you can activate the Save Polygon Cache option in the Project Settings menu and apply the Save Project As ... command.