GoZ Preferences
Here you can define what you want to import or export in conjunction with ZBrush.
Within ZBrush you can work with different plug-ins that can modify the scale of your object. In ZBrush, you can use the Scale Master function, for example, if you want to print your model with a 3D printer. This can change the scale of your object quite a bit. If you want to adjust the model's scale in Cinema 4D you will find numeric values here with which the measurements of the geometry can be multiplied for import or export.
Enables/disables the import/export of the color map if it has been generated in ZBrush or is present on the Cinema 4D model.
Enables/disables the import/export of the normal map if it has been generated in ZBrush or is present on the Cinema 4D model.
Enables/disables the import/export of the displacement map if it has been generated in ZBrush or is present on the Cinema 4D model.
Enables/disables the import/export of the UVs if they have been created in ZBrush or is present on the Cinema 4D model.
Cinema 4D lets you weight edges so the smoothing in these regions can be lessened a Subdivision Surface object. To do so you can select edges along the geometry's edges and, for example, use Mesh > Add > Weight Subdivision Surface to assign an percent value for these edges. The greater the percent value, the harder these edges will appear, even if the object is made a Child of a Subdivision Surface object.
Note that in Cinema 4D individual weighting can also be assigned for points. This is not possible in ZBrush. Therefore, you should only use edge weighting instead. ZBrush also doesn't offer intermediate values in percent for edge weighting. You should therefore only use the extreme values of 0% and 100% in Cinema 4D for edge weighting in order to get identical shapes in both applications.
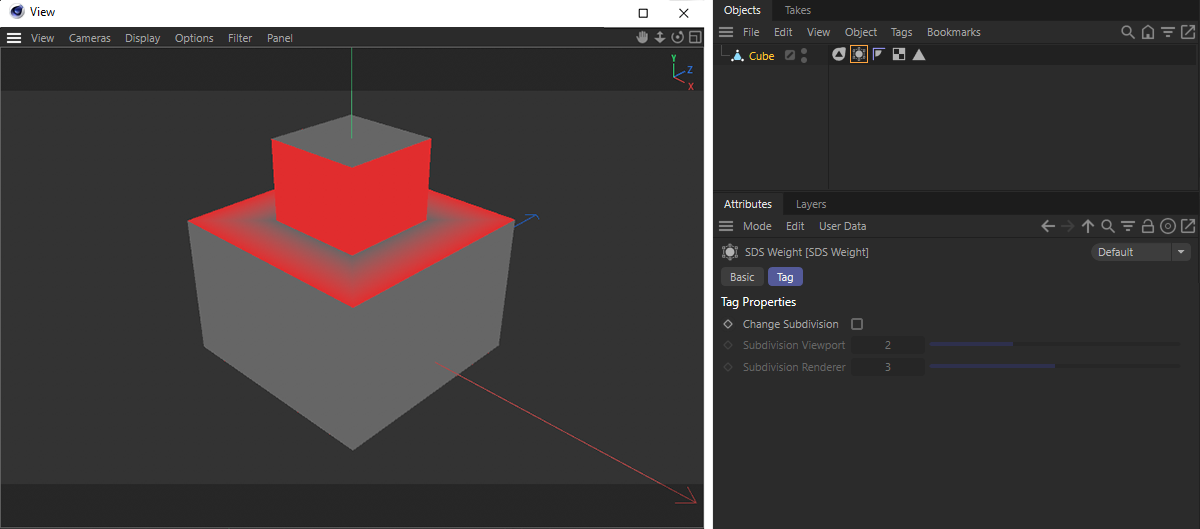
The weighting information is saved in a SDS Weight tag and can also be used as a color overlay in the Viewport. As you can see in the image above, only the SDS Weight tag has to be selected. In this example, the model's horizontal edges were weighted with 100%..
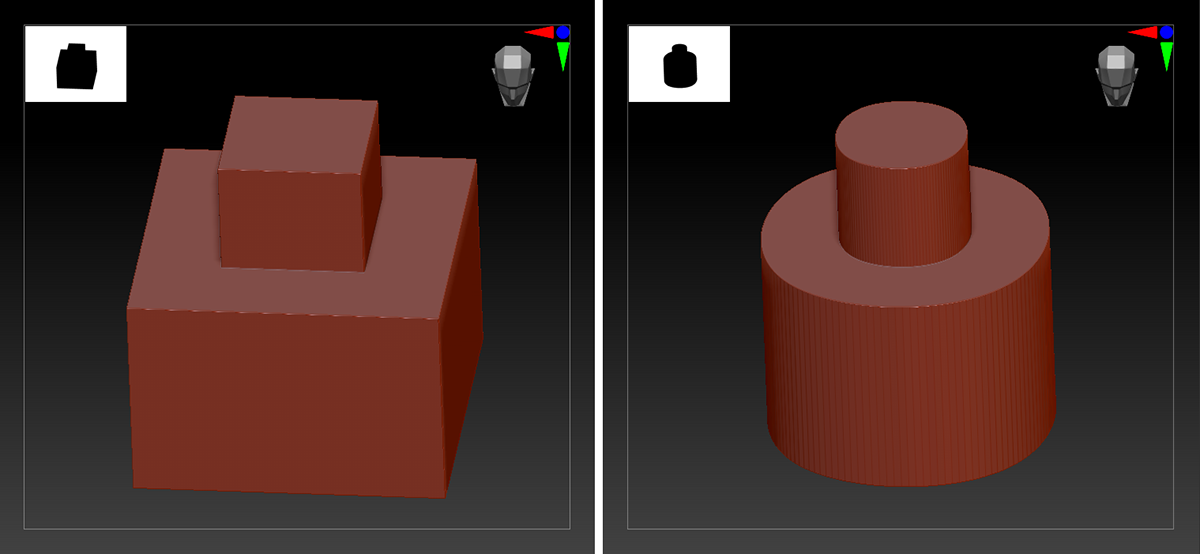
The information contained in the SDS Weight tag is used automatically in ZBrush to sharpen the edges if the subdivision levels are increased. The image above shows an example of an object imported from Cinema 4D with the weighting information (left) and with the shape (right) that was created by adding multiple subdivisions in ZBrush
If the Subdivision Surface option is enabled, a Subdivision Surface object will be generated automatically when a ZBrush object is imported into Cinema 4D if the ZBrush model had sharpened edges.
Enables/disables the import/export of the Polypaint information. This information will be stored inside a Vertex Color tag. If you want to create new Polypaint information in Cinema 4D and export this to ZBrush, use the Vertex Color tag and make sure to use the name "Polypaint" for this tag.
Enables/disables the import/export of the Polygon Group or ZBrush Polygroup. This information will be stored inside a Polygon Group tag.
If option is enabled: Cinema 4D will try to ascertain if the object in the opened scene already exists. If so, current elements will be replaced with the imported elements. These include:
- The Polygon Group tag
- The Vertex Color tag
- Assigned textures
ZBrush materials that can contain color information and Normals or Displacement maps can be imported directly to Cinema 4D. You can define for which Cinema 4D renderer these materials should be created. The following settings are available:
- Auto: Materials will automatically be created for the renderer selected in the Render Settings .
- Standard/Physical: A standard material will be created that is compatible with both the Standard and Physical renderers.
- Redshift: A Redshift Node material will be created. In addition, Redshift Object tags will be created for the objects that are used by the displacement.
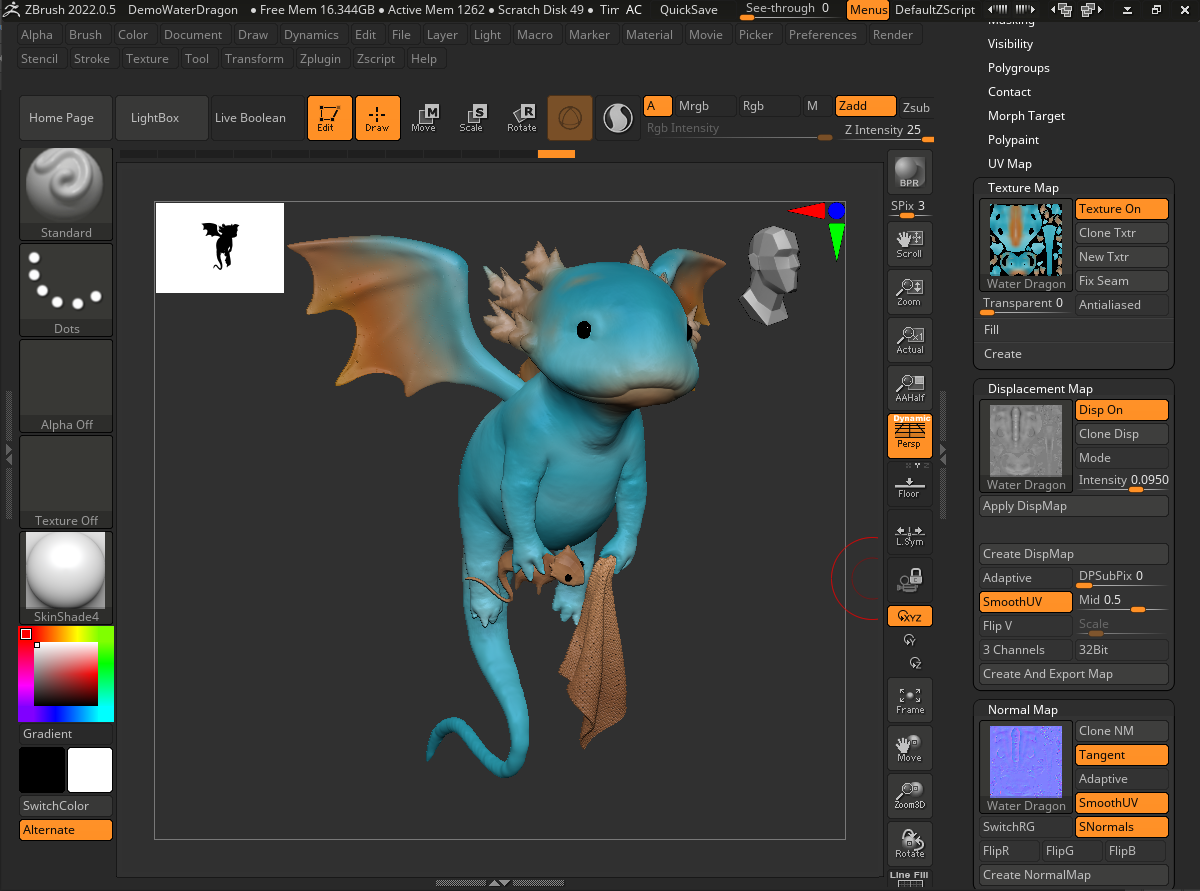
In the image above you can see an example of a project open in ZBrush. It's one of the example scenes included in the application.
As you can see in the column on the right, textures were already calculated for the colors, Normals and the displacement. Several objects still only use polypainting information, i.e., only have color values assigned to them that are saved with the points on the geometry. This information is passed to Cinema 4D in the Vertex Color tag..
If you want to pass vertex colors from Cinema 4D to ZBrush, this can also be done. Just make sure that the Vertex Color tag is named "Polypaint".
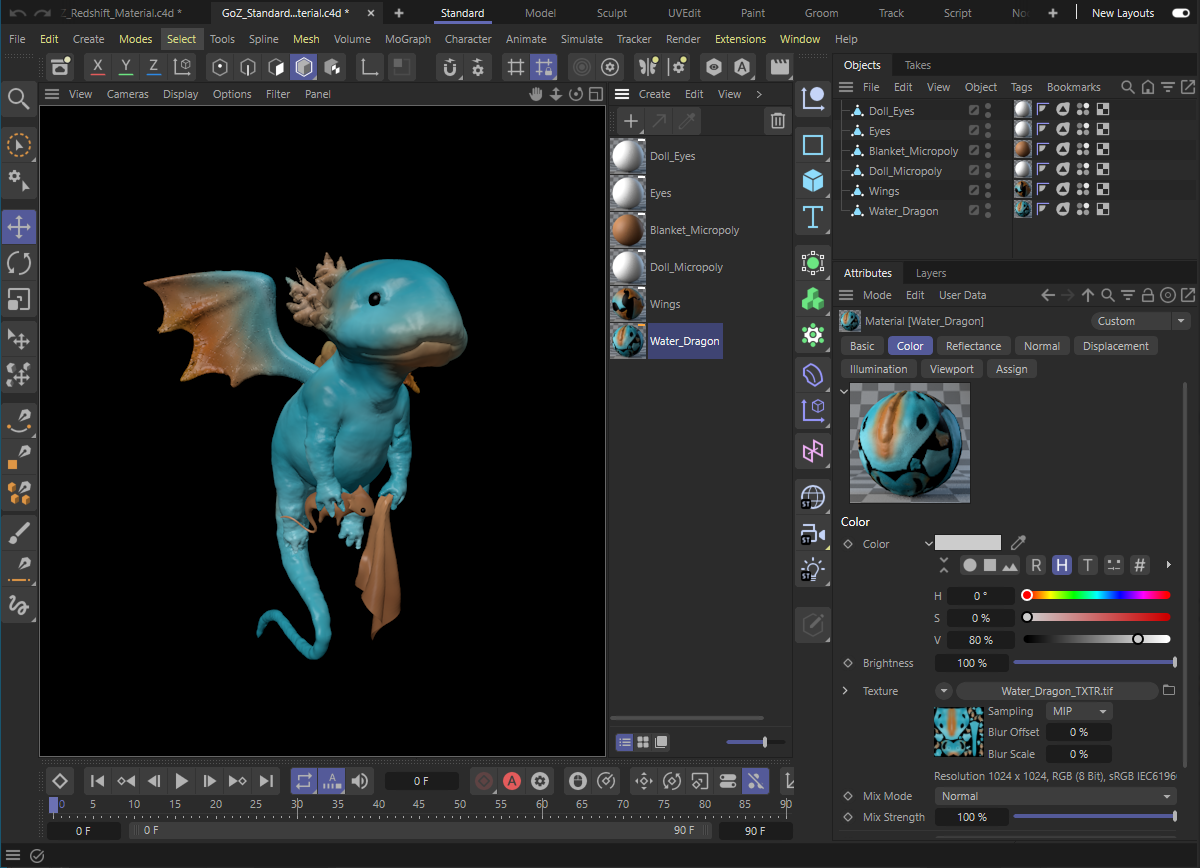
When transferring via GoZ to ZBrush or when importing to Cinema 4D via Extensions > Go ZBrush > GoZ Importeryou will fine the objects, including the respective configurated material, in the Object Manager, as it looks in the image above. If the ZBrush project contains Subtools,each Subtool must be sent from ZBrush to Cinema 4D individually.
When using standard materials or physical materials, the ZBrush textures will automatically be loaded in the fitting material channels. This can also be seen in the Attribute Manager in the image above.
If Redshift is used to render and is also selected as the target for the creation of materials, Node materials are created for which the textures will automatically be included. For this, an additional ZBrush GoZ Default Material group will be created whose sole purpose will be to define a unique data type for the loaded textures. The textures and color values will in principle be passed through the group unchanged, as is shown in the image below.
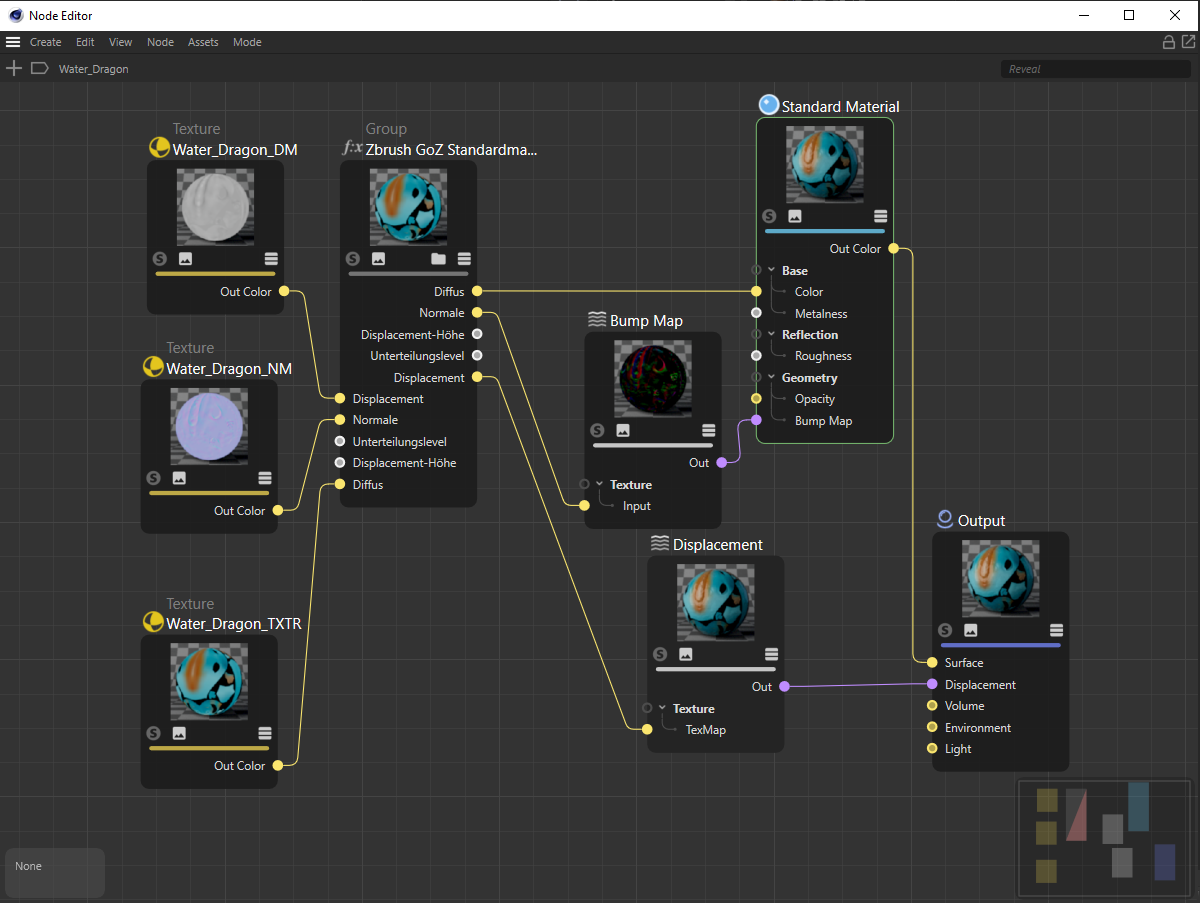
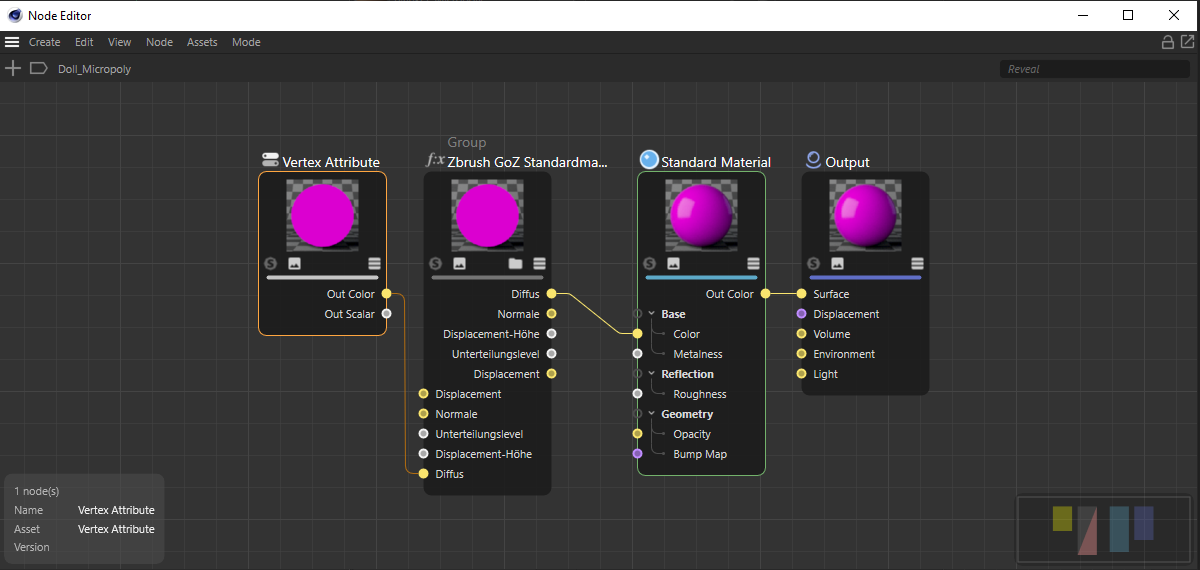
The Polypaint information available on the objects will be saved for the objects in the Vertex Color tags from which they will automatically be read out via a Redshift Vertex Attribute Node and interpreted as a material color, as shown in the image below.
Note that these colors can first be seen when rendered or if you select the Vertex Color tag. However, if you activate the Always Show Points option in the Vertex Color tag, the object will also be displayed in color in the Viewport if the tag is not selected.
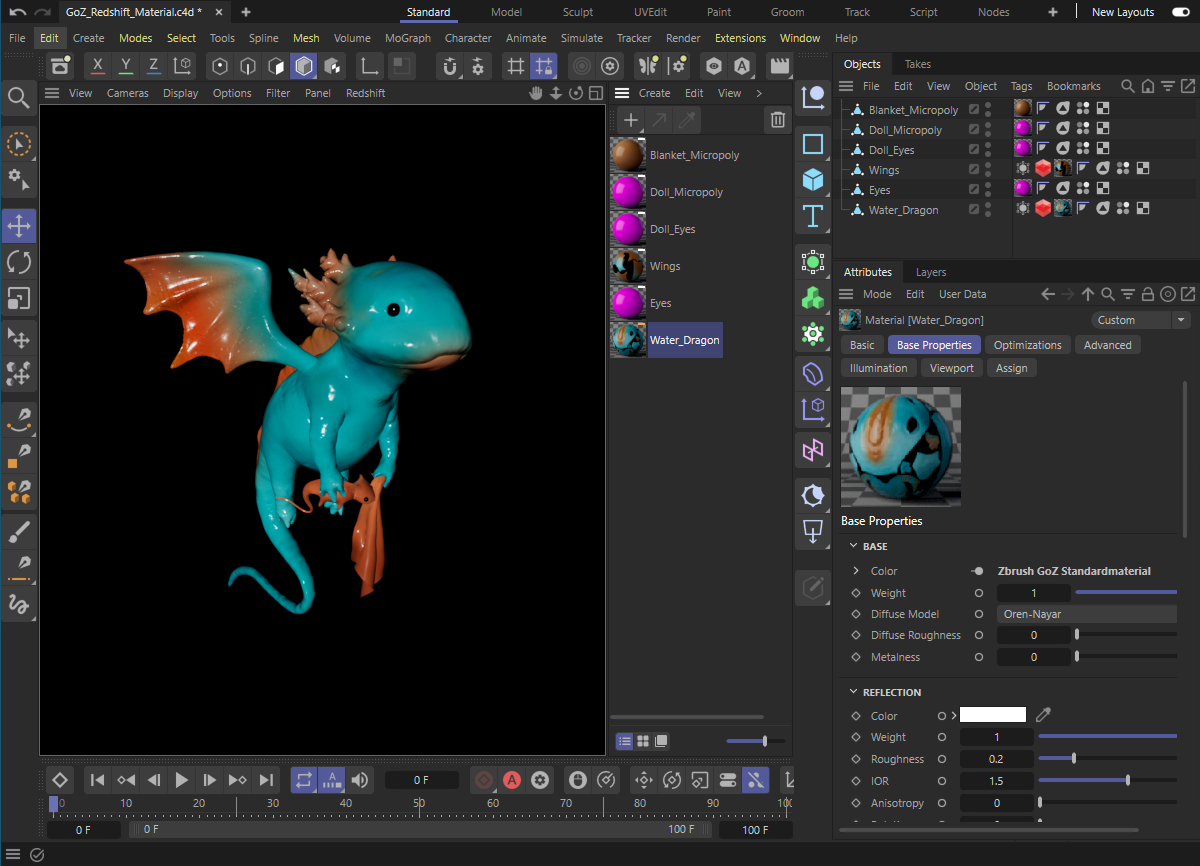
The Redshift Object tags required for displaying displacement are automatically created on the objects when they are exported from ZBrush when Displacement textures are detected. The number of subdivisions will also be calculated automatically and will already be included in the tag. The following image shows an example of a ZBrush scene displayed in Cinema 4D with Redshift.
If this option is enabled, the existing, selected hierarchy (and, for example, the result of a Generator as well) will be combined and exported as a single object.
This makes it much easier to export numerous objects at once because they don't have to be made editable first, for example,