|
|
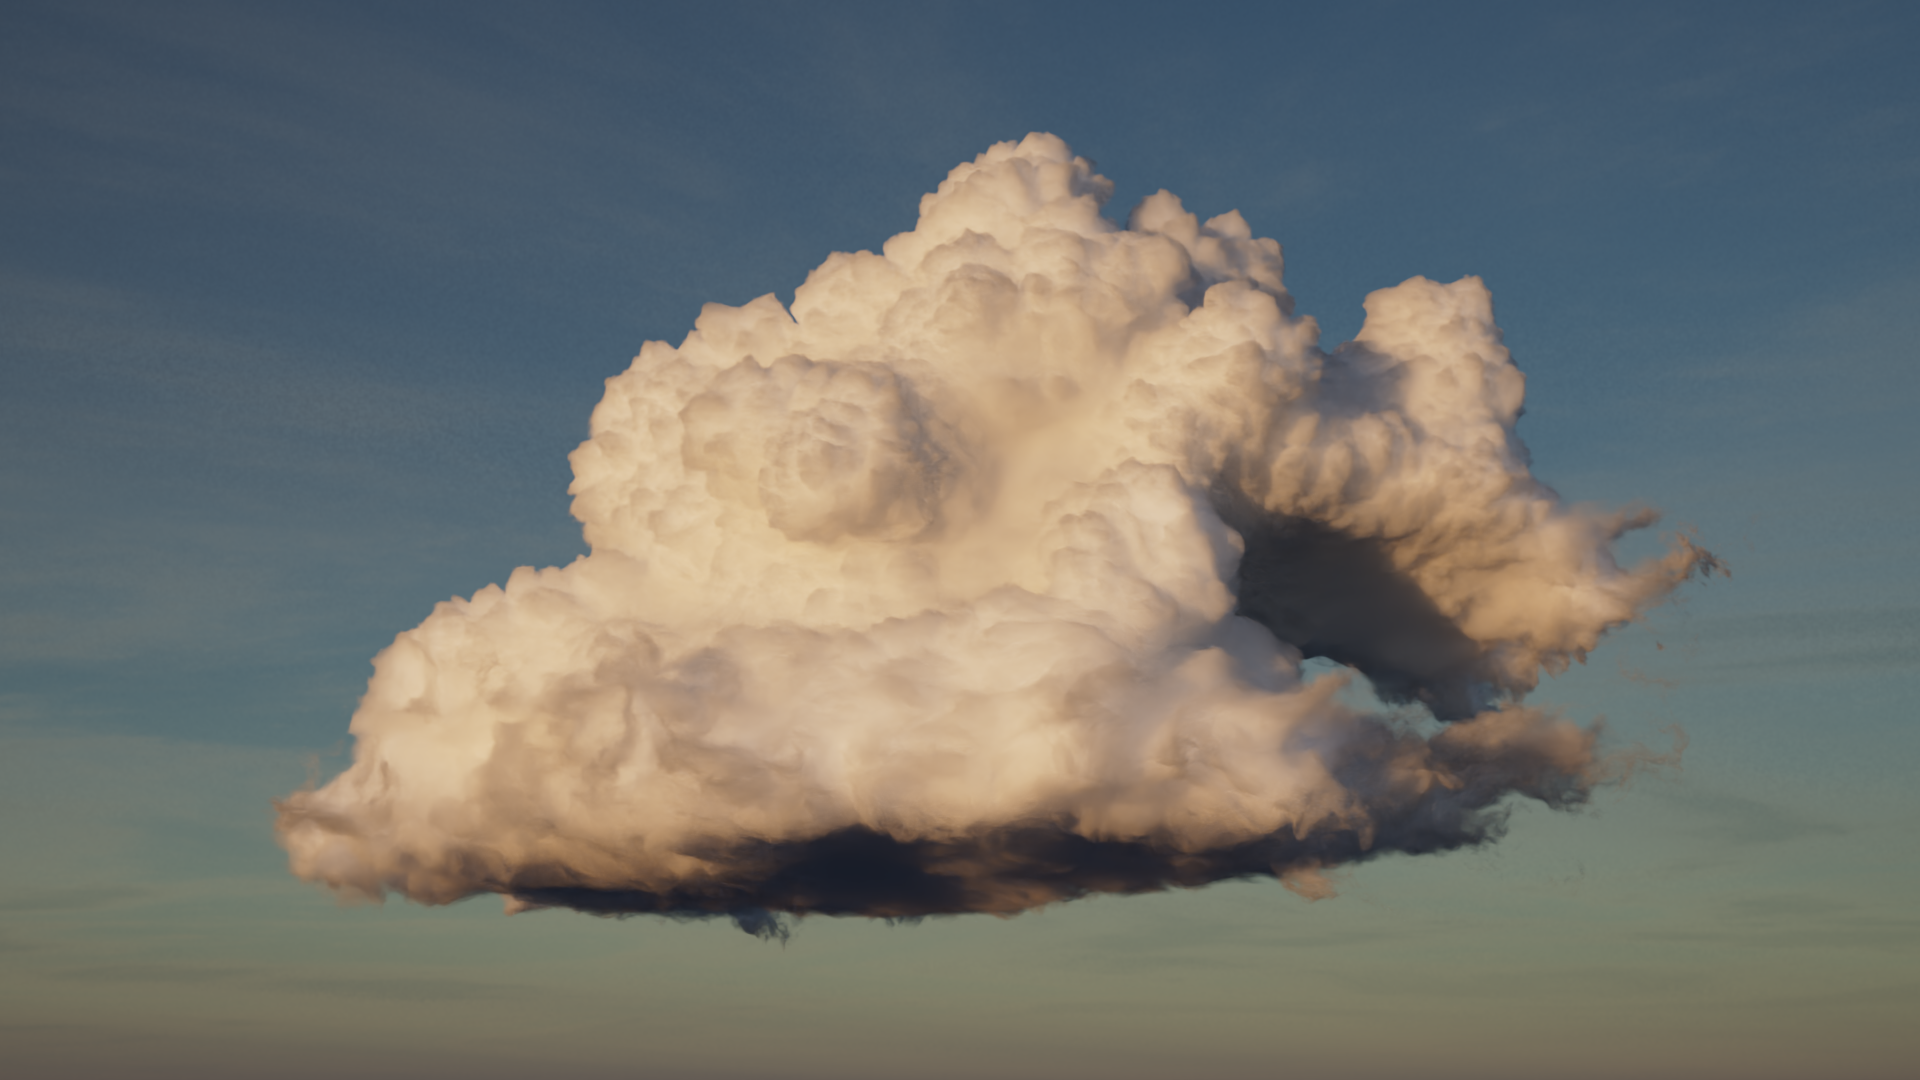
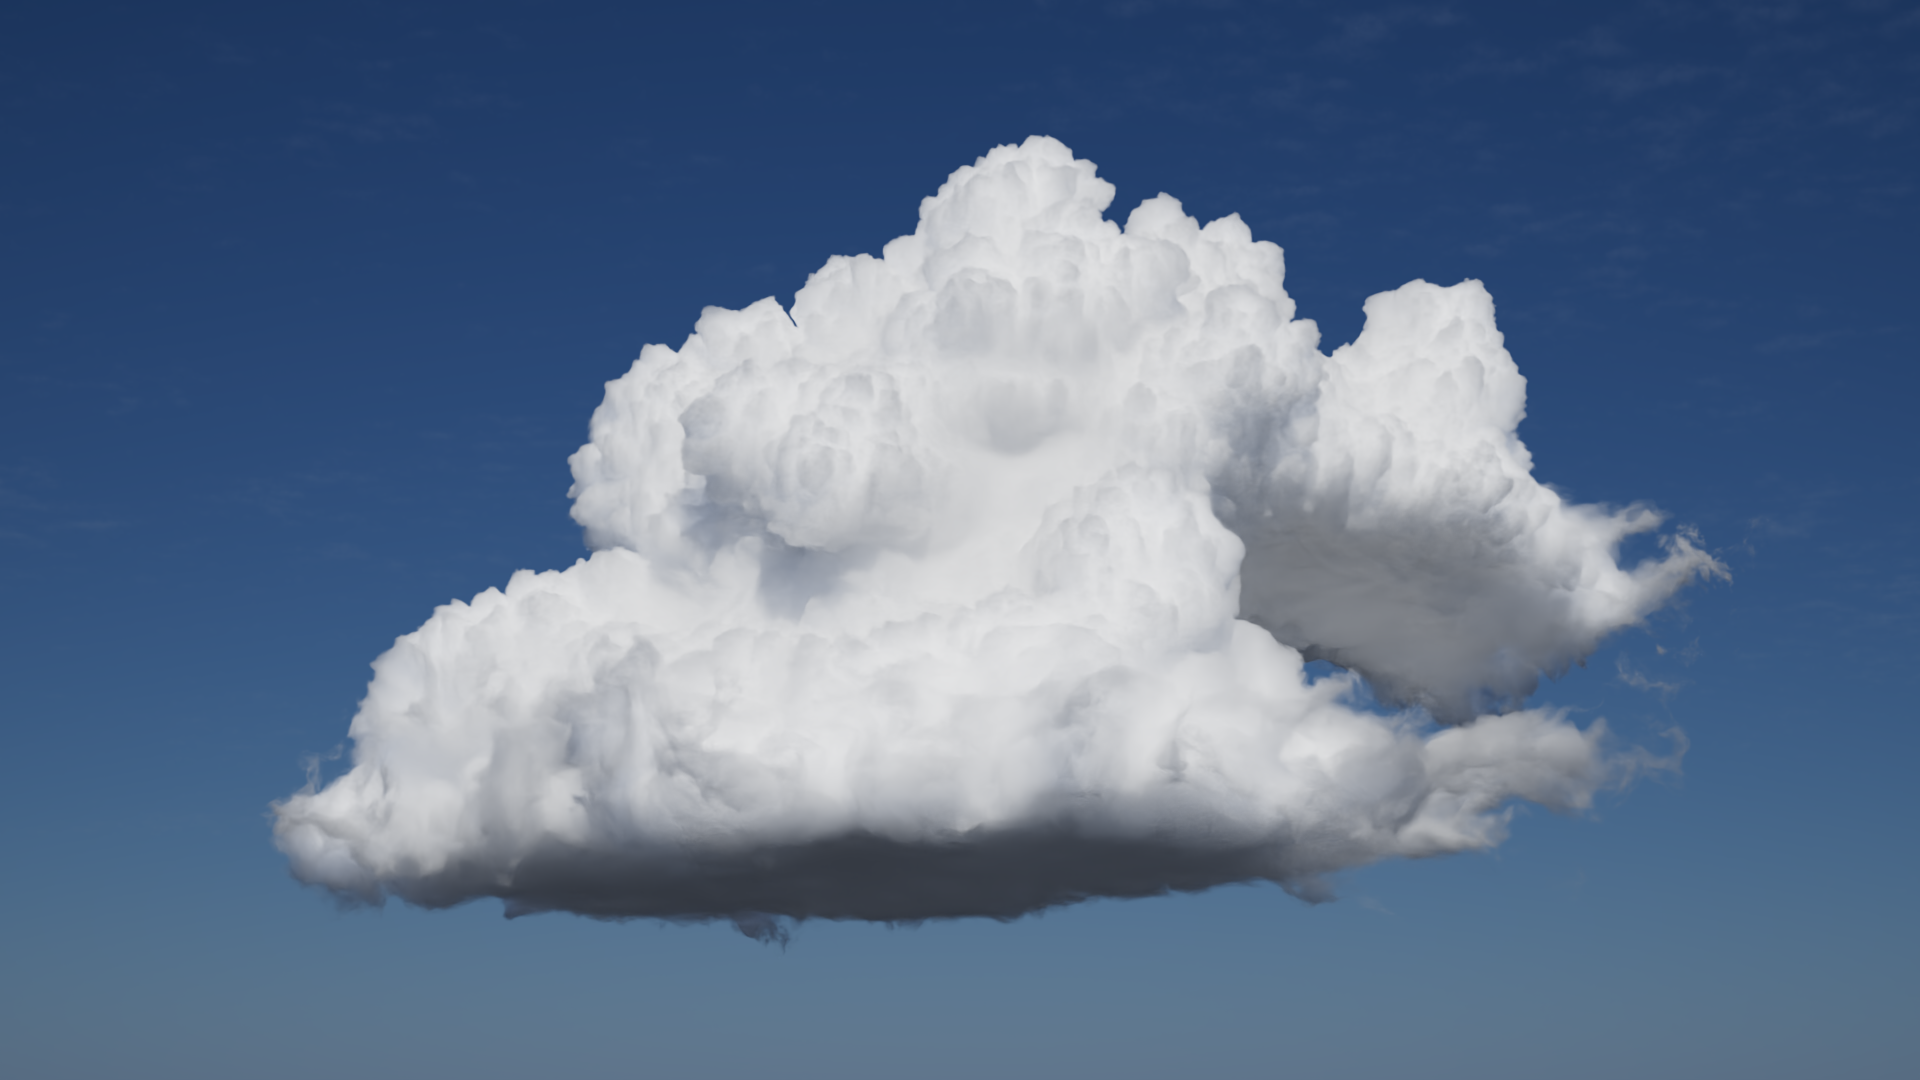
| Cloud rendered with Redshift - Asset Courtesy of Walt Disney Animation CC BY-SA 3.0 License |
Standard Volume
Table Of Contents

|
|
| Cloud rendered with Redshift - Asset Courtesy of Walt Disney Animation CC BY-SA 3.0 License |
The Standard Volume shader is a physically based shader designed to render heterogeneous volumes like clouds, smoke, fire, and explosions. It combines an easy to use interface and controls while enabling greater flexibility and artistic control with the introduction of programmable volume shading. The Standard Volume shader accepts external shader inputs allowing for the creation and control of procedural volumes or the modification and displacement of existing volume grids.
The shading components of a volume shader are mainly driven by grids of voxel data contained inside a volume object, like an OpenVDB file. Volume grids may also be referred to as channels, particularly in a shading context, and Redshift uses the channel terminology when referencing a VDB grid in a volume shader.
For more information on OpenVDB files, example VDBs, and loading them into your scene please see the Volume Object page.
OSL does not currently work with volume shading.
If speed is what you need, the Standard Volume shader supports a special mode when no external nodes are attached making it faster and more optimized. This can be achieved simply by using the built-in Volume Channel and Emission Channel fields to import your volume grids. In this mode, it behaves very similarly to the classic Volume Shader but with more intuitive controls.
The Standard Volume supports displacement by using the Position Offset parameter in a Volume Scalar Attribute or Volume Color Attribute node, this allows you to move existing voxels in a grid around the scene.
Volume displacement is always limited by a volume's bounding box. Volume Padding, an option found on a Redshift Volume Object, can be used to expand the volume bounding box allowing for greater volume displacement.
| Increasing Volume Padding |
Volume grids loaded into the built in Density and Emission Channel fields can mask out displaced scattering or emission voxels. It is generally recommended to leave these fields blank if you intend to displace your volume with external inputs because any empty voxel has a value of 0 and the built in channels are multiplied with the rest of the shader. Multiplying any displaced voxel with a value of 0 will return a value of 0 and therefore you will not be able to see those displaced voxels, making it appear like displacement is not working.
A basic example node graph depicting displacement and programmable volume shading is pictured below. It uses:
A Volume Scalar Attribute node to load a density channel and directly drive the Standard Volume's density input. The density node is displaced by a Maxon noise for added detail.
The Density Channel built into the Standard Volume is left blank so it cannot mask the displaced density voxels.
A volume scalar attribute node to load a temperature channel and directly drive the Standard Volume's temperature input. The Output Max is set to 6500 to set the temperature appropriately.
The Emission Channel built into the Standard Volume is left blank so it cannot mask the displaced temperature voxels.
A Maxon noise remapped by a color ramp to create a colorful pattern throughout the volume.
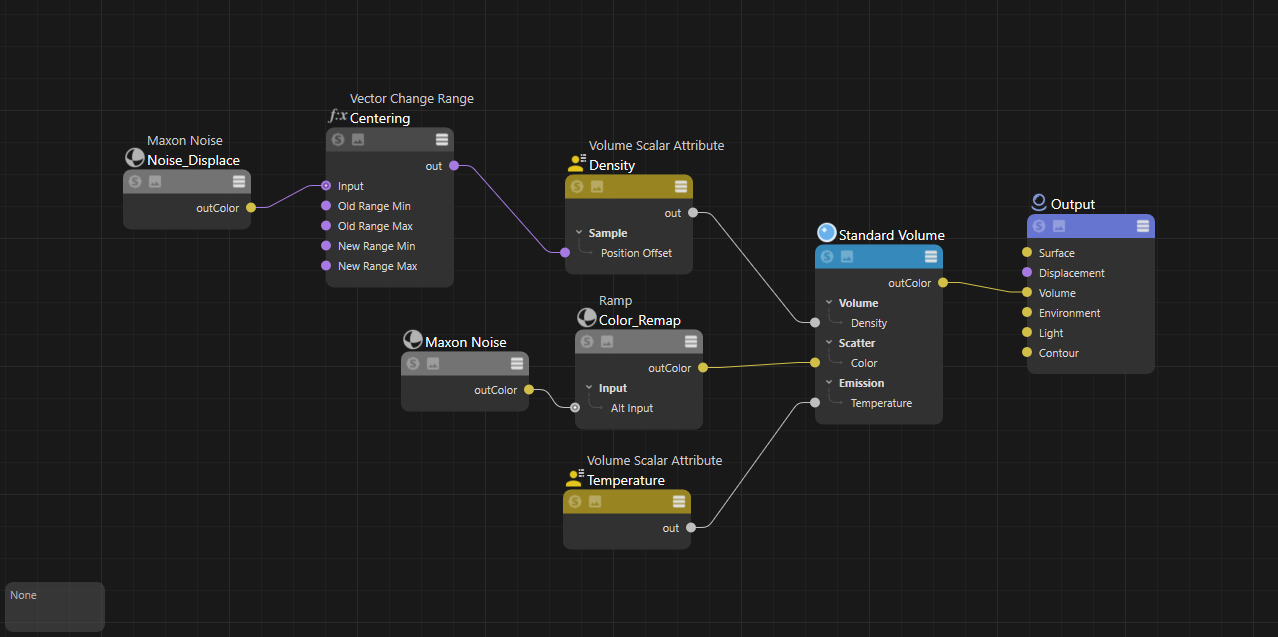
|
The look and shape of a volume is heavily dependent on how it interacts with light. When a light photon enters a cloud it makes contact with the different molecules that make up its composition and then scatter around inside the medium. Clouds are mostly made up of water and ice molecules which results in a lot of scattered light, thick cumulus clouds can even reflect up to 90% of incoming light.
Volumetric multiple scattering simulates this phenomenon to create much more realistic volume renders. In Redshift, this is controlled by the Volume Trace Depth parameter which is found in the Render Settings. Increasing the volume trace depth allows a light ray to scatter and bounce around more often inside a volume, this leads to brighter and more realistic volume renders at the expense of longer render times. The impact multiple scattering has on the look of a volume depends on the shader parameters.
Volume multiple scattering is only compatible with Brute Force global illumination. If point based global illumination methods (Irradiance Cache or Irradiance Point Cloud) are used for the primary or secondary GI engine, ray traced global illumination (Brute Force) is automatically used for all volumes in the scene — the remaining objects will use the point based GI methods.
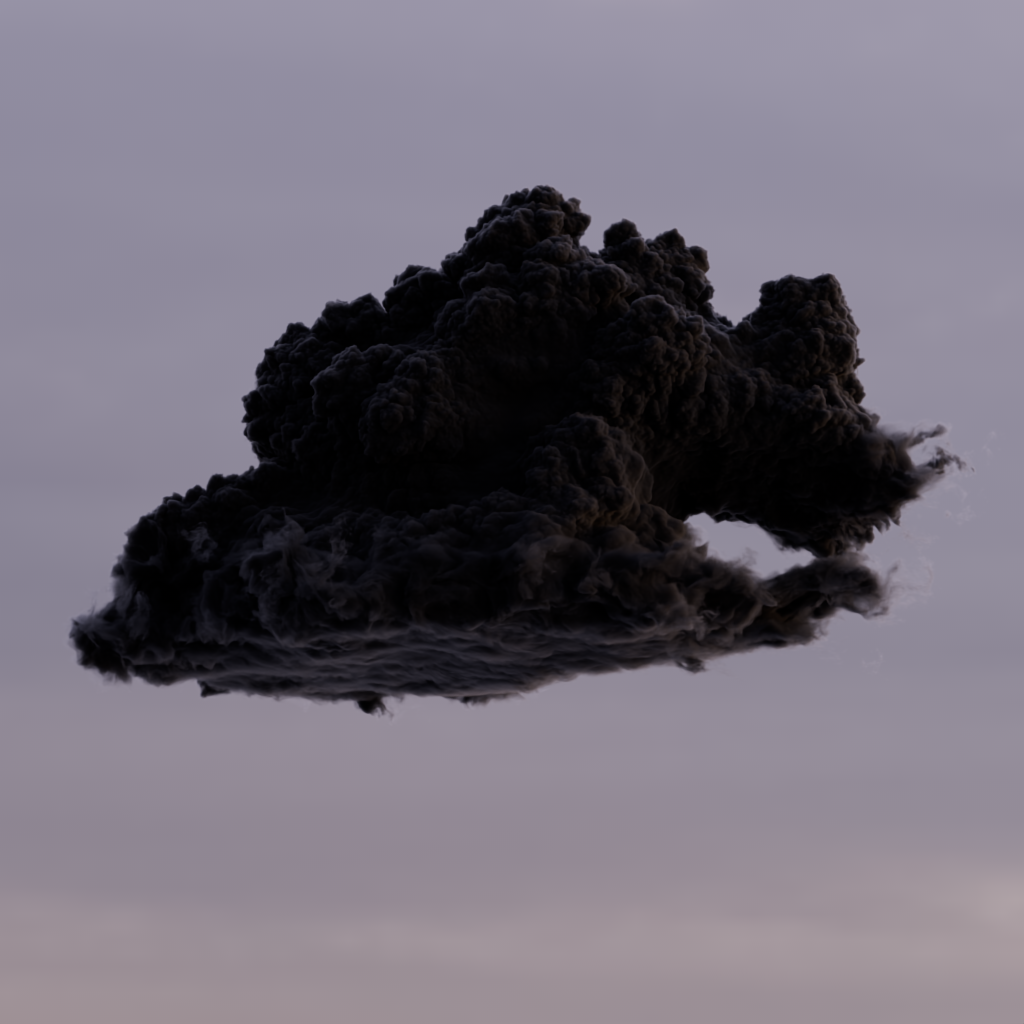
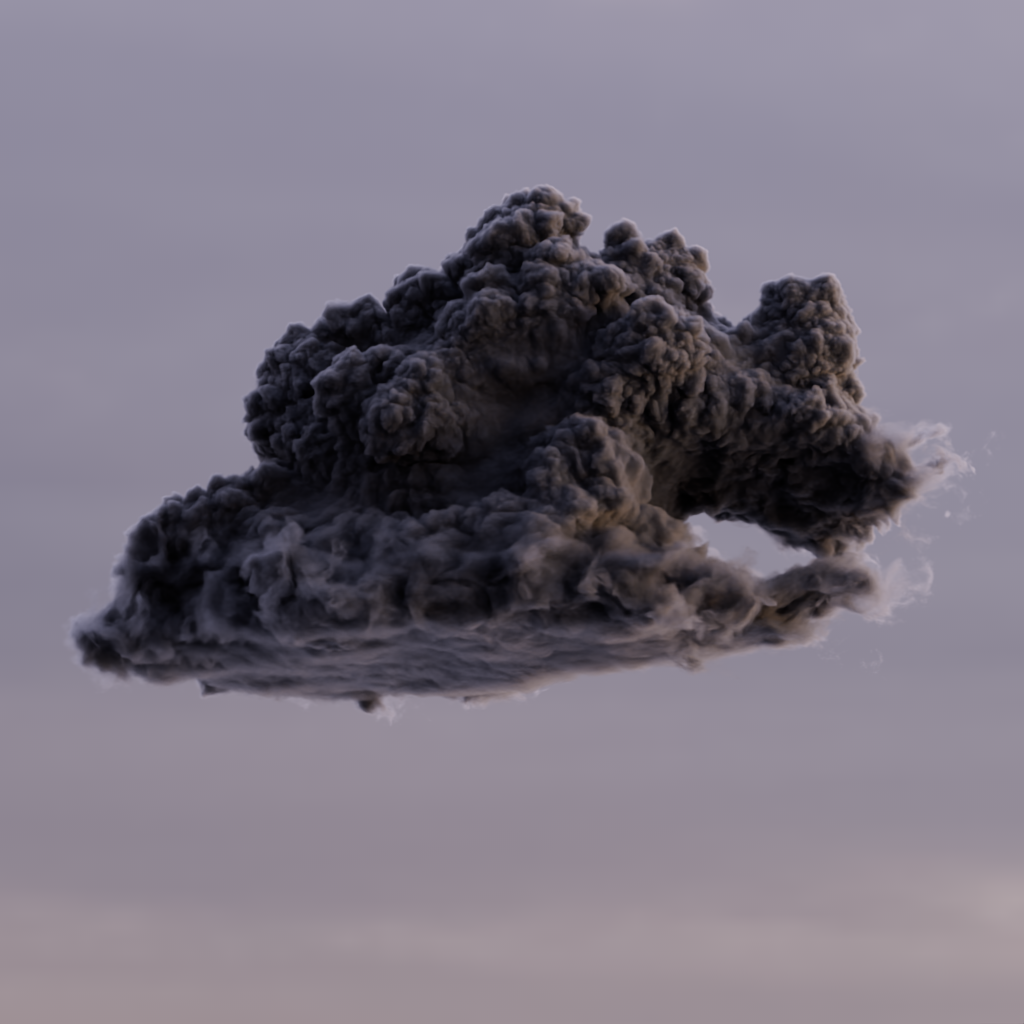
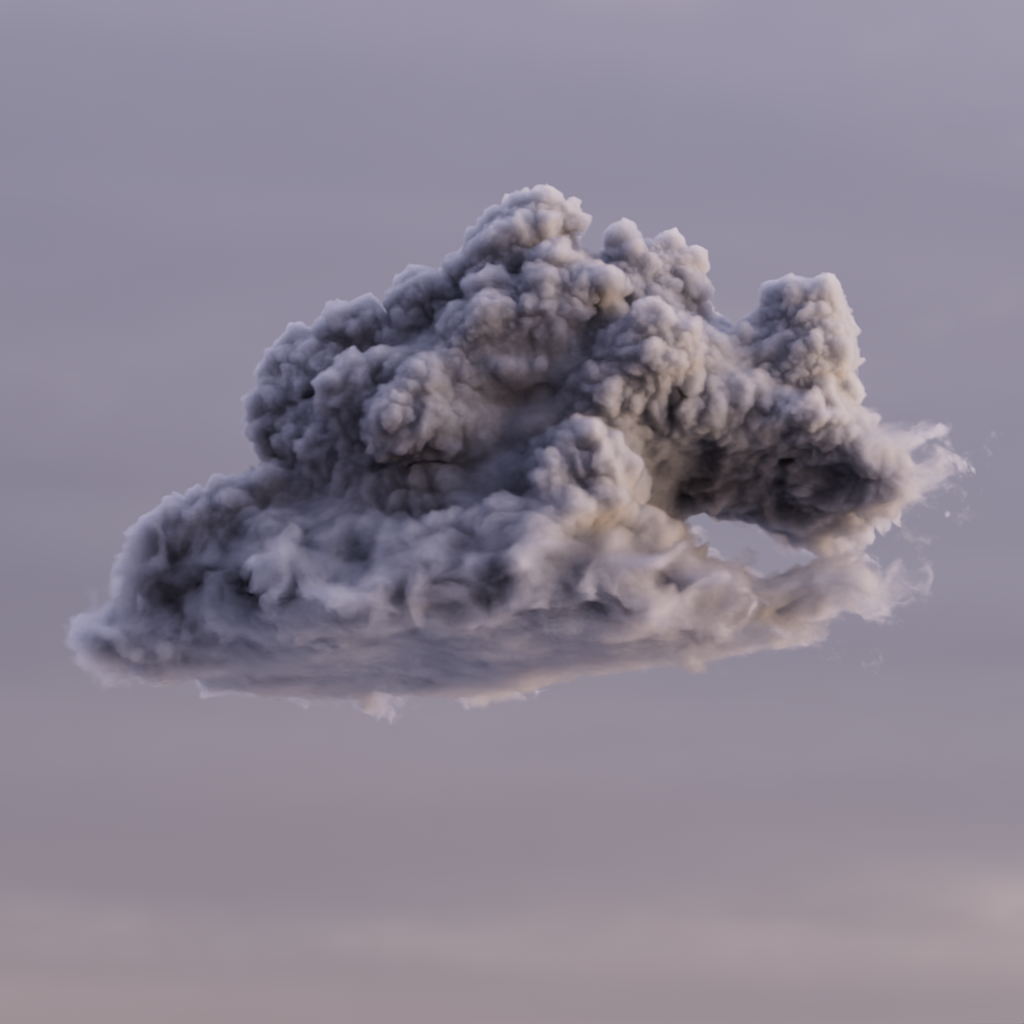
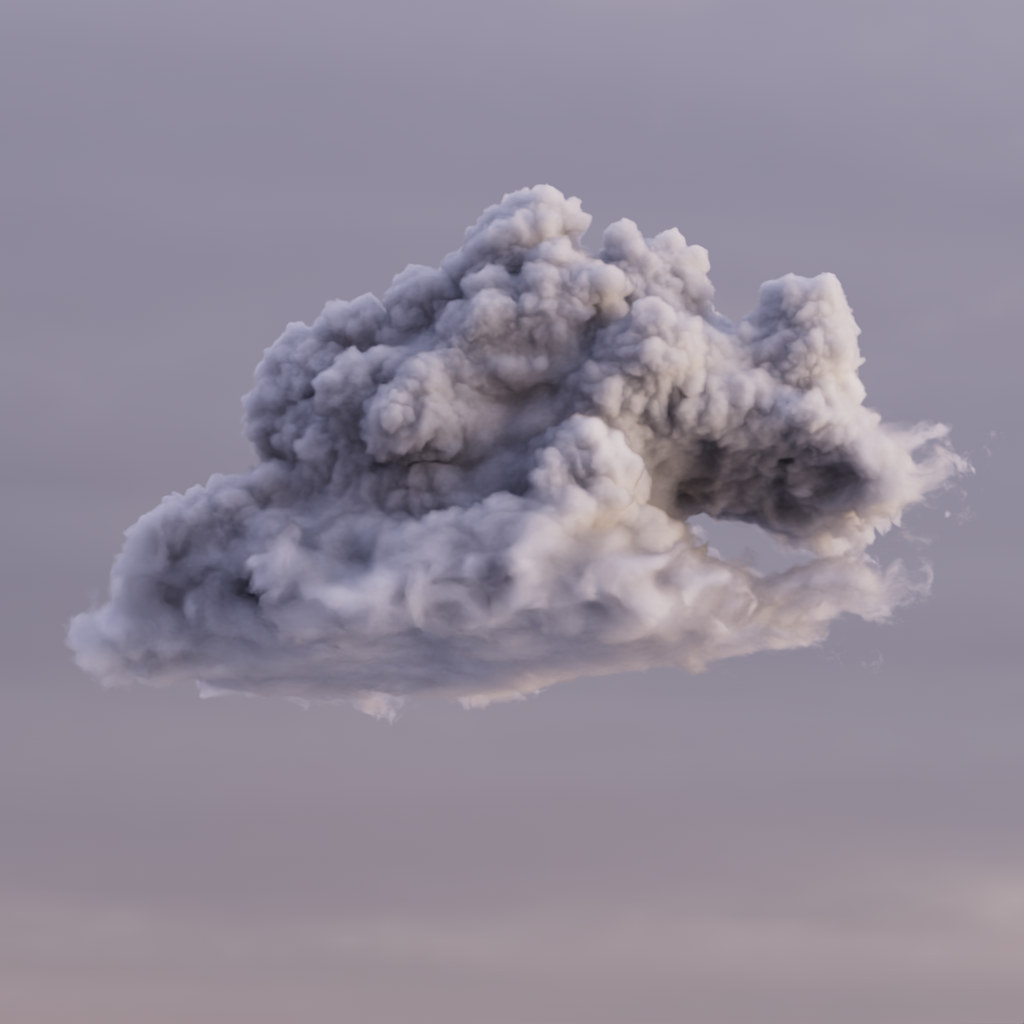
In the example images below, you can see how increasing the volume depth significantly changes the look of a cloud. Clouds have a heavily forward scattering (positive anisotropy) nature which results in more light being driven deeper into the volume rather than reflecting back out, because of this, each successive volume bounce carries more light energy than a volume that is more isotropic which scatters light more evenly in all directions.
|
|
|
|
| Volume Trace Depth: 1 | 3 | 11 | 31 |
| Asset Courtesy of Walt Disney Animation CC BY-SA 3.0 License |
|||
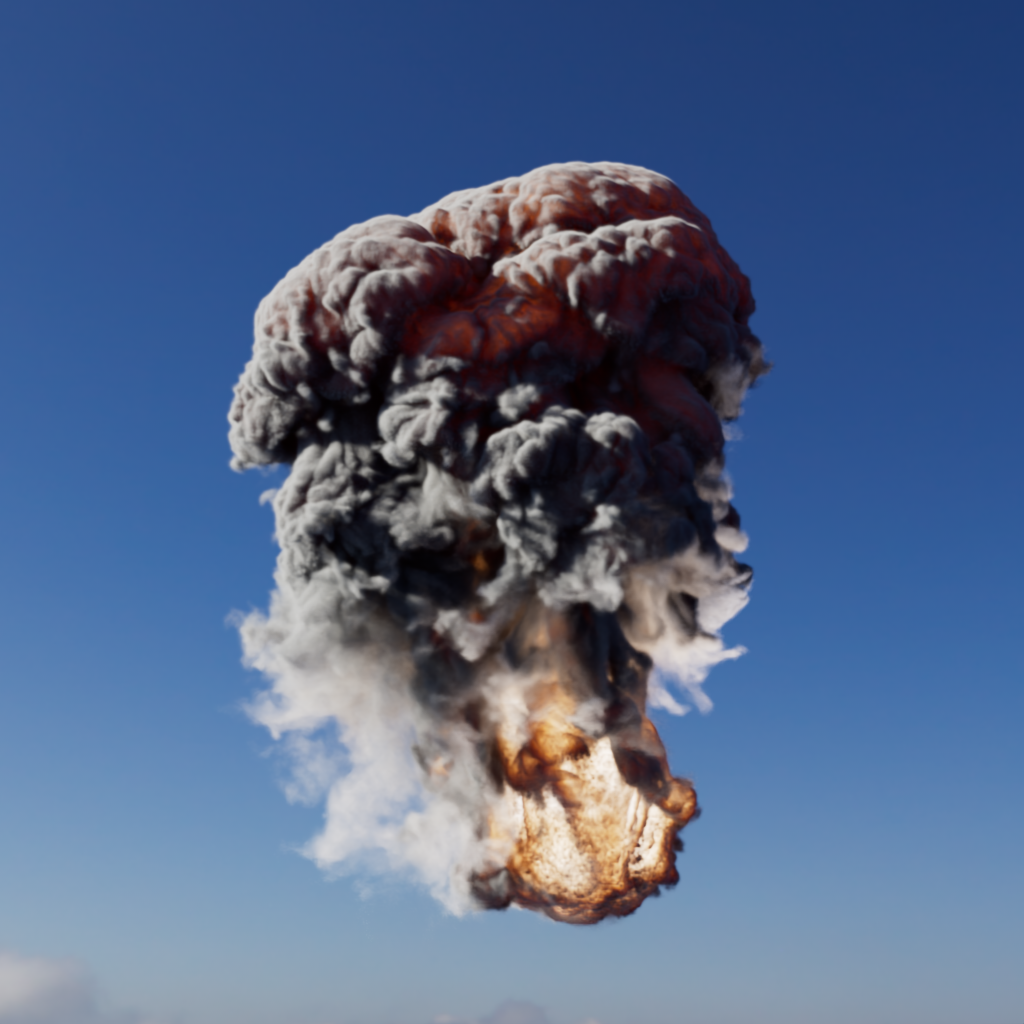
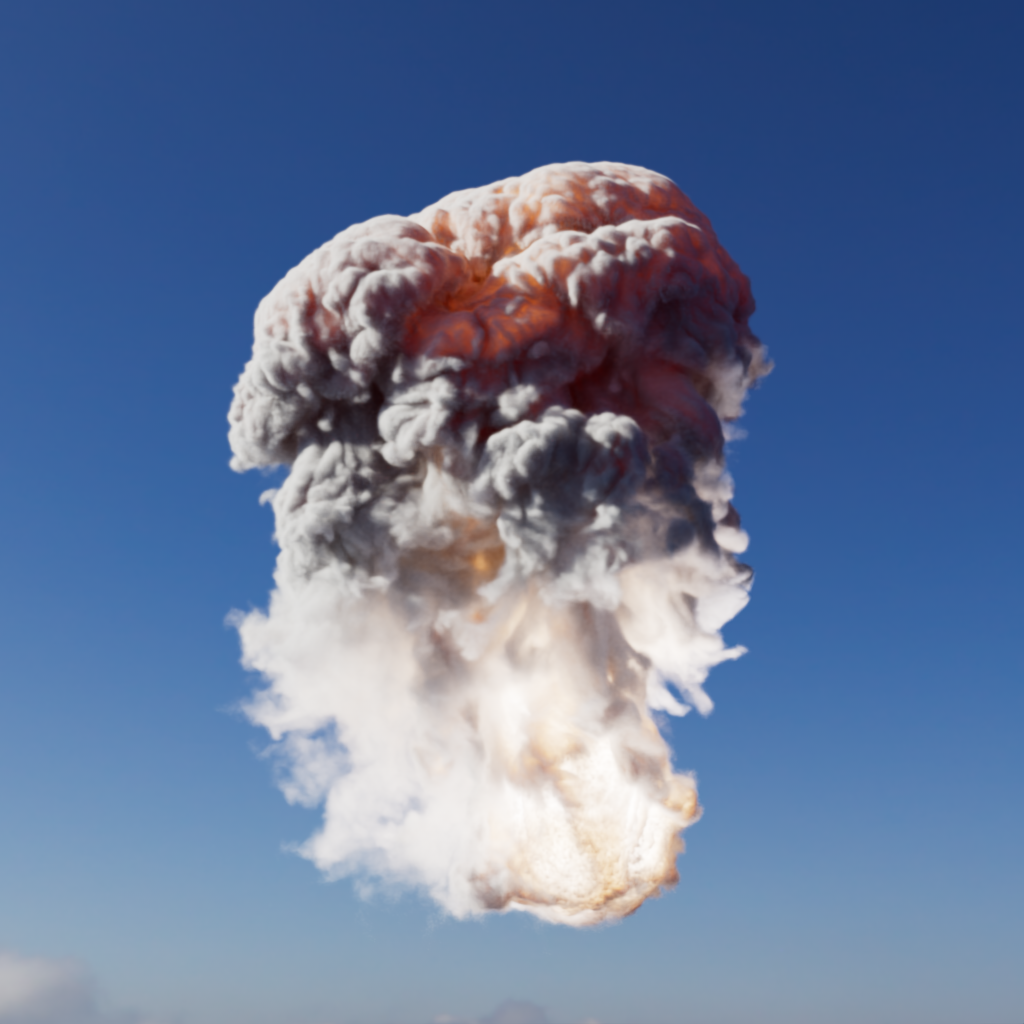
Smoke, by comparison, tends to scatter far fewer times as it is more isotropic (anisotropy closer to 0) and therefore sees diminishing returns as volume trace depth is increased. The difference between a trace depth of 11 and 31 is minimal with the demo example compared to the cloud images above.
|

|
|
| Volume Trace Depth: 1 | 11 | 31 |
|
An updated demo scene created by Saul Espinosa that uses the Disney cloud VDB and the Standard Volume shader is provided below as a starting point for better understanding the effects of multiple scattering and other volume shader parameters.
Redshift Cloud Multiscatter Demo.zip (65 MB)
Download Contents:
Scene files for 3ds Max, Blender, Cinema 4D, Houdini, and Maya using the Standard Volume Shader
Scene files for 3ds Max, Blender, Cinema 4D, Houdini, and Maya using the classic Volume Shader
HDRI dome light texture by Saul Espinosa
Example PNG renders
Cloud VDB must be downloaded separately at Walt Disney Animation - Data Sets and the "wdas_cloud_half.vdb" should be placed in the same folder as the downloaded scene files.
The Redshift demo volume VDB (242 MB) can also be added to this scene and used.
|
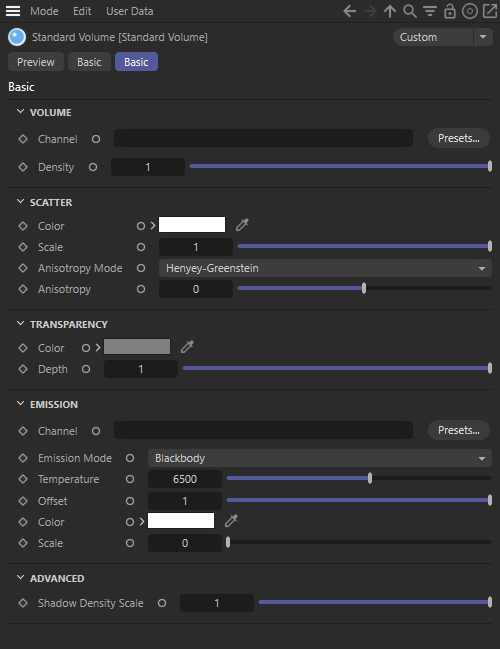
The Volume Channel can load a VDB grid to drive the overall look of a volume objects scattering contribution, this is the primary shading component for clouds and smoke. A VDB grid is loaded by typing its name into the channel field, the most common name for a scatter channel is 'density'. The Volume Channel is multiplied with the Density parameter.
This field is case sensitive.
The Volume Channel should generally be left blank if you intend to drive the Density parameter directly with an external shading node. Since the Volume Channel and Density parameter are multiplied together this may lead to unexpected results, like the grid loaded into the Density channel masking out displaced voxels. Think of an empty voxel as having a value of 0, if this is multiplied with a displaced voxel then it will return 0 and you will not be able to see your displaced voxels.
Alternatively, this also means a grid loaded into the Density Channel can be used like a mask to control where displaced voxels are allowed to appear.

|

|

|
| Volume Channel: Density | Temperature | Velocity |
Controls the density of the volume or, more specifically, where the voxels are located in your scene and how dense those voxels are in order to inform all aspects of volume scattering. Higher values create thicker looking volumes while lower values create thinner looking volumes.
The Density parameter can be used as a multiplier to control the density of a grid specified in the Volume Channel. Alternatively, an external shader can be connected to directly control the density. For example, you can use a Volume Scalar Attribute to procedurally displace your volume with a noise shader driving the Position Offset.
Instead of using Density to primarily control how thick a volume looks, consider using the Transparency options instead. While changing the density can achieve the same results, it also affects all other aspects of volume scattering — where as Transparency only affects how thin a volume looks. For example, Transparency can make the volume appear less dense but it can't actually displace your volume since it is based on the density itself. It may be helpful to think of Density as the starting point for volume rendering, use it to control the overall shape and the relationship between thick and thin parts of your volume and then use Transparency to fine tune the thickness of your volume.
| Density: 0 - 3 | Position Offset |
Controls the color of the volume. Color ramps and projected textures can be connected here.

|

|
||
| Scatter Color: White | Green | Color Ramp | Multicolor Noise |
Controls the brightness of the volume. Higher values result in more scattered light and brighter volumes, while lower values result in less scattered light and darker volumes.
| Scatter Scale: 0 - 3 Anisotropy Mode: Henyey-Greenstein |
0 - 3 Jendersie d'Eon |
Black and White Noise |
The Standard Volume shader supports two different Anisotropy modes.
By default, the Henyey-Greenstein (HG) model is the same anisotropy mode you are familiar with from the classic Redshift Volume Shader. It is a great all around mode that works well for many different volumes, particularly isotropic volumes like smoke.
On the other hand, the Jendersie-d'Eon (JDE) model excels at approximating the scattering of light through water droplets by simulating the Mie phase function. This makes it an excellent choice for cloud rendering and any volume with heavy forward scattering properties.

|

|
| Anisotropy Mode: Henyey -Greenstein | Jendersie-d'Eon |
| Asset Courtesy of Walt Disney Animation CC BY-SA 3.0 License |
|
Because of the high forward scattering by default, Jendersie-d'Eon may look darker when front lit using the same settings. Scatter Scale can be increased to compensate or the Diameter can be decreased to 1 for a more neutral isotropic look. It's worth noting that Henyey-Greenstein also looks darker when front lit with increased forward scattering, because less light is scattering back to the camera.
Henyey-Greenstein must be set as the Anisotropy mode to use this parameter.
Controls the direction light scatters inside a volume within a -1 to 1 range, adjusting a volume's anisotropy allows for more artistic control and increased realism. In the real world the composition of a volume can cause light to scatter in specific directions, for example, clouds frequently exhibit forward scattering (positive values) due the inclusion of water and ice molecules.
The default anisotropy of 0 results in isotropic scattering, when the light scatters equally in all directions, which is generally appropriate for smoke.
Positive values increase the chance for forward scattering, when more light is scattered in the direction the light rays are already traveling. Negative values increase the chance for back scattering, when more light is scattered back towards the location of the light source.
Values close to the extreme ends (-1 and 1) can result in unexpected or unwanted results as the light scattering becomes highly concentrated in a single direction.
| Anisotropy: -0.7 - +0.7 Front Lighting |
-0.7 - +0.7 Back Lighting |
Jendersie d'Eon must be set as the Anisotropy mode to use this parameter.
Controls the direction light is scattered inside a volume.
The default diameter of 5 results in forward scattering, when more light is scattered in the direction the light rays are already traveling, and this increases up to the maximum value of 50.
Values below 5 push the volume closer to isotropic scattering, when light scatters equally in all directions. A value 1 results in fully isotropic scattering, and more closely matches the default behavior of a volume using Henyey-Greenstein.
| Diameter: 5 - 50 Front Lighting |
5 - 50 Back Lighting |
Controls how dense the volume looks with a color input. Color ramps and textures can be connected here.
By default, Transparency uses a 50% grey color value, darker colors make the volume appear thicker while brighter colors make it appear thinner.
| Transparency Color: White to Black | Black and White Noise | Multicolor Noise |
Using colors tints the volume with the opposite color, this also affects the color of shadows cast by the volume. By comparison, changing the Scatter Color does not change the color of the shadows. Subtle color saturation can go a long way with transparency color and highly saturated colors may result in undesired looks. In the examples below, note how changing the transparency color affects the shadow color on the wall — however, when only changing the scatter color the shadows are not affected. In the middle example, the scatter color has been set to a similar color as the transparency color, this results in direct control over the volume color and the shadow color.
| Transparency Color: 360° hue shift Scatter Color: White |
360° hue shift 360° hue shift |
50% Grey 360° hue shift |
Controls how dense the volume looks and the distance in scene units a ray needs to travel before the transparency color reaches full saturation. Higher values result in thinner looking volumes while lower values result in thicker looking volumes.
As light travels through a volume, some wavelengths of light get absorbed/attenuated making volumes darker/lighter in regions of differing densities. Therefore, Transparency Depth should be set in accordance with the actual thickness of the volume taken into consideration. At higher values, the visual density of the volume decreases resulting in less absorption of color in the object.
| Transparency Depth: 0 - 15 | Black and White Noise |
The Emission Channel can load a VDB grid to drive the overall look of a volume objects emissive contribution, a primary shading component for fire and explosions. A VDB grid is loaded by typing its name into the channel field, the most common name for an emissive channel is 'temperature'.
This field is case sensitive.
The Emission Channel should generally be left blank if you intend to drive emission directly with an external shading node. Since the Emission Channel and other emission parameters are multiplied together this may lead to unexpected results, like the grid loaded into the Emission Channel masking out displaced voxels. Think of an empty voxel as having a value of 0, if this is multiplied with a displaced voxel then it will return 0 and you will not be able to see your displaced voxels.
Alternatively, this also means a grid loaded into the Emission Channel can be used like a mask to control where displaced voxels are allowed to appear.

|
| Emission Channel: Temperature |
Emission Mode controls how emission color is determined with the following options:
Color - Emission color is controlled solely by the color swatch or an external shading node to drive the color.
Blackbody - Emission color is primarily controlled by a physically correct method of rendering volumes based on temperature for things like explosions and flames. Blackbody mode controls the both color and the intensity of the emission. In this mode, Emission Color tints can still be used to the blackbody emission result — leaving it at the default white will leave blackbody emission unaffected.
In Color mode, the temperature has no effect, so the color of the emission channel can be driven directly by a color ramp. The brightest parts of an emissive channel map to the right side of a horizontal ramp while the darkest parts map to the left side of a ramp.

|

|

|

|
| Emission Color: White Emission Mode: Color |
White to Black | Flame coloration | Colorful ramp |
When Blackbody mode is used the color swatch can still be used to tint the emission output based on the temperature's intensity and color. In the red colored examples below, note how the black parts of the ramp reduce the intensity of the blackbody emission.

|

|

|

|
| Emission Color: White Emission Mode: Blackbody |
Black to Red | Red | Red to Black |
Only relevant when using Blackbody emission mode.
The temperature parameter maps values to a Kelvin temperature range which changes both the color and the emission intensity. Higher values make the emission hotter and brighter while lower values make the emission colder and darker.
When a VDB Grid is loaded via the Emission Channel, this parameter defines the maximum temperature the values in the grid can be mapped to.
Alternatively, an external shader can be connected to directly control the temperature, while the Emission Channel is blank. For example, you can use a Volume Scalar Attribute to load a VDB grid and set the maximum temperature value as the "New Max" value or procedurally modify the temperature with a noise shader.
| Temperature: 0 - 12,000 | Temperature Position Offset |
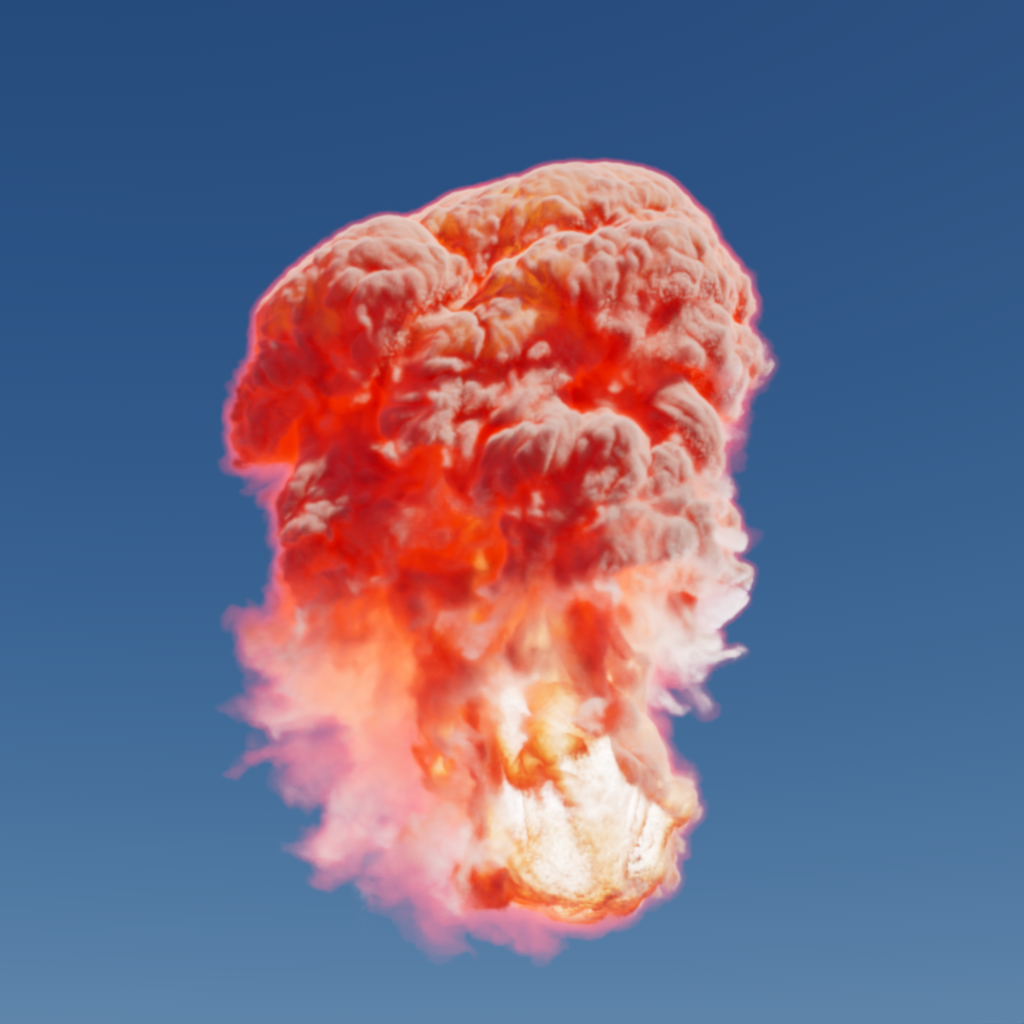
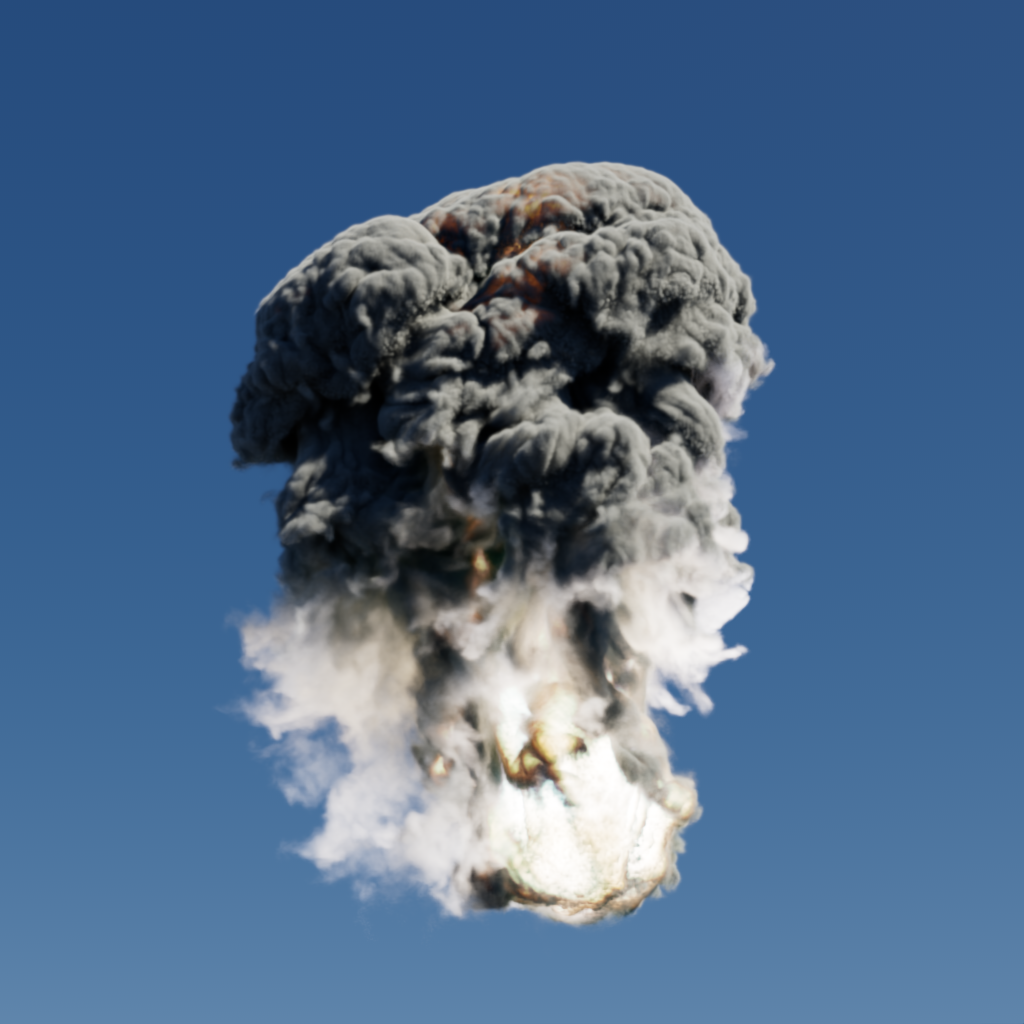
Only relevant when using Blackbody emission mode.
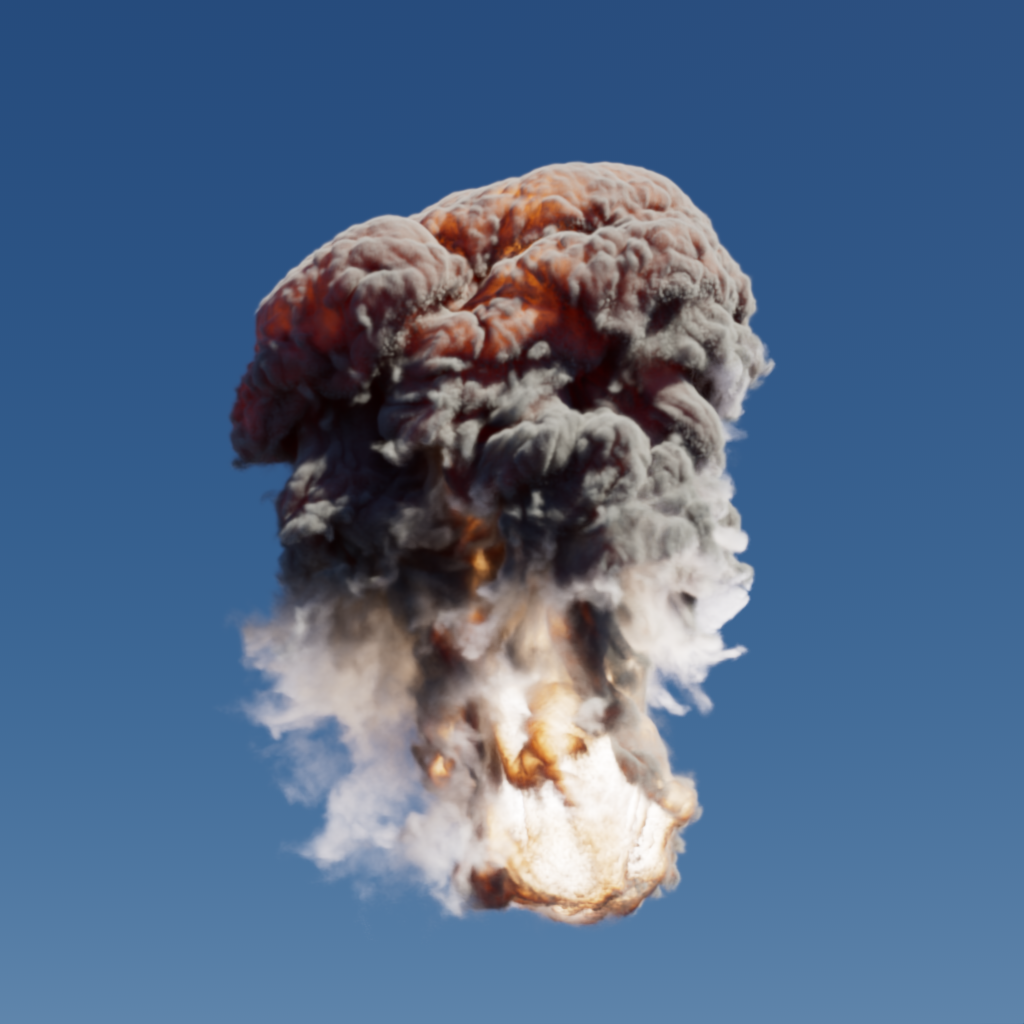
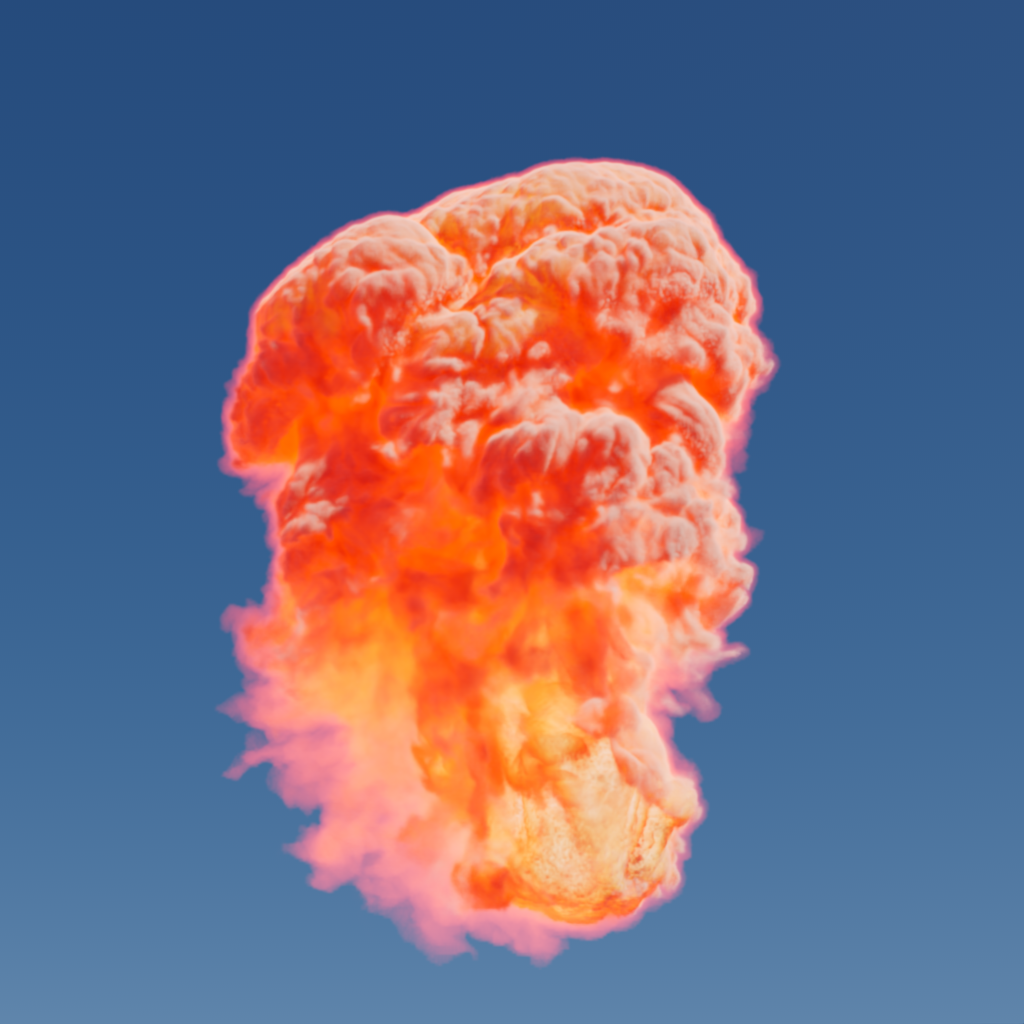
Offset interpolates the emission intensity between the emission channel value and the calculated physically correct radiance.
For physically correct results, offset should be left at the default value of 1. Lower values will result in a more even and constant emission.
|
|
|
|
| Offset: 1 (default) | 0 | 0.5 | 2 |
Controls the color of the emission. Using darker color reduces the intensity of the emission.
See the Emission Color Mode description for example images.
Controls the intensity of volume emission. Higher values increase the brightness of emission while lower values decrease the brightness, a value of 0 results in no emission.
An external shading node can be used to control the emission scale.
| Emission Scale: 0 - 2 | Black and White Noise |
Controls how dense a volume looks without affecting its overall shape and silhouette. In effect, it is a "trick" that can emulate multiple scattering with a less severe impact to render times than actual multiple scattering. This can be achieved by setting the shadow density scale to a value below 1.0. Higher values will make the volume look more dense and at extreme values in either direction you are likely to lose definition in your volume.
Transparency could be increased — or density reduced — to allow more light to pass through a volume, however, this would also change the overall appearance of the volume. Shadow density scale, on the other hand, retains a volume's shape while allowing more light to pass through it.
| Shadow Density Scale: 0 - 1 | Changing Transparency Depth |