Table Of Contents
Introduction
When a renderer computes shading, it uses the mesh's vertex normals. This way, if the mesh has smooth normal, the renderer can generate smooth lighting even if the mesh is of a low-tessellation. However, this can create the unfortunate situation where a vertex normal might be able to 'see' the light which the polygon might not!
To understand this, let's look at a picture of a box and a light. The box has smooth normal. The green arrows represent the box's vertex normals while the red arrows represent its polygon normals. The box's right polygon cannot 'see' the light because the light is behind that polygon's normal. But the top right vertex can see the light (dashed line) because the light if in front of the vertex normal.
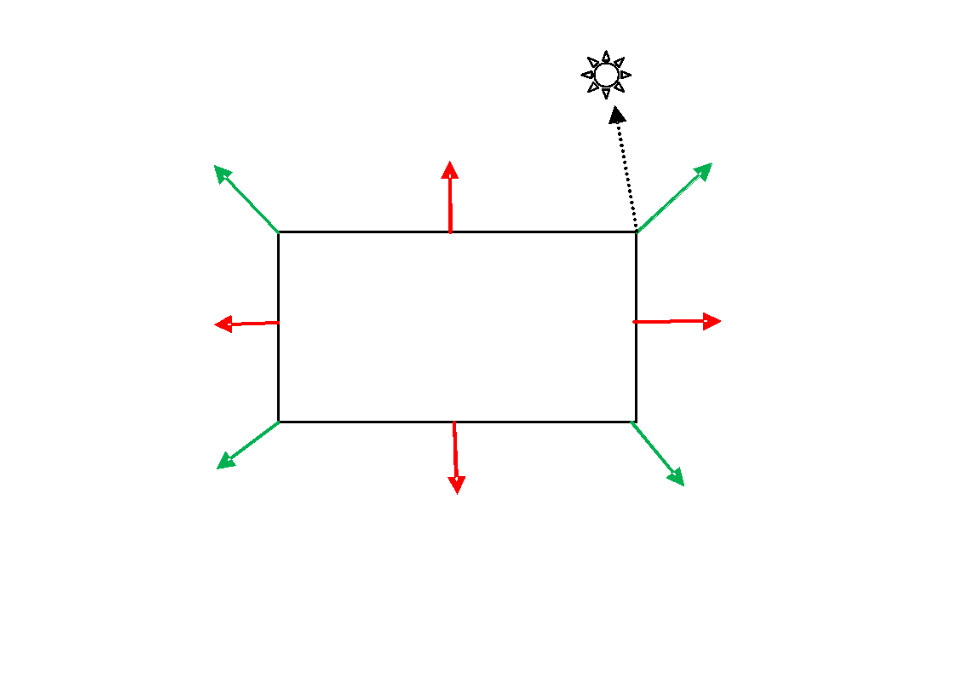
When vertex normals 'disagree' with polygon normals about which lights they can see, the polygon shadows itself! The problem appears mostly on low-poly meshes, like the sphere shown below.
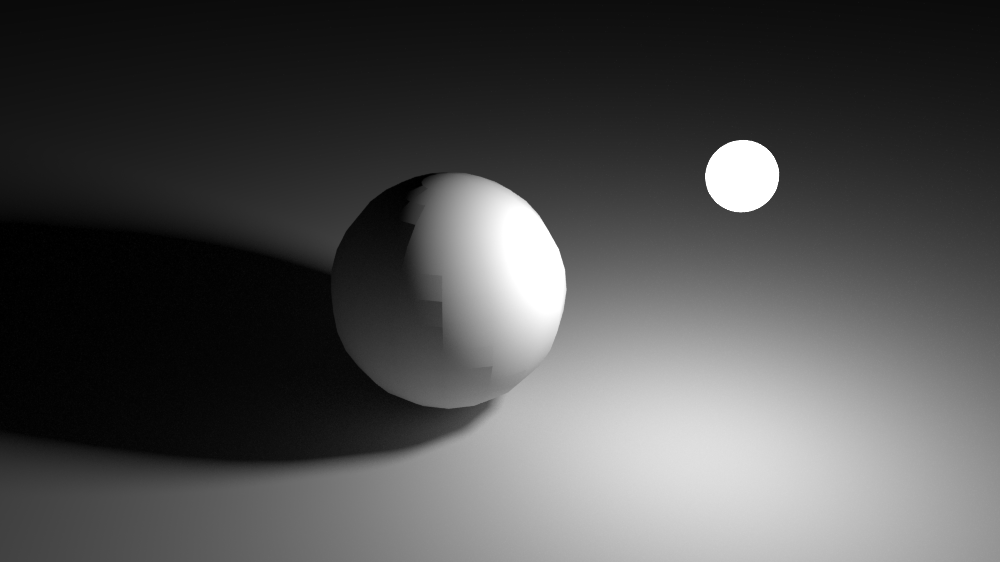
When shadow ray biasing is disabled, polygonal artifacts can appear near the lighting silhouettes
Shadow ray biasing is a trick Redshift does in order to avoid self-shadowing artifacts, as shown below
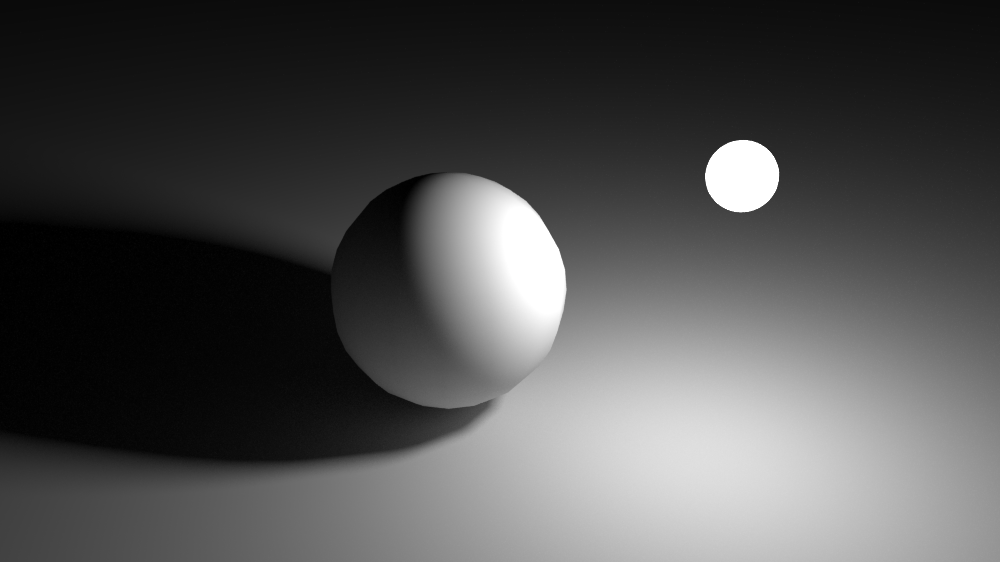
Redshift performs shadow ray biasing by default in order to avoid such artifacts
Different renderers use different techniques to avoid this issue. Some renderers require the user to add a kind of "epsilon" on meshes. Redshift attempts to solve this issue automatically by looking at how big the polygon is and also how bent the vertex normals are with respect to the polygon normals. Based on these two factors, it decided how much to 'push' the shadow ray away from the polygon so that the polygon doesn't shadow itself!
Problems
Even though shadow ray biasing can get rid of most self-shadowing issues, it can introduce other types of artifacts in certain situations. For example, if the geometry extremely low-poly and has very 'bent' vertex normal with regards to the polygons, the rays might be pushed out too much and introduce the opposite problem of self-shadowing:
light leaking!
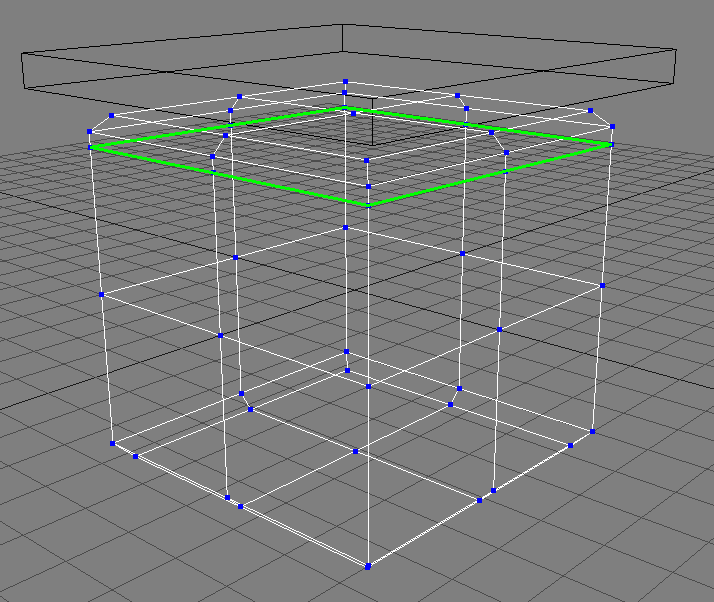
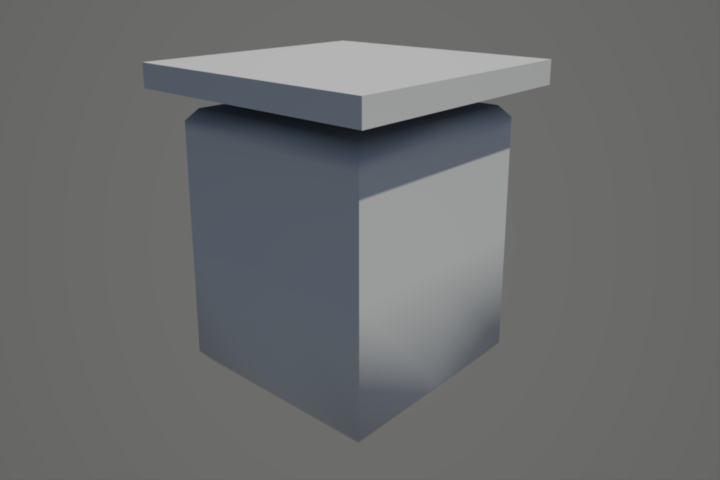
One of the worst-case scenarios for light leaking can be seen on a cube with smooth normals, as shown below. As it can be seen, all sorts of light leaking artifacts appear on the cube, including missed shadows.
The problem here is that we are trying to achieve smooth shading on a surface that is not smooth at all! As a result, the shadow rays are pushed away from the cube too much and 'skip' the shadow-casting top mesh.
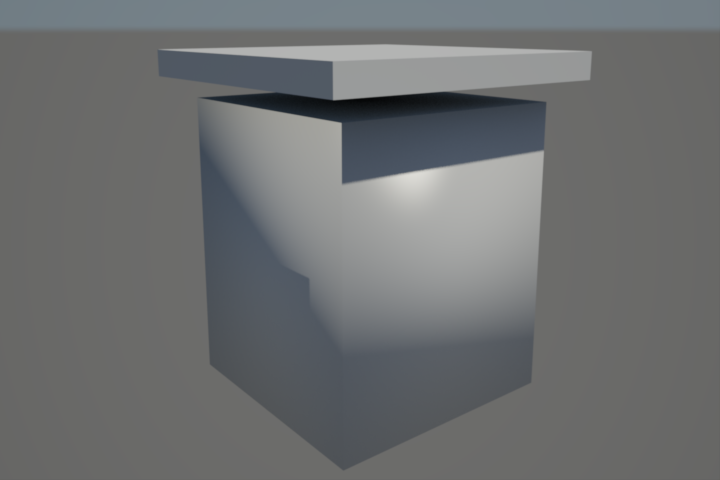
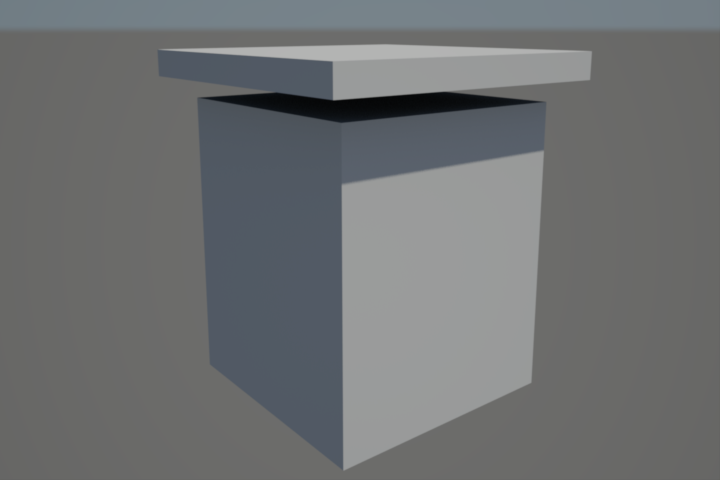
Hard edges (normals), of course don't have this problem, as shown below. That's because the polygon normal and the vertex normal are now the same.
Solutions
So what can we do to fix the above light leaking issue? There are a couple of options.
Disable Shadow Ray Biasing
If your scene is already tessellated enough you might not have any self-shadowing artifacts – or they might only be in places that are not seen by the camera. In this case, the quickest way is to globally disable shadow ray biasing.
Increase tessellation / Modify topology
As mentioned above, Redshift determines how much to bias the shadow rays depending on the size of the polygons. So one possible solution is to apply a bit of tessellation to the problematic polygons. Smaller polygons will cause less shadow biasing and, therefore, fewer light leaking artifacts.
Also, if the problems appear mostly near bevels, you can try adding extra edges near the bevels as shown below.
The first pair of images show a beveled cube. The mesh is still low-poly and all the edges are smooth. Notice the missing shadows and other artifacts on the cube's left polygon.
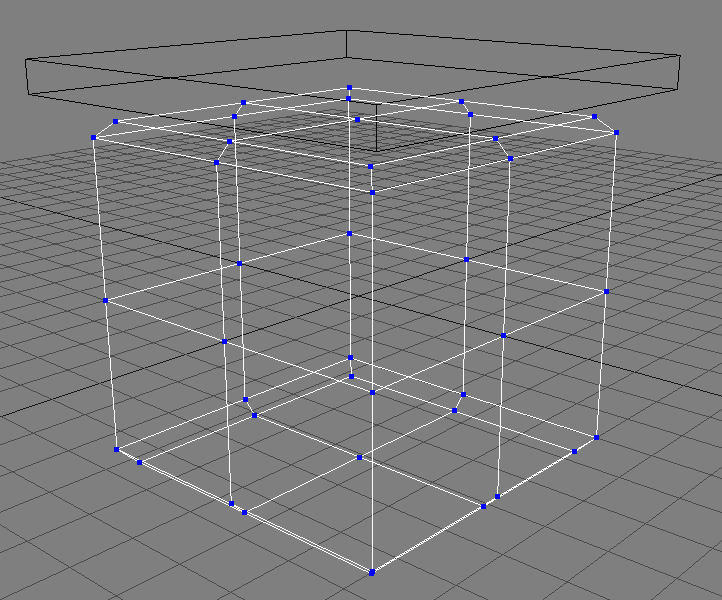
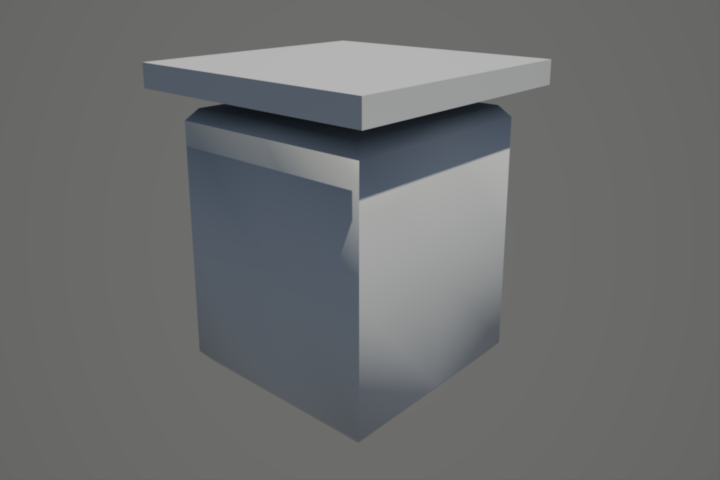
By adding an extra edge near the top bevel, the light leaking issues go away:
