Symmetry Object
The functionality of the Symmetry object has been adapted to the new global Symmetry System. You will therefore find numerous identical settings, which have the same effect.
The Symmetry object is primarily used in modeling and mirrors objects on symmetry planes. Imagine you are modeling a face. It would be awkward to have to model both halves of the face. Instead, create only one half and let the Symmetry object create the other half, merging points on the symmetry plane.
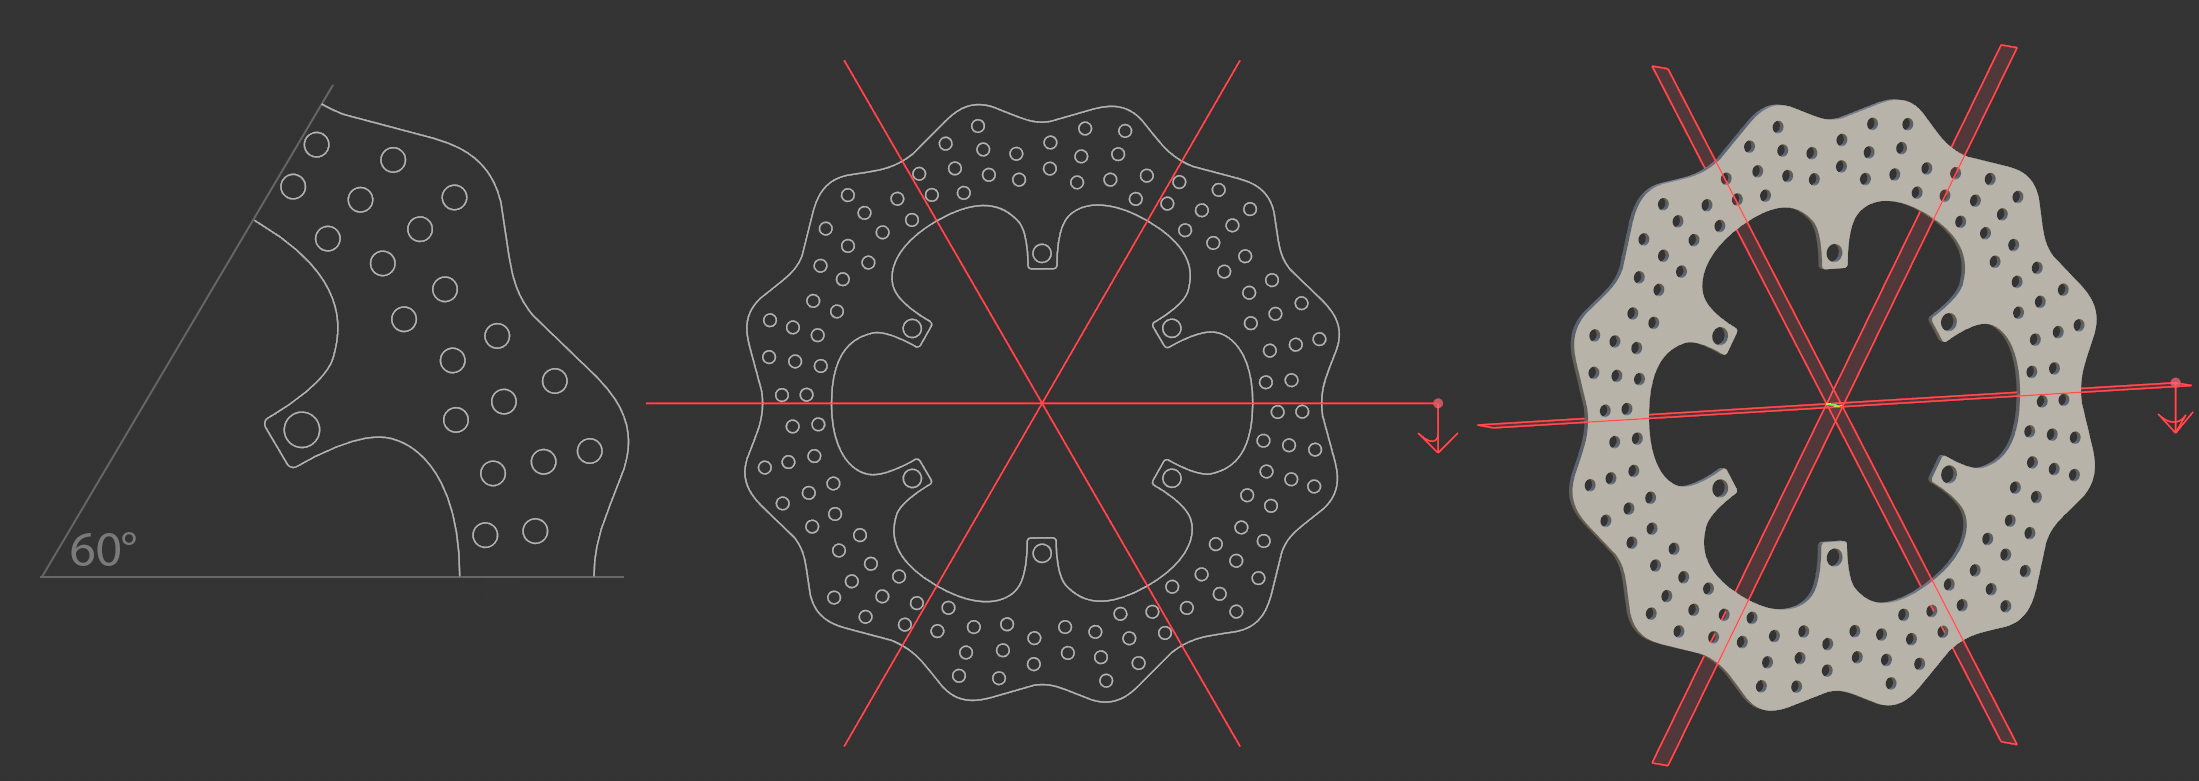
Even with rotationally symmetrical objects, it is sufficient to model only one "pie slice" and leave the duplication of the segments to the Symmetry object:
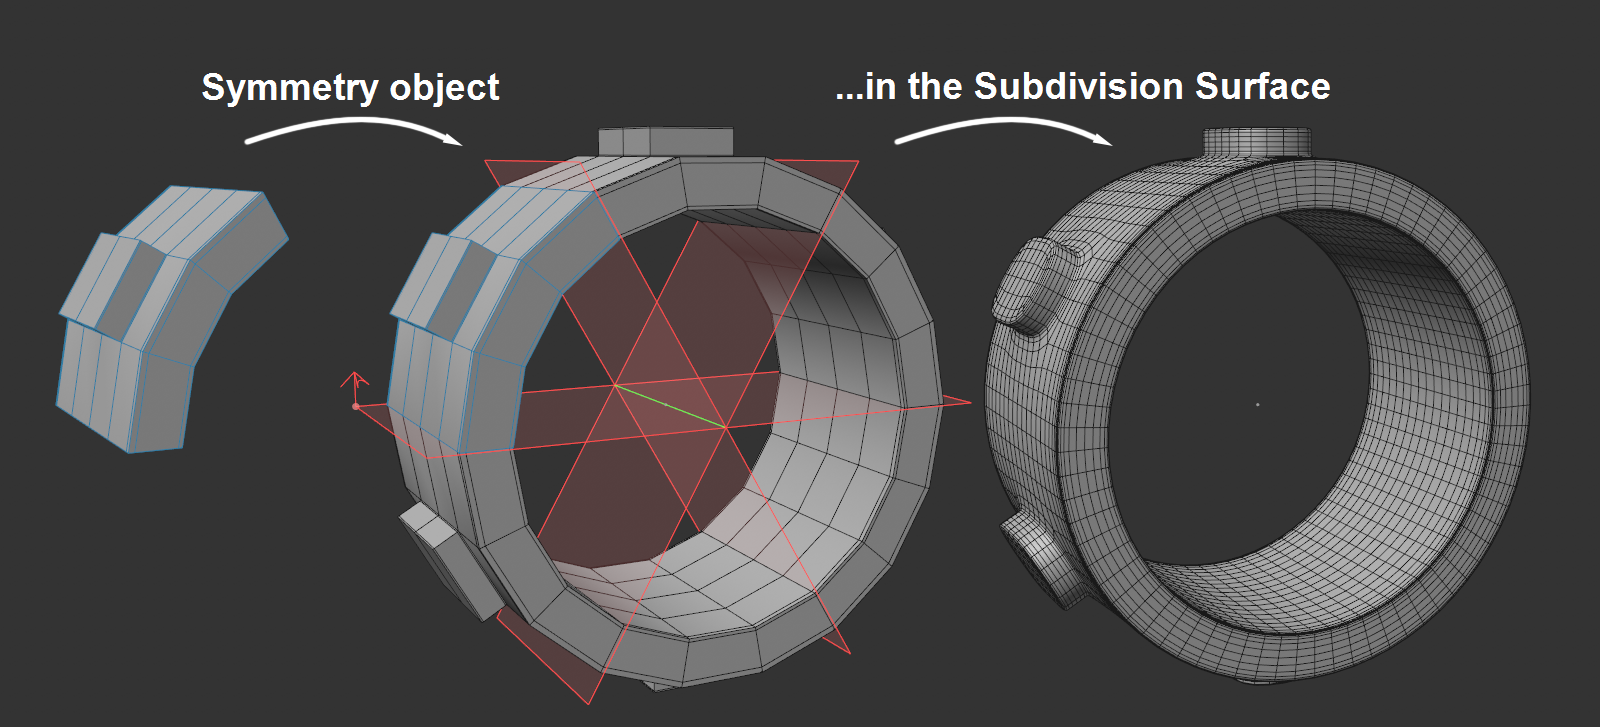
The Symmetry object merges the points (if desired) that come to rest on one another at the symmetry planes and provides a complete, closed object, as in the above example, which can be further processed by appropriate generators such as a Subdivision Surface object.
There would also be nothing to stop you from creating symmetrical light source setups - which was not possible with the old Symmetry object.
Example
In this scene, the rotationally symmetrical part of a brake disk is modeled with splines in a 60° 'pie slice'. Make sure that the contouring spline start and end points are positioned exactly on the edges of the pie slice so that the Connect object can merge them. The Extrude object can then form a correct cap surface.