---
title: "Render View"
url: "https://help.maxon.net/c4d/en-us/Content/_REDSHIFT_/html/Render%2BView.html"
description: "Redshift has its own custom render view (RV) with a number of exclusive benefits over Cinema 4D's native render view. Some of the primary Redshift RV …"
---
# Render View
## Overview
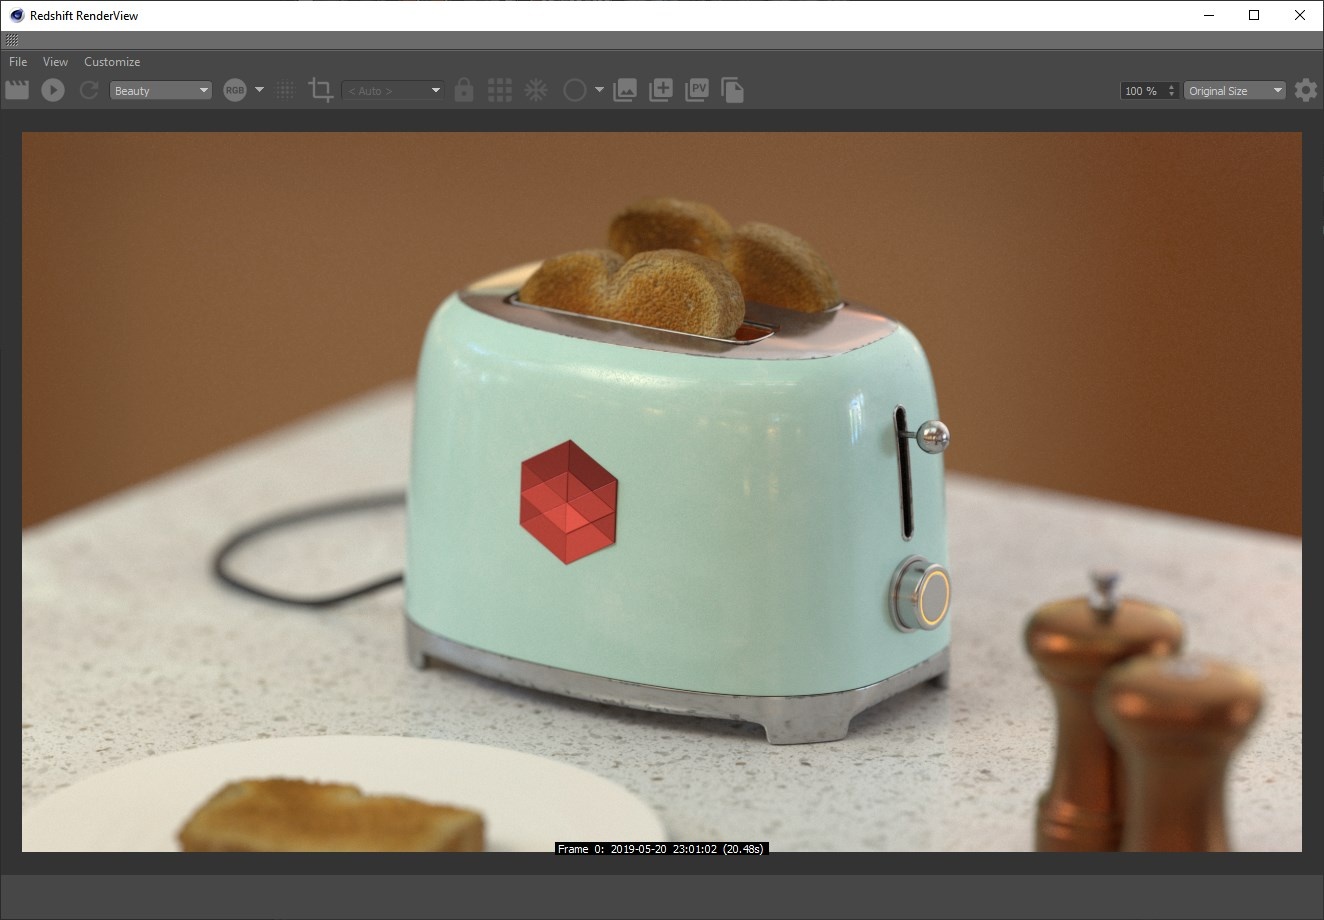
*Cinema 4D's Redshift Render View*
Redshift has its own custom render view (RV) with a number of exclusive benefits over Cinema 4D's native render view. Some of the primary Redshift RV benefits are:
- Faster Interactive Preview Rendering (IPR)
- IPR undersampling
- Redshift AOV previews
- Tessellation freezing
- Quick toggles for bucket rendering, clay rendering, and samples diagnostic rendering.
- Built in PostFX like bloom and flare.
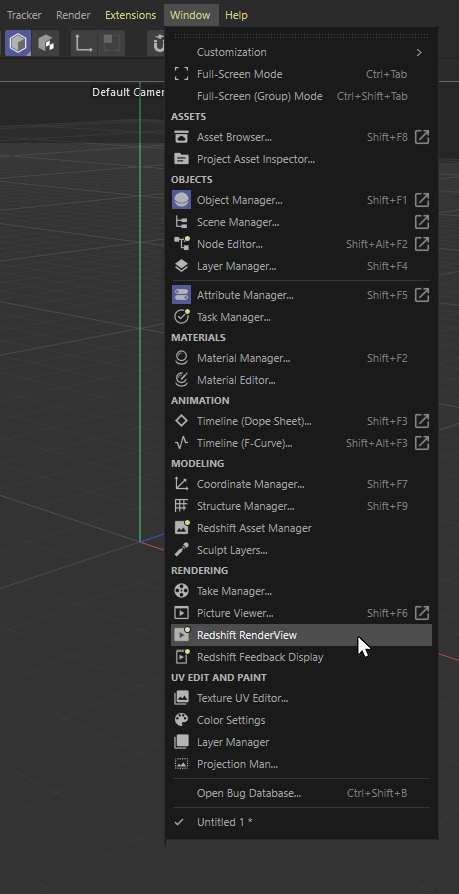
To open the Redshift RV go tothe Cinema 4D Window menu and select "Redshift Render View."
> **Important:** Cinema 4D has some DCC specific features, for more information please see here.
## Toolbar

*Cinema 4D's Redshift Render View Toolbar*
| Icon | Title | Description |
| --- | --- | --- |
|  | **Render Button** | Starts a new render. |
|  | **Start / Stop IPR** | Starts and stops Redshift's Interactive Preview Rendering, intended for quick render feedback. |
|  | **Refresh IPR** | Forces a refresh for your Interactive Preview Render. |
|  | **AOV Preview** | Lets you select which AOV is currently displayed from a dropdown menu, this defaults to the primary Beauty pass. For more information on AOV's see [here](https://help.maxon.net/c4d/en-us/Content/_REDSHIFT_/html/AOV%2BTopics.html.md) and for examples and more information on the AOV Preview menu please see here. |
|  | **Color Channels** | This button lets you select which RGB channel is visible. You can choose from an isolated view of the red, green, blue, and alpha channels. For more information please see here. |
|  | **Show Output Before Denoising** | Toggles between the noisy beauty image and the image after denoising. This helps you quickly see the positive (less noise) and potentially negative (less detail) effects of denoising. Denoising must be enabled in the Redshift Render Settings in order for this to work. For more information please see [here](https://help.maxon.net/c4d/en-us/Content/_REDSHIFT_/html/Denoising.html.md). |
|  | **Region Render** | Draw a custom rectangular selection to render inside using either primary bucket or interactive preview rendering. For more information please see here. |
|  | **Camera Select** | This dropdown lets you specify which scene camera to use when rendering. By default the Render View is set to \< Auto > and will use whatever camera is currently active in the viewport. |
|  | **Lock** | Locks the render view to the current camera when enabled. Changing the active viewport while this setting is enabled will not change the render view camera. |
|  | **Bucket** | Toggles bucket rendering on and off. If enabled during IPR rendering Redshift will start a new bucket render with each scene change which can help you if you are previewing AOVs, Subsurface Scattering or other things that require bucket rendering. |
|  | **Freeze Tessellation** | When enabled this button freezes any Redshift [tessellation](https://help.maxon.net/c4d/en-us/Content/_REDSHIFT_/html/Tessellation%2BAnd%2BDisplacement.html.md) from updating. This is useful for ensuring quick render previews with scenes that have tessellation, especially the adaptive variety. For more information on the freeze tessellation button please see here. |
|  | **Freeze Geometry** | When this button is enabled, all geometry information, such as the radius of a parametric cube object or the point positions of a polygon object, is frozen to avoid re-translating the geometry for rendering. Changes to the geometry are no longer visible in the current render. |
|  | **Render Mode** | This button provides a quick way to switch between different diagnostic modes during an IPR render. Yoou can switch between the default beauty render mode, a clay render mode, and a show samples view mode. For examples and more information please see here. |
|  | **Click to Focus** | Rendering the view of a Redshift Camera, activating this option allows to set a focus distance by clicking directly into the Render View. |
|  | **Select Object** | ctivating this option allows to click directly into the Render View to select an object. |
|  | **Select Material** | Activating this option allows to select a material by clicking on a surface in the Render View. |
|  | **Snapshot Panel** | Toggles the visibility of the Snapshots bar. Snapshots are saved versions of previous renders that are helpful when comparing different renders. For examples and more information please see here. |
|  | **Snapshot** | Saves the current image visible in the Render View to the Snapshots bar. This includes the ability to save images of AOVs besides the default Beauty and to be able to compare saved render snapshots. For examples and more information please see here. |
|  | **Snapshot to Picture Viewer** | Sends the current Snapshot to the Cinema 4D Picture Viewer and opens the Picture Viewer. |
|  | **Copy Frame Buffer** | Copies the current image visible in the Render View to your clipboard allowing for easy pasting elsewhere. |
|  | **IPR Render Zoom** | This displays and controls how far you are currently zoomed into your render in the render view. 100% means you are viewing it at native resolution. For more information please see here. |
|  | **Zoom Mode** | There are several different zoom modes to choose from in the render view via this dropdown menu. For more information please see here. |
|  | **Settings** | Toggles the visiblity of the Render View settings panel and it's three tabs: display, pixel, and snapshot. This panel can provide you with many different details and options for your renders. For more information please see here. |
## Toolbar in Detail
### AOV Preview
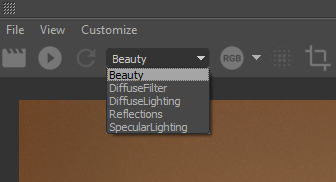
*AOV dropdown menu*
The AOV dropdown menu lets you easily preview any AOVs currently active in your scene. This can be helpful for diagnosing render issues like noise by being able to isolate the different render passes and see where the source of your noise is coming from. Below are some examples of a simple sphere, ground plane, and domelight scene. You can even check most of your AOVs during an IPR.
For more information on AOV's see [here](https://help.maxon.net/c4d/en-us/Content/_REDSHIFT_/html/AOV%2BTopics.html.md).
[Video: rsrv_aov_demo392b.mp4](https://help.maxon.net/c4d/en-us/Content/_REDSHIFT_/Resources/Multimedia/rsrv_aov_demo392b.mp4)
*Changing current AOV*
### Color Channels
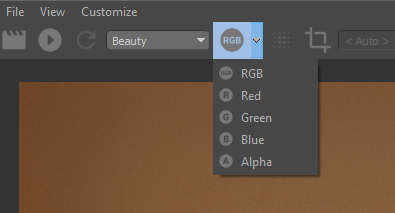
*Color Channel dropdown menu*
The Redshift Render View lets you quickly switch between viewing different color channels as demonstrated in the images below. This works on AOVs as well.
[Video: rsrv_rgb_demobc77.mp4](https://help.maxon.net/c4d/en-us/Content/_REDSHIFT_/Resources/Multimedia/rsrv_rgb_demobc77.mp4)
*Changing the Color Channel display*
### Show Output Before Denoising
[Video: rsrv_output_before_denoisee159.mp4](https://help.maxon.net/c4d/en-us/Content/_REDSHIFT_/Resources/Multimedia/rsrv_output_before_denoisee159.mp4)
*Toggling Show Output Before Denoising on and off*
The Show Output Before Denoising button\
\
simply toggles back and forth between the denoised output and the before denoising render output. This allows you to quickly switch back and forth seeing the difference with and without denoising.
> **Important:** Denoising must be enabled in order to make use of this function. Fore more information please see [here](https://help.maxon.net/c4d/en-us/Content/_REDSHIFT_/html/Denoising.html.md).
### Region Render
[Video: rsrv_render_region87fa.mp4](https://help.maxon.net/c4d/en-us/Content/_REDSHIFT_/Resources/Multimedia/rsrv_render_region87fa.mp4)
*Region render demonstration with frame region feature*
The Region Render button:\
\
or "R" hotkey toggles between full-screen or region rendering. Once in region rendering mode you can move around and resize the rectangular marquee that defines where Redshift will render.
> **Note:** You can quickly define a region render area with the hotkey combination **Shift + Mouse click & drag** inside the Redshift render view.
### Camera Select & Camera Lock
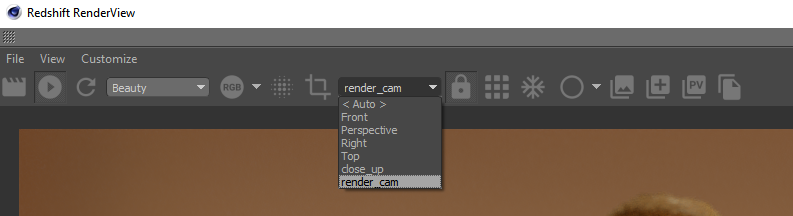
*Camera selection dropdown menu*
Redshift allows you to select which scene camera to render from right inside the Render View by using the Render Camera dropdown menu. When you select a camera from the dropdown menu the Camera Lock button\
\
is automatically enabled. When the Camera Lock button is enabled Redshift will continue to render from your selected camera, even if you change active cameras in your DCCs viewport. This allows you to easily render from the correct perspective but continue working from a different perspective in your DCC. When the Camera Lock button is disabled again, Redshift will automatically switch back to the "\< Auto >" camera selection mode which will render from the active camera.
[Video: rsrv_camera_selection9fc2.mp4](https://help.maxon.net/c4d/en-us/Content/_REDSHIFT_/Resources/Multimedia/rsrv_camera_selection9fc2.mp4)
*Changing cameras*
### Freeze Tessellation
The Freeze Tessellation button:\
\
lets you toggle on or off [tessellation](https://help.maxon.net/c4d/en-us/Content/_REDSHIFT_/html/Tessellation%2BAnd%2BDisplacement.html.md) freezing. If you're using tessellation in your scene freezing tessellation can greatly improve your IPR responsiveness. When freeze tessellation is enabled Redshift will do its best to avoid re-translating the geometry each time a change is made. Depending on how much you are tessellating in your scene, freeze tessellation can mean the difference between near-real time IPR responsiveness or a slide show due to updating the tessellation on each new frame or scene change.
> **Important:** Please note that if you manually change any of your scene tessellation settings Redshift will re-translate the scene so that the new tessellation settings can be used even if freeze tessellation is enabled.
> **Note:** If you are using adaptive tessellation in your scene freeze tessellation might cause your IPR renders to look wrong due to the tessellation not being allowed to update each time a change is made like moving the object or camera closer to one another as depicted in the animation below. Batch rendering will still render out fine but freeze tessellation should be handled with care when trying to determine the final settings to use for an animation.
[Video: rsrv_freeze_tessellation04a5.mp4](https://help.maxon.net/c4d/en-us/Content/_REDSHIFT_/Resources/Multimedia/rsrv_freeze_tessellation04a5.mp4)
*This demonstrates a scene with adaptive tessellation and how Freeze Tessellation will stop Redshift from updating the tessellation on a camera change.*
### Render Mode
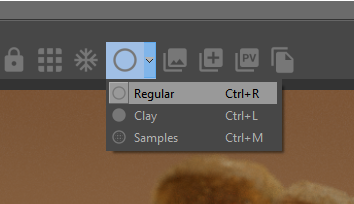
*Render Mode dropdown menu*
The Render Mode dropdown provides a quick way to switch between different diagnostic modes during an IPR render. Your three options are the default beauty render mode, a clay render mode, and a show samples view mode.
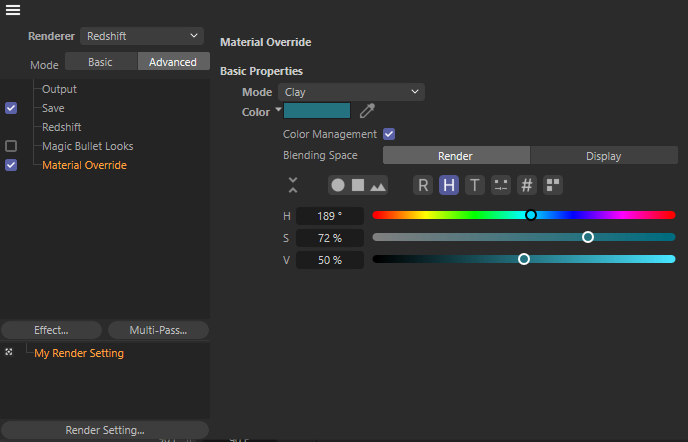
> **Note:** The clay render mode uses the same [Material Override](https://help.maxon.net/c4d/en-us/Content/_REDSHIFT_/html/System.html.md) settings found in the Redshift Render Options > System tab.
> **Note:** The clay render mode can also use the color from the *Material Overwrite Effect* in the Cinema 4D *Render Settings*, if the *Material Overwrite Mode* is set to *Clay*.
>
> 
[Video: rsrv_render_mode_demo4f11.mp4](https://help.maxon.net/c4d/en-us/Content/_REDSHIFT_/Resources/Multimedia/rsrv_render_mode_demo4f11.mp4)
*Switching between the different render modes*
The Show Samples render mode enables a debug rendering mode which shows the numbers of rays that were shot for each pixel in a grayscale form. Darker pixels mean that fewer rays were shot while brighter pixels mean that more rays were shot. A pure white color means that 'max samples' rays were shot for that pixel. When this rendering mode is enabled, the noisy parts of the image will typically be brighter because the unified sampler will shoot more rays trying to clean up the noise. For more information on Unified Sampling please see [here](https://help.maxon.net/c4d/en-us/Content/_REDSHIFT_/html/Unified%2BSampling.html.md).
> **Note:** The Show Samples mode automatically enables\
> \
> bucket rendering as this is necessary to show the correct information. This can be seen in the demo above.
### Snapshots
Snapshots are saved versions of previous renders, you can use this to compare different render settings or scene changes. Start by bringing up the Snapshots bar by clicking the Snapshots button:\
\
or and then click on the Take Snapshot button:\
\
to save a render to the Snapshots bar. You can switch back and forth between different snapshots by clicking on them. You can rename your snapshots by double clicking on the text over each snapshot and writing your own caption as demonstrated below.
[Video: rsrv_snapshots_saving2dda.mp4](https://help.maxon.net/c4d/en-us/Content/_REDSHIFT_/Resources/Multimedia/rsrv_snapshots_saving2dda.mp4)
*Opening the Snapshots bar and editing two snapshots*
You can also compare screenshots by setting an A and B snapshot by right clicking on them in the Snapshots bar or controlling this in the lower right of the Snapshots bar. Once set you can move around the point where the comparison is masked as well as rotate it and adjust the opacity between the comparison as demonstrated below.
[Video: rsrv_snapshots_compare8693.mp4](https://help.maxon.net/c4d/en-us/Content/_REDSHIFT_/Resources/Multimedia/rsrv_snapshots_compare8693.mp4)
*Comparing two snapshots*
In the bottom right of the Snapshots bar you can view snapshot specific render data including the total render time, frame number, date, and resolution. Here you can also double click in this section to add your own notes as demonstrated below.
[Video: rsrv_snapshots_notesffbd.mp4](https://help.maxon.net/c4d/en-us/Content/_REDSHIFT_/Resources/Multimedia/rsrv_snapshots_notesffbd.mp4)
*Adding notes to a snapshot*
You can choose between either a horizontal or vertical Snapshots layout and control what notes are automatically saved with your snapshot as demonstrated below.
[Video: rsrv_snapshots_customize3064.mp4](https://help.maxon.net/c4d/en-us/Content/_REDSHIFT_/Resources/Multimedia/rsrv_snapshots_customize3064.mp4)
*Customizing Snapshots*
You can also retrieve the PostFX settings used at the time of your previously saved snapshots. For more information on PostFX please see [here](https://help.maxon.net/c4d/en-us/Content/_REDSHIFT_/html/PostFX.html.md).
[Video: rsrv_snapshot_load_PostFX8c89.mp4](https://help.maxon.net/c4d/en-us/Content/_REDSHIFT_/Resources/Multimedia/rsrv_snapshot_load_PostFX8c89.mp4)
*Loading PostFX settings from snapshots*
### IPR Render Zoom
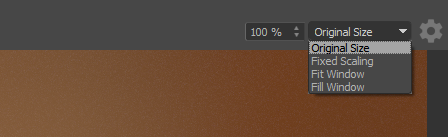
*Render zoom toolbar options*
The Redshift Render View has several different IPR zoom modes that can behave quite differently as explained below:
- **Original Size**: This mode forces Redshift to render at the current render resolution. You can control how zoomed in you are with the zoom percentage control.
> **Important:** Original Size is not affected by changing the shape and size of the Render View as demonstrated below.
>
> A normal non-IPR render will *always* render at original size.
[Video: rsrv_zoom_original973d.mp4](https://help.maxon.net/c4d/en-us/Content/_REDSHIFT_/Resources/Multimedia/rsrv_zoom_original973d.mp4)
*Render View adjustment behavior when set to Original*
- **Fixed Scaling**: This mode lets you render at a fixed resolution scale which is a custom percentage of the current render resolution. For example, if your current render resolution is 1920x1080 and you set the right percentage control to 50% then Redshift will render at 960x540. The left percentage controls how zoomed in you are as usual.
> **Important:** Fixed Scaling is not affected by changing the shape or size of the Render View.
| | | |
| --- | --- | --- |
| 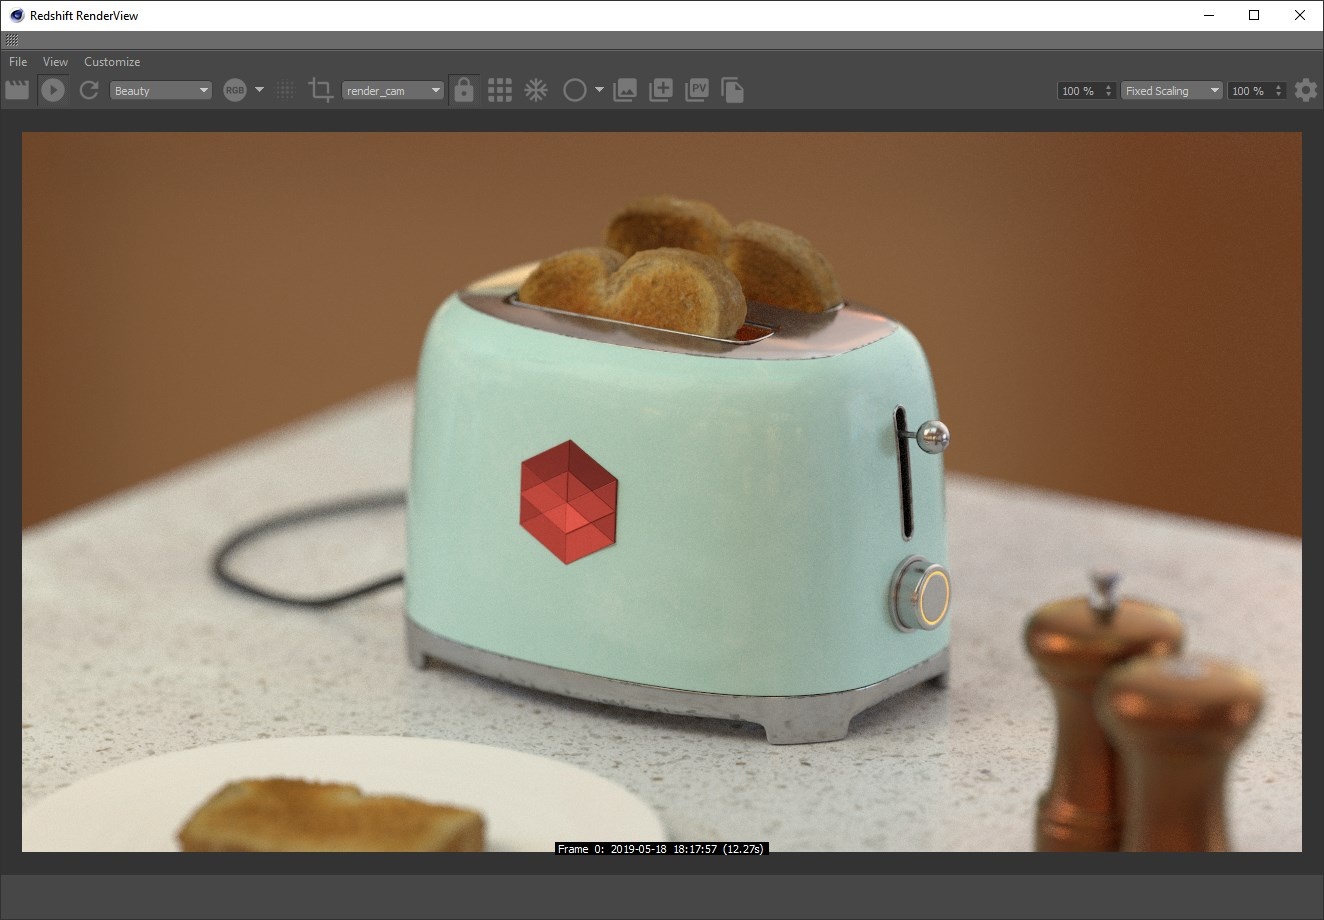 | 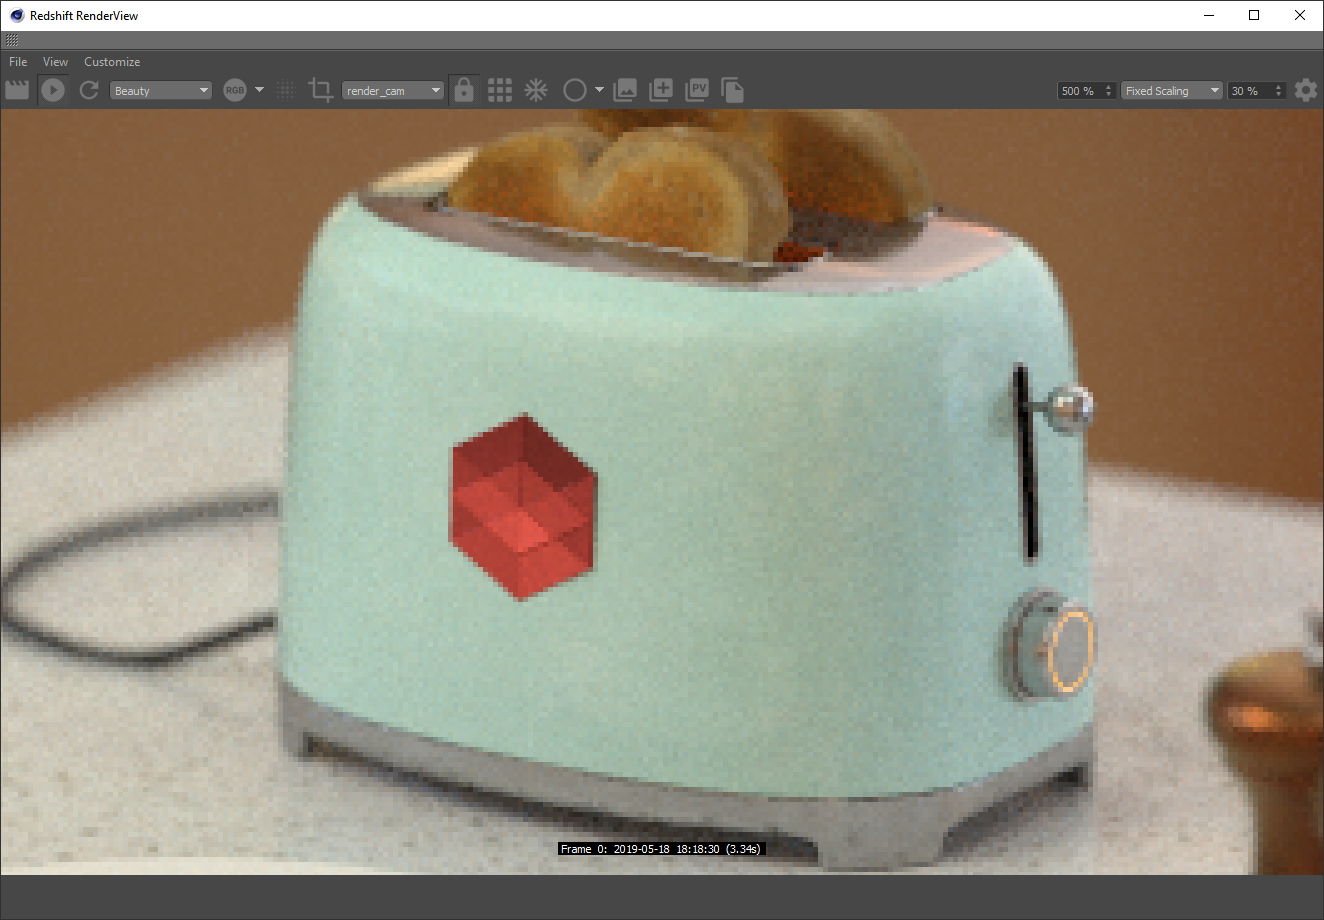 | 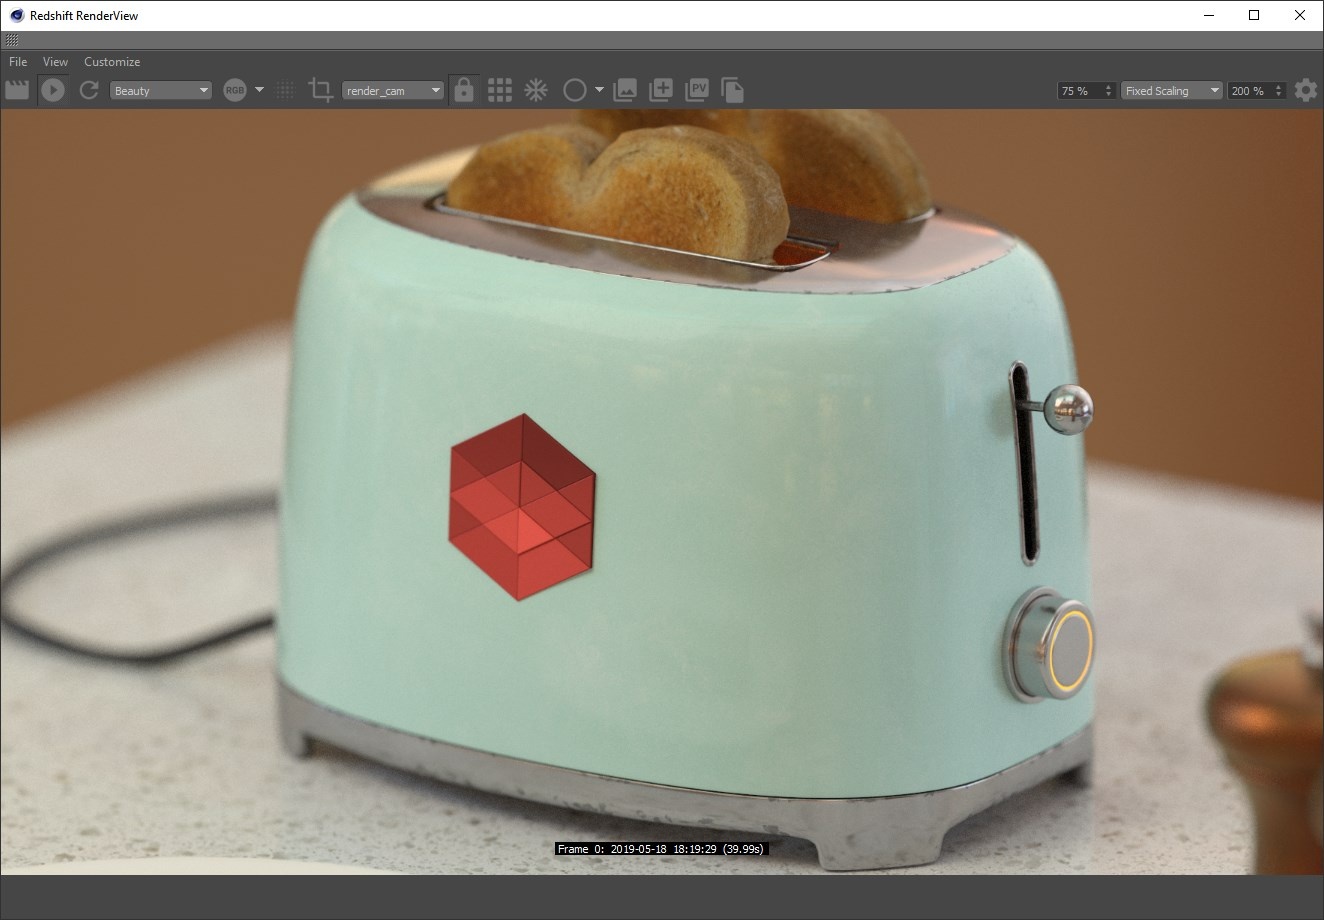 |
| *Resolution Scale: 100%* *Render Resolution: 1280x720* *Zoom: 100%* | *30%* *384x216* *500%* | *200%* *2560x1440* *75%* |
| | | |
| | 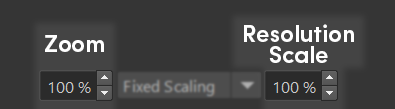 | |
| | *Fixed Scaling controls* | |
- **Fit Window**: This mode places an emphasis on always *fitting* the entire render in view by using the shortest of either the width or height in determining the constraint on the render resolution. You can control how zoomed in you are with the percentage control.
> **Important:** Fit Window is directly affected by changing the shape or size of the Render View as demonstrated below.
>
> This mode ignores the current render resolution and will render at whatever resolution is appropriate to fit the render view window while maintaining the current aspect ratio.
[Video: rsrv_zoom_fit_window9cc0.mp4](https://help.maxon.net/c4d/en-us/Content/_REDSHIFT_/Resources/Multimedia/rsrv_zoom_fit_window9cc0.mp4)
*Render View adjustment behavior when set to Fit Window*
- **Fill Window**: This mode places an emphasis on always *filling* the render to the entire space available in the render view by using the longest of either the width or height in determining the constraint on the render resolution. You can control how zoomed in you are with the percentage control.
> **Important:** Fill Window is directly affected by changing the shape and size of the Render View as demonstrated below.
>
> This mode ignores the current render resolution and will render at whatever resolution is appropriate to fill the render view window, original aspect ratio is *not* maintained.
[Video: rsrv_zoom_fill_windowa03e.mp4](https://help.maxon.net/c4d/en-us/Content/_REDSHIFT_/Resources/Multimedia/rsrv_zoom_fill_windowa03e.mp4)
*Render View adjustment behavior when set to Fill Window*
## Settings
### Display
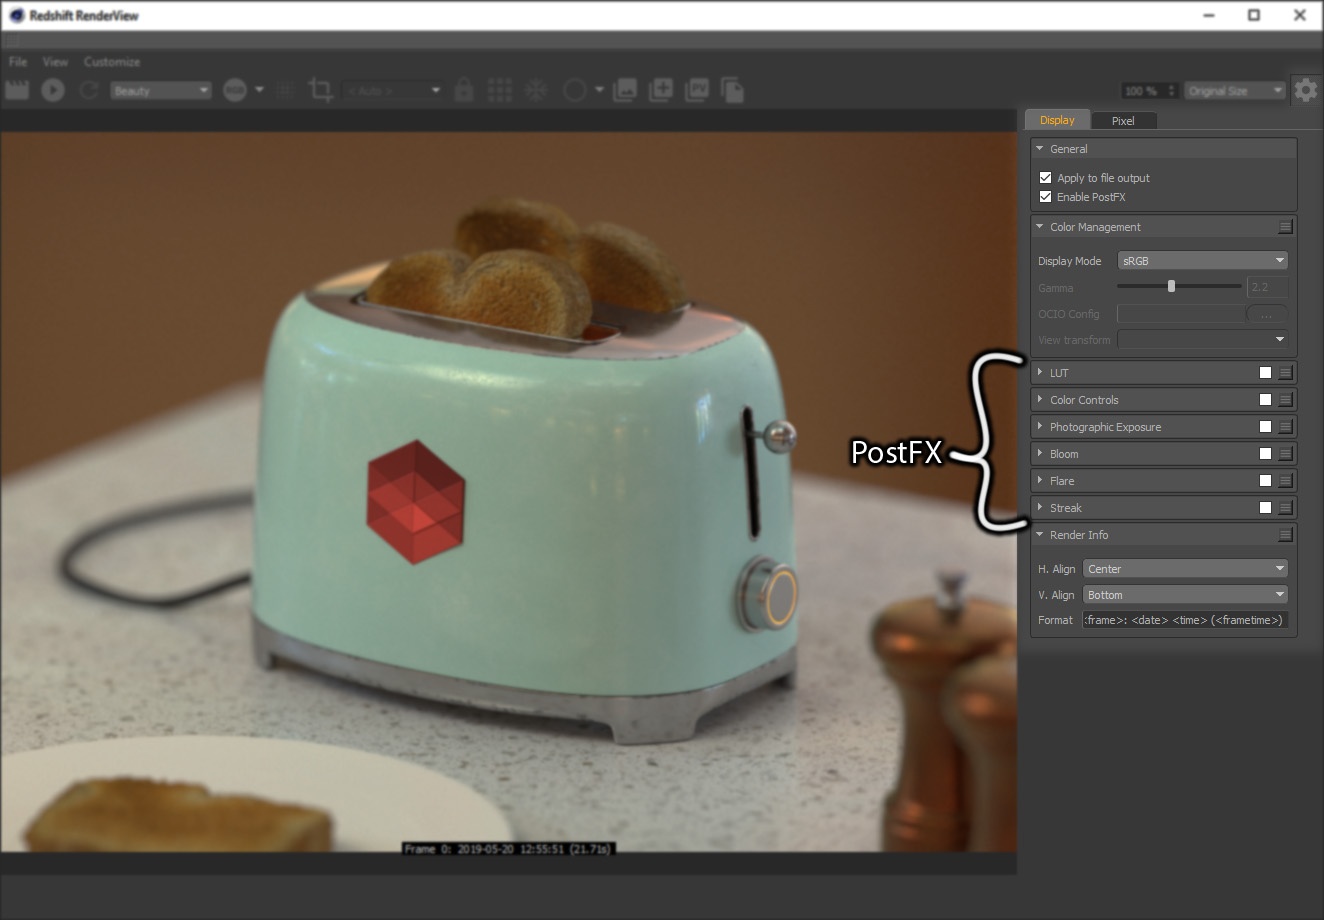
*Settings Display tab*
The Display tab is home to all your Render View image processing settings. Here you can adjust color management options, PostFX, and the Render Info output with each frame in the Render View.
PostFX includes LUTs, Color Controls, Photographic Exposure, Bloom, Flare, and Streak. For more detailed information on PostFX please see [here](https://help.maxon.net/c4d/en-us/Content/_REDSHIFT_/html/PostFX.html.md).
### General
**Apply to file output**
When enabled this options applies all your current display settings to any saved file output. When disabled you can still preview your image in the Render View with your current display settings but they will not be saved out with the file.
**Enable PostFX**
This option quickly toggles all PostFX settings on or off.
### Color Management
Redshift uses an Open Color IO (OCIO) color management system which makes use of an ACES color rendering space with an sRGB display transform by default. For more color management options and information, like setting your own OCIO config file, please see the [Globals](https://help.maxon.net/c4d/en-us/Content/_REDSHIFT_/html/Globals%2B-%2BAdvanced.html.md) page and [Color Management](https://help.maxon.net/c4d/en-us/Content/_REDSHIFT_/html/Color%2BManagement%2B-%2BOCIO%2BACES.html.md) pages.
**Display**
This is the Output Display Transform that should be set to a color space that is supported by the display that you are working on, for most people this will be sRGB.
**View**
This determines how the image is displayed on screen and works in conjunction with the Display transform. By default this can be set to an ACES SDR tone-mapped result, un-tone-mapped, a logarithmic color space (ACEScct) or the raw linear result which is unaffected by the Display transform.
Use Monitor Color Space
When enabled, your monitor's device profile is used and colors are adjusted accordingly. This helps with accurately previewing your renders in the Redshift Render View, especially when comparing a render in another tool that uses your monitor's color space like Photoshop.
### Post Effects
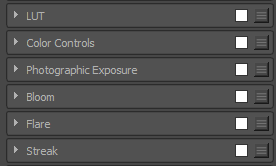
*PostFX subsections*
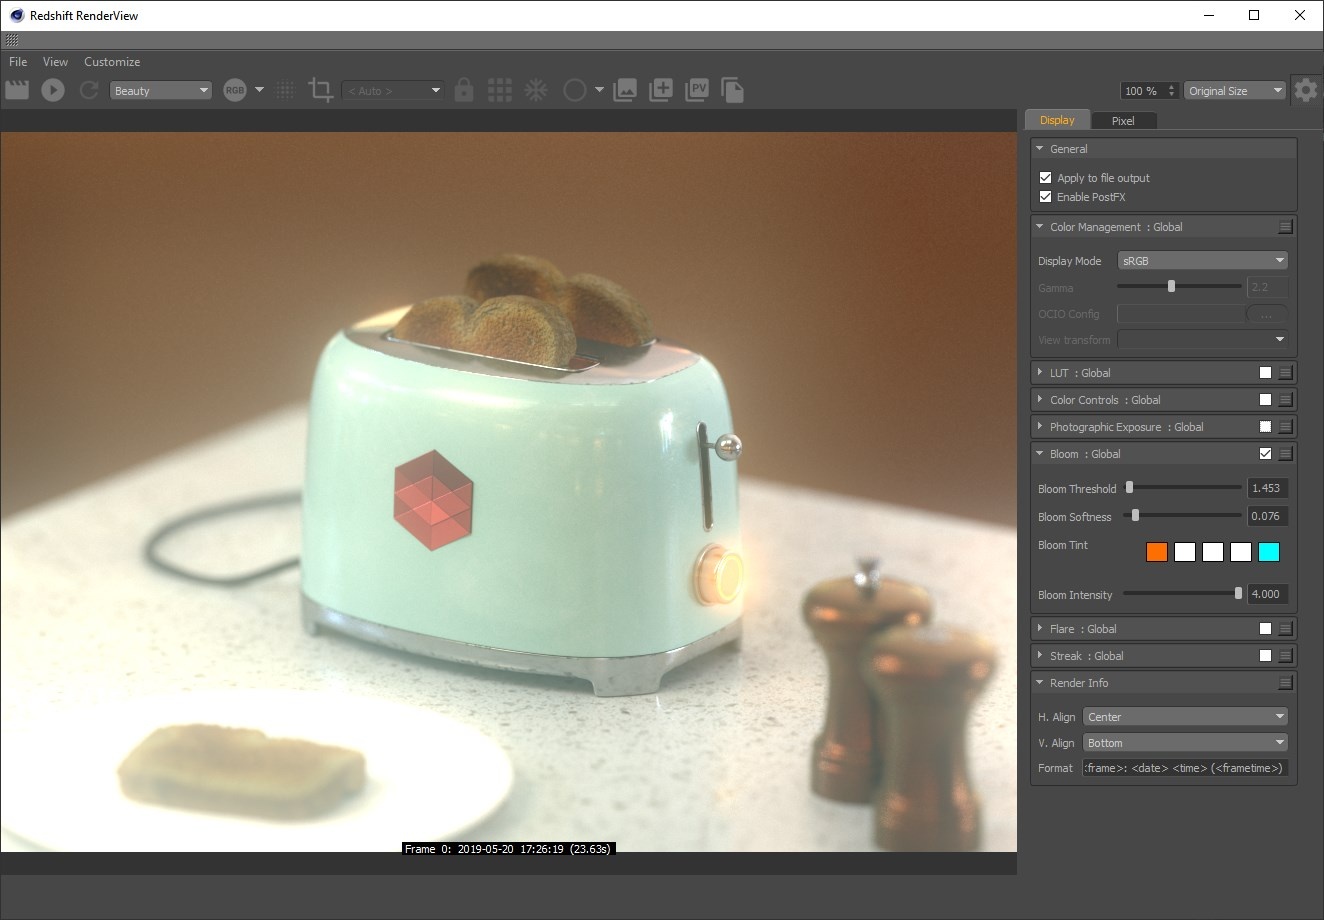
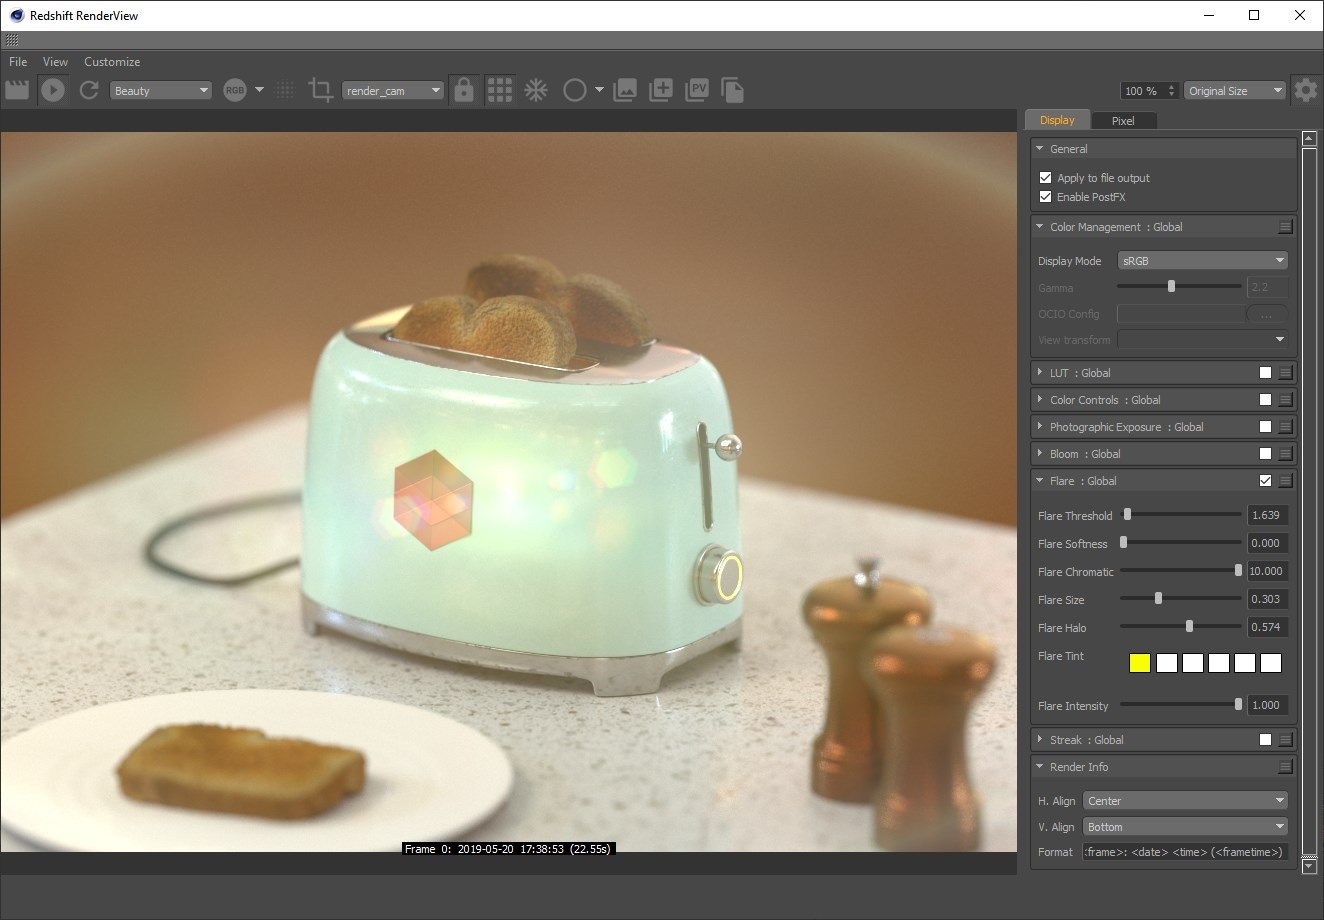
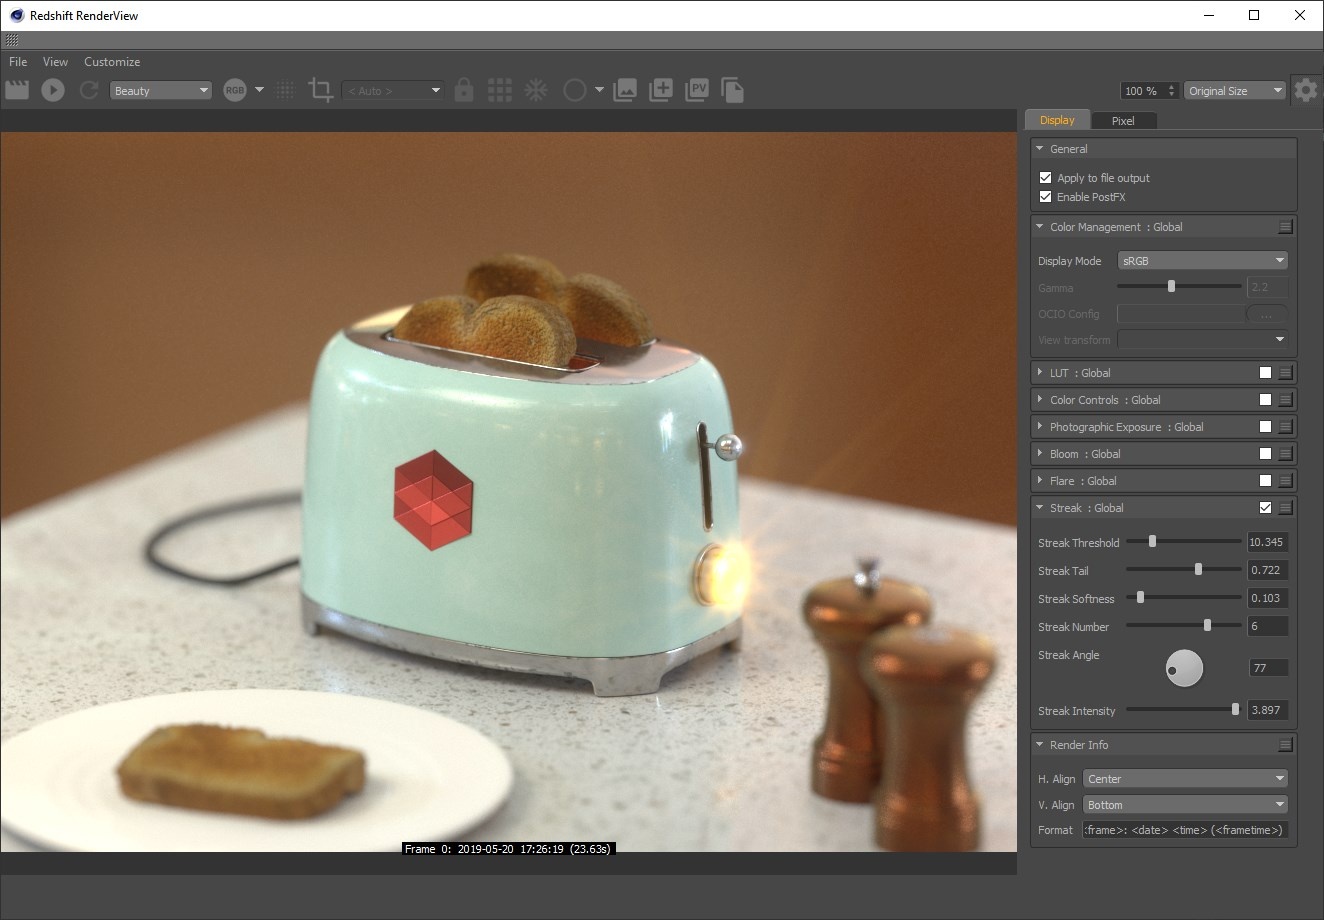
These settings are all considered Post Effects. Below are a few quick visual examples of each feature but please see the [Redshift Camera page](https://help.maxon.net/c4d/en-us/Content/_REDSHIFT_/html/Redshift_Camera_Object.html.md) for more information.
| | | |
| --- | --- | --- |
| 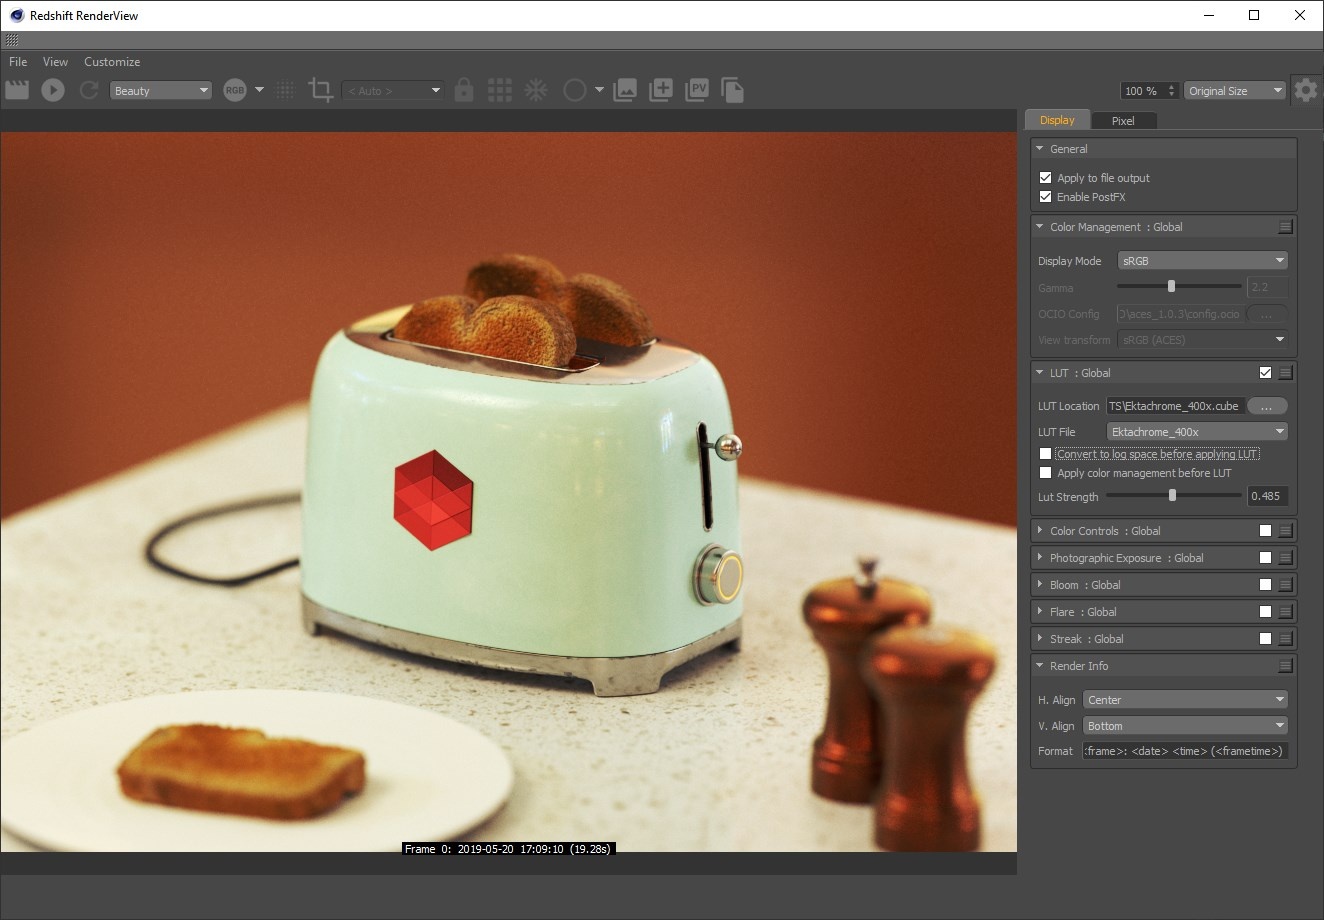 | 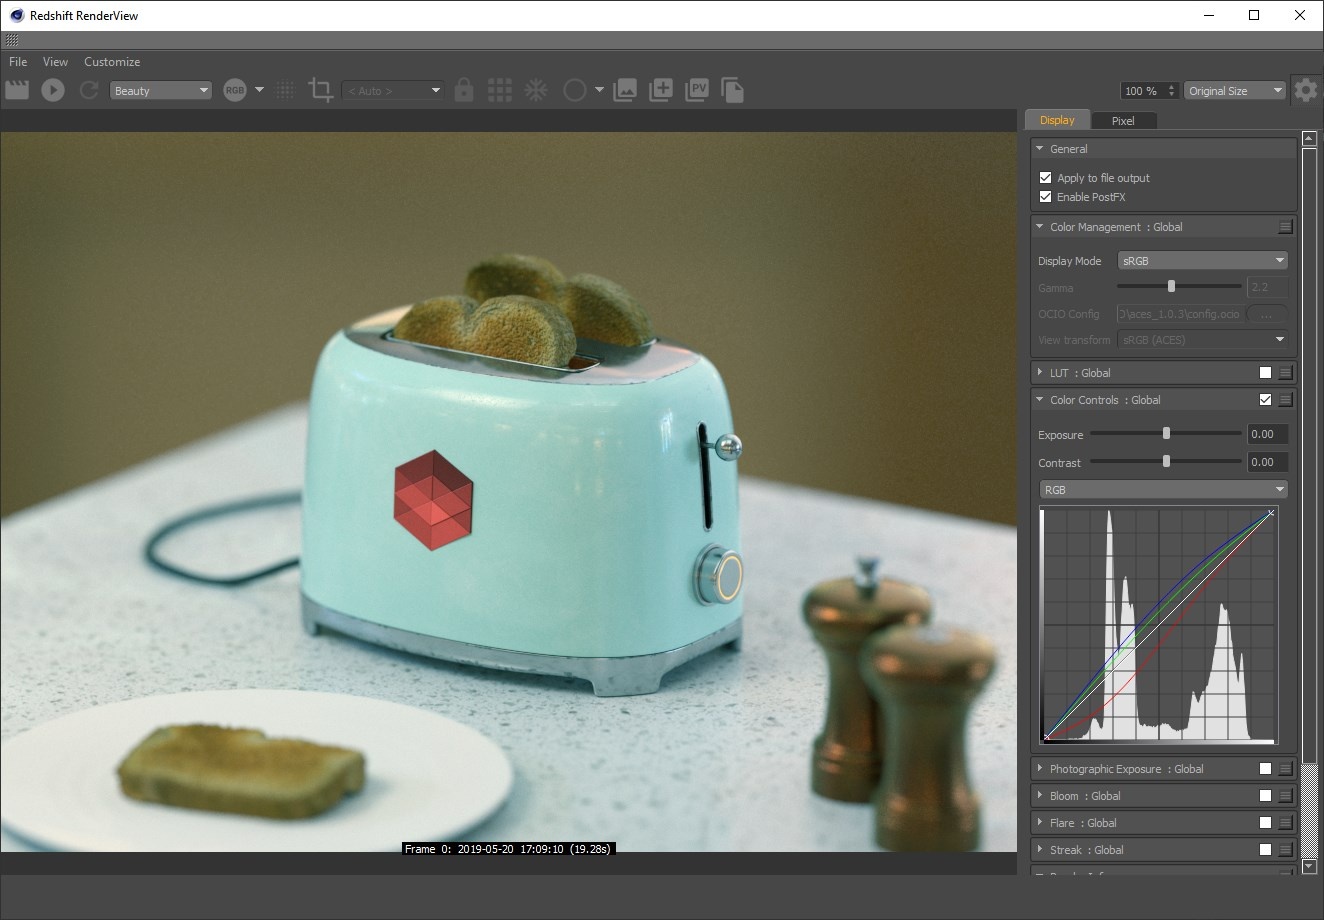 | 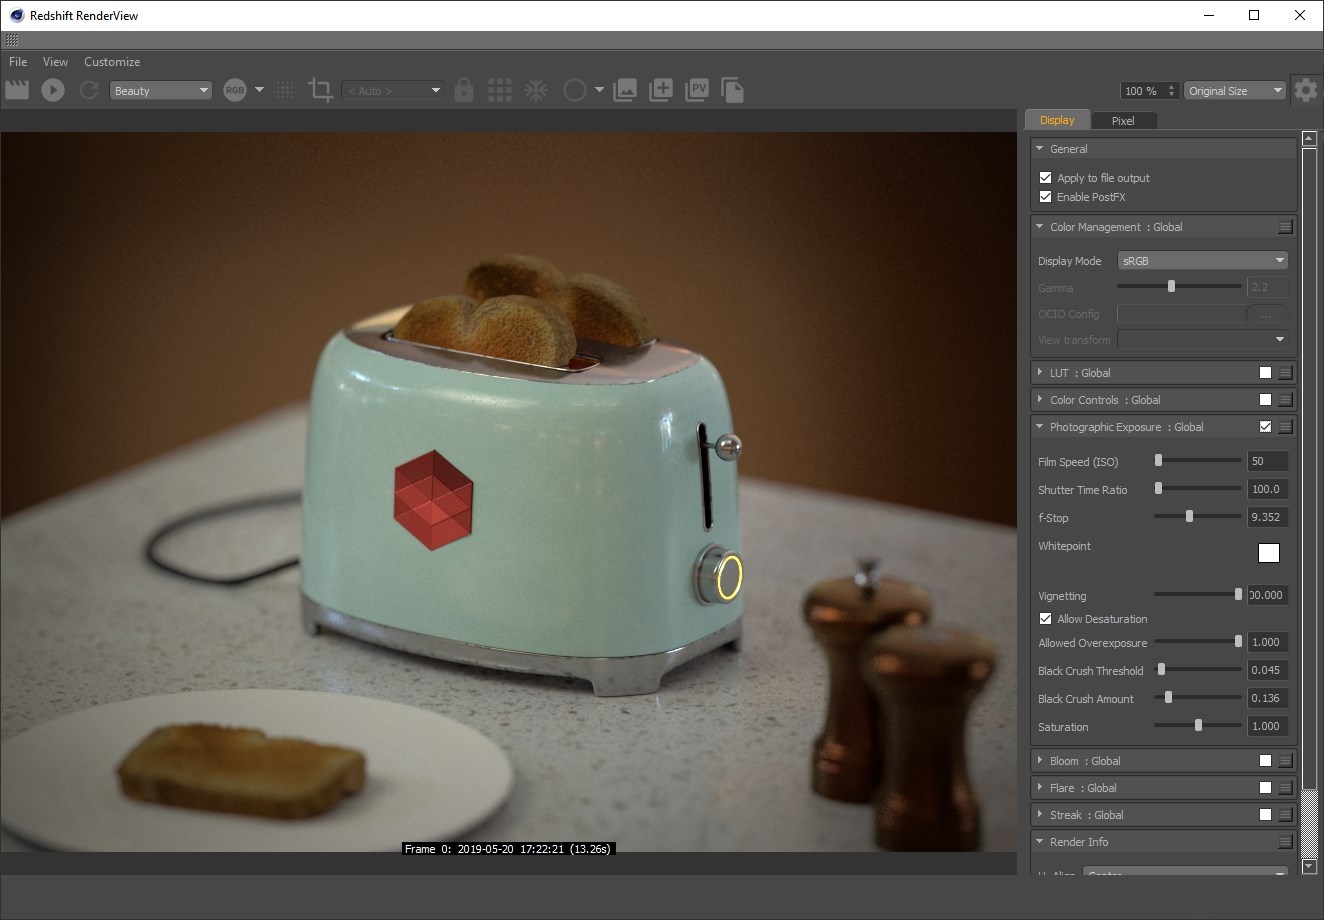 |
| *LUT* | *Color Controls* | *Photographic Exposure* |
| | | |
|  |  |  |
| *Bloom* | *Flare* | *Streak* |
### Denoise
| | |
| --- | --- |
|  | 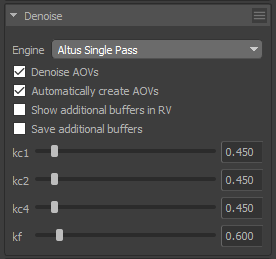 |
| *OptiX Denoise options* | *Altus Denoise options* |
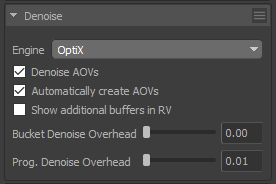
The Denoise options allow you to quickly adjust the denoise engine and related settings straight from the render view. For more information please see the [Denoising page](https://help.maxon.net/c4d/en-us/Content/_REDSHIFT_/html/Denoising.html.md).
### Render Info
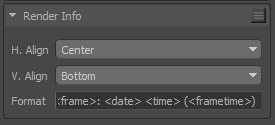
*Render Info options*
The Render Info section lets you specify what information is printed with each rendered frame like render time and frame number. The information displayed is determined by various System and Scene tokens. You can also adjust location of the Render Info and the order of the information.
**H. Align**
Horizontal Align controls where the render info is printed in the renderview horizontally.
- **Left**
- **Center**
- **Right**
**V. Align**
Vertical Align controls where the render info is printed in the render view vertically.
- **Top**
- **Bottom**
**Format**
Format controls what is printed in the render info and in what order it is printed.
By right clicking the Format entry window you can see a list of valid System and Scene tokens as demonstrated below.
[Video: rsrv_render_info_tokenseb7c.mp4](https://help.maxon.net/c4d/en-us/Content/_REDSHIFT_/Resources/Multimedia/rsrv_render_info_tokenseb7c.mp4)
*Adding a Camera Scene Token*
**System Tokens**
| Token | Description |
| --- | --- |
| \ | Date rendered. |
| \ | Render resolution. |
| \ | Redshift version number. |
| \