Weld UV Points / Edges
This interactive tool is similar to the Stitch and Sew tool in the modeling environment, as it allows you to reconnect separate UV elements. You can work in Points, Edges, or Polygons mode. The tool automatically detects elements located at the edges of UV islands and provides a preview of other connected UV elements. The direction of the UV Weld connection can be controlled by the position of the mouse pointer. The following figure provides an example.
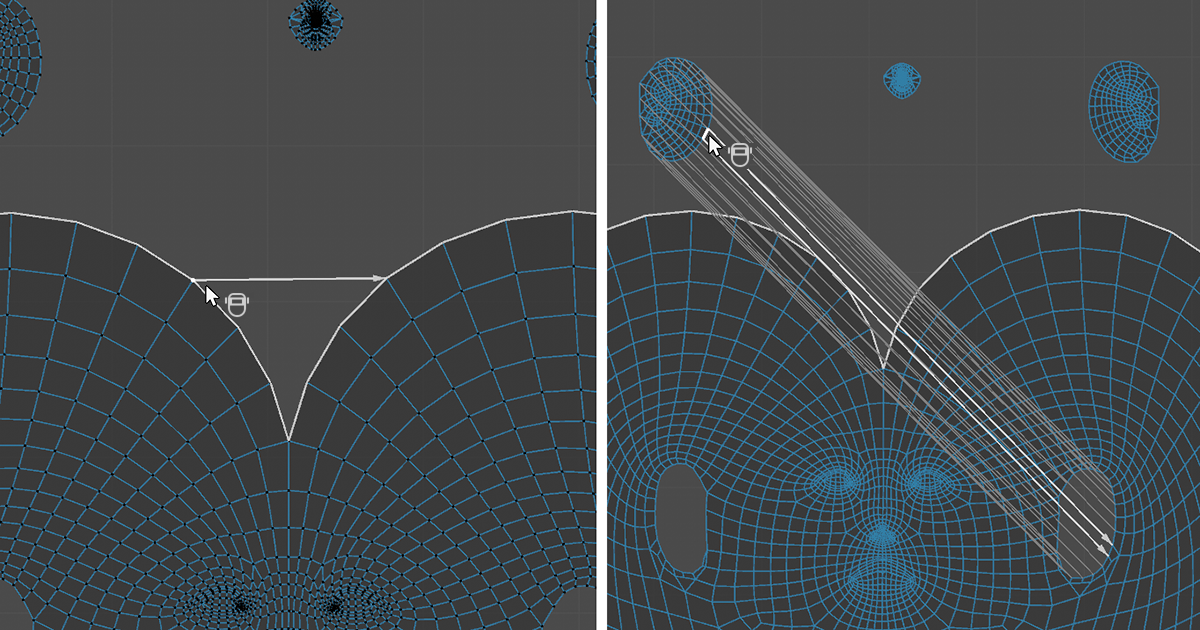 On the left, a Weld connection is configured in Points mode; on the right, in Edges mode.
As shown in the figure, guide lines appear as soon as the mouse pointer hovers over a UV element that is connected to another UV element on the object. In the left half of the image, you can see an arrow leading from the point near the mouse pointer to the corresponding point on the right side of the UV island. Accordingly, when you click, this point will move to the position of the right point. There, both UV points will be welded together into a single point. If you place the mouse pointer over the right point, the preview arrow would point to the left, and the weld would be calculated toward the left UV point.
The right half of the image uses Edges mode and demonstrates that this feature automatically detects complex edge paths along UV openings or along the outer edges of a UV island without requiring a selection to be created beforehand. Here, too, lines and arrows indicate the direction in which the weld is made. The position of the mouse pointer therefore always plays a role.
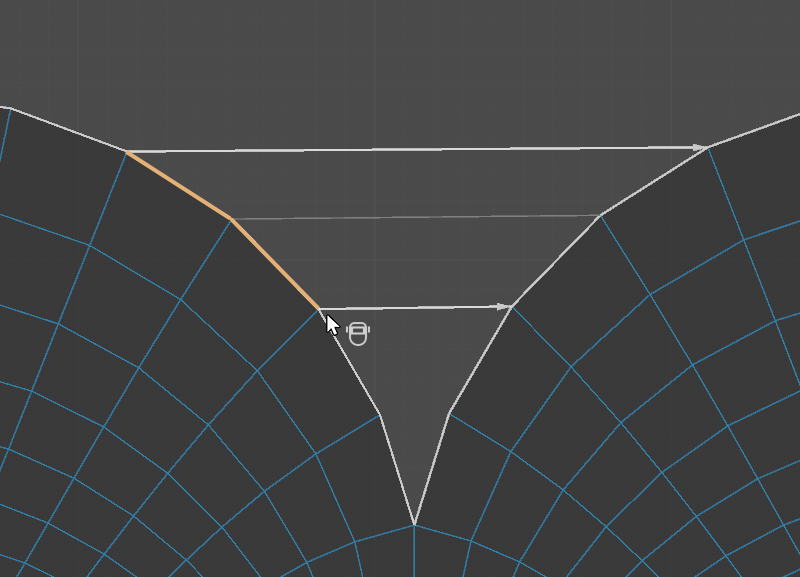 A Weld connection can be limited by a selection.
As shown in the figure above, you can also select and process only specific UV elements along an open edge. To do this, first create an edge or polygon selection, and then position the cursor of the Weld UVs tool over the edges you want to connect. To make this work with a selection along an edge loop, activate the Expand Edge Loops option.
By default, only the elements on open borders are moved and merged, but additional keyboard shortcuts are available that change the tool's behavior:
- Holding Ctrl: The corresponding elements are welded together at the center, between their respective positions.
- Holding Shift: When working in Edges or Polygons mode, welding shifts the entire UV island. This allows you, for example, to insert smaller UV islands into empty areas of larger islands. Here, too, the position of the mouse pointer when the tool is executed plays a role. The UV island over whose edge the mouse pointer is positioned will be moved (see figure below). If you like this behaviour as a default, activate the Transform islands option.
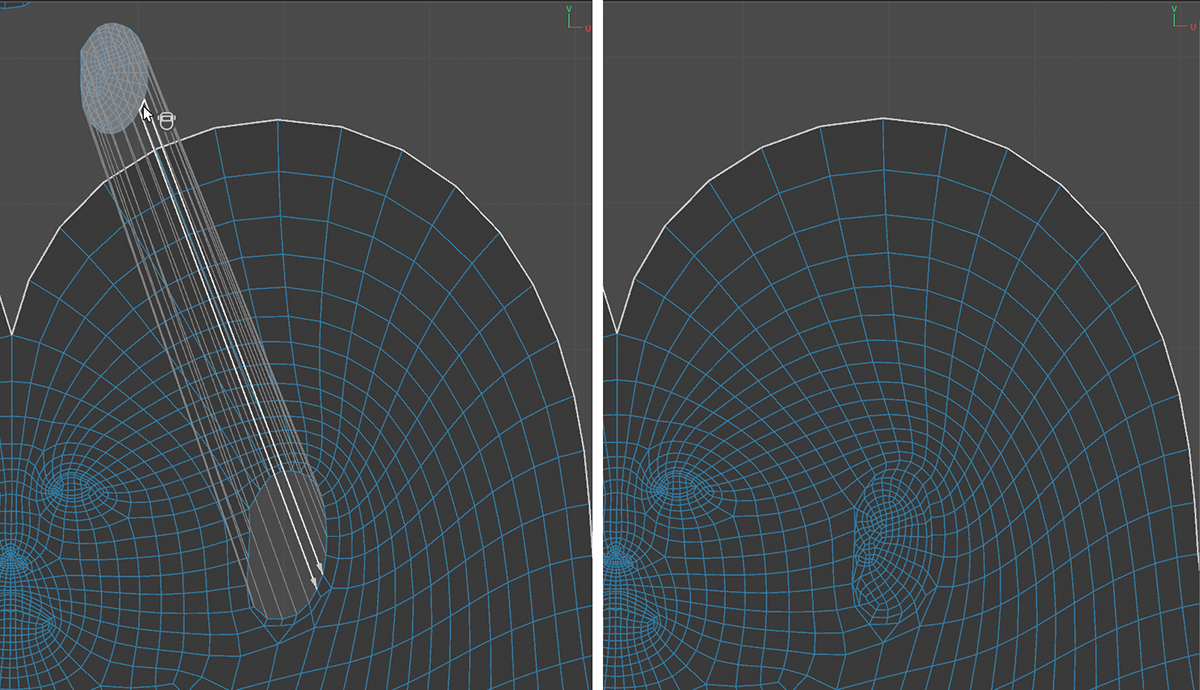 In combination with Shift complete UV islands can be moved while welding their borders.