Basic Properties
You can find general information regarding the Physical Renderer in the Renderer section.
Enables or disables the depth of field for the Physical Renderer.
Strictly speaking, a real camera can only focus clearly on a single distance at a time. Everything in front of and behind this plane appears increasingly blurry. The area between the nearest and farthest objects that appears focused is known as depth of field.
A large depth of field is when a large region in the distance is displayed, whereas a small depth of field is when a relatively small region is displayed in focus.
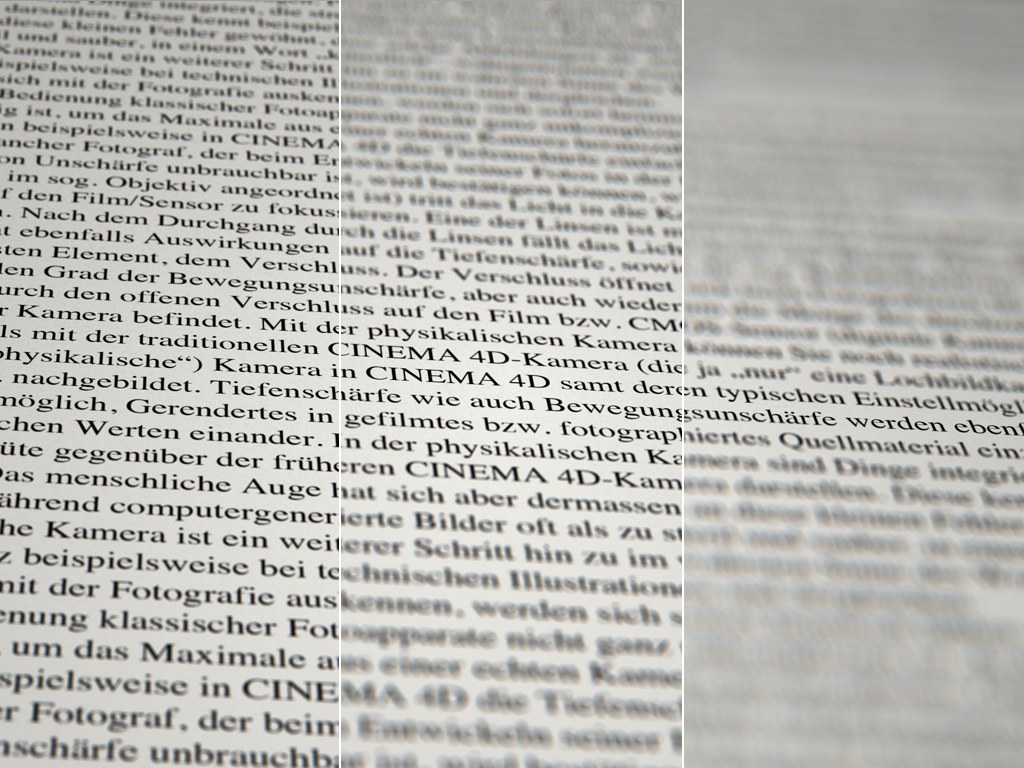 Decreasing depth of field from left to right.
In Cinema 4D, the depth of field for the angle of view of the camera is defined using the Focus Distance, which can be varied interactively in the Viewport:
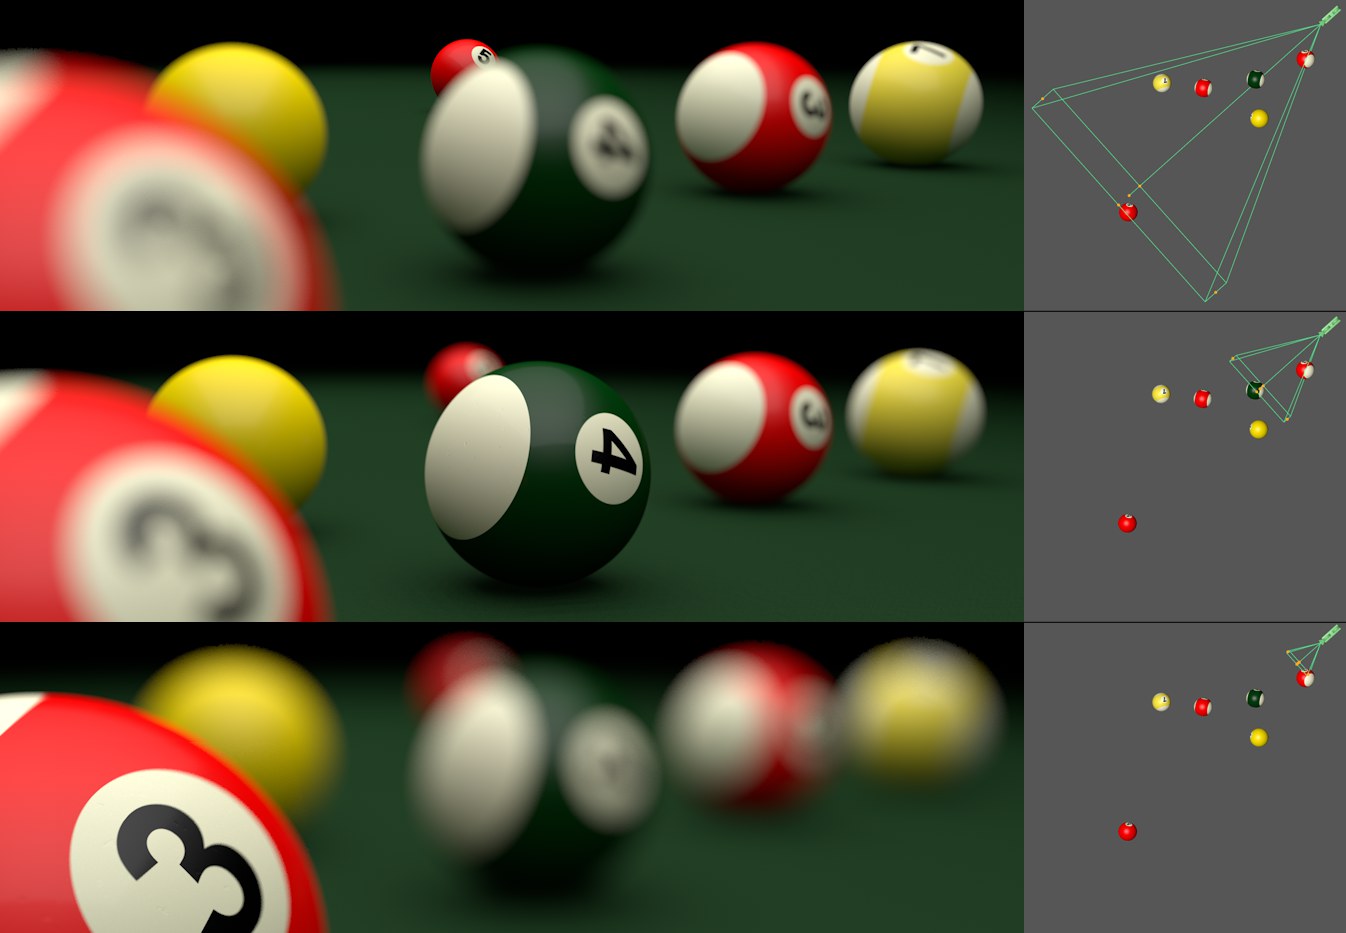 The varying focal distances shown on the right move the depth of field vertically along the camera's angle of view.
The depth of field (spatial position, strength) is influenced by 3 camera settings:
- Focal Length (the greater the Focal Length, the smaller the depth of field)
- Sensor Size (controls the degree of depth of field; the smaller the F-Stop (f#) (the wider the real-world sensor will be opened) the smaller the depth of field)
- Focus Distance (the lesser the distance to the object the more blurred it will appear). Details can be found under Focus Distance
Note that scaling the depth of field of a project can alter the project dramatically! See also Project Scale. The Focus Distance will adapt accordingly but the previously mentioned "visual" parameters will remain unchanged.
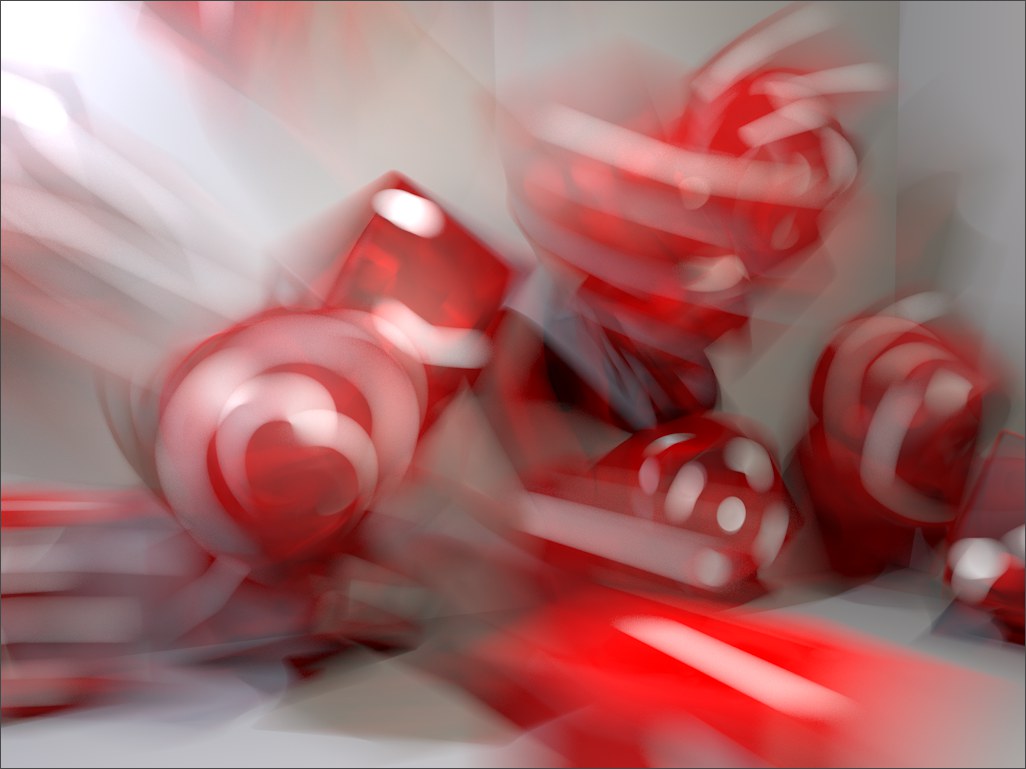 Extremely slow shutter speeds can create interesting effects.
Enables or disables motion blur for the Physical Renderer. This motion blur is in fact real, rendered and physically correct motion blur. Motion blur occurs when an object or the camera itself moves while the camera's shutter is open. The degree of motion blur depends on the camera's shutter speed and the speed with which the object(s) or camera moves.
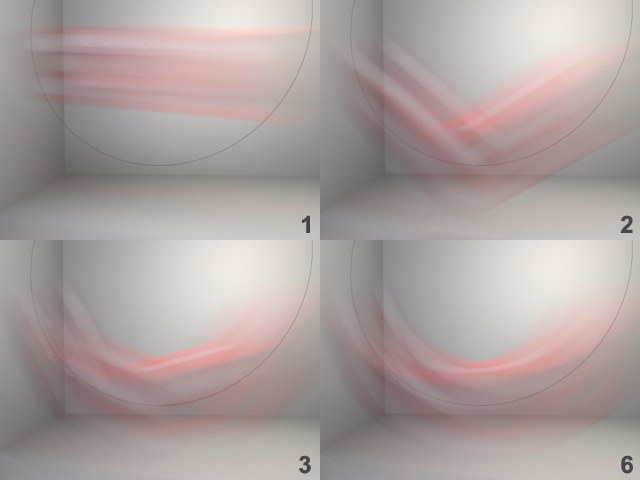
 Slower shutter speeds result in more pronounced motion blur.
As is the case with depth of field, motion blur also requires a lot of computing power and therefore (render)time. However, this effect helps create a realistic look for film and video sequences, even though the most recent trend in action films is towards faster shutter speeds, which results in staccato-like image sequences.
A few general tips regarding motion blur:
- Note also the Motion Blur tag, which offers numerous special functions.
- You should always bake Dynamics to ensure that the motion blur is calculated correctly.
- Motion blur will not be calculated when rendered in the Viewport.
- For generated objects whose total number of points changes during animation, problems can occur because interpolation cannot be done correctly. Example: A Path Spline animated via PLA. The number of spline points can change dynamically, which also affects the number of generated polygons. Solution: Intermediate frame motion blur always helps in such a case. In particular when using Sweep object Intermediate Points can be set to Uniform. The number of points along the Spline will remain the same.
- Motion blur does not render correctly in the IC GI mode.
- For animated Generators (e.g., Loft object; in this special case, the Per Segment option can help), the UV coordinates can change abruptly. In such cases, faulty motion blur calculations can result.
 The cube moves along the Spline. With a Motion Subdivision value of 6 the cube moves correctly along the Circle Spline.
It is especially important to calculate positions between animation frames when animating fast, circular movements. This value defines the degree of subdivision between two sequential frames of animation (1 = 0; 2 = once; 3 = three times, 4 = 7 times, 5 = 15 times, 6 = 31 times). Higher values will lead to more memory use (although nominal for normal scenes - a noticeable difference only occurs when applied to very many objects). For single images/stills, this value should be greater than four figures to ensure maximum motion quality.
Deformation Subdivisions[0..6]
See Motion Subdivisions, only for deformation effects (i.e. when objects change their shape), for example as may be caused by Joints.
See also Motion Subdivisions, only for animated hair. Note that this option requires a great deal of memory. Therefore you should use this option sparingly and only use very low values.
The Sampler does just that - it samples the Project's cache from the angle of view of the camera in a pixel raster (see also How does antialiasing work?). The Sampler has to determine which regions have to be sampled again with regard to antialiasing or blur effects (depth of field, motion blur, blurriness effects) in order to achieve the desired render quality.
The samples gathered (i.e. colors), whose number far exceeds the number of pixels, will in the end be turned into pixels colors via an antialiasing filter. This is a somewhat simplified explanation of very complex procedures that actually occur.
The following Sample settings serve as a controlling instance for the samples to be calculated. The following primarily applies: The more samples taken at critical regions, the better the final result will be (with correspondingly longer render times). In short:
- Adaptive: Depending on the settings defined, an increased sampling will take place at critical or important regions. This mode is best for use in most cases because it offers a good compromise between quality and render speed (comparable with the default renderer's Best Antialiasing setting).
- Fixed: A definable and unchangeable per-pixel sample number (which will, however, already be increased in blurriness effect regions, depending on the settings there) will be calculated (comparable with the default renderer's Best and Min/Max Antialiasing settings).
- Progressive: This sampler can render infinitely (samples will continuously be calculated). The longer it renders the better the antialiasing and blur effects such as DOF, motion blur and blurriness effects will be calculated.
 The render results using the values shown for Sampling Subdivisions.
This sampler subdivides each pixel in a defined number of sub-pixels, according to the value entered for the Sampling Subdivisions value. For example, to make the blurred region of a motion blur effect visually appealing you should use a relatively high value (e.g., 4 or 5). This means that 16 and 25 samples, respectively, will be calculated per pixel (irregular values such as "2.4", etc. can also be entered). Even in superfluous regions. Take a look at the image above, at the top right of the scene where you can see a section of the wall. This is a region in which such a large number of samples would be completely superfluous. Here we have a pretty homogenous wall surface, which remains unchanged. Fixed is therefore a "brute force" method of rendering an image.
Render time is valuable. This is why there is an Adaptive mode that recognizes at which locations more sampling must be done.
Increasing the Sampling Subdivisions level by a single value normally doubles the required render time. Here you can estimate render times quite precisely, which on the other hand is quite difficult using the Adaptive sampler.
The Adaptive sampler is a much more intelligent sampler compared to the previously described Fixed sampler, i.e., it very often renders faster. On the other hand it's more difficult to control because is calculates the following 4 values and distributes the samples accordingly:
- Sampling Subdivisions
- Shading Subdivisions (Min)
- Shading Subdivisions (Max)
- Shading Error Threshold
For special effects such as blurriness effects, additional settings are available at the bottom of the dialog window.
Independent of any settings, special attention is paid to object edges, to which additional samples are applied to ensure that they are always antialiased optimally.
Note that, as a matter of principle, the Adaptive sampler renders slightly less sharp than the Fixed mode:
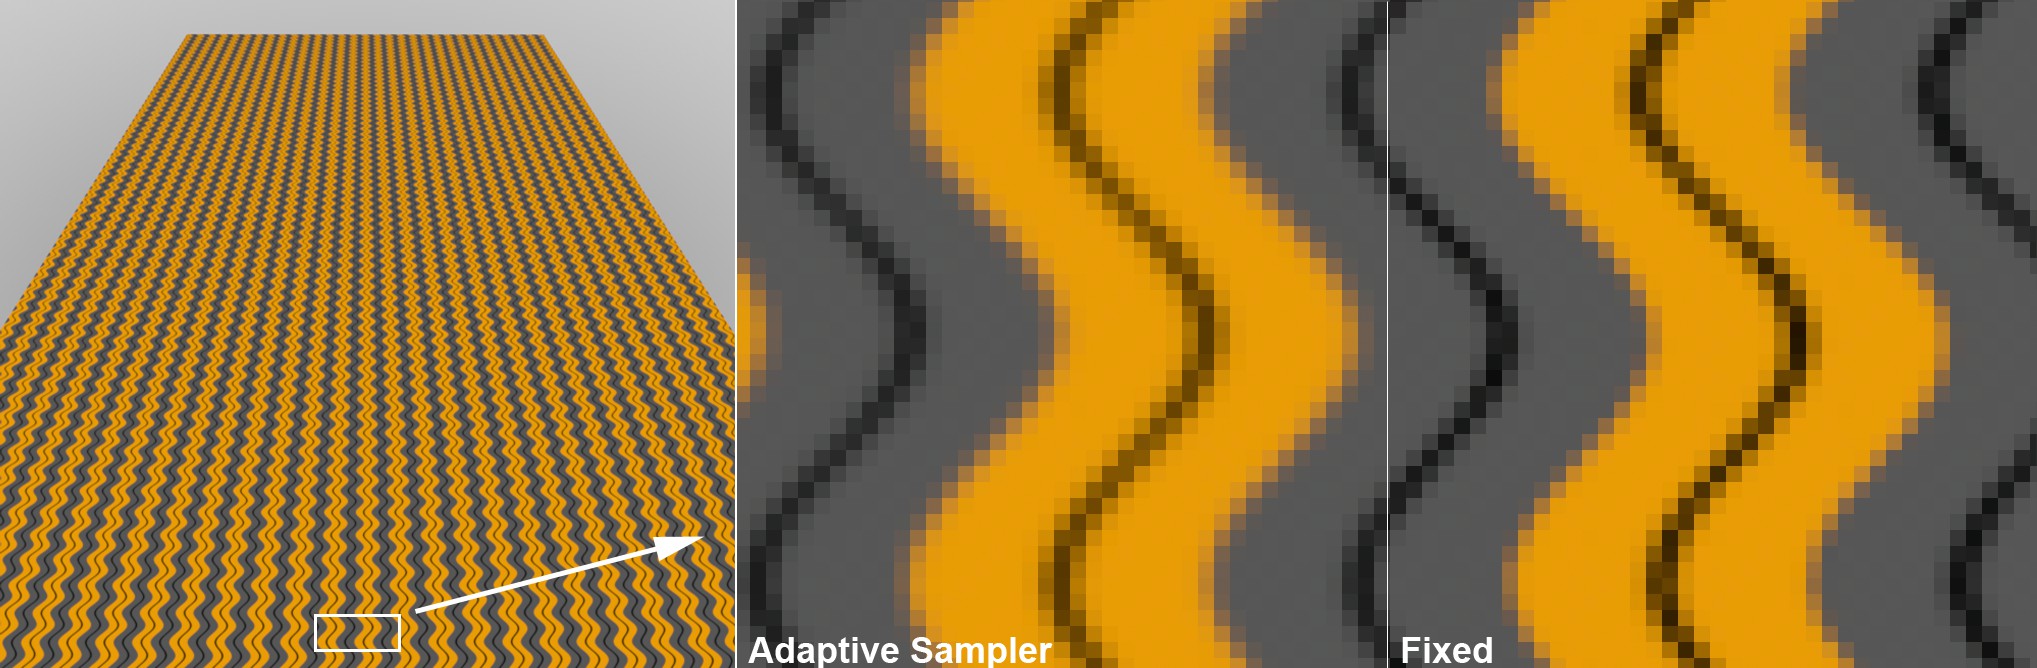
Hence, if you want to create a sharp render of a Project with very detailed textures, the Fixed mode would be the better option.
 The longer the render the better the result (quality).
This render mode is completely new in Cinema 4D and differentiates itself strongly from the usual render modes that produce a finished image after a finite render time. The Progressive render mode can render infinitely, during which time the result will continuously improve. This is not so obvious on homogenously colored surfaces but can primarily be seen in regions in which blur effects such as DOF, motion blur, area shadows, blurriness effects or antialiasing are applied. The initially grainy image will become increasingly less grainy, i.e., more homogenous. Don't confuse this mode with "unbiased" rendering, whose popularity has increased in the last years. In this mode the GI, among other things, is "unbiased" (unadulterated with regard to physical correctness and precision), i.e., the GI effect is continuously improved. The Progressive mode does not offer this effect!
This mode is primarily suited for fast preview renderings because you can very quickly determine the quality of the image as a whole. No other method offers you such a fast rendition of the entire image (with reduced quality at the start). To this end it is recommended that the subdivision values at the bottom of the dialog window be set to 0.
If you would let a scene render infinitely you would always achieve a perfect, non-grainy image. However, very good results are achieved FAR before infinity. Nevertheless, under certain circumstances it can take longer to render as with other render modes.
Note that you can make numerous settings visible for this mode by clicking on the small arrow next to Sampler.
Progressive Pass Count[1..65536]
Progressive Time Limit (minutes)[0.00..16384.00]
Progressive Pass Count Limit[1..65536]
Use these settings to define whether the render should never end (Infinite) or if it should end after a specified number of passes (Pass Count), if this setting should be used to abort the rendering of single images (stills) or render time (Time Limit). A pass in this context is defined as a completely new rendered result over the entire surface of the given image (a summation of which is displayed along with all other passes in the Picture Viewer). The Pass Count currently being calculated is displayed in the status bar at the bottom of the Picture Viewer.
Note that when using Time Limit you should allow for enough time for at least 1 pass, otherwise it can result in faulty renderings if the pass is stopped halfway through the images.
Progressive Pass Count Limit: This setting prevents infinite rendering for an animation frame and works exclusively for animations and Infinite Progressive Mode, regardless of whether a single machine, Team Render or the Render Queue is used.
This selection menu makes your work a little easier by automatically defining parameter combinations, depending on which setting (of the 4 described below) is chosen. Preview, Low, Medium, High refer to the quality of the rendered image – the higher the setting the less grain the image will have but the longer it will take to render. If Automatic is selected, only the Shading Error Threshold value can be defined individually. Custom will automatically be selected when one of the parameter values is modified manually.
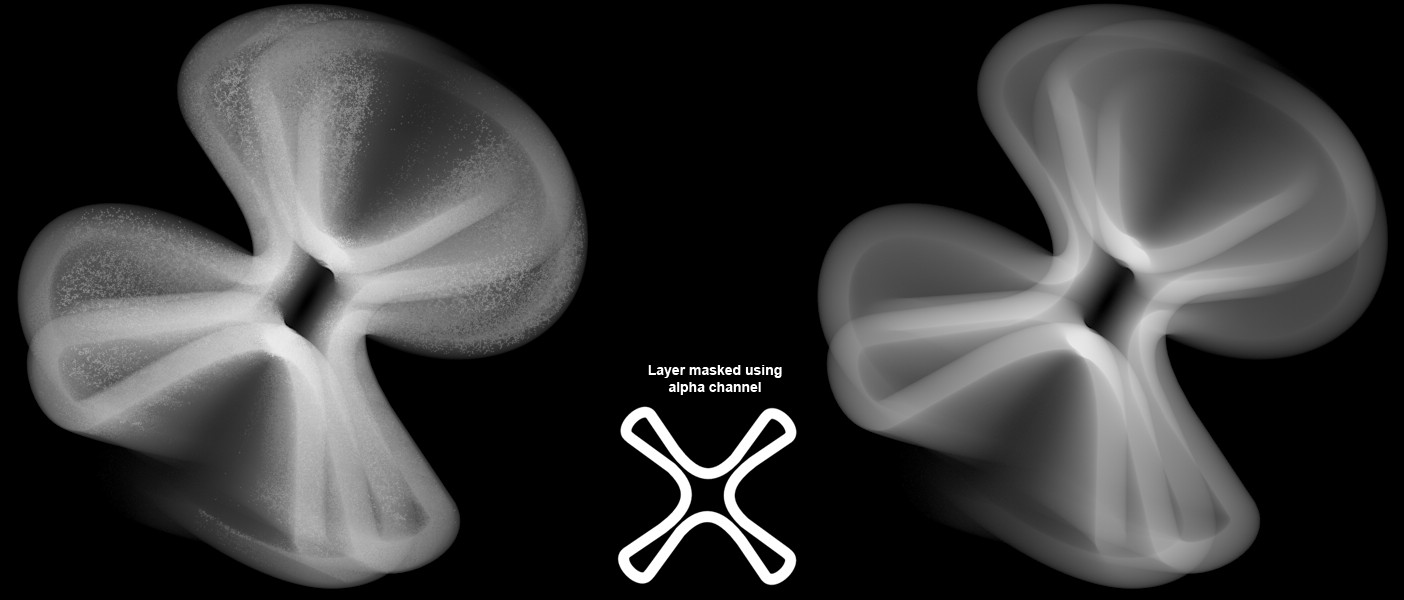 Left disabled, right enabled Shading Transparency Check option for an animated object with alpha channel and motion blur.
This option can be enabled to prevent the effect shown at left that occurs when alpha channels are used in conjuction with motion blur. The adaptive sampler will be used to make additional calculations in order to differentiate transparent regions from non-transparent regions. Unfortunately, this additional effort causes render times for projects with complex, transparent materials to increase dramatically. Therefore, this option is disabled by default. This option should only be enabled if the effect pictured at left in the image above occurs (when alpha channels are used in conjunction with motion blur).
Sampling Subdivisions[0.00..16.00]
This setting functions somewhat differently, depending on if you select Fixed or Adaptive.
This setting basically breaks each pixel up into a specified number of sub-pixels (to the value of two: 0=1; 1=2; 2=4; 3=8; 4=16, etc. Uneven values can also be entered) for each of which at least the same number of samples will be calculated.
- For a fixed number: The absolute number of samples that are calculated per pixel (depending on the subdivision values at the bottom of the dialog window, additional samples will be calculated accordingly). See also Fixed.
- For an adaptive number: A number of samples that are taken from the scene in order to gather information which will be calculated in a subsequent step (by the three shading parameters), i.e., if the values entered here are too low, greater values for the other parameters will not lead to good results:
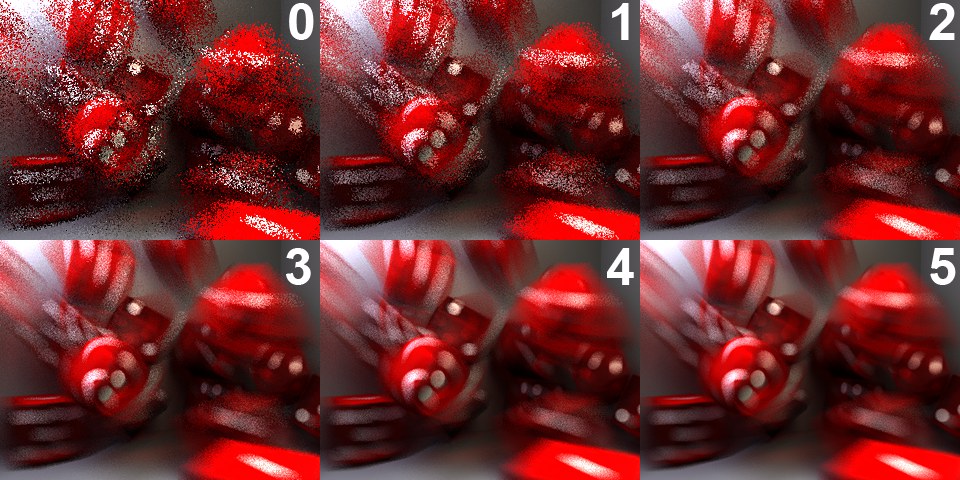
 Sampling Subdivisions values that are too low cannot be compensated for by higher-quality shading parameters (Scene by Tim Clapham).
Shading Subdivisions (Min)[0.00..16.00]
Shading Subdivisions (Max)[0.00..16.00]
Shading Error Threshold[0..100%]
You should be familiar with this trio of settings from other Cinema 4D functions: The default renderer has it in its antialiasing settings’ Best mode, and the quality of the Area shadows is also adjusted using these settings. These settings function basically the same way in the Sampler. Simply put, the information gathered by the Shading Subdivisions setting is applied and the number of shading samples required per pixel will be determined based on the shading parameters.
"Shading" is defined as the calculation of a color value based on shadows, textures, refractions, reflections, etc. This can be very complex and time-consuming process, depending on the scene (the Physical Renderer can re-use shading samples - depending on the scene - which helps save time).
The Shading Subdivisions (Min) value defines the minimum number of shading samples that will always be calculated (also to the power of two, i.e., 1, 2, 4, 8, 16, etc.).
The Shading Subdivisions (Max) value defines the maximum number of shading samples, in correlation with the Shading Error Threshold value, that should be calculated. The Shading Error Threshold value controls the number of samples that will in fact be calculated. The lower the value, the more the number of samples will lean towards Shading Subdivisions (Max) (however, only in critical regions!).
If the at times extremely bright lights of HDR textures or extremely bright light sources when calculating antialiasing and/or blur effects are bothersome, this setting can be used to reduce the brightness of these effects during calculation. But be careful: The image will then lose some of its dynamic, which is not always a desired result. It is therefore suggested that values of between 2 and 8 are used. Lesser values will reduce brightness, greater values allow more brightness (which then might have to be rendered in conjunction with greater Sampling values to achieve a softer look).
 At top a larger, at bottom a smaller HDR Threshold value.
Subdivisions
The following three subdivision settings are not set at material level (Reflectance or Transparency channel, Ambient Occlusion Shader, AO render presets) or object level (Soft Shadows, light sources) but globally, i.e., scene-wide. These are the quality settings for the respective effects (blurriness effect, Area shadows, Ambient Occlusion). The strength is still defined on material or object level, or in the Render Presets menu.
Each value is to the power of two: 0=1, 1=2, 2=4, 3=8, 4=16, etc. (uneven values can also be entered).
These values will be taken into consideration when Progressive mode is used. Higher values will result in a slower, more gradual rendering. For preview renders in this mode it is suggested that each of these values be set to 0.
Blurriness Subdivision (Max)[0.00..16.00]
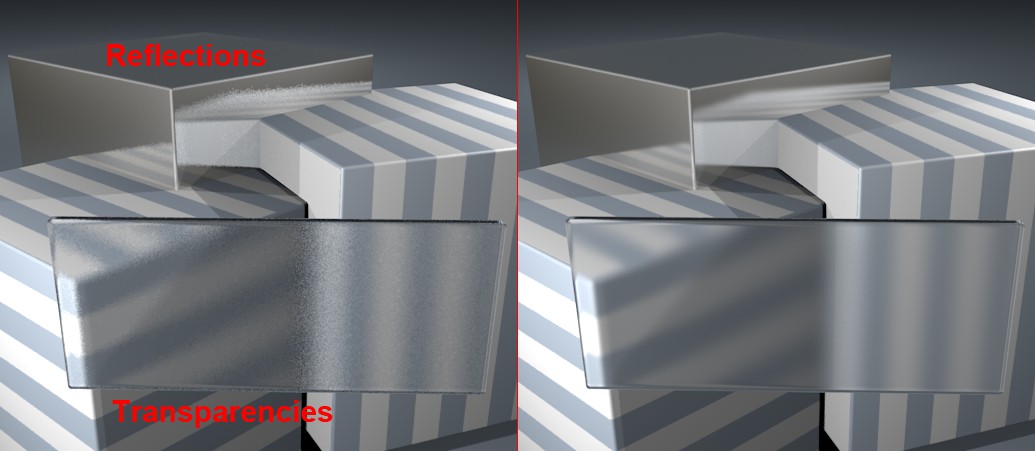 More samples (right) result in better quality in blurry reflections and transparencies.
If blurriness effects are defined for materials (Transparency and/or Reflectance channel), use this value to adjust the quality (=graininess) of the effect. Larger values will result in better quality but will also increase render times accordingly. Render times for a given effect will double each time this value is increased by a factor of 1.
Shadow Subdivision (Max)[0.00..16.00]
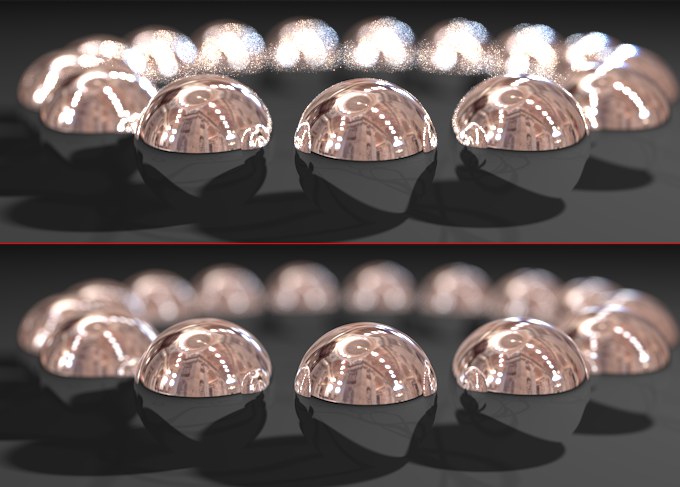
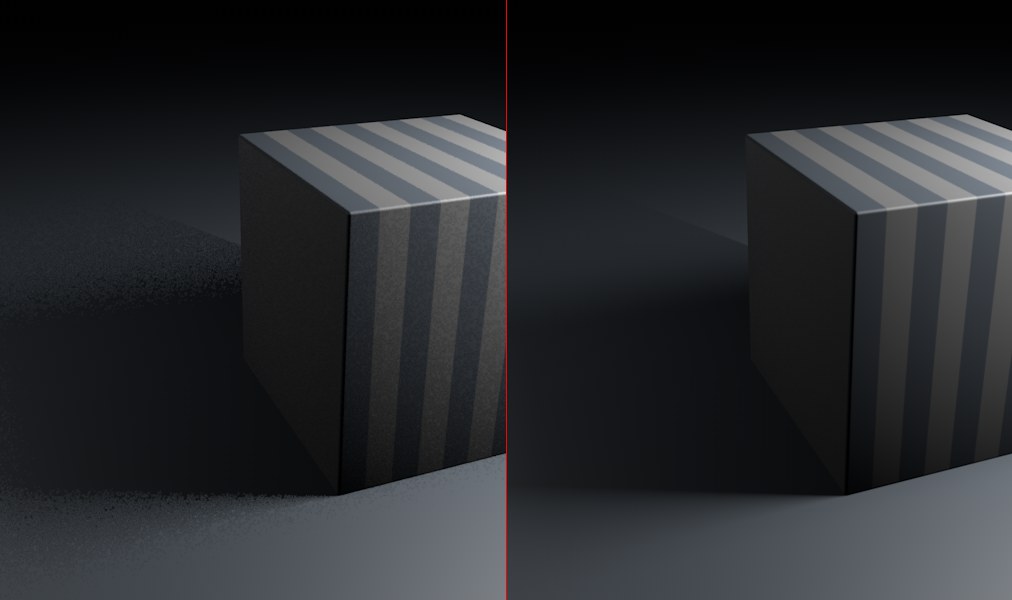 More samples (right) improve the quality of soft shadows.
This parameter refers to Shadow Maps (the Physical Renderer simulates Shadow Maps because it cannot calculate them). Larger values result in better quality but also increase render times accordingly.
Ambient Occlusion Subdivision (Max)[0.00..16.00]
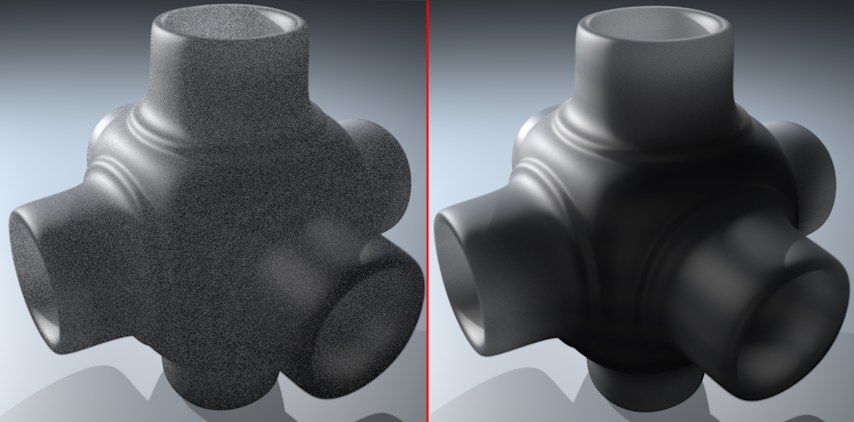
 More samples (right) result in improved Ambient Occlusion quality.
Use this value to adjust the quality of Ambient Occlusion effects. Larger values result in better quality but also increase render times accordingly.
Subsurface Scattering Subdivision (Max)[0.00..16.00]
If Mode is set to Direct, the quality of SSS can be defined here. Larger values will produce higher-quality results with correspondingly longer render times and vice versa.
This setting can be defined for materials or objects via the Sampling Subdivision option.