Overview
Redshift provides the Redshift RenderView for interactive rendering, but you can also use interactive rendering directly in your Cinema 4D viewport. To do this, take a look at the Redshift menu of the viewport.
The Redshift menu in the viewport is only available if Redshift is also your active Renderer (see Cinema 4D Render Settings).
The Redshift menu of a viewport offers almost the same functionality as the Redshift RenderView.
Redshift menu
The functions and options in this menu are identical to those in the Redshift RenderView. See the extensive RenderView documentation for details.
Start IPR
Starts and stops Redshift's Interactive Preview Rendering, intended for quick render feedback.
Your selection of the Rendering Mode and the method for Interactive Rendering plays a role here. Both settings can be found in the Sampling tab of the Redshift Render Settings (if necessary, enable Advanced mode there to access all options).
After selecting Rendering Mode Production, you can then choose either Progressive mode or Bucket rendering, which will be used when you select Start IPR. Progressive mode refines the image through continuous recalculation and is therefore suitable even when objects or, for example, light sources are still being moved in the view. However, this requires accepting a certain reduction in detail and some image noise. These drawbacks are eliminated when using Interactive Rendering Bucket, but in this case, the view is calculated in individual sections (Buckets). Therefore, you must wait longer for a fully rendered view, and nothing within the scene may change; otherwise, the calculation will be aborted and start over from the beginning.
Finally, Live Rendering Mode enables the latest rendering algorithm, which is comparable to the Production renderer in many respects, while also offering the advantage of automatic re-rendering whenever changes are made to the scene. Live is therefore ideal for continuing to work on a scene within a rendered view. More information on the technical differences between these modes can be found here.
Refresh
In the Redshift Preferences, you can disable Interactive Updates. In this case, you can use this function to force a refresh manually.
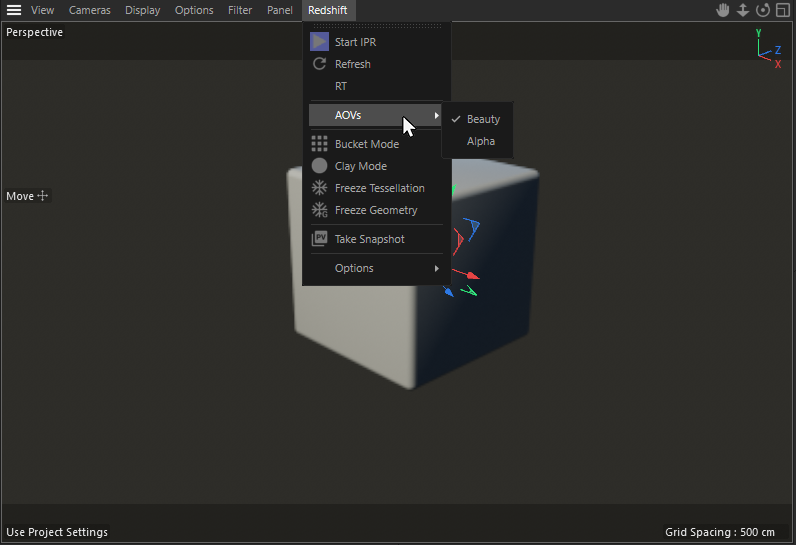
AOVs
Here you can switch between the defined AOVs. Learn more about AOVs here.
Bucket Mode
If enabled during IPR rendering Redshift will start a new bucket render with each scene change which can help you if you are previewing AOVs, Subsurface Scattering or other things that require bucket rendering.
Clay Mode
This option will replace all materials by a simple color, speeding up the rendering even further and making it easier to evaluate the light distribution in your scene. The Clay Mode can be used together with the Material Overwrite Effect in the render Settings. Just activate Mode "Clay" for the Material Overwrite and choose any color.
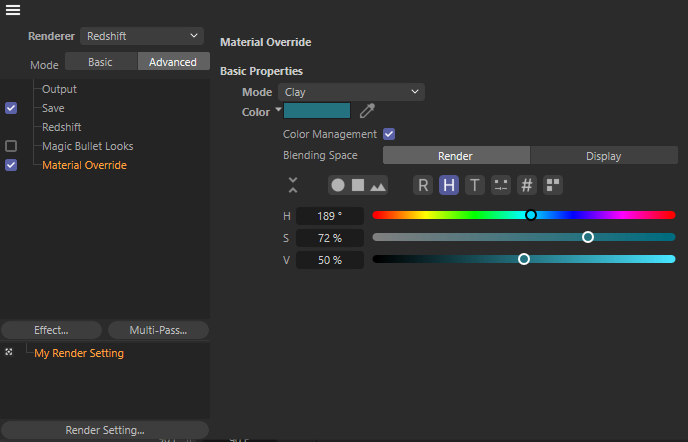
The color choosen for the Material Overwrite Effect will be used for Redshifts Clay mode.
Freeze Tesselation
When enabled, your objects tesselation is not updated. This is useful for ensuring quicker render previews with scenes that use displacement.
Freeze Geometry
When enabled, all geometry information, such as the radius of a parametric cube object or the point positions of a polygon object, is frozen to avoid re-translating the geometry for rendering. Changes to the geometry are no longer visible in the current render.
Take Snapshot
Opens the current image visible in the viewport in the Cinema 4D Picture Viewer. This allows you to compare several taken snapshots and renderings.
Options
Here you can find several options to control the quality of your interactive rendering in the viewport.
Undersampling
Undersampling is another feature that can increase responsiveness during IPR rendering. The Undersampling value determines how much the render resolution is divided in its first passes. Higher Undersampling values mean a faster first pass because of the lower resolution during those first passes. Essentially this settings allows you to sacrifice some clarity on the first couple of passes in exchange for the benefit of some speed in render view feedback.
Scale
This value corresponds to a percentage and refers to the resolution available in your viewport. A Scale of "50" would result in a viewport that is scaled down by 50% being rendered and scaled back up to 100% for display. Shaders exhibit some blurring and edges may have more visible steps as the Scale value decreases, but this has the advantage of rendering faster.
Mixed Rendering
Post-Effects
Redshift Cameras, as well as Redshift Render Settings and Redshift RenderView, enable the use of additional effects, such as color correction or bokeh, that can be activated for rendering. Enable this option to see such effects in interactive preview renders as well.