
Table Of Contents
The Texture Sampler is the primary means of loading textures into Redshift. It supports all known formats and UDIM / UVTILE textures.
|
|
The name and location of the texture to be sampled.
UDIM/UVTILE textures can be sampled by inserting <UDIM> or <UVTILE> tags into the file name. See the tiling documentation for more details.

|

|
|
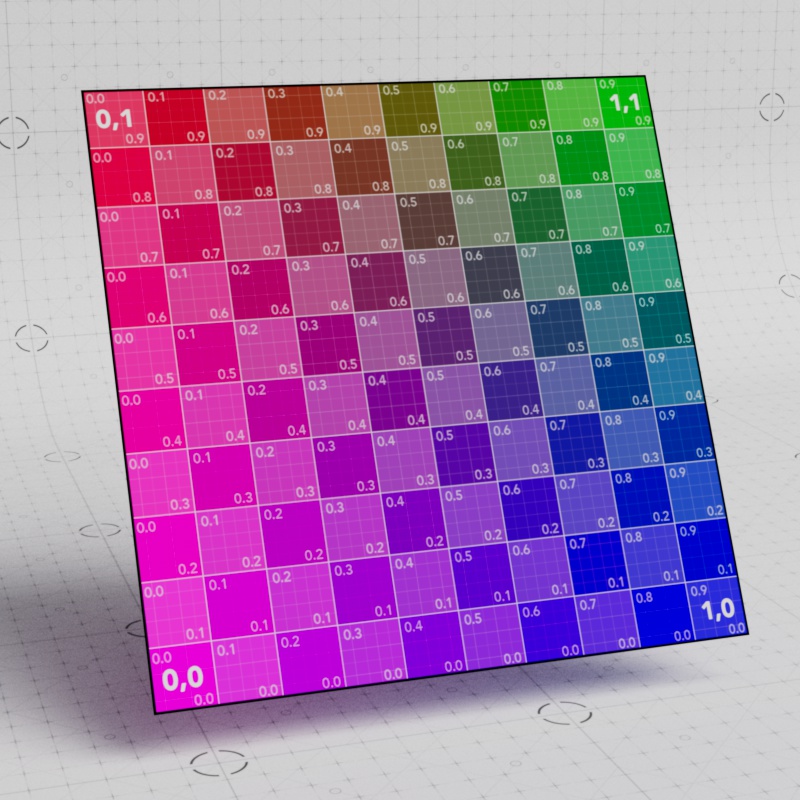
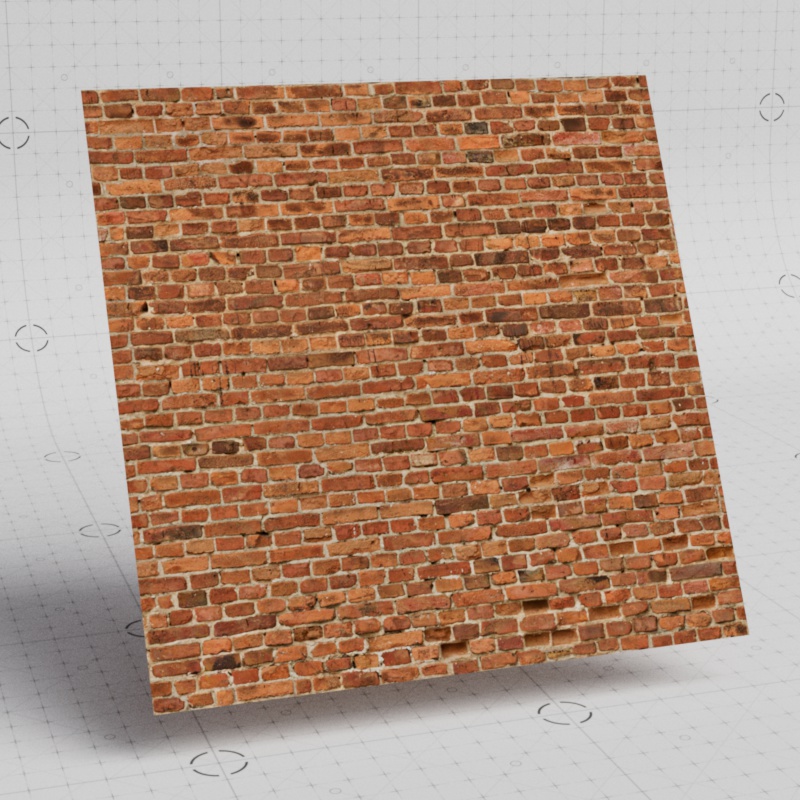
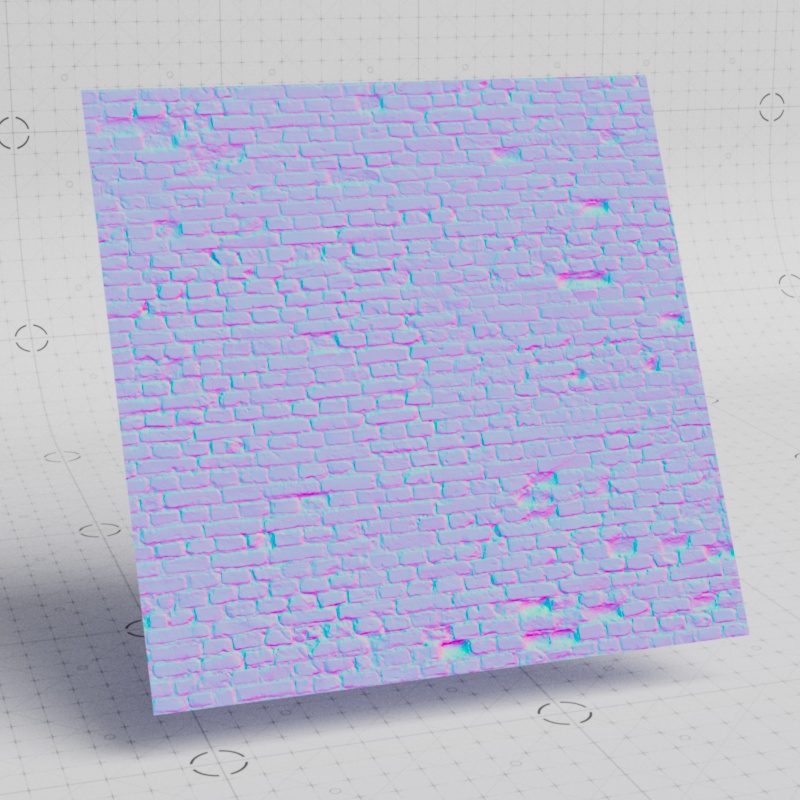
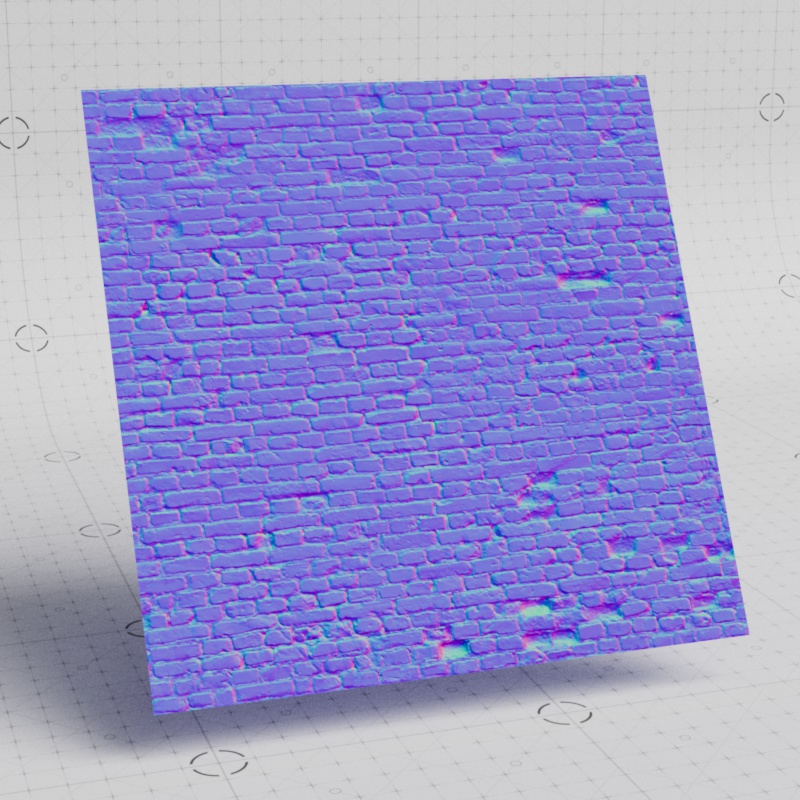
| File: Brick diffuse texture | Brick normal map texture | UV Coordinate Texture |
| Brick textures from PolyHaven.com | ||
If the loaded file contains multiple layers, you can use this menu to select a specific layer in that file.
In order for colors to display as expected all source assets must first be converted into the same linear rendering color space, ACEScg by default. This is accomplished by setting the color space correctly for each asset using the Color Space drop-down menu. These color space parameters serve as a built-in Input Display Transform (IDT) when viewed through the lens of an ACES workflow. You can learn more about OpenColorIO (OCIO) and ACES on this page.
Redshift automatically converts native color swatches like diffuse colors, ramp colors, and the Redshift physical sky into the linear rendering color space. Redshift is set up by default to automatically (Color Space: Auto) convert any textures used with materials, lights, and dome lights into the rendering color space but there is a chance that it will get this automatic conversion wrong. It's important to make sure that the color space is set correctly for each asset which is why it can be overridden manually by following these general tips:
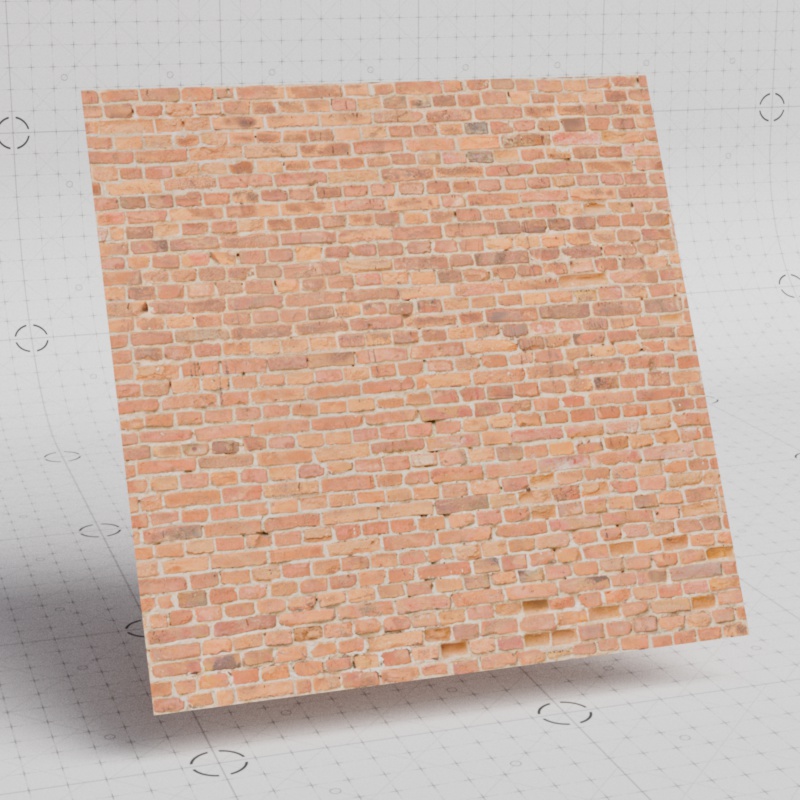
Below is an example of a common color texture, since it describes the color of a brick material it should be interpreted using the sRGB color space. If instead we used Raw as seen in the second image, the color appears very washed out and loses all contrast which is not how the material should look.
|
|
| Colorspace: sRGB (correct) |
Raw (incorrect) |
Below is an example using a normal map texture for a brick material. Since a normal map is not used to describe the color of a material it should be set to Raw as seen in the in the left image. It may look washed out but this is correct because in this scenario it's not about how the texture looks when previewed directly, it's only about how it is interpreted by Redshift and a normal map and other non-color shading features require exacting colors for the correct behavior.
|
|
| Colorspace: Raw (correct | sRGB (incorrect) |
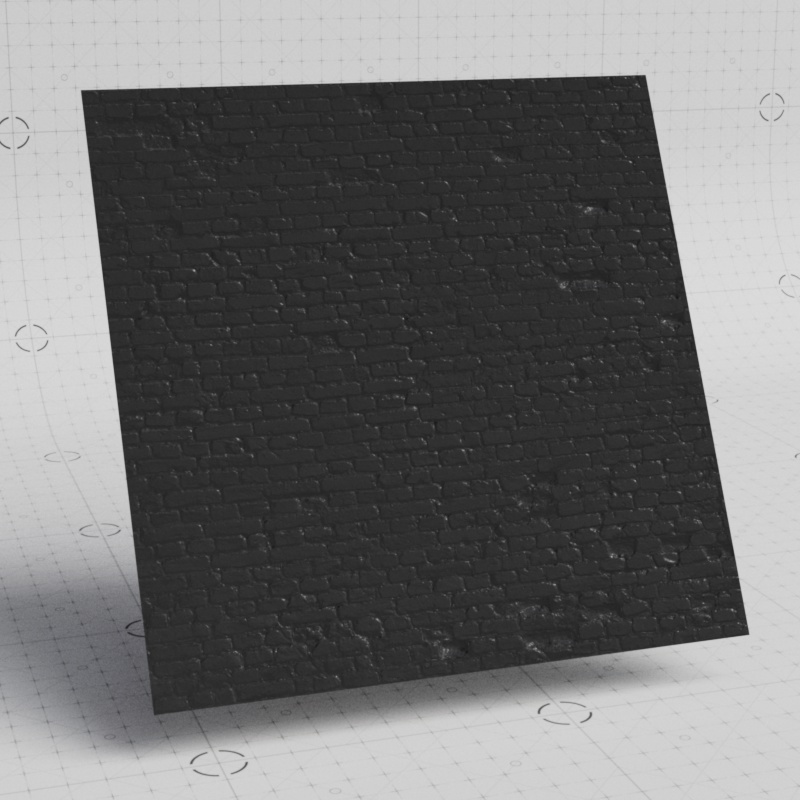
When routed into a Bump Map node and connected to an OpenPBR material you can see how massive the difference is with an incorrectly chosen color space. Here the raw normal map looks great, providing lots of brick detail — however if you used the incorrect sRGB color space it doesn’t look right at all.

|
|
| Colorspace: Raw (correct | sRGB (incorrect) |
Redshift renders in a linear color space, so the texture sampler must de-gamma bitmap textures before sampling. By default Redshift attempts to automatically compute the correct gamma encoding for the bitmap file. It assumes integer textures formats (like 'png') are sRGB gamma encoded and floating-point (like 'exr' or 'hdr') or scalar textures are linear. This option lets you specify the gamma directly.
This is the name of the vertex UV channel that contains UV coordinates.
When a texture is used in combination with a projection shader (like Triplanar or UV Projection), this channel is ignored in favor of the dynamically computed UV coordinates.
When enabled, the texture is mirrored across the U axis (horizontal).
|
|
| Mirror U: Disabled (default) | Enabled |
When enabled, the texture is mirrored across the V axis (vertical).

|
|
| Mirror V: Disabled (default) | Enabled |
When enabled, the texture is repeated along the U axis (horizontal).
When disabled and the texture moves out of the 0-1 range, the Default/Invalid Color is visible instead.
|

|
| Wrap U: Enabled (default) Default / Invalid Color: Black |
Disabled |
When enabled, the texture is repeated along the V axis (vertical).
When disabled and the texture moves out of the 0-1 range, the Default/Invalid Color is visible instead.

|

|
| Wrap V: Enabled (default) Default / Invalid Color: Black |
Disabled |
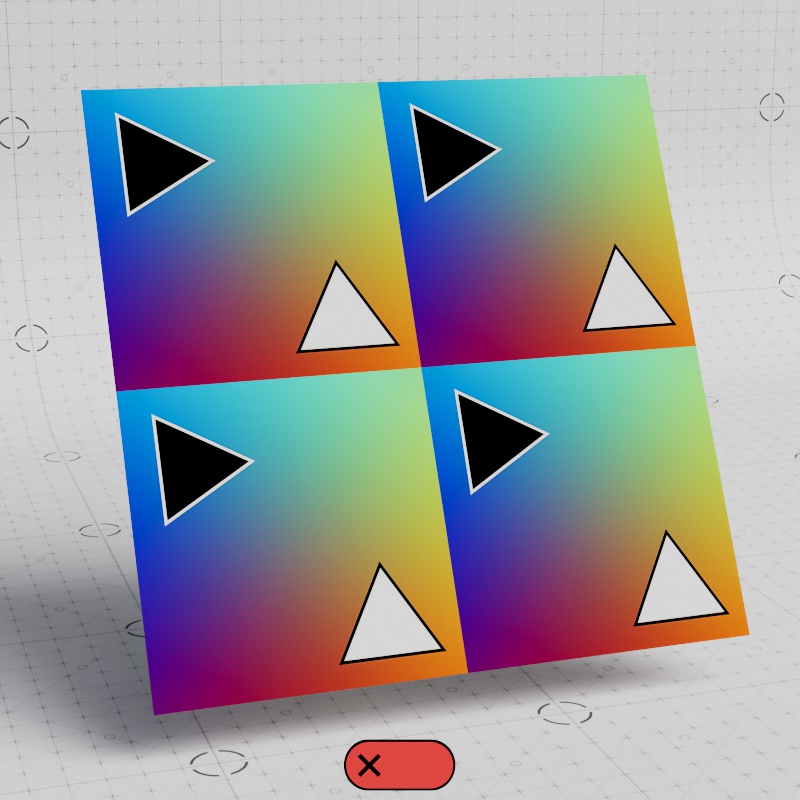
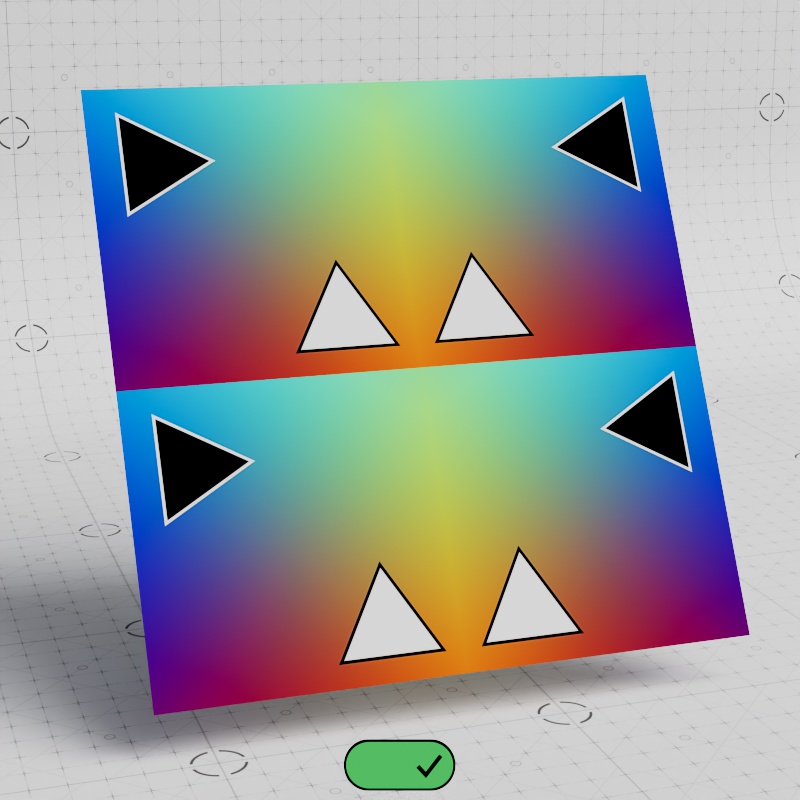
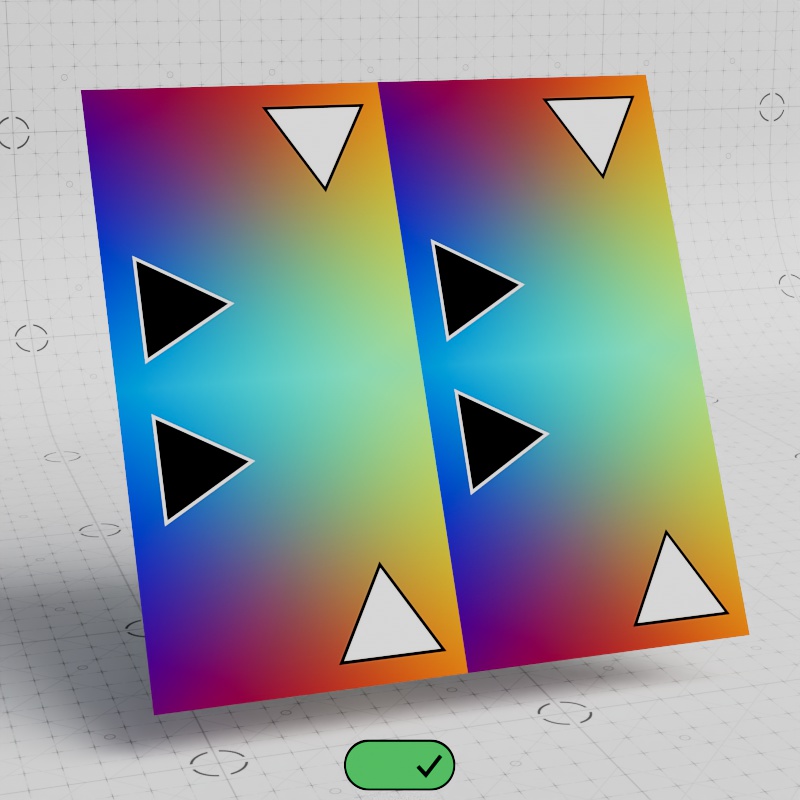
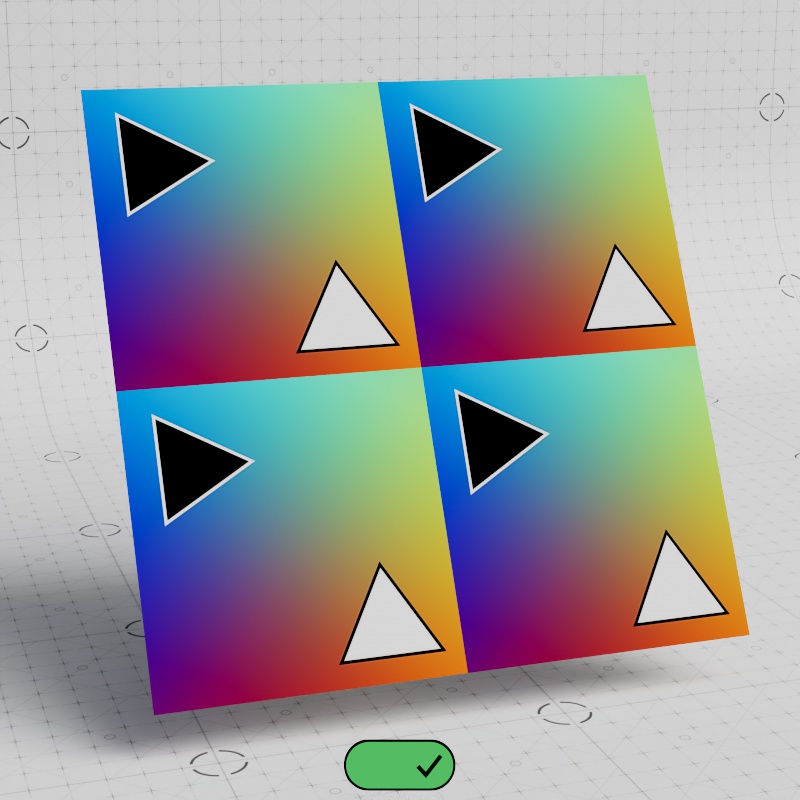
Below is an example with a 2 x 2 tiling texture that rotates. On the left, Wrap U and V are enabled which results in a fully tiling texture that spins around — note how tiles outside the 2x2 starting grid are visible as it rotates. However when both Wrap U and V are disabled no repeating occurs leaving only a single tile visible.
| Wrap U & V: Enabled (default) Default / Invalid Color: Black |
Disabled |
This is a multiplier that scales the UV coordinate, this can be thought of as a tiles control within UV space. For example, a value of 4 results in 4 visible.
Wrap U and V must be enabled for the tiling to be visible.
| Scale U / V: 0 - 3 | Scale U: 1 - 3 | Scale V: 1 - 3 |
These values are added to the UV coordinate to move the frame. A noise, or other texture, can be connected here to distort the texture — the different values of the noise offset it in different amounts resulting into the distortion.
| Offset: Linear movement | Noise offset |
Rotates the texture within the UV coordinate frame.
| Rotate: 0 - 360 Scale: 1 x 1 |
0 - 360 2 x 2 |
Connect a UV Context Projection node here to enable a local connection for simplified texture mapping. For more information, please see the UV Context Projection page.
A color that is multiplied with the sampled texture color channel. The default is white so that no color change occurs.
| Color Multiplier: Changing colors | Black to White |
A color that is added to the sampled texture color channel. The default is black so that no color change occurs.
| Color Offset: Changing colors | Black to White |
A value that is multiplied with the sampled texture alpha channel. The default is 1 so no alpha change occurs.
In the example below, note how the alpha channel (previewed in the small plane on the bottom) changes which affects the transparency of the opacity of the texture on the large plane.
| Alpha Multiplier: 0 - 1 |
| Plant textures from PolyHaven.com |
A value that is added to the sampled texture alpha channel. The default is 0 so no alpha change occurs.
In the example below, note how the alpha channel (previewed in the small plane on the bottom) changes which affects the transparency of the opacity of the texture on the large plane.
| Alpha Offset: 0 - 1 |
When enabled, the alpha is based on the sampled texture's color luminance — brighter colors are more opaque while darker colors are more transparent.
When disabled, the alpha comes from the sampled texture's alpha channel, if the texture has no alpha channel then the alpha will be 1.0.

|

|
| Alpha is Luminance: Disabled (default) | Enabled |
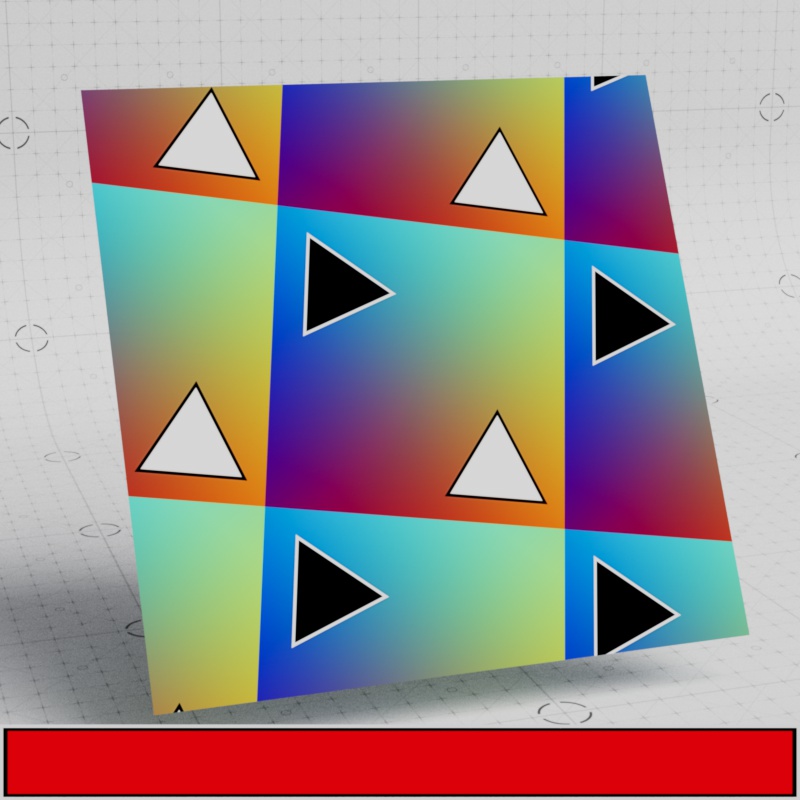
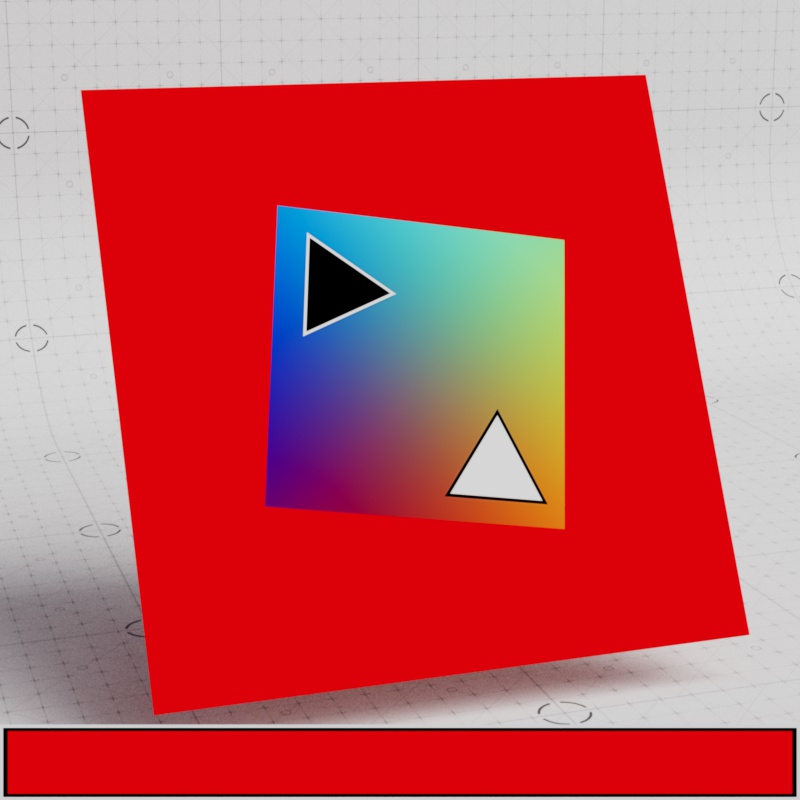
This is the color that becomes visible if the UV coordinate is outside of the 0-1 range or if the texture bit-map file does not exist. This can occur easily when Wrap U and V are disabled.
|
|
|
| Default Color: Red Wrap U/V: Enabled |
Red Disabled |
Transparent Disabled |
These options allow advanced control of texture filtering and should be used with caution as they can affect texture sampling quality and performance.
Please see this topic for more information about these options:
Selects the filtering enable mode of the texture sampler;
Enables bicubic filtering on textures that are magnified. This produces much softer looking textures than regular bilinear filtering, but at the expense of slower rendering.
Biases primary rays texture filtering to produce sharper looking textures.
Biases texture mip-maps to yield sharper looking textures when the bias is less than 0 or softer looking looking textures when greater than 0.
When enabled, you can use an external texture (instead of a RS Ramp) for tone mapping with the Toon material. It works just like the RS Ramp in that colors on the left side of the texture map to the darkest parts while the brightest parts map to the right side of the texture.
When disabled, the texture is mapped to the objects as usual.