Dynamics
 Filling things is no problem for Dynamics.
A brief explanation of the difference between keyframe animation and a Dynamics simulation: For a keyframe animation an animator has to plan where a collision will take place, e.g., that of two billiard balls. The animator must animate each ball separately, i.e., set keyframes. In order to make the animation look realistic, the animator will most likely have to have a real-world (video) source as reference. The animation will then be simulated as accurately as possible based on this reference animation using position and rotation tracks in the Timeline. This is a complicated and time-consuming process. However, the animator does have full control over the motion of the billiard balls.
The advantage of using Dynamics lies therein that collisions between the billiard balls must not be played out mentally or planned in advance. The billiard balls are simply given an initial velocity and let the movements take their course. Sound easy? It is. But you do partially relinquish the control you have over the movement to the Dynamics simulation, i.e., you can’t always predict the outcome.
Cinema 4D’s Dynamics simulation takes a lot of work off your hands by automatically calculating the movement of objects using realistic physical properties such as mass and velocity. These objects can be affected by force fields (e.g., (particle)modifiers), springs, motors, collisions and connectors.
Cinema 4D simulates real movement processes that occur in nature based on forces and mass.
Dynamics is designed primarily for creating complex, interactive movements such as the filling of vessels, collapsing of walls, billiard balls, etc. Objects affected by Dynamics can be organic, i.e., do not have to be hard. Soft, springy objects such as rubber balls, trampolines, waving flags, etc. can also be created (these are called "Soft Bodies").
Dynamics in Cinema 4D is based on a simple open source library called "Bullet". Working with Dynamics is now much simpler - you no longer have to create separate Solver objects or Gravity fields but simply have to assign a Rigid Body tag (Object Manager: Tags / Simulation Tags) to the objects you want to affect:
 The most simple Dynamics scene, incl. collision: 2 objects, each with a Dynamics Body tag assigned to them.
This is all you need to make a cube fall to the floor!
The Dynamics calculation occurs very fast and works with parametric objects, i.e., you don’t have to make any ![]() Sweep
Sweep
The Dynamics Body tag (Object Manager:
The Dynamics Body tag (Object Manager:
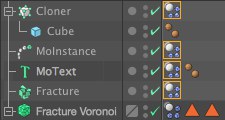
All clones are dynamic objects! Note that the Individual Elements option might have to be set to Top Level OR ALL.
The Dynamics parameters can be found here:
- Dynamics Body Tag: Object-specific settings for all objects affected by Dynamics.
- Project Preferences: general scene-specific settings (e.g., gravitation, quality of simulation, etc.)
-
 Connector
-
 Motor
Motor
-
 Spring
-
 Force
Force
Animation frame 0 has a special meaning for Dynamics: it defines a starting state for the simulation. Therefore, as long as you are setting up the scene you should always do this at frame 0. Later, Dynamics will take control and it will no longer be possible to move Connectors or objects with Dynamic Body tags (unless Dynamic is set to Off).
Frame 0 will also be the state of rest for Soft Bodies (all Springs that define a Soft Body’s state of rest will be at their length at rest) - unless otherwise defined.
Note that the Project’s preview length should also include frame 0 because the start state will otherwise not be included.
The difference between these two elements:
- Rigid Body: For Dynamics a solid, hard object that is affected by forces as a whole (each object to which a Dynamics Body tag is assigned is such a body). Note that this classic definition is still correct within Cinema 4D but a Rigid Body can also be assigned a Deformer and the object would still behave as a Rigid Body. Imagine a cylinder standing on end that is bent using the Bend object. If bent too far, the cylinder will fall over.
- Soft Body: A soft body that can be deformed by dynamic forces (this must be defined via the Soft Body option).
Example of Dynamics with a Cloner object
Let’s say you used the Cloner Object to create the following scene:
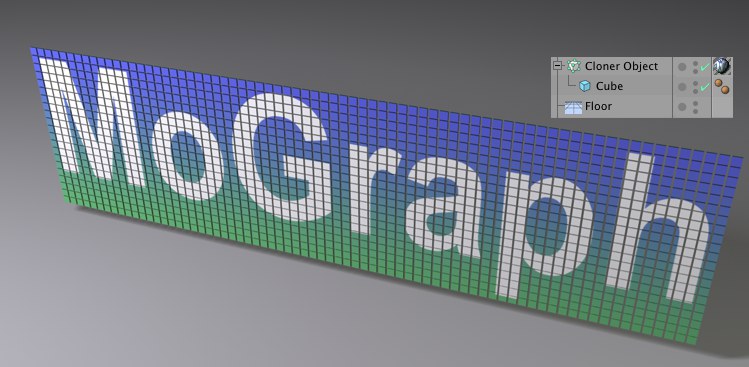
Initially, no gravitational force should affect the Clones. However, we want a Wind Object to blow over the constellation. At a later point we want the Clones to fall to the floor. So, how can this be done?
- First, assign a Dynamics Body Tag to the Cloner Object(
The Dynamics Body tag (Object Manager:
 <|span><|div> Body). Make sure the IE option is set to All. This will "make the Clones available" for Dynamics.
- Assign a Dynamics Body Tag to the floor as well. This will make it a collision object onto which the Clones will later fall.
- Create a Wind Object (
). Set the Wind Object’s Wind Speed value to 10 and its Turbulence value to 1000. This will create a relatively strong turbulence.
- Since we want gravity to affect the Clones at a later point, the Gravity (Project Settings / Dynamics / General tab) parameter can be animated now. Go to frame 20, for example, set the Gravity value to 0 and set a key. Go to frame 21, set the Gravity value to 1000 and set another key.
- Done. Play the animation and you will see the following result:
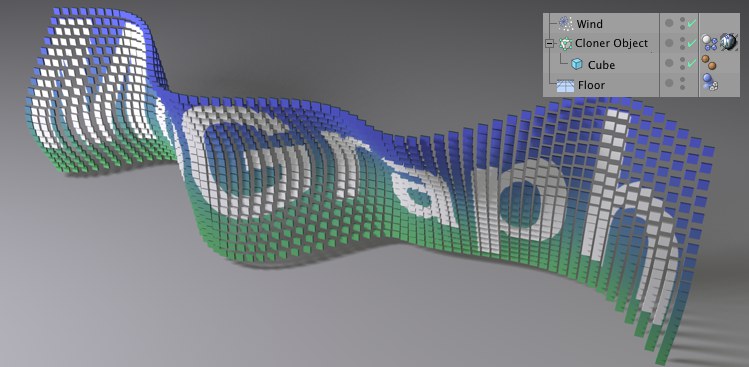 After the turbulent wind has started to blow …
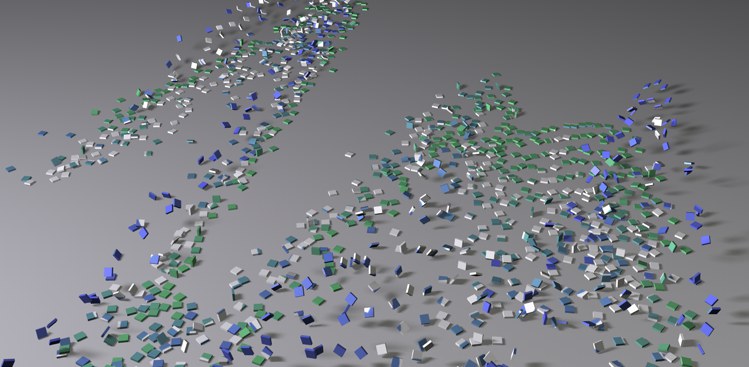 … the gravitational effect sets in.
You have several commands from which to choose to easily modify the settings of objects with a Dynamics Body tag assigned to them (right-click on the object: Simulate tag).
Adds a Dynamics Body tag with Rigid Body properties to a selected object.
Adds a Dynamics Body tag with Soft Body properties to a selected object.
Adds a Dynamics Body tag to selected objects. The object itself will then not move but can function as a collision object for other dynamic objects.
Adds a Dynamics Body tag to selected objects. The Ghost object itself will then not move but other dynamic objects can analyze quasi collisions.