Cross Section
![]()
With this interactive tool, you can create cross sections for a group of splines; we will refer to these as rail splines.
The splines must be selected in the Object Manager.
Cross sections are always created at right angles to the current view. You should therefore select a view in which you can see the rail splines directly from the side.
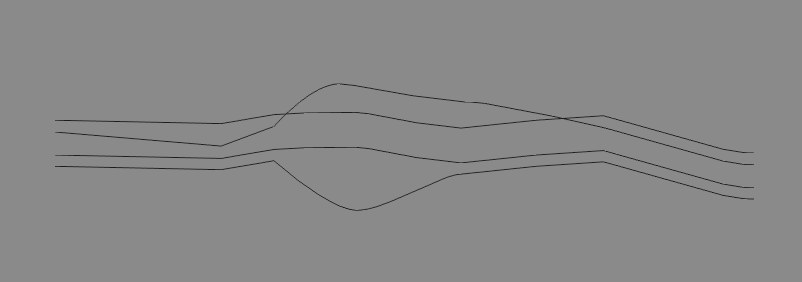 Figure 1.
Figure 1 shows some splines before any cross sections have been created. If you activate the Cross Section tool, you can drag to draw a line where a cross section is to be created.
In Figure 2, three cross-sections have been created.
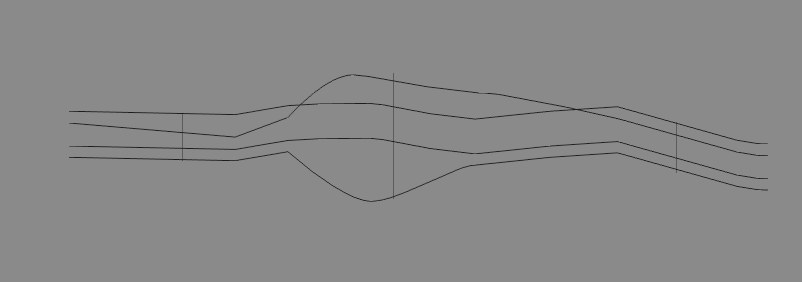 Figure 2.
In the 3D viewport you can see that this has created circles (more or less) that are wrapped around the four rail splines (Figure 3).
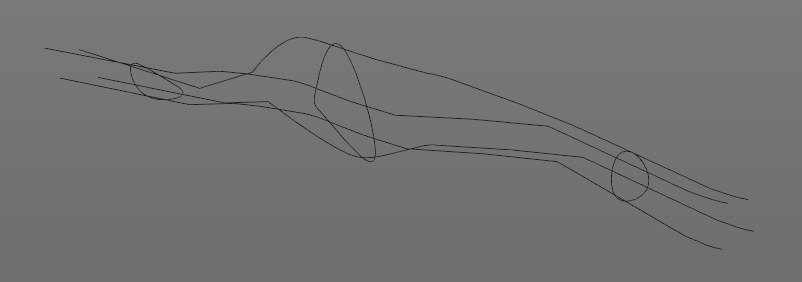 Figure 3.
These cross sections are new splines with Bezier type interpolation are especially useful when used as Child objects of a Loft object. The order of these rail splines within the Loft object is important. When working with more than two rail splines, make sure that these are placed in the correct order within themselves in the Object Manager, because Cinema 4D uses this object order when creating the cross sections. The start point of the cross section spline is located on the first rail spline and the end point on the last.
If the rail splines wind around themselves, giving a cross section spline that overlaps with the rail splines, Cinema 4D selects the first intersection in the direction of travel of the spline (Figure 4).
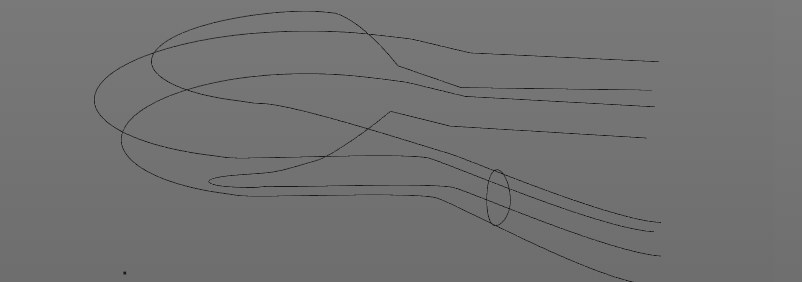 Figure 4.
Perhaps you would like to be able to draw the cross sections only in certain directions, rather than free-form. To snap the cross-section to particular directions as you draw it, define a Constrain Angle and hold down the
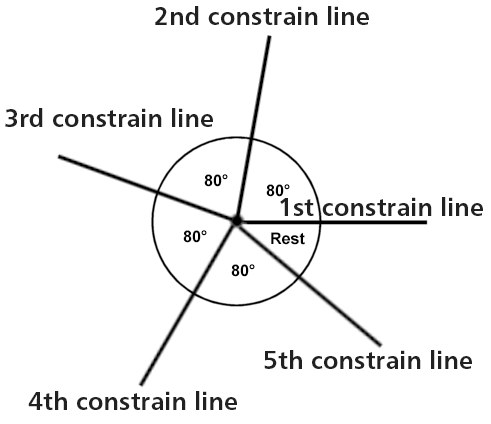
The value you enter in Constrain Angle is used to define the direction of the cross section, starting east (to the right) in the current view and working anti-clockwise. So, if you entered a value of 80 for Constrain Angle, you would be able to draw cross sections at 0, 80, 160, 240 and 320 as shown in the diagram above. Remember to hold down