Modeling Clothes
The first part of modeling a garment starts with creating a Polygon object (Create / Primitive / Empty Polygon). This object will allow you to create polygons anywhere in the scene. Remember that the cloth engine will handle the draping and simulation process. All that needs to be created is the geometry for the cloth engine to drape. So a rough box model of the garment is all that is needed.
Use the Create Polygon Tool (Mesh / Polygon Pen) to create this box model of the garment. Being that Cinema 4D now supports n-gons, quickly draw out the front plane of the garment. Using Plane Cut (Mesh/Cut), distribute cuts evenly throughout the garment, trying to keep as many quadrangles as possible in preference to triangles.
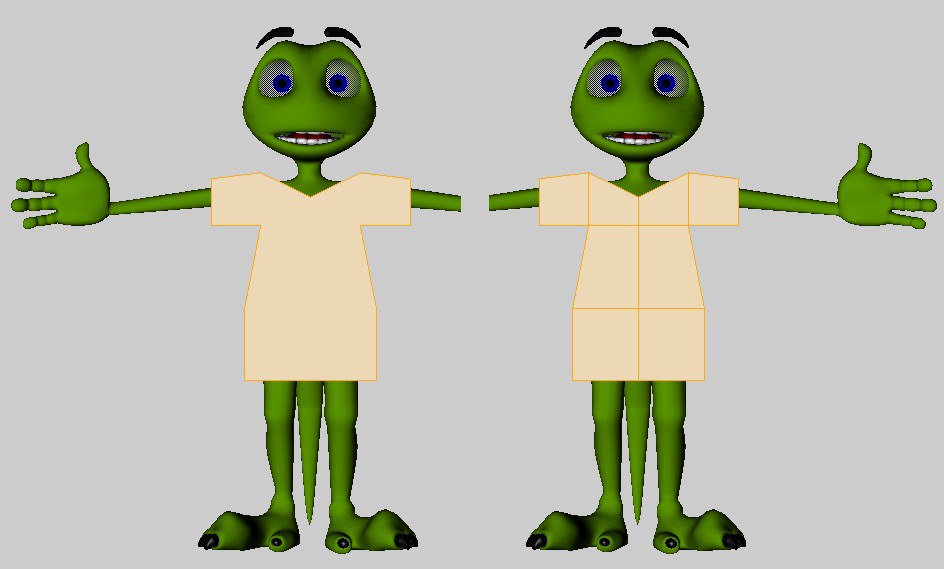
Before using the Knife tool to cut the garment (left) and after (right). Create quadrangles in preference to triangles.
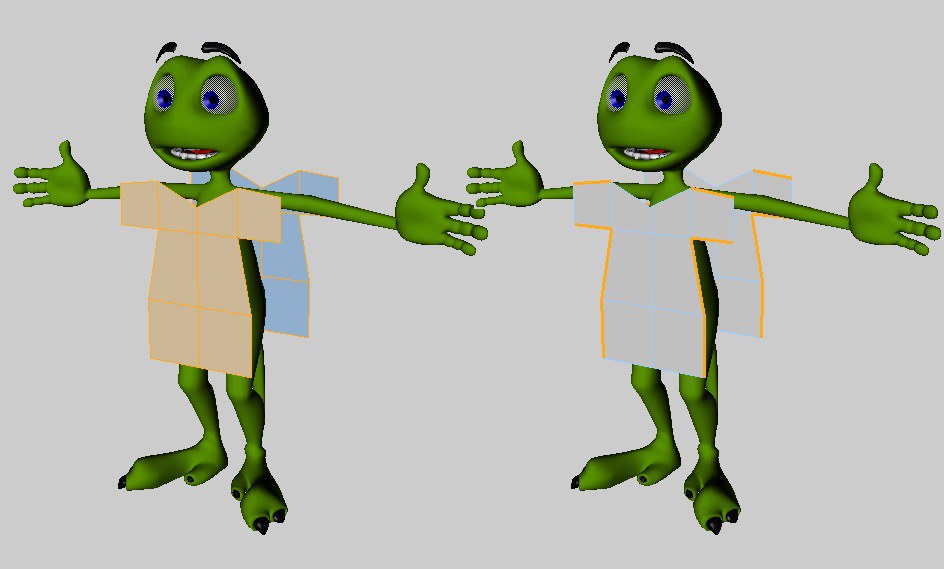
After the front plane of the garment is modeled, make sure all of the polygons are selected and use the Clone function (Mesh / Clone / Clone). This will mirror the geometry to create the back plane of the garment. Usually, using a Clone value of 1 and 180-degree rotation around the Y axis works for this situation. Select the edges where the garment will need to be seamed together. Remember to exclude the edges where the garment will fit around the character: collar, sleeves, and bottom of the shirt.
Select the edges where the garment will need to be seamed together. Remember to exclude the edges where the garment will fit around the character: collar, sleeves, and bottom of the shirt.
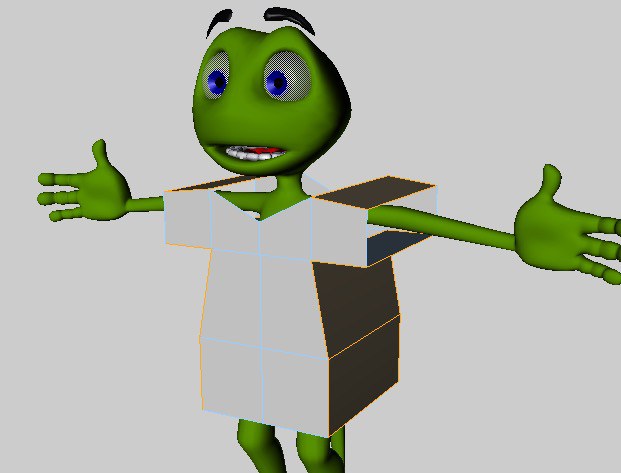
Now the seams need to be created between these two planes. Use the Stitch and Sew tool to create the geometry for the seams. Holding the Shift modifier for this tool will add geometry as opposed to merging the edges, which is needed for the seams.
Use Cinema 4D’s Stitch and Sew tool to create the seams.
Keep the polygons of the front and back planes selected. It is at this point that you will want to subdivide the garment (Mesh / Commands / Subdivide). A value of 3 subdivisions will usually suffice. Invert the selection so that the geometry of the seam is selected (Select / Invert).
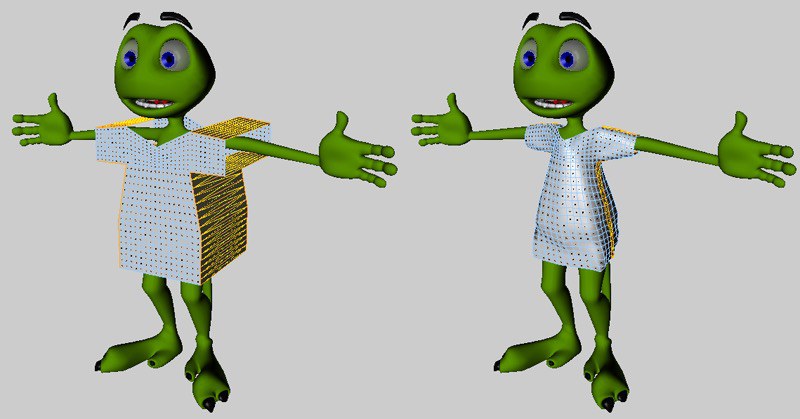
At this point, a Cloth tag can be applied to the garment to drape the geometry onto the character. Using the functions on the Dresser tab, such as Set Seam Polys and Dress-O-Matic, will perform this draping process. Prior to doing this you will also want to apply a Collider tag on the geometry of the character; otherwise, the Cloth engine will not know what to drape the geometry onto.
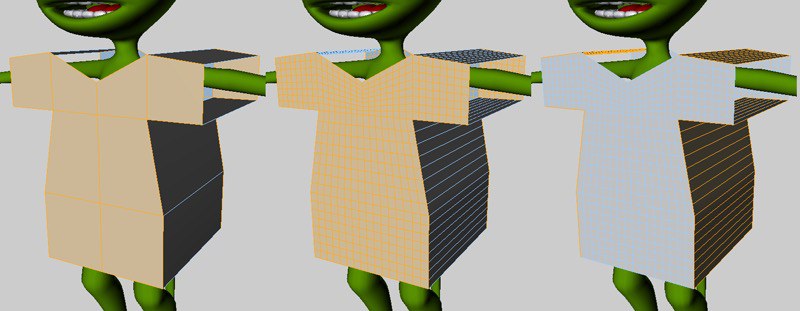
Before using the functions on the Dresser tab to drape the garment onto the character (left) and after (right).
Keep in mind that Cloth is as much a modeling tool as it is an animation tool. At any point in time the Cloth tag can be deleted and the cloth can be treated as regular geometry. Even deleting the Cloth tag and modeling areas like collars at a later time is still possible. Then just re-apply a Cloth tag to the new model and start the simulation from there.
As the screen shots show, it is best to drape a garment while a character is in the T-pose. But an animation never has a character start in the T-pose. The trick here is to animate the character from the T-pose at a negative frame, usually –10 but this depends on the extremity of the start pose.
On the Tag Properties tab of the Cloth tag, you can disable the Auto option and manually specify from Frame –10 to Frame 0. Once the simulation gets to Frame 0 you can define that as the new Initial State and the simulation will be able to start calculating the garment from that state.
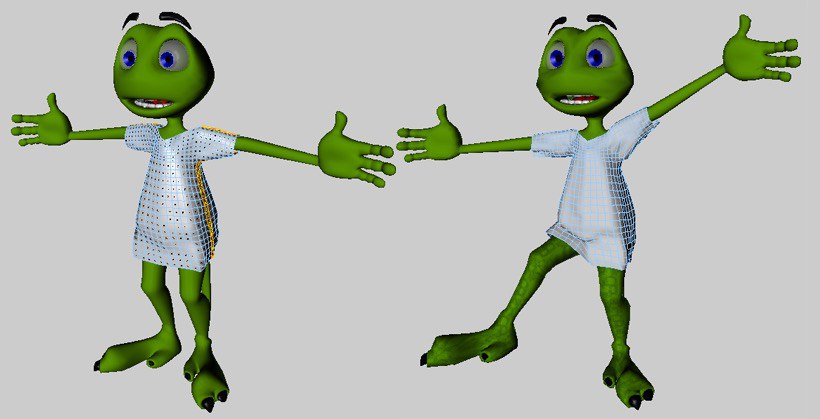
It’s best to drape a garment while the character is in the T-pose (left). Naturally, you will want to start the animation from a different pose (right). The trick here is to record the T- pose before frame 0, such as at frame -10.
Remember that if the starting pose is really extreme, you can belt (Belt tag) all the points of the garment during the simulation. Once the cloth object is in place, you can remove the belted points and set the Initial State of the garment.