Layer Controls
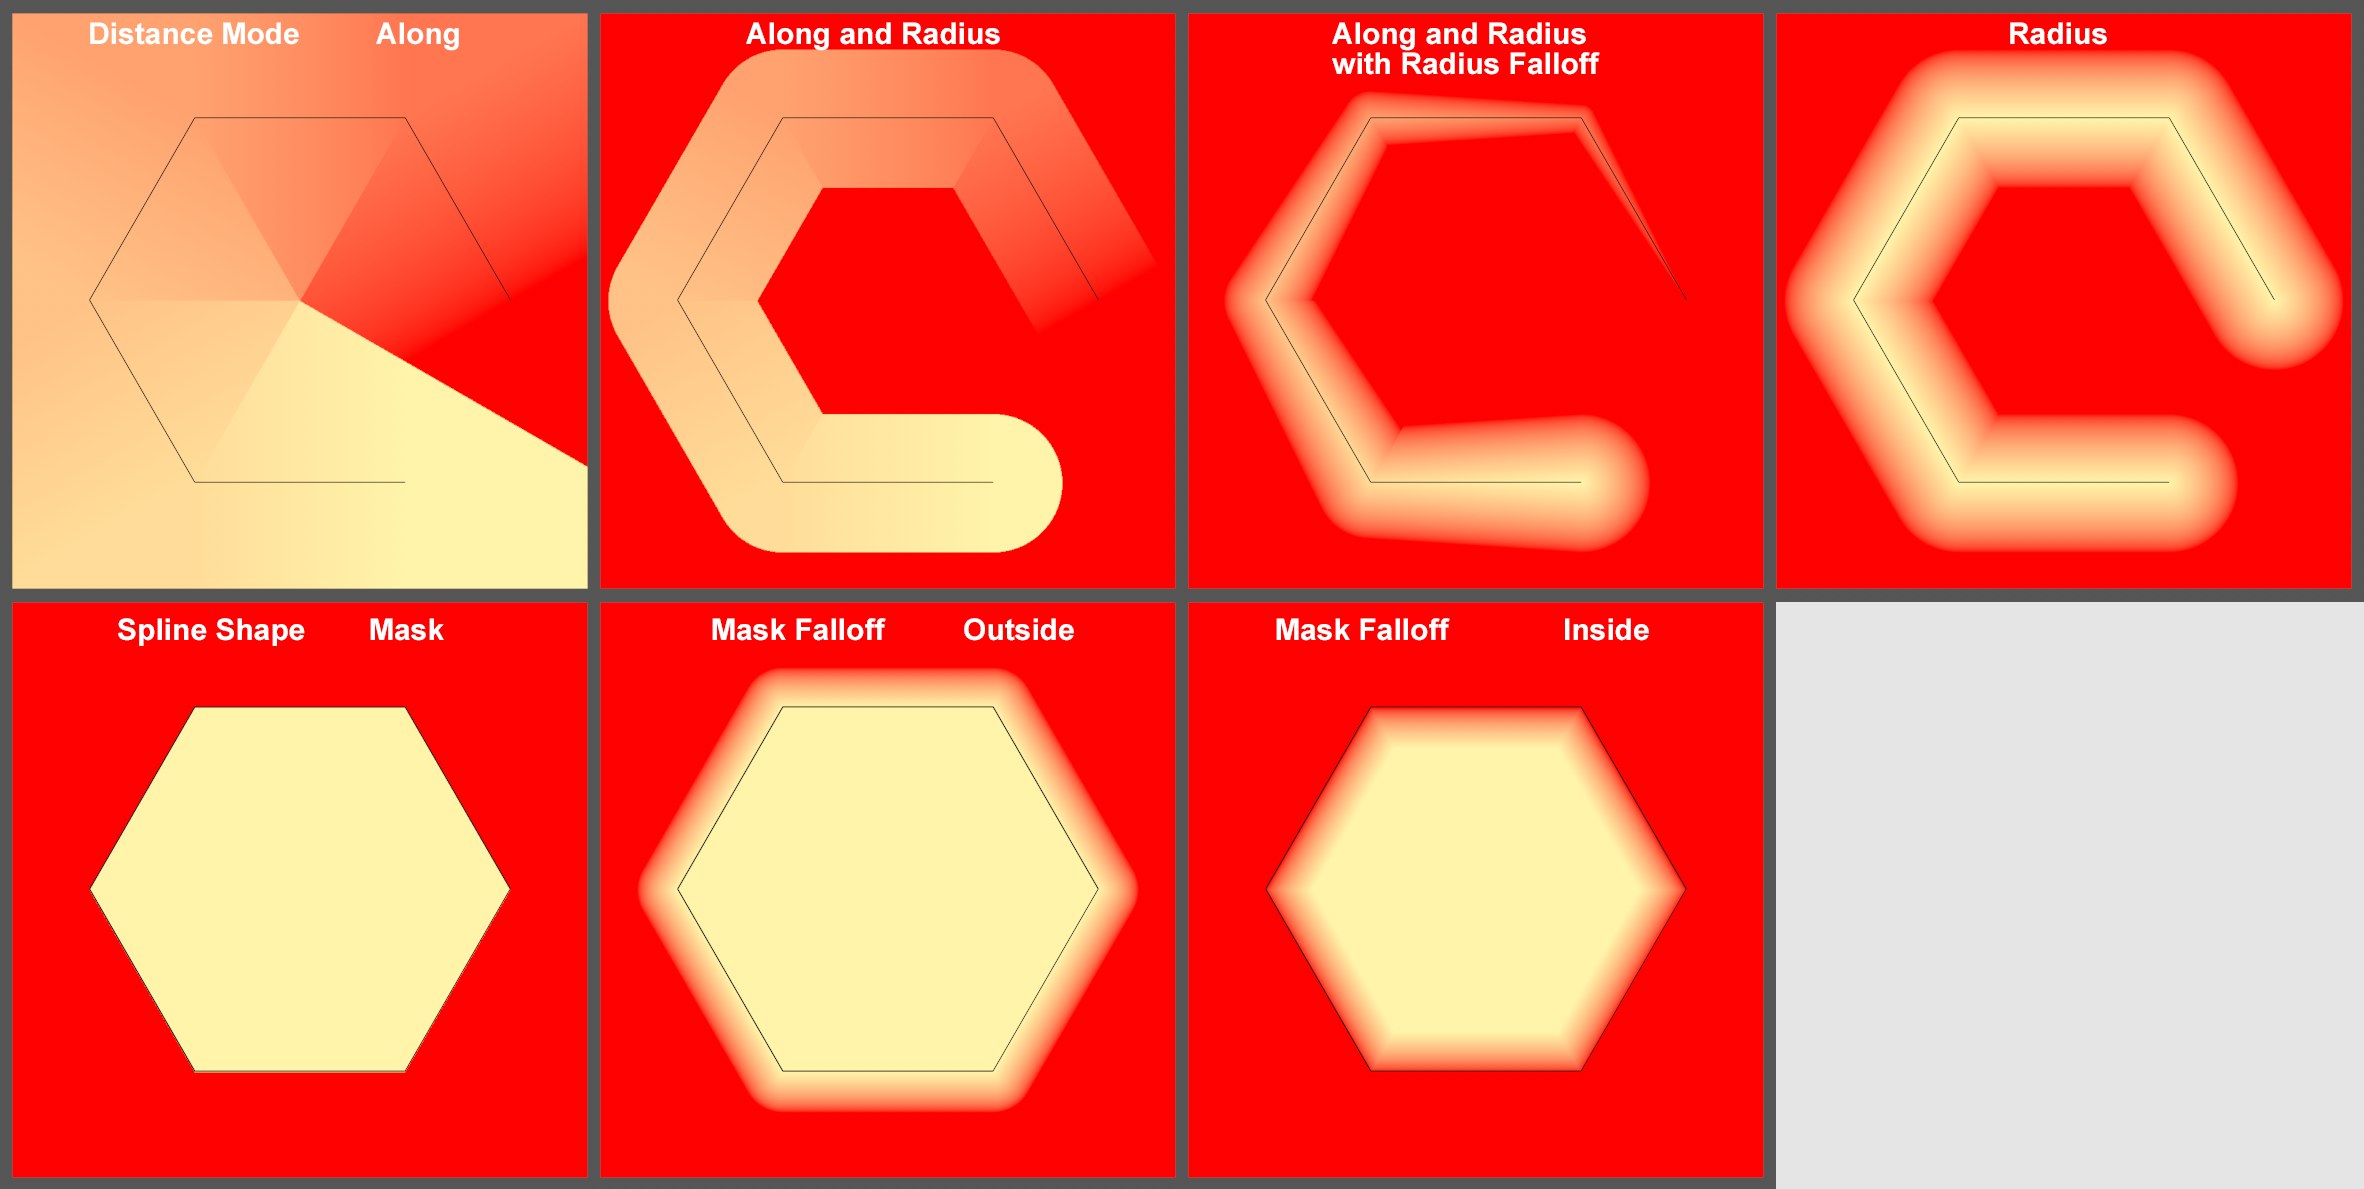
 A Spline object in a Vertex Map with different modes. Imagine the effect in three dimensions around the spline.
Two modes are available:
- Curve: The Field’s effect will primarily work within an adjustable tube around the spline (top half of example image)
- Mask: A volume is created using the selected Mask Projection - a closed spline - within which the Spline object’s effect is at a maximum (bottom half of example image)
Three modes are available:
Each element (e.g., clones or object points) has a shortest distance to a point on a spline. This spline position relative to its start and end defines the value of the element position from 0 to 1.
This mode works like Along and Radius with an infinite radius.
In this mode, imagine a tube around the spline with a defined Radius. The effect is largest along the spline and decreases to 0 at the Radius.
This mode is a combination of Along and Radius. A decreasing effect with spline curvature can be defined both perpendicular to the spline tangents and along the spline (see image above).
![]() Radius Options
Radius Options
The Radius setting can be used to define the tube’s radius. The Radius Falloff setting can be used to define this perpendicular to the spline tangent.
This function is often required for spaces that have an inside and an outside. This is entirely logical for the shape Fields (e.g., Spherical Field) but less obvious for particle, spline and volume objects, etc. Volume objects often have settings such as radius, with which a space can also be placed around a point or they define the space themselves. There is always in inside and an outside. This function defines how the inside should be treated. If nothing should happen (option enabled) or should null values, for example, be applied (option disabled), which will hide Fields below it if Blending Mode is set to Normal.
This setting can be used to adjust the radius perpendicular to the spline tangent.
![]() Along Curve Options
Along Curve Options
For all modes that have different strengths along the spline’s length, you have to define if the length along the entire spline should be calculated as the sum of its segments (Whole Spline) or if each segment should be viewed as a separate spline length (Per Segment).
Range Start [0..100%]
Range End [0..100%]
For all modes that have different strengths along the spline’s length, the effect can be restricted from the spline start or spline end. Prior to or after, for example, 0% and 100%, respectively.
This setting can be used to offset the state defined by Range Start and Range End along the spline. If Cycle is enabled, the effect will be continued beyond the spline’s end.
If you want to modify the Spline object’s effect over the length of the spline, this can be done using this curve.
Enable this option if the spline displayed below should be repeated prior to Range Start and after Range End. Continuous effects can be created in combination with modifying/animating the Offset value.
The spline coordinate system can be used for the Mask mode, on which the projection of the spline will be based and whose effect range is defined by the Distance option.
Depending on the Distance defined, a falloff of the effect can be assigned to the inside or outside of the spline. This setting defines the direction in which the falloff should take place.
Here you can define the distance between the spline and the point at which the null effect starts. A soft transition for the effect can be defined here.
This function is often required for spaces that have an inside and an outside. This is entirely logical for the shape Fields (e.g., Spherical Field) but less obvious for particle, spline and volume objects, etc. Volume objects often have settings such as radius, with which a space can also be placed around a point or they define the space themselves. There is always in inside and an outside. This function defines how the inside should be treated. If nothing should happen (option enabled) or should null values, for example, be applied (option disabled), which will hide Fields below it if Blending Mode is set to Normal.