Unwrap UV

This new tool is at the core of an optimized edge workflow (edges defined as UV Seams, unwrapping/relaxing UV mesh with UV Unwrap, select more edges, unwrap again, etc.).
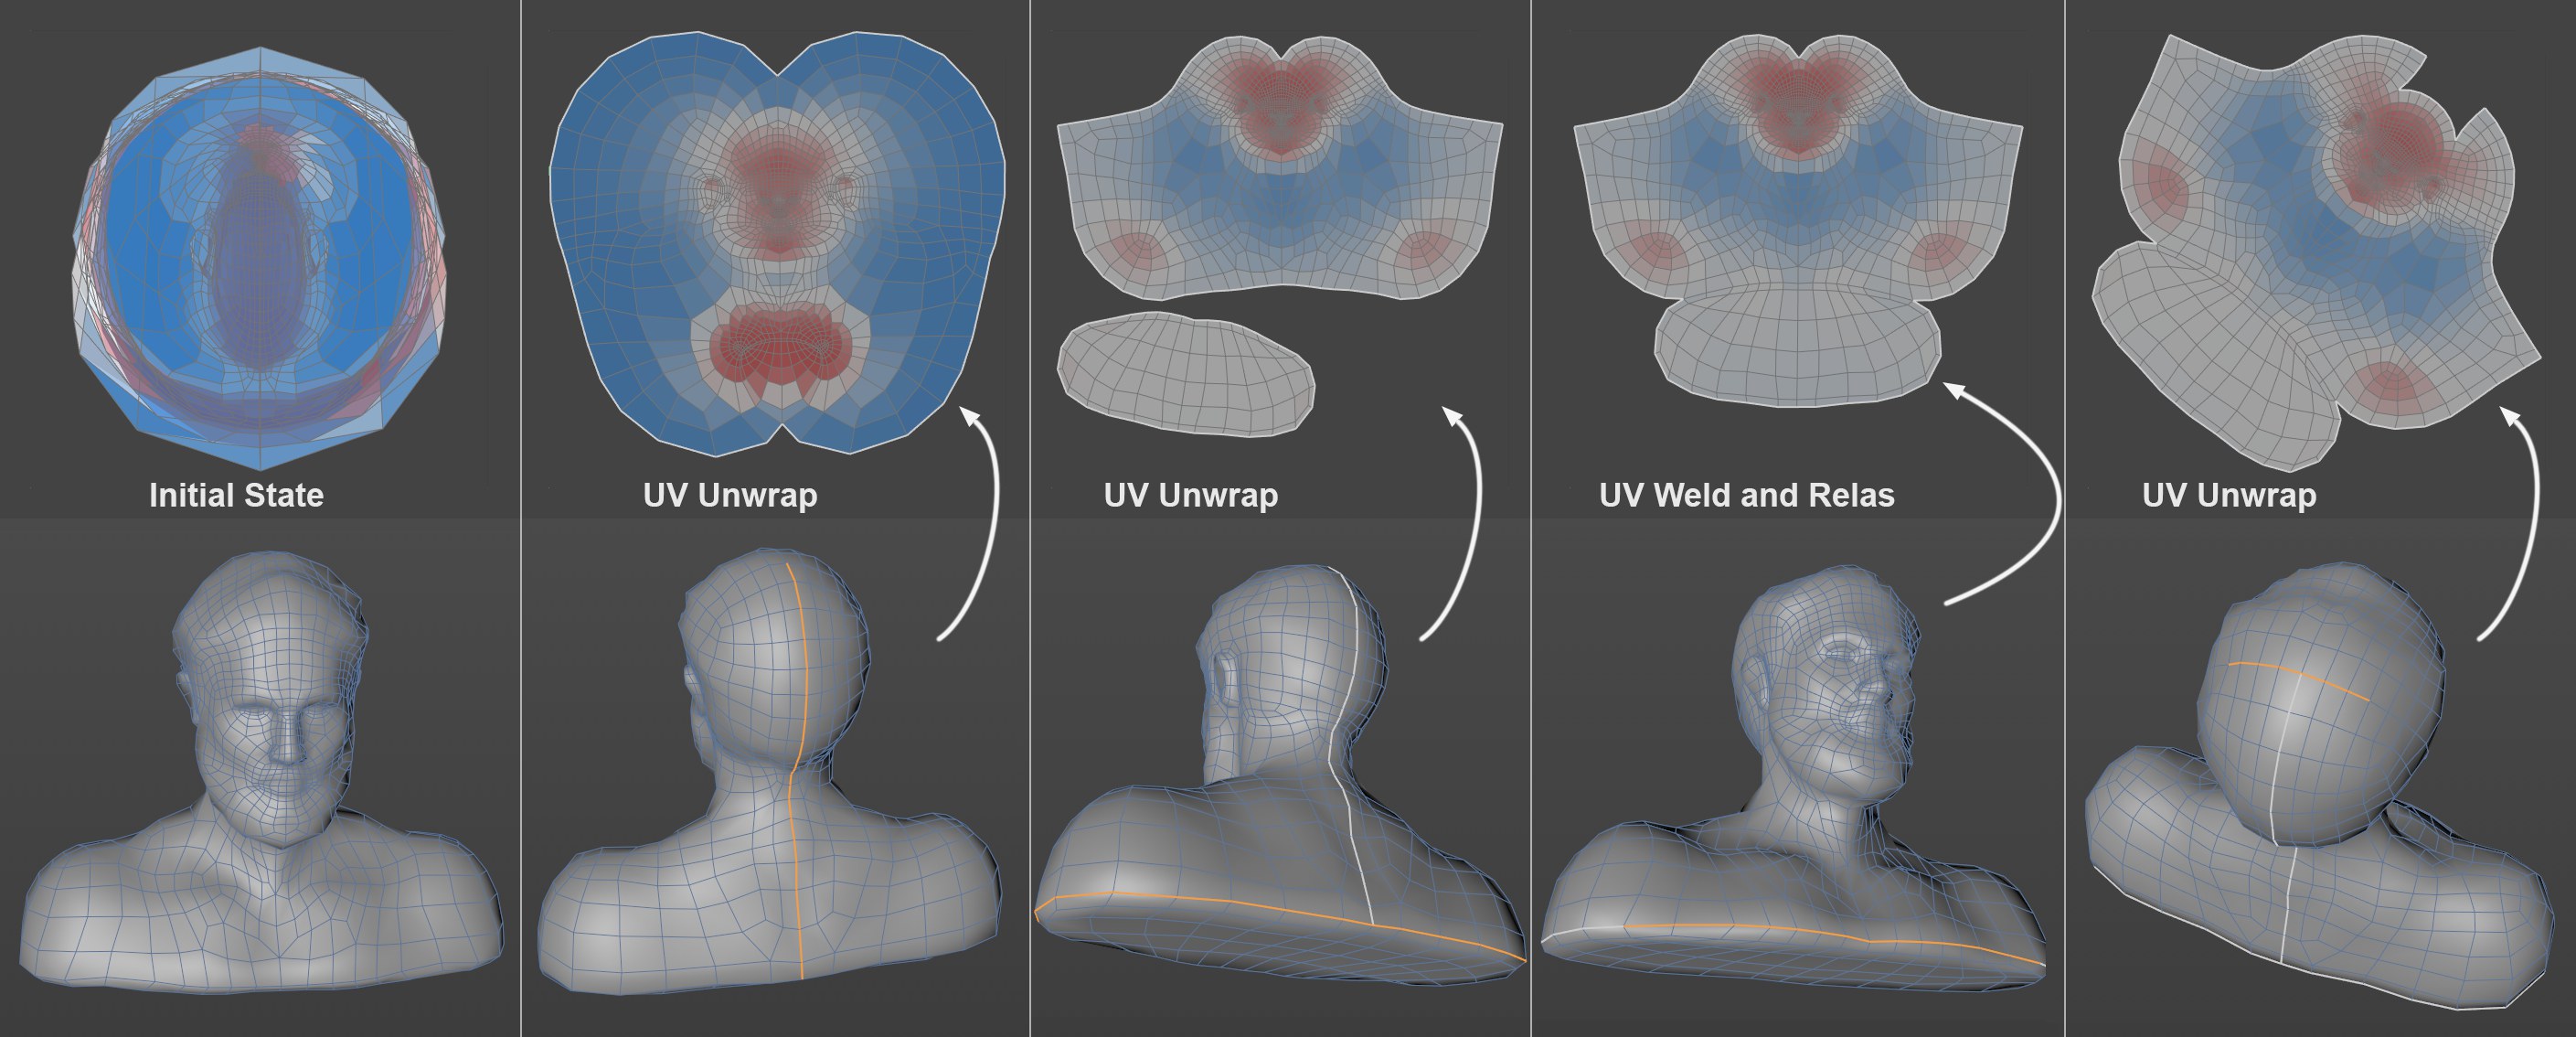
 A bust with a Shrink projection is assigned edge
selections multiple times, then unwrapped using UV Unwrap. The UV Weld and Relax
command can be used to add UV Islands. The new Mirror Selection command can save
you a lot of clicks (however, not shown here).
UV Unwrap also works in conjunction with edge selections that are used as UV Seams. The UV mesh is opened and the edge selections, unwrapped, relaxed and re-arranged. This procedure might sound familiar to you. In principle, the same happens with the UV Relax command. UV Unwrap includes all of this in a single command, which makes the process much simpler and saves you a lot of clicks. The UV mesh relaxation is done using the ABF algorithm.
In Use Polygon mode, congruent selections will be seen as islands (and internally an edge selection will be placed around the islands) and unwrapped separately.
Note that the command does not work with complete UV meshes that do not have a border, e.g., as can be the case with Shrink, Flat and Frontal projections on closed volumes. If, on the other hand, you only select a part of the mesh - which will then have borders - the algorithm will work.
- Good results can be achieved with organic objects if the original projection is done using Frontal, Flat or Shrink projection and then defining the UV Seams using edge selections. It can help to try out various projection types (e.g., different Frontal projections) to get the best results for UV Unwrap.
- Imagine a T-Rex dinosaur, for example, (can be found in the Content Browser). Good results can be expected here if you first apply a Frontal projection, then define the edge seams and then unwrap the extremities individually: e.g., make an Edge Loop selection at the top of the left leg, then an edge selection from the loop at the back of the leg down to the foot, then branch out from the bottom of the feet to each toe and use this cut to help unwrap. Then you can turn to the right arm, for example and so on.
The command has the following options:
- Use Polygon Selection: If a polygon selection exists, the algorithm will be restricted to this selection if this option is enabled. Otherwise the complete UV mesh will be edited (even if no polygons are selected). In Use Polygon mode, this option is grayed out. The polygon selection will be treated as a UV island - it will be separated from the rest of the UV mesh.
- Add Pin Selection: Enable this option if points should be fixed to the UV surface for parts of the algorithm (see also Add Pin Selection). This fixation only applies to the internal relaxation step and not for the weld process or the final realignment (enabled Auto Realign) option. In the end, UV Pins will not stay put. An example of how the fixation process works for relaxation can be seen here.
- Auto Realign: After the unwrapping and relaxing steps, the UV Islands involved will be aligned as efficiently and closely as possible in the UV Editor work area and, if possible, without any overlapping. Otherwise the new UV Islands will be stacked more-or-less over one another and will not lie within the assigned UV tile.