Effectors
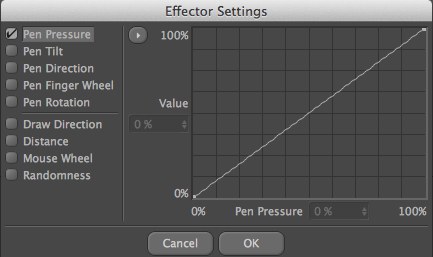
You can enable an effector for numerous brush settings, including the Sculpting brushes. To open the effector for a parameter, click the blue circle next to the parameter’s name. If the circle is filled, it means the parameter has an effector enabled; if the circle is not filled, no effectors are enabled for the parameter.
An effector enables you to change the parameter dynamically by means of a specified input method. For example, you can use the pen pressure to change the brush size while you paint. Most of the input methods have a graph that you can edit to fine-tune its behavior.
Nine different input methods are available. You can assign as many of the methods as you wish to the same effector. For example, you can change the brush size value using the pen finger wheel as well as the distance. Also, you can use the same input method with more than one effector. For example, you can change the brush Size and Pressure values using the pen pressure.
Pen Pressure
 Several important Effectors and how they are applied.
This adjusts the setting based on how hard you push down the pen on the graphics tablet. The graph to the right defines exactly how this input method affects the setting (the graph is straight by default).
Pen Tilt
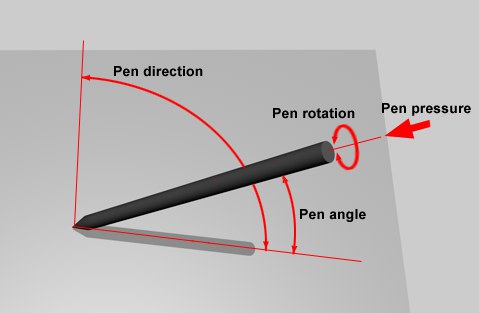
This method controls the setting based on how you tilt the pen. If the pen is at a right-angle to the graphics tablet, the tilt is 0˚. If the pen is resting on the tablet, the tilt is 90˚. The graph to the right defines exactly how this input method affects the setting (the graph is straight by default).
Pen Direction
This is the direction in which the pen is pointed, e.g., from upper right to lower left when viewing the tablet directly from above.
Pen Finger Wheel
This adjusts the setting based on the angle of the finger wheel. The graph to the right defines exactly how this input method affects the setting (the graph is straight by default).
Draw Direction
This method changes the parameter based on the direction of your brushstroke. For example, if you activate this input method for the Rot. effector, the texture will rotate automatically to follow your brushstroke. The graph to the right defines exactly how this input method affects the setting (the graph is straight by default).
You can create some interesting effects with this function, especially if you assign it to the Rotation brush setting. For example, choose a rectangular brush, set Spacing to about 130% and set Rotation to 90˚. Assign Draw Direction to the Rotation brush setting to create the effect shown above.

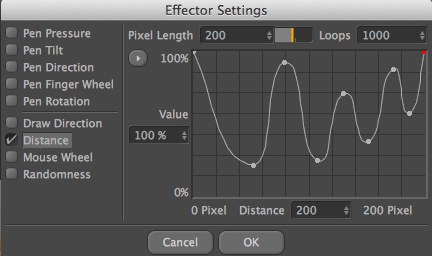
Distance
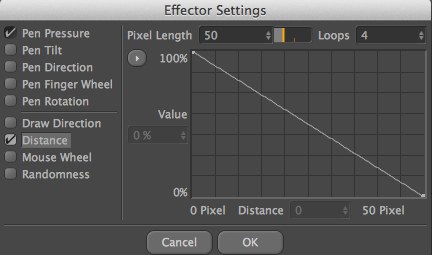
This function’s speciality is fading brushstrokes — assign Distance to the Pressure brush setting and your brushstrokes will fade gradually. Pixel Length defines the effector’s area of influence.
For example, if the Pixel Length is set to 200 the curve will be evaluated over the first 200 pixels of the brushstroke. So, if the default (straight) curve is used with the example, the Pressure will be 100% at the start of the brushstroke and 0% by the time the stroke is 200 pixels long.
You can also enter a value in the Loops box. This determines the maximum number of times the curve can be repeated if the brushstroke is longer than the Pixel Length value.

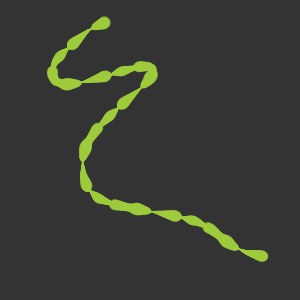
You can also use Distance to create wobbly lines. To add a wobble to your brushstroke, assign Distance to the Size brush setting and define a curve similar to the one below. Note the large number of loops in the example. This lets you paint (almost) as long a brushstroke as you wish without the wobble effect diminishing.
Mouse Wheel
Changes the setting based on the angle of the mouse wheel. The graph to the right defines exactly how this input method affects the setting (the graph is straight by default). For example, if you assign this to the Pressure brush setting, you can use the mouse wheel to adjust the brush pressure while you paint with the mouse. Alternatively, you may prefer to use both hands: one hand paints with a graphics pen while the other uses the mouse wheel to adjust the Size or Pressure brush setting.
Pen Rotation
The pen’s angle of rotation (i.e. the angle of rotation around the pen’s center-line (roll)axis.) will be passed on to the selected pen parameter in accordance with the defined curve. So, what can this be used for? Surely you are familiar with those luminous highlighter pens with the squared off tip. Rotating sich a pen around its center-line axis changes the applied stroke.
Randomness
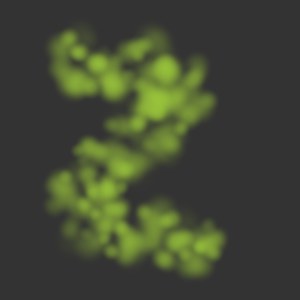
This function assigns random values to the setting. You can specify minimum and maximum values (Min and Max). For example, suppose you have set Size to 50 pixels. In the effector for Randomness, you leave the Min and Max values set to 0% and 100% respectively. If you paint with this brush, the Size will alter randomly between 0 and 50 pixels. If on the other hand you set Min to 50% and leave Max at 100%, the width of the brushstroke will vary between 25 and 50 pixels.
The effect above was achieved by assigning Randomness to the Size, Pressure, Hardness and Jitter brush settings.