Command Manager
![]()
The Command Manager contains all Cinema 4D commands. Commands contained in the Command Palette can be linked to custom Icon Palettes, menus or even directly to the HUD in the editor view. Keyboard shortcuts can also be defined.
- Keyboard shortcut: Keyboard keys pressed in combination to execute a particular command.
- Hotkeys: A key that must remain pressed while the mouse is moved (e.g., the 1-key to move the camera).
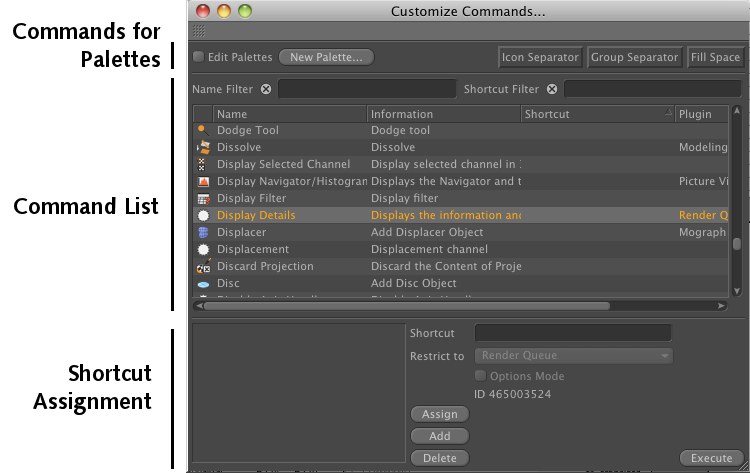
The Command Manager consists of three parts:
- The items required in order to add commands to given palettes.
- A list of all commands, including two filters for managing the numerous commands.
- The items necessary for creating corresponding keyboard shortcuts.
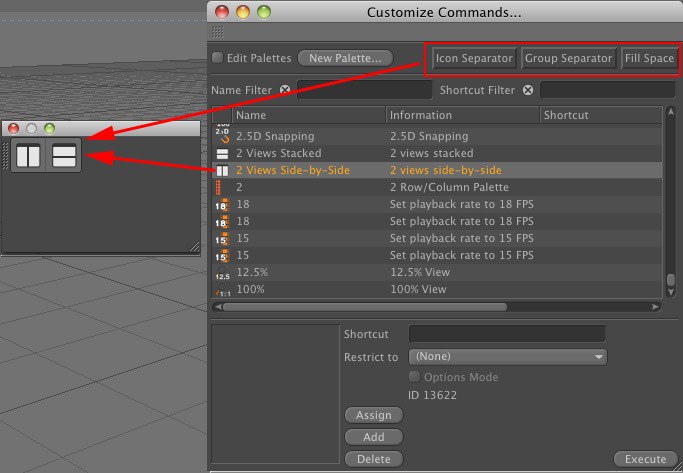
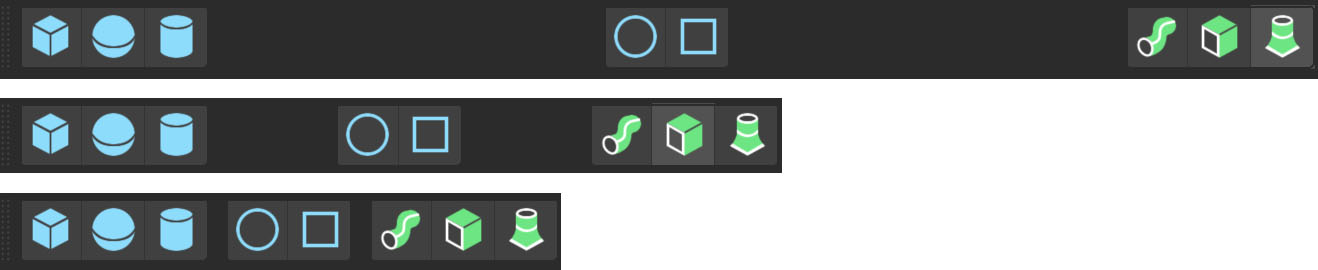
If you want to assign a command to a particular palette, simply drag the command onto the corresponding palette. The Icon Separator 1 and Icon Separator 2 buttons can be dragged onto the palettes, between the commands, in order to visually separate the commands.
Activate the Edit Palettes option if you want to rearrange or delete (double-click) palette commands or separators using drag & drop. Selecting New Palette will create a new, empty palette.
Use the Fill Space command to create such an icon group (vertical or horizontal), which will automatically be sized according to the respective icon group but at least as large as Group Separator 2. This makes it possible to create left or right aligned icon groups:
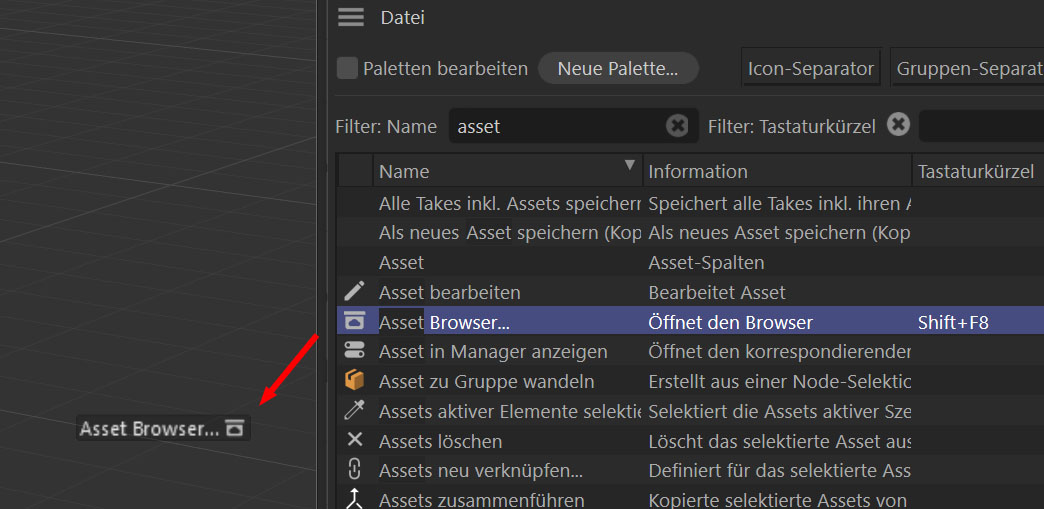
Two filters are available. Each will display only items that contain part or all of an entry made into the corresponding filter’s text field. These filters can be used to quickly locate commands or find out which keyboard shortcuts have already been assigned. Search entries can be cleared by clicking on the x next to the respective filter name. All commands and keyboard shortcuts will then be displayed (providing the alternate filter’s search field is also empty).
In addition to the names and icons (if applicable) of commands, the commands list also includes the name of the feature to which a given command may correspond, any keyboard short cut assigned, the type of command and the corresponding help text. Since this list is for reference purposes only, only the keyboard shortcut itself can be edited. Clicking on the title of a given row at the top of the list will arrange the list accordingly.
The keyboard shortcut assigned to a given command will be displayed at the lower left of the Command Manager when selected.
Commands as HUD elements
Commands can also be dragged directly into the editor view. The command, including its icon (can be hidden) will then be displayed in the HUD. Simply click on the HUD command to execute it.
The Concept Behind Keyboard Shortcuts in Cinema 4D
Each command can be assigned any number of keyboard shortcuts. Furthermore, the same keyboard shortcut can be assigned to different commands, in which case the commands will be executed according to the window over which the cursor currently lies or which window is currently active (the Shortcut option in the Preferences’ Interface menu must be active).
Global and local commands are available:
- Global commands can be applied with the same effect anywhere in Cinema 4D (e.g., creating a cube).
- Local commands apply only to a given Manager such as the Timeline (e.g., Delete Unused Tracks, which would be useless in the Material Manager).
Each Manager can be assigned its very own set of shortcuts which are executed independently of all other Managers or global shortcuts (e.g., Ctrl+p can execute a given command globally, yet execute an entirely different command in the Timeline).
Global shortcuts can be limited in their globalism by restricting them to specific Managers. As long as the cursor is placed over the corresponding window, these restricted shortcuts will have priority over global shortcuts of the same combination.
If all of this confuses you a little, here’s a simple, albeit useless, example:
By default, the 1 key is assigned to the Move Camera command. The 1 key can also be assigned to execute a different function (e.g., create a new material) and restricted to the Material Manager:
-
Locate and select the New Material command in the Command Manager.
-
Click in the Shortcut text field and press the 1 key. Click on the Restrict To button to open a list of Managers to which this (or any other) command can be restricted.
-
Select the Material Manager.
- Click on Add and you are done. You have just created a local command for the Material Manager.
Now, if you press the 1 key while your cursor lies over the Material Manager a new material will be created (i.e. the local New Material command was executed, not the global Move Camera command).
The following options are available in the Command Manager’s shortcut area:
Displays a list of shortcuts defined for the selected command. Select the shortcut to edit or delete it.
Click in this field and press the corresponding keyboard key for the shortcut you want to set. The key pressed will be displayed in this field but will not yet be assigned. Assign the selected shortcut by clicking on Add or Assign. Shortcuts can consist of a single keystroke, a combination of multiple keystrokes (e.g., A~A when the a-key is pressed quickly in succession. See below), a key in combination of one of the following: Ctrl/Cmd, Shift, ALT or a combination of these keys themselves.
Global shortcuts that are not restricted to a specific Manager or share the same name and are restricted to a single Manager cannot be assigned the same combination of keys. If this occurs, an error message will appear. Clicking on Yes will overwrite the existing shortcut.
The following shortcuts can be incorporated for the mouse:
- Middle mouse button MMB
- 4th mouse button MX1
- 5th mouse button MX2
Furthermore, keyboard shortcuts used for creating objects (Ctrl/Cmd, Shift, ALT for re-arranging objects in the hierarchy - see also Objects), will still be observed. If, for example, you create an Extrude object using the ALT+U keyboard shortcut, the new Extrude object will be created as a Parent object of the currently selected object (e.g., a Spline).
Select a Manager from the list that appears to which a given command should be restricted. Select none if the command should work globally. If any of the items on the list is grayed out the selected command will not function in conjunction with that particular Manager (i.e. the command selected is already a local command).
Here you will find the Tool Overwrite command, which can be used to overwrite an existing keyboard shortcut with a hotkey. This command is less relevant to you as a user but uses it to fine-tune existing hotkeys.
Numerous commands are available (mainly from the mesh menus) that have multiple options. Here you can define if a given command should display these options in a small dialog window every time its called up or if the command should be executed using the currently defined settings (see also Mesh menu).
A currently selected shortcut can be overwritten by a new one once Assign is clicked.
Adds the current shortcut to the existing shortcuts without overwriting the selected shortcut.
Deletes the currently selected shortcut.
Executes the currently selected shortcut. You can use this option to see if you selected the correct shortcut from the thousands available.
Shortcut hierarchies
Shortcut hierarchies are called by pressing two or more keys one after the other. When you press the first key a menu will appear that lists all commands in the hierarchy of the key that you pressed. Press the second key to call the desired command. You can freely configure the short-cut hierarchies.
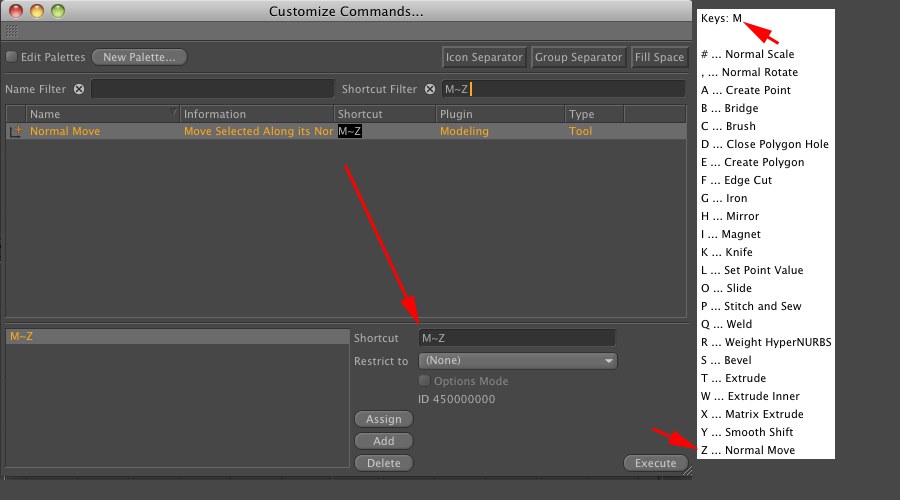 Assigning a shortcut hierarchy (main) and calling the shortcut (inset).
Click in the lower keyboard shortcut box and press two or more keys one after the other. A tilde (~) will be placed between the keys. Click on the Assign button.