Effector
Use this setting to adjust the overall strength of the effect. Values of less than 0% and greater than 100% can be entered.
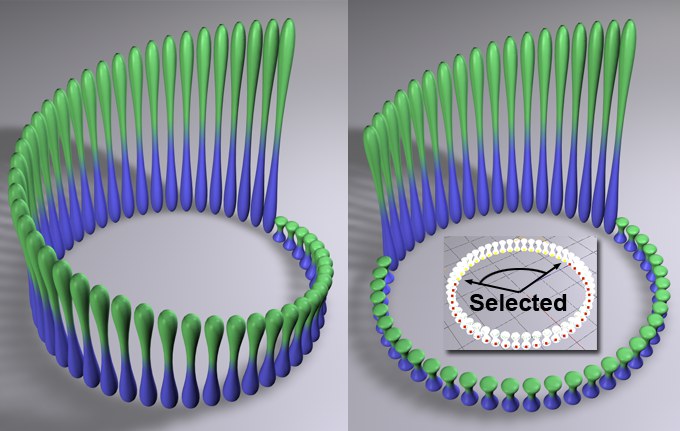 At left a Step Effector without a selection, at right with a selection.
A MoGraph Selection or MoGraph Weightmap tag can be dragged into this field or placed automatically by selecting a Cloner Object and an existing MoGraph selection/weighting, and creating an Effector.
The Effector will then work as follows, depending on the tag’s settings:
- MoGraph Selection tag: Will only affect the clones belonging to the selection.
- MoGraph Weightmap tag: The clone weighting (values between 0% and 100%) saved in the tag will be multiplied with the effector strength.
As is the case with all Effectors, this slider is used to define the overall strength of the Effector. Values less than 0% and greater than 100% can also be defined.
 Min/Max
Use these settings to increase or decrease internal range values.
Note also the Remapping settings for the Layers in the Field list. Use this Field functionality as your preferred method since it’s more powerful and easier to understand in combination with other Layers.
Use these sliders to limit or expand the internal range of values defined for the transformations.
S.Y is set to 30. If Minimum and Maximum have been set to 0% and 100%, respectively, the clones will be scaled to 0 during times of absolute silence and to 30 when the frequency is loudest. If Minimum and Maximum are set to 50% and 80%, respectively, the clones will consequently be scaled between 15 (silent) and 26 (loud). Values less than 0% and greater than 100% can also be defined.
Sound Track
Clicking on the arrow button will make the Load Sound command available with which you can load a sound file from outside of Cinema 4D. If you play the animation, the loaded sound file will be played and the volume/amplitude distribution will be displayed live by the Amplitude Graph.
The sound formats that can be loaded are listed under Sound Formats.
Distribution
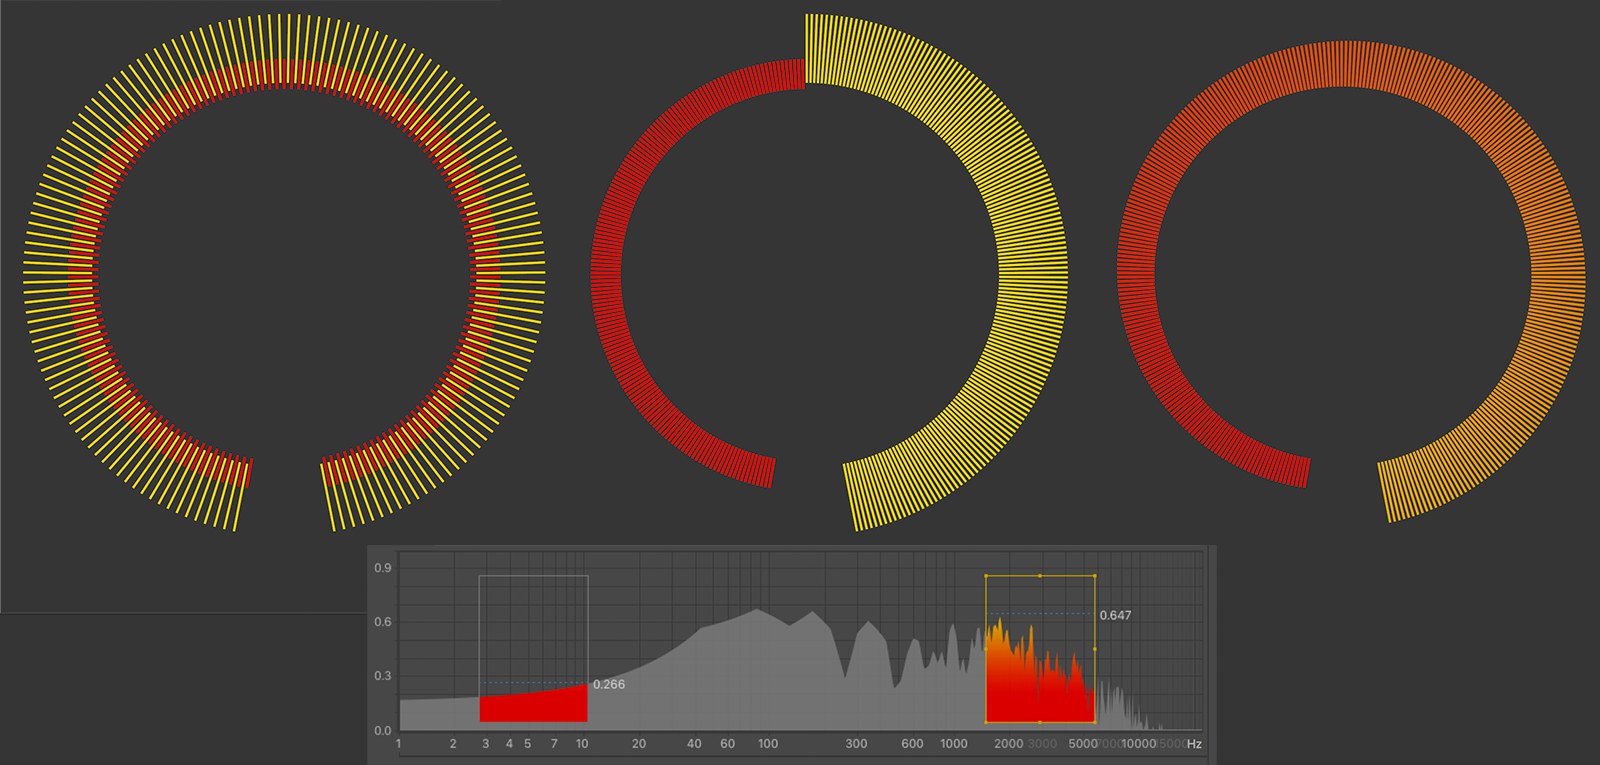 A circular arrangement of clones affected by a Sound Effector with Distribution set to Iterate, Distribute and Blend (each with the two sample ranges shown).
Since multiple Probe ranges can be defined in the Amplitude Graph, you have to define which Probe range should affect which clones.
You can select from the following:
Iterate
The Probe ranges will affect the clones alternately. This will be based on their buffer numbers. Example: 2 Probe ranges exist; clone #0 is affected by Probe range 1, #1 by Probe range 2, #3 by Probe range 1 and so on.
Distribute
Each Probe range will latch on to and affect a coherent part of the clones (with consecutive buffer numbers). For 2 Probe ranges, the first will affect the first half and the second the second half of the clones.
Blend
The different effects of the Probe ranges will be blended steplessly.
Amplitude/Frequency Graph
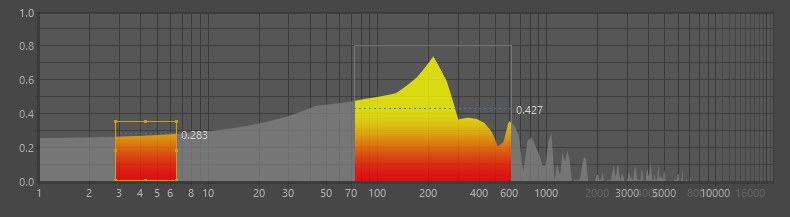 2 Probe ranges, the one on the left is selected.
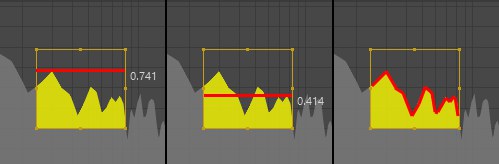
The Amplitude Graph shows the current amplitude/volume progression, which is recalculated for each animation frame. The rectangles represent the Probe ranges, which each cover a specific amplitude/volume range from which the Effector ascertains the volume values for its effect. For the Sampling options Peak and Average, the ascertained effect will be displayed numerically.
The Effector only recognizes volume that lies within the respective Probe range (exception: Clamp option). The horizontal Probe range borders define the minimum and maximum range of the effect.
The following hotkeys can be used in the graph field:
- 1: the view can be moved
- 2 or mouse wheel: the view can be scaled
Probe ranges can be created in the following ways:
- Cmd/Ctrl+RMB+drag a rectangle
- Cmd/Ctrl+LMB+drag on an existing Probe range to copy it
- By clicking on the Add Probe button
Any number of Probe ranges can be created.
Selected Probe ranges’ properties are displayed in the Probe Properties menu. A selected Probe has several handles that can be used to adjust the frequency and loudness rages. If multiple Probes are selected, a common handle will be displayed with which all selected Probe ranges can be edited simultaneously. Click and drag a Probe to move it.
Furthermore, (if Sampling is set to Peak or Average)) each Probe displays the currently ascertained Loudness value that is used to influence the Effector.
Probes can be selected by clicking on them or by dragging a rectangle around them. The hotkeys Shift and Cmd/Ctrl work as usual: add a selection; remove a selection. Click on an empty space to deselect all.
Selected Probes can be moved per drag & drop, and can be deleted by pressing the Del.
Add Probe
Each time this button is clicked, a Probe will be added (see above for interactive creation of Probe ranges).
Remove Probe
Deletes the selected Probe. If none is selected, one after the other will be deleted.
Frame All
If you zoom in to far into the Amplitude field, clicking on this button will zoom back out to display all Probes.
Logarithmic
This setting only affects the Amplitude graph’s display. Normally, amplitude is displayed logarithmically so the lower frequencies, which can be heard best by the human ear, are given more room than the higher frequencies. The amplitude display (0%) and the logarithmic display (100%) can be blended stepplessly.
This has no effect on the Effectors’ output.
Channels
If you have a stereo sound file, this setting can be used to define if both or only one channel should be taken into consideration by the Effector. Mono channels are not affected by this setting.
Gradient/Direction
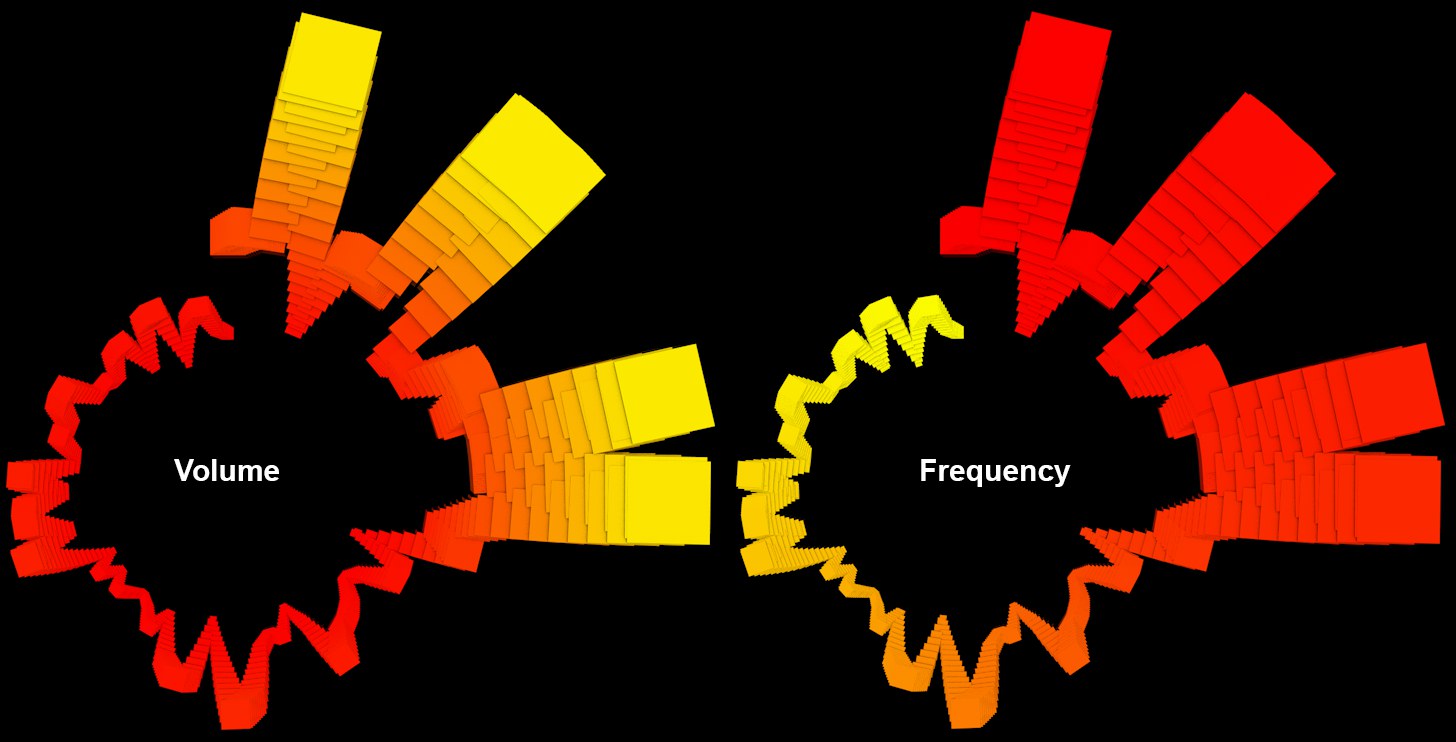 A radial cluster of clones jumps to the beat of the music and are colored according to their Direction.
Clones can be colored (set Color Mode to Effector Color). This gradient’s colors can be distributed according to either loudness or frequency.
An individual color gradient can be assigned to each Probe range In the Probe Properties menu. The gradient used here is a default gradient for all newly created Probes.
Freeze Value
This option can be enabled to freeze the animation at a specific location. The clone state will not change when the animation is played again.
The following settings apply to the currently selected Probes’ properties.
Low Frequency
High Frequency
Low Loudness
High Loudness
These four values define the 4 sides of the Probe in the Amplitude graph. They will change automatically if the Probe range is modified with the mouse but can also be defined here manually.
Sampling
This setting defines the value that the Probe passes on to the Effector for processing:
- Peak: The highest value within the Probe. Effectors will affect all clones uniformly.
- Average: The average value within the Probe range. Effectors will affect all clones uniformly.
- Step: The curve profile within the Probe range will be ascertained and values will be distributed to the individual clones accordingly. This option should be used if you want to use clones to reconstruct frequency progressions.
Decay
If this value is set to 0, the Effector evaluate the frequencies and loudness in real-time, i.e., the Effector’s effect can change quickly and significantly in accordance with the sound file. The larger the Decay value, the more subdued the declining Effector effect will be after a maximum volume level.
Strength
This setting defines the strength of an individual Effector’s effect per Probe range. Negative values invert the Probe range’s effect.
Clamp
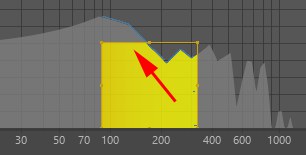
This option defines what should happen with the loudness sections that are larger than the top-most Probe range limit (as marked in the image above). If enabled, the effect will be cut off at this limit, i.e., no additional effect will take place for volume in excess of this limit. If this option is disabled, the Probe range’s effect will also take effect proportionally to the volume, even beyond this limit.
Color
Use this setting to define an individual color for Probe ranges (see also Gradient/Direction). You can select from the following options:
- Default: The Probe range will assume the gradient color defined above
- Custom Color: Lets you assign a uniform color to all clones that control the selected Probe range using the color swatch.
- Custom Gradient: Each Probe range can be assigned a unique gradient (Probe range: color gradient).