Object Properties
When in this mode, a Cloner’s children will be assigned to other objects. There are two methods that can be used to tell the Cloner on which object clones should be generated:
- Make the Cloner Object a child of the shaping object.
- Place the shaping object into the Object text field.
If both of the above-mentioned conditions are true, #2 will receive priority.
The clones will be assigned as follows:
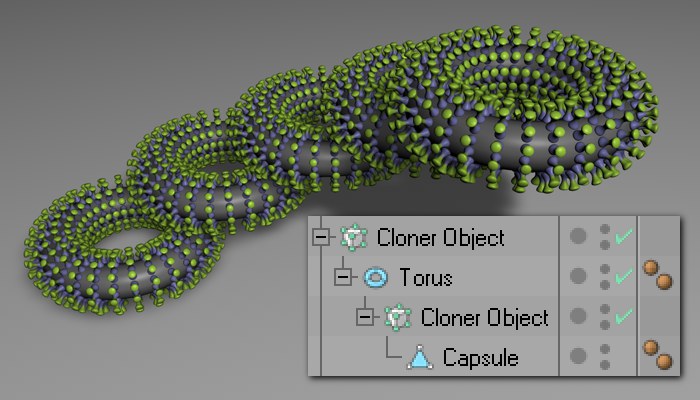
- Polygonal objects: Vertices, edges, polygon center, randomly arranged onto an object’s surface, selections.
- Splines: Along the splines.
- Particle emitters or Thinking Particles particle groups: Onto the particles.
- Matrix Objects: A clone will be positioned onto each vertex of the matrix.
When in this mode, a clone’s child objects will be arranged linearly (can also be curved), originating from the Cloner. The clone’s Position, Rotation and Scale settings can be modified which will cause the child objects to move accordingly.
Selecting this mode will arrange a clone’s child objects circularly around the center of the Cloner.
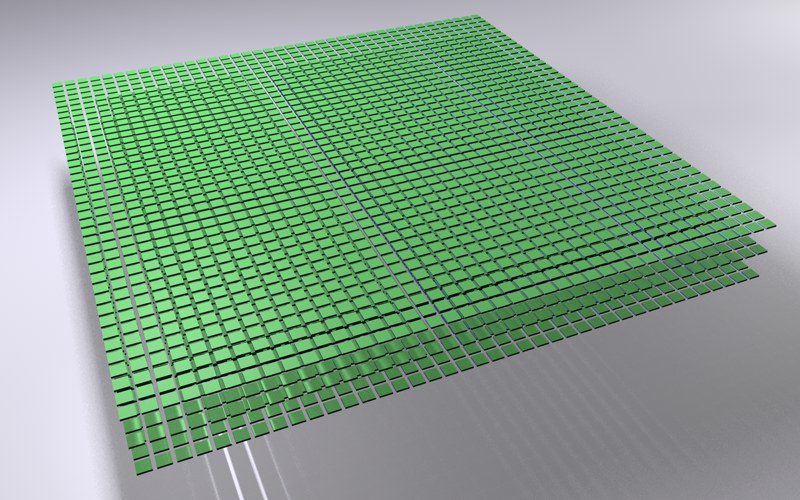
Selecting this mode will arrange a Cloner’s child objects in a grid-like manner. This can be used to achieve effects such as the one below:
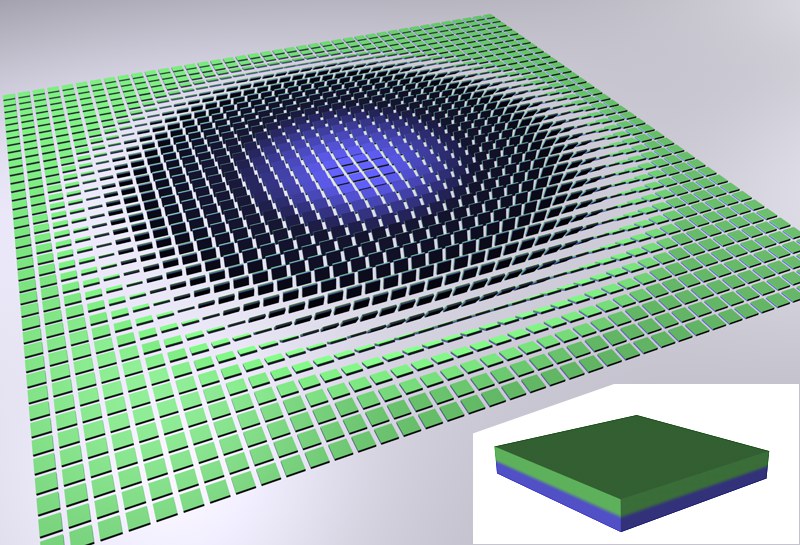 The object (insert) was cloned and its rotation varied in the Grid Array mode.
Some very nice effects can be achieved by letting an Effector fly through such an arrangement of clones.
Since using Grid Array can generate very many objects, thus slowing the editor view, the following Cinema 4D level of detail settings can be used:
- Editor view: Display / Level of Detail
- Display tag. Assign the tag to the Cloner.
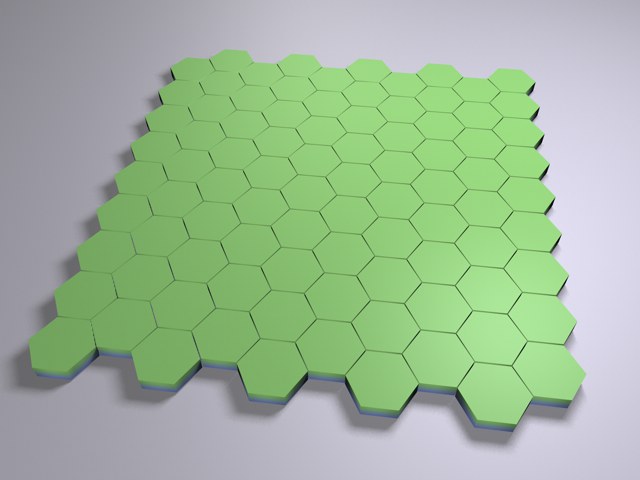
This mode creates a simple grid in which every other row is offset horizontally so individual clones are positioned at the center of the clone lying above it. A honeycomb pattern will be created, which can, for example, be used to create brick walls or similar patterns.
When in this mode, matrices will be created that are displayed as small cubes, but cannot be rendered. (these matrices can be seen as little coordinate systems whose orthogonal state will not be influenced by deformers).
So, what good are a bunch of little cubes that can’t be rendered?
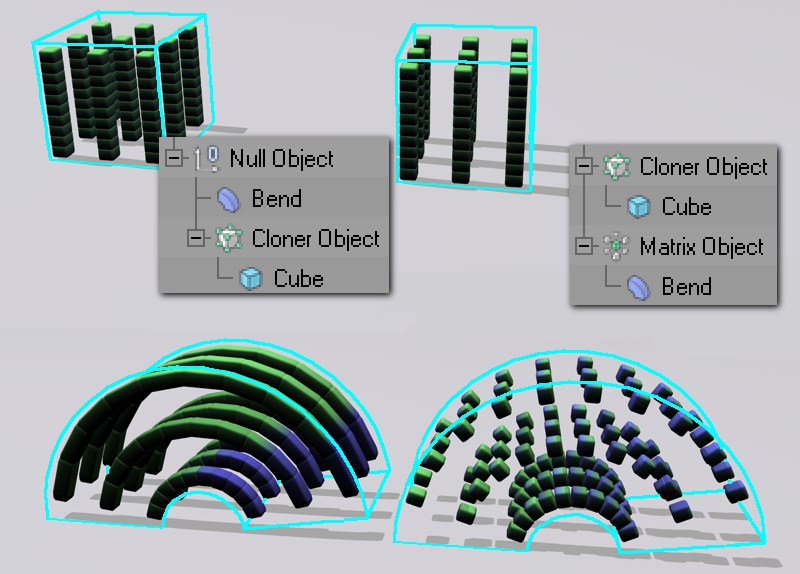 Top: Initial state. Bottom: Bend object applied.
Answer: A lot of good. In the image above, bend objects were used to affect clone arrangements. In both cases, the effect of position and rotation are the same. However, where no Matrix Object is applied, the Cloners will be distorted - which, in most cases, is an undesired effect. If the deformation object effects the Matrix Object, only position and rotation of the clones will be modified. No geometry will be distorted.
By also applying Cinema 4D deformation objects, another weapon in your clone-positioning arsenal can be added.
This is the option with which Thinking Particles can be brought into play. This option lets the Matrix Object act as an Emitter, letting clones be affected by Thinking Particles nodes and vice-versa. Particles will be created in the very first frame of animation.
Drag the particle group (from the Thinking Particles settings) that should be disrupted by the particles created by the Matrix Object into this field. Leave this field empty if the particles generated should be assigned to the All group.
Use this slider to define how much of the initial clone movement (e.g., from an animated Matrix Object) will be transferred onto the particles/clones.
- If this slider is set to 100%, clones and particles will be affected uniformly by TP-Nodes and MoGraph Effectors.
- If this slider is set to 0%, particles will not be affected by Effectors.
The function of the Follow setting can be compared with the PMotioninheritance TP-Node, the only difference being that the movement of the matrices/clones will be inherited. In doing so, the differences in speed of the matrices/clones is taken into account, allowing the TP Particles to continue moving freely based on the Thinking Particles nodes (e.g., if PWind was applied, its effect will be added to the movement of the matrices/clones).
Use this slider to define exactly how particles should come to lie on the actively changing position of the matrices/clones. If the slider is set to 100%, TP-Nodes will have no effect and the TP Particles will be completely constrained onto the matrices/clones. If this slider is set to 0%, the TP Particles will be able to move freely. The trick to using the Constrain setting is to effectively mix back and forth between matrices/clones and particles, i.e., letting TP-Nodes have influence and subsequently relinquishing control to MoGraph.
Normally this setting will result in a calming effect. If this setting is increased to 100% in the course of an animation, the clones will assume the position they would have if Generate were set from to Matrices Only.
If the matrix Thinking Particles functionality is viewed as an internal Effector and not as a separate object, these options define where the Thinking Particles Effector should be placed within the list of Effectors:
First on the list of Effectors.
Last on the list of Effectors.
The behavior of clones, as well as the visible limits of an Effector’s falloff in the editor view, is better discernable when Before Effectors has been selected. When in this mode, clones will in fact react in accordance with the visible falloff limits. If After Effectors has been selected, clones will only react if the Effector affects the Thinking Particle’s starting position (this effect will only be visible if the Effector’s falloff has not been set to Infinite).