Spline Mask
![]()
The Spline Mask is paramount to a Boole Object for splines (see your Cinema 4D reference manual). Use the Spline Mask to cut out, connect, etc. spline shapes. This works best when the splines are smooth and all in on the same plane.
This is a very good tool for quickly creating spline shapes. Spline Mask objects can be used everywhere where a normal spline can be used:
- Extrude object
- Sweep object, etc.
Furthermore, every (closed) spline shape can be displayed in polygon mode. A Spline Mask can be converted to a polygon object via the Make Editable or Current State to Object commands (Create Cap must be active).
A Spline Mask can be made a subordinate object of more than 2 splines. The target spline is always the first spline beneath the Spline Mask object:
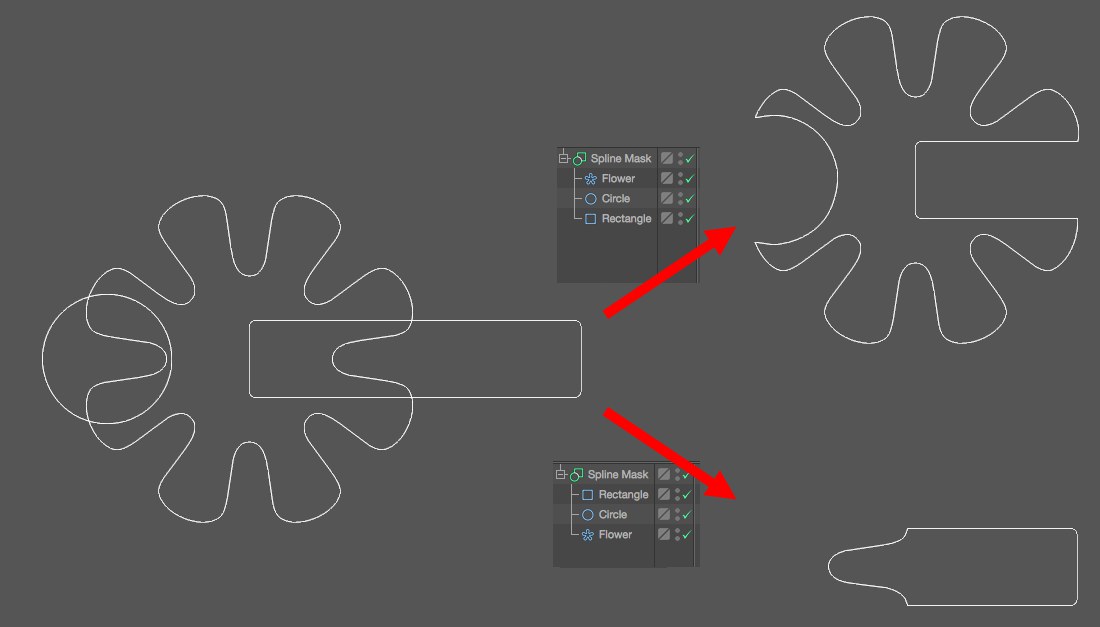 The Spline Mask’s first subordinate object is always the target spline (in this example Mode is set to A minus B). All further splines will be cut from the target spline.
For several modes - like the subtract modes - the target spline is important while for others (e.g., Union) the order of the subordinate splines is irrelevant.