Object Properties
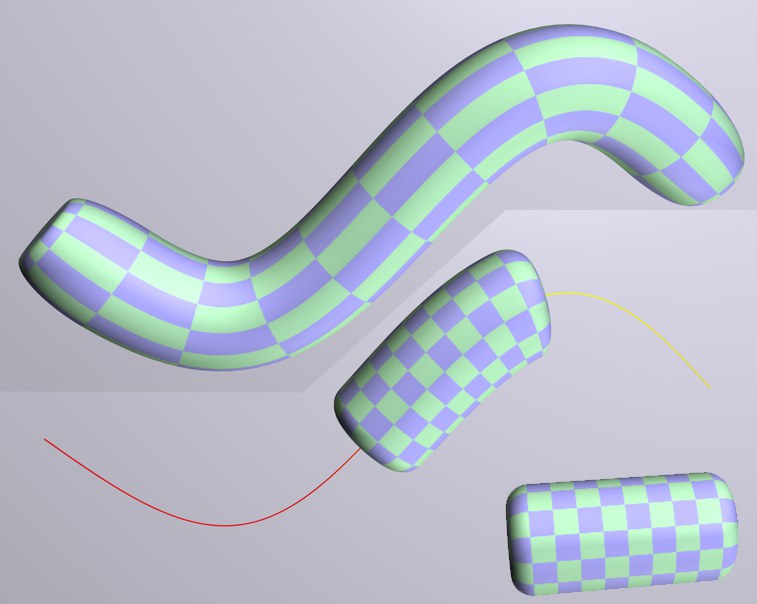
Place the spline (or spline primitive) along which an object should be deformed. The quality of the spline’s interpolation will have an effect on the quality of the deformations. The object to be deformed should also contain enough subdivisions to allow it to be deformed.
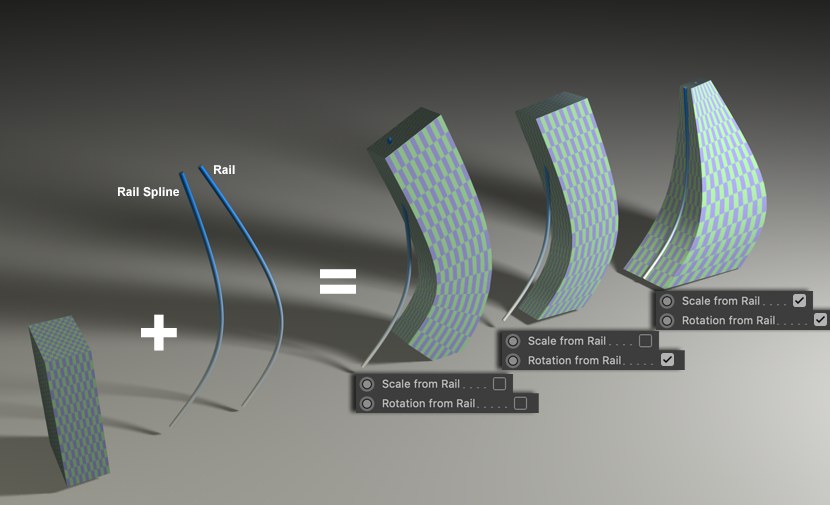
When using the Spline Wrap, an additional Spline (Rail) can be used as a boundary or guide. Simply drag the Spline you want to use as the Rail into this field.
The two options described below define how the object points will be positioned along the Spline.
One interesting application method is for the creation of text effects. The Offset value can be animated, which will cause the object to be deformed to quasi pass through the
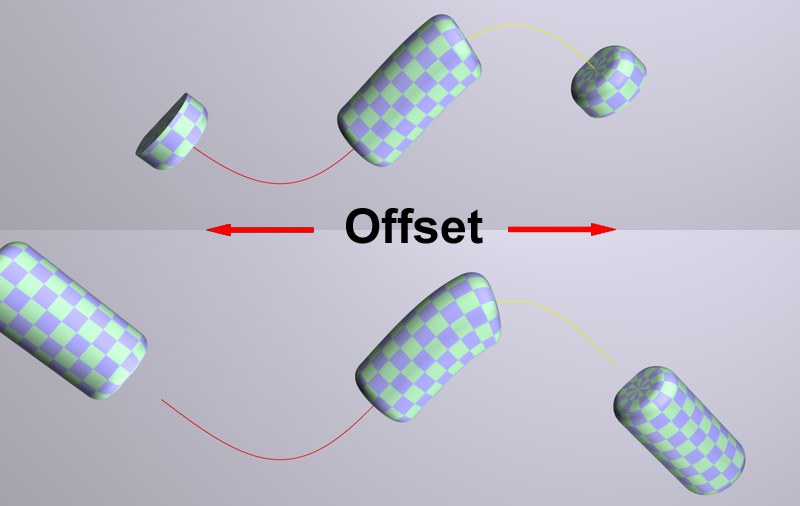
 An object’s deformation can be animated by using a Rail and animating the Offset value.
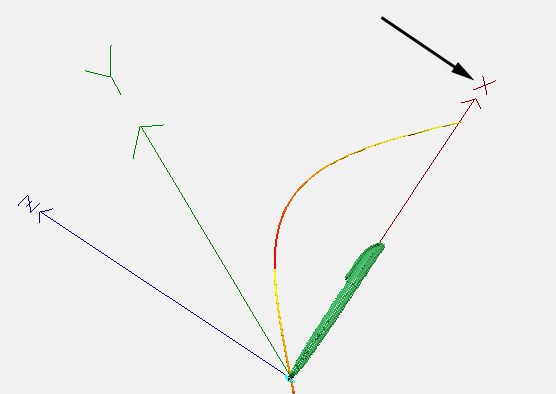 The pen is pointing in the X-direction of the world coordinate system. Set Axis to either +X or -X if the pen should be arranged along the length of the spline.
Imagine the axis as a direction in the world coordinate system that runs along the length of the Spline Wrap, passes through the original non-deformed object, and transfers object vertices onto that object. If you use an oblong-shaped object that would normally run along the length of the spline with its longitudinal axis, the object will point in a direction of the world coordinate system and Axis should be set accordingly.
Use this slider to adjust the overall strength of the deformation. In most cases, the slider can stay at 100%.
Use this slider to move the deformed object along the spline. Values of less than 0% and greater than 100% can also be defined - this can lead to interesting effects, especially when End Mode is set to Extend.
Use these sliders to define over which stretch of spline the deformations should take place. For example, if From is set to 0% and To to 100%, the deformed object will be stretched along the entire length of the spline.
 Modes from top to bottom: Fit Spline; Keep Length; Spline Wrap turned off.
Depending on which option Mode has been set to, 0% (From) and 100% (To) will have the following results:
The object to be deformed will be stretched to fit along the length of the spline.
The object to be deformed will maintain its length with regard to the above-mentioned axis.
 Top to bottom: Clamp mode; Extend mode.
The End Mode options have the following effect when an object is moved along the length of a spline via the Offset slider:
The object will end at the ends of the spline.
The object will extend beyond the ends of the spline in accordance with the direction of the respective end, and will not be deformed further.
 Size
Size
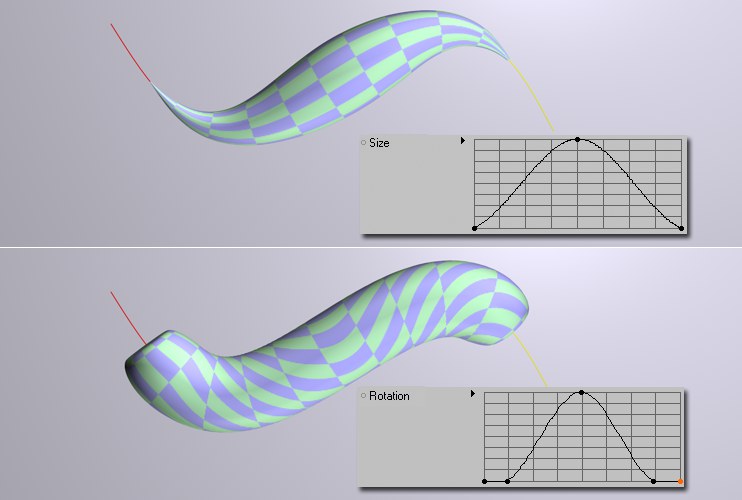 Size and Scale examples.
Use these function graphs to define the apportionment of size along the length of the deformed object. Scaling occurs on a plane vertical to the spline tangent. The graph’s X axis reflects the length of the deformed object, i.e., if the object is moved along the spline via Offset, its scaling will remain constant (in contrast to the Spline Size graph).
Use this slider to adjust the strength of the spline scaling.
Use this function graph to define the change in scaling of the deformed object over the length of the spline, i.e., if the object moves along the length of the spline via an Offset variation, the objects scaling will be modified dynamically.
Use this setting to adjust the spline size strength.
Rotation
If enabled, the points that lie on planes perpendicular to the Spline will be aligned accordingly, i.e., the (imaginary) planes will point to the correlating Rail Spline position. This can be seen in the first Rail example above: The bottom edge of the deformed cube in the center points to the beginning of the Rail Spline. In contrast, the cube to its left, whose bottom edge lies on a plane perpendicular to the beginning of the Spline.
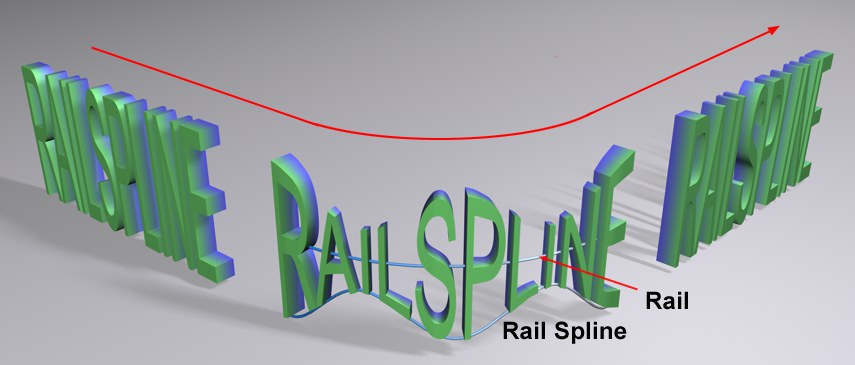
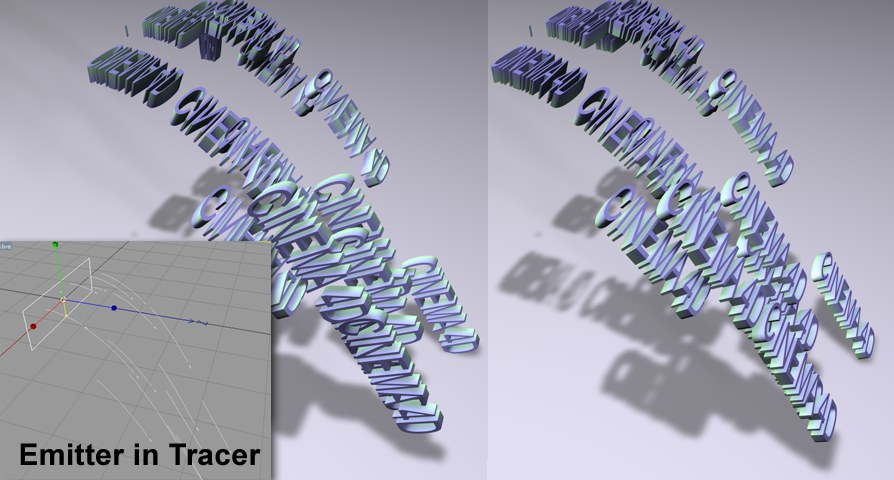 Spline Wrap is used to deform a Text Object. The splines are generated with the help of a Tracer Object. The text at left looks far less dynamic than the text at right, to which Up Vector was applied.
Use this setting to make the object deformation more dynamic. Enter 1 in one of the available fields.
Use this setting to rotate (bank) the deformed object uniformly around its long axis.
Use this graph to twist the object into itself along its length. The strength of this twisting is defined by the following setting, Rotation Strength.
Use this slider to define the strength of the Rotation effect described above.
Use this graph to twist a given object along its length, i.e., if the object is moved along the length of the spline using Offset, the degree of twisting will vary according to position.
Spline Rotation Strength[-∞..+∞%]
Use this slider to adjust the strength of the Spline Rotation described above.
Using this option, the deformed object can be made to match one side of the Rail Spline exactly.
Planes lying perpendicular to the Rail will be scaled along with the points lying on it. The object will be wrapped evenly in a radial direction around the Rail.
The Spline Wrap’s bounding box has numerous additional settings compared to other Deformer objects.
The bounding box is visible and can be moved and scaled freely and interactively in the Viewport. However, it will usually be automatically adapted to the size and location of a given object. An Axis is also displayed within the bounding box along which the object that is deformed will follow the spline.
The bounding box can be moved and scaled interactively in the Viewport. This is ideal for fine-tuning the bounding box - with the Spline Wrap disabled (see also below regarding re-positioning of bounding boxes.
Unwanted effects can occur with regard to shared bounding boxes when opening a scene on a different system or when rendering using Team Render (especially when several objects are deformed in the course of a given animation).
Often, objects can end up jumping, animated objects in particular, as in the following example:
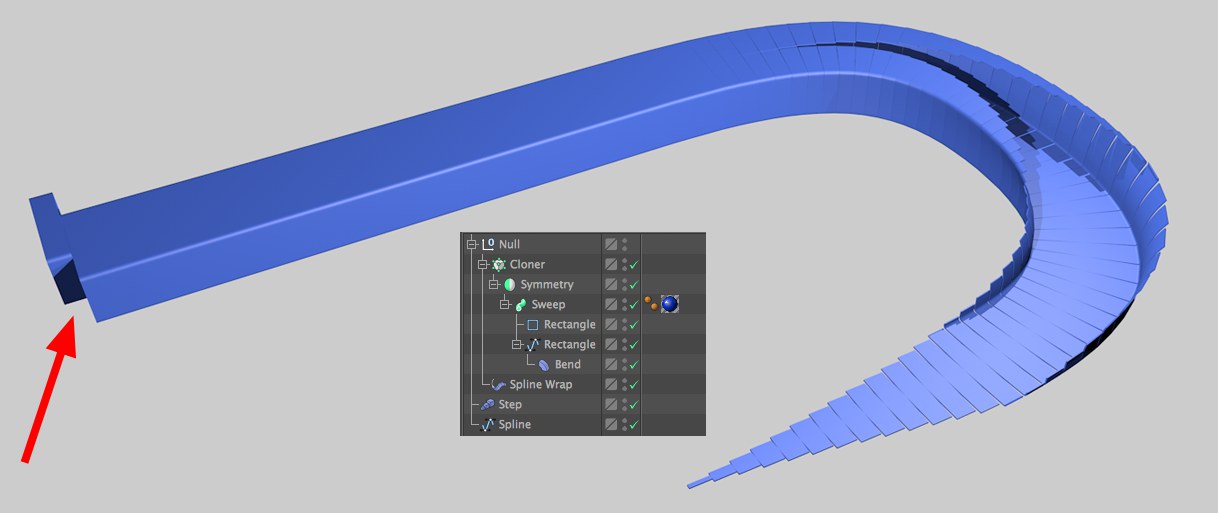 A common error when Fix Bounding Box is disabled
A shared bounding box is a virtual cube that encompasses and defines all objects deformed by the Spline Wrap.
When these objects are animated the bounding box will change accordingly and results in a change of position of the deformed objects. If this option is active, a fixed bounding box will be used that will keep the deformed objects in place.
The values for these settings will automatically be filled out if the Fix Bounding Box option is enabled. The bounding box will then automatically match the maximum dimensions of the object (incl. the issues pictured above) affected by the Spline Wrap. As soon as a value is modified (either manually or interactively in the Viewport), a fixed bounding box will be used.
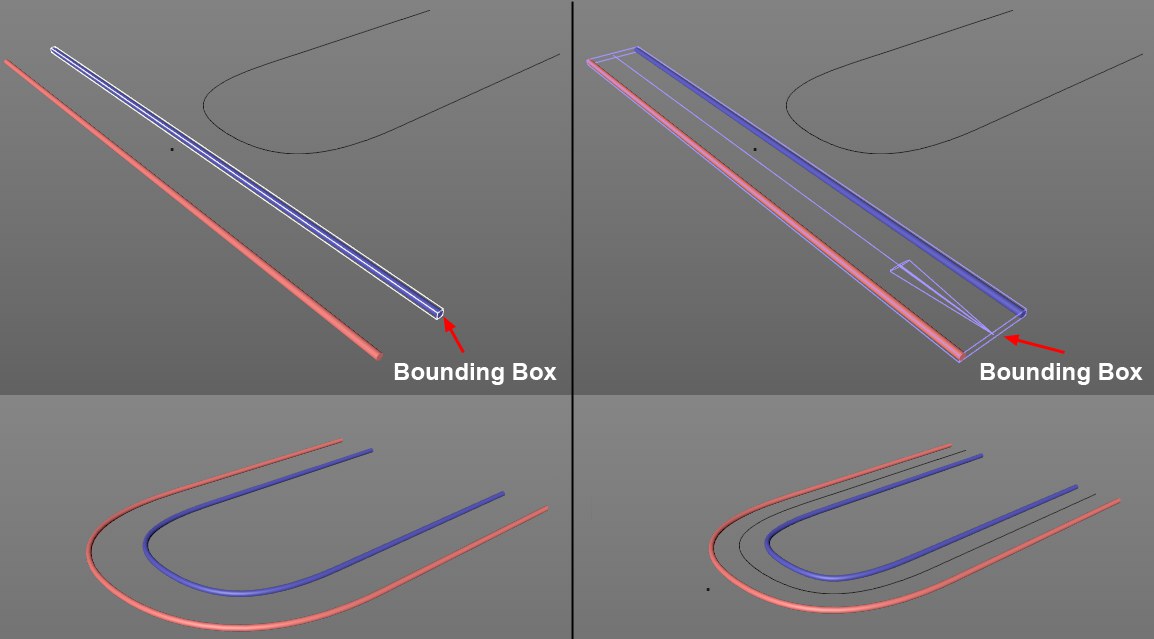 Both cylinders and the Spline Wrap lie below the Null object. Left: a fixed bounding box matched to the size of the cylinder; right: Fix Bounding Box option disabled.
These settings can be used to precisely match the position and size of the bounding box. Remember: the bounding box’s axis length (which runs through its center) defines the regions of the object that will be deformed that come to rest on the spline’s start and end points.