Sweep Object
![]()
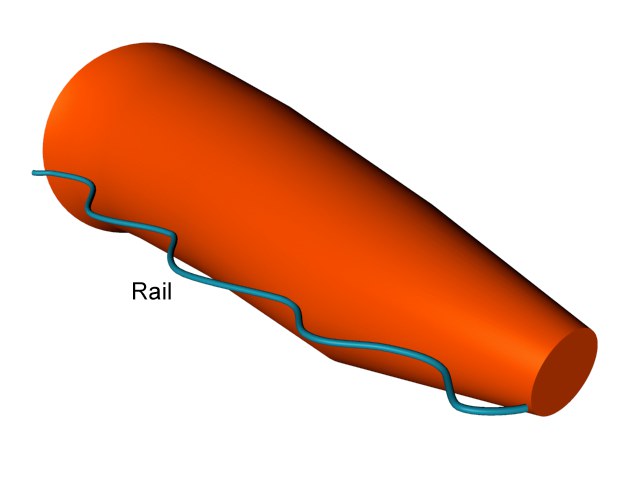
The Sweep object requires two or three splines. The first spline, the contour spline, defines the cross section and is swept along the second spline, the path, to create the object. The optional third spline Rail Spline can be used to modify the scale of the contour spline over the object’s length. Alternatively, the function graphs can be used, with which all pertinent Rail Spline functions can be adjusted.
You can use splines with multiple segments, e.g., you can sweep an entire word along the path.
 This logo was swept parallel along two path splines (the final scale is 30%).
The contour spline is swept along the path in the direction of the contour’s Z axis. If you are using a planar (two-dimensional) path spline, there are no further considerations. However, the behavior of the sweep is a little more complicated with a non-planar (three-dimensional) path.
If you enable Banking, the following rules apply: The contour spline is rotated at the start of the path spline so that its X axis is parallel to the average plane of the path spline. The contour is still placed with its Z axis tangential to the path spline. All subsequent contours are placed in such a way that the angle change from start to finish is kept to a minimum. If necessary, the contour is also given a rotation so that the start and end contours meet with closed path splines.
Banking allows you to use arbitrary 3D paths. However, it is not suitable for a precise sweep since the contours may break up, depending on the path.
If the Banking option is disabled, the following applies: the contour spline is rotated for each subdivision so that on the one hand its Z axis is always tangential to the path spline and on the other hand its X axis is parallel to the XZ plane of the path spline. You can use this XZ plane to control the sweep, although you do lose the ability to model loops, since the contour flips over when the path runs vertically.
Finally, there is another, much more powerful functionality — you can use a rail spline to control the direction and/or scale of the contour as it runs along the path. The path spline controls the positioning of the subdivisions. Adaptive spline interpolation is usually a good choice since it generates a relatively low number of surfaces. Uniform spline interpolation, on the other hand, is the better choice for animation since the subdivisions will be a uniform distance apart.
 Banking enabled Banking enabled
|
 Banking disabled Banking disabled
|
 Intermediate Points set to Adaptive Intermediate Points set to Adaptive
|
 and Natural and Natural
|
Troubleshooting tilted contour splines
The most commonly encountered problem when using Sweep object is when the contour spline appears to tilt or flip over for no apparent reason as it runs along the spline. The cause of this is rooted in complex math. We will not concern ourselves with the math here. Instead, take a look at the examples below for the solution.
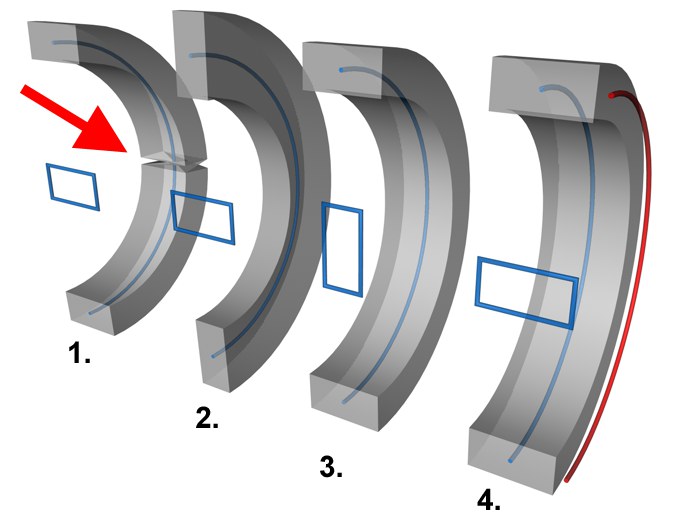 In blue: the contour spline and the path spline. In red: the rail spline.
Figure 1. demonstrates the typical problem: the contour spline suddenly changes direction. In Figure 2., the Banking option has been enabled, only partially solving the problem by tilting the spline as it travels along the path.
Figures 3. and 4. represent alternative solutions to the problem. In Figure 3., the X and Y measurements for the contour have been swapped around and Banking has been enabled. Figure 4. demonstrates how you can overcome the problem using a rail spline — there’s no need to enable Banking in this case.