Tag properties
This mode works in consideration of the Offset and Time Factor (with the exception of Spring) settings and makes the following effects available:
Spring
This effect applies only to PSG animations The object will behave as if it's attached to the animation point via a spring. The object will behave accordingly. This creates the secondary motion, e.g., the oscillation of the object.
Here you can define the effect's strength. If set to 0%, the spring will have no effect (will function as a normal keyframe animation), and increasing values will create a correspondingly stronger spring effect.
Here you can define the hardness of the spring. The greater the hardness, the less the object will oscillate and vice-versa.
Spring damping describes the amount of internal spring friction. This means essentially that the greater the damping, the shorter the oscillation time, e.g., if the animation requires an abrupt stop.
Posterization
This effect is similar to a stop-motion movement - instead of a harmonious, uniform movement from key to key, the animation will be jumpy. If Strength is set to 100%, the animation will jump from one value to the next (similar to the key interpolation Step).
Here, the complete object animation - if desired including tag settings - can be offset by the number of frames defined here without having to touch a single frame in the Timeline.
A value of -4, for example, will offset the animation by 4 frames to the front (earlier).
The Time Factor will compress or expand the animations of all objects to which the tag is assigned starting at frame 0 in accordance with the value defined here. A 30-frame animation would be compressed to 15 frames if this value is set to -50%; if set to 100% the animation will be extended to 60 frames.
Strength defines how jerky the animation should be. The greater the value, the slower the animation will jump to the next keyframe. Lower values will cause the jumps to be correspondingly smaller and will increasingly play like a normal keyframe animation.
Here you can define the time between jumps. This is the frame rate of the stop-motion movement.
Noise
The Noise effect calculates small - or if desired large - deviations/inaccuracies to an animation that is otherwise too smooth. With the settings described below you can define in what way and how strong the Noise effect should work.
Here you can define the maximum deviation from the original animation. Since Noise algorithms are used internally, smaller jumps will result. The animations will play consistently and harmoniously up to their respective amplitudes. This Strength value is a general multiplier for the subordinated animation types.
Here you can define the effect strength for the respective animation type. Attribute refers to all animation tracks of a given object/tag.
Here you can define how quickly the deviations should change. Larger values will produce a correspondingly more hectic jitter and smaller values will produce slower, more oscillating deviations.
If the current randomness isn't what you want you can enter a different value here. Details about Seed Values can be found there.
Smooth
In this mode you can smooth animations. If you have animations that are too jittery, this mode can be used to help the animation play more smoothly.
It can, for example, be used to round linear animations up parametrically at each keyframe.
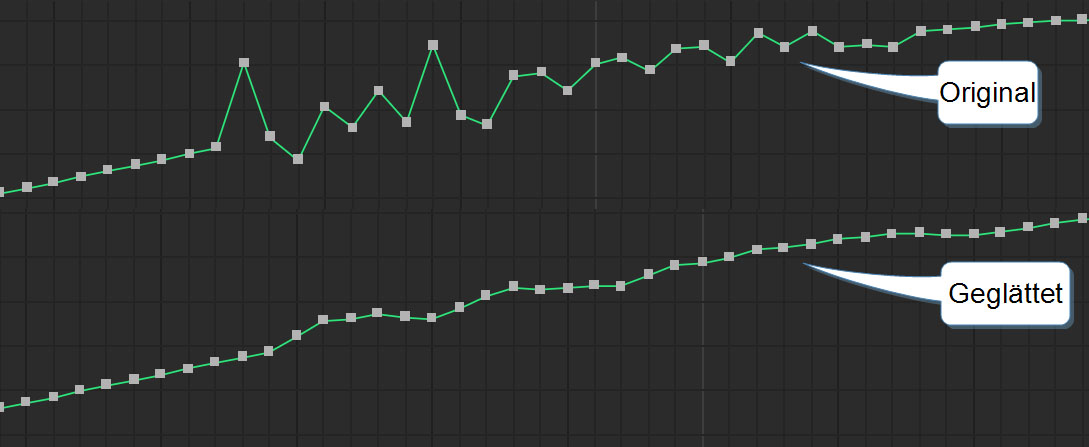 A jittery animation (top) can be smoothed (bottom). This functionality also works with keys that lie far apart.
Here you can define the Strength of the effect.
When calculating the average value, the Range defines which temporal range around the current point in time should be taken into consideration (e.g., at frame 5, 2 frames before and after). The larger the value, the more uniform and calm the curve will run. The curve defined in the Mask setting is used to define the influence of the values before and after the current time.