Matrix Extrude
![]()
The Matrix Extrude tool is similar to Extrude, but with one difference: you can make as many extrusion steps as you want in one go. This is achieved by defining a relative value for move, rotation and size, which is then applied at each step.
Matrix Extrude can be applied to polygons. The polygons are extruded individually — groups of surfaces are broken apart. If you have not selected any surfaces or if you are not in polygon mode, then all surfaces of the active object are automatically used.
To use Matrix Extrude interactively, drag within the viewport. While you drag, you can also use the following keys for additional functionality:
Shift+drag to adjust the Size value.
Ctrl+drag to adjust the Rotate value.
Alt+drag to move in the Z direction.
A couple of examples will help to illustrate the versatility of Matrix Extrude. For the first example, select a side of a cube and then apply the Matrix Extrude function with one of the default values:

The side will be extruded a total of eight times. With each extrusion step, the surface will be moved 50 m in the Z direction. Furthermore, it will also be scaled by a factor of 0.8 on each axis per step. Additionally, at each step it will be rotated by 10° around the H axis (Heading).
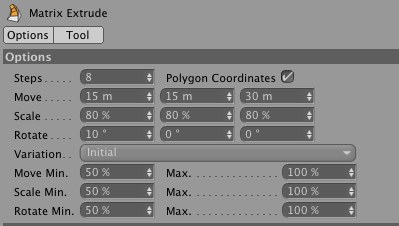
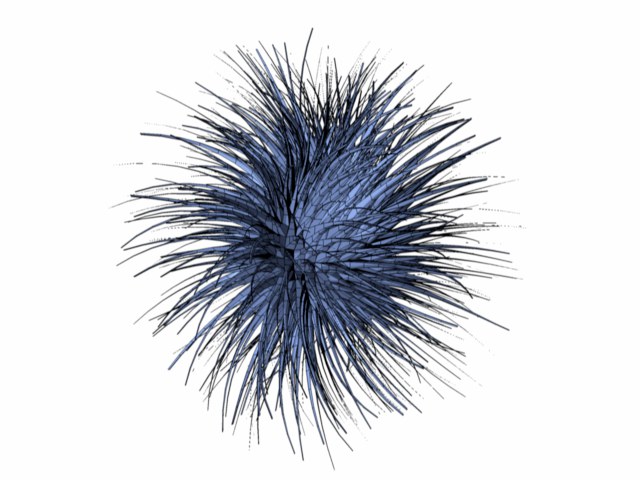
For the second example, create a sphere and make it editable by choosing Mesh / Conversion / Make Editable. Choose Mesh / Create Tools / Matrix Extrude, enter the values shown below and click OK to apply the matrix extrusion and create the hairy sphere.