Function available in CINEMA 4D Prime, Visualize, Broadcast, Studio & BodyPaint 3D
Workflow Example
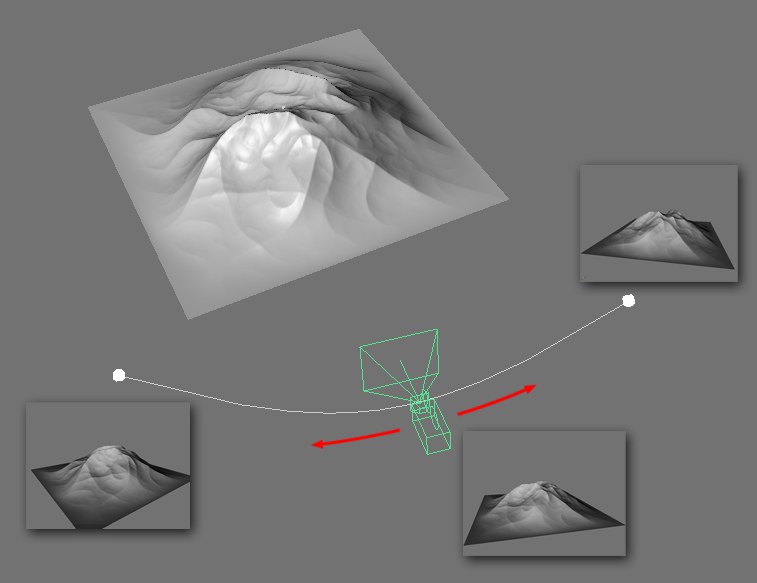
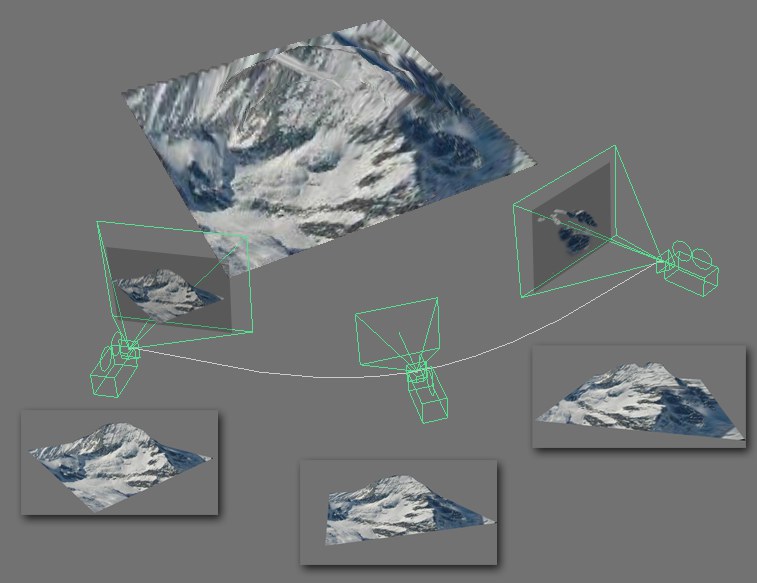
What we want to do: We want to animate a camera around an element in an outdoor landscape, which means that the object must be textured in two camera perspectives, and we will texture the object using Photoshop (this can also be done using BodyPaint 3D).
This is how we will do it:
- Create and position two cameras that will be used for the camera projection. We recommend that one camera be placed at the beginning and one at the end of the animation. Name the cameras "Camera 1" and "Camera 2", respectively.

- Open the Projection Man Manager (main menu: Window / Projection Man) and double-click on the "Camera 1" camera icon. This sets the active view to the "Camera 1" (also, switch to "Photoshop" mode in the "Mode" menu). Next we will create a basic texture in this camera view:
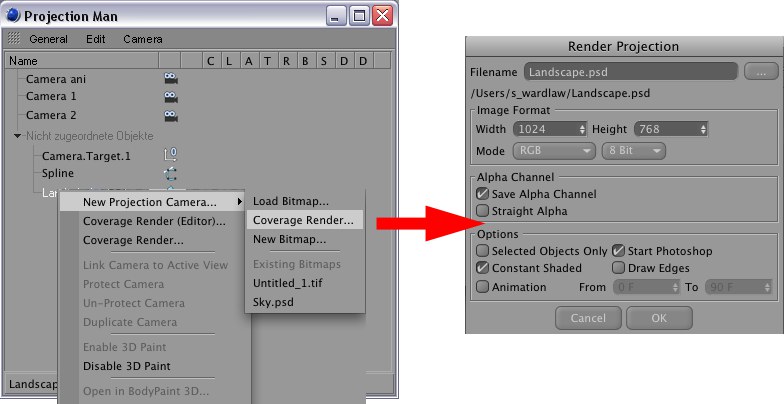
- Right-click on the landscape object and select New Projection Camera … / Coverage Render.
 Note:
Note:
Make sure that a directory path to the Photoshop application has been entered in the Preferences’ Projection Man tab.
In the dialog window that appears, leave all settings at their default values and deactivate the Draw Edges option. Click on OK. Cinema 4D will now render the scene as it is viewed through "Camera 1" as a Photoshop file (that will subsequently be edited in Photoshop), including alpha channel, launch Photoshop, opening the image in the application. Simultaneously, a new projection camera will be created and named after the texture file.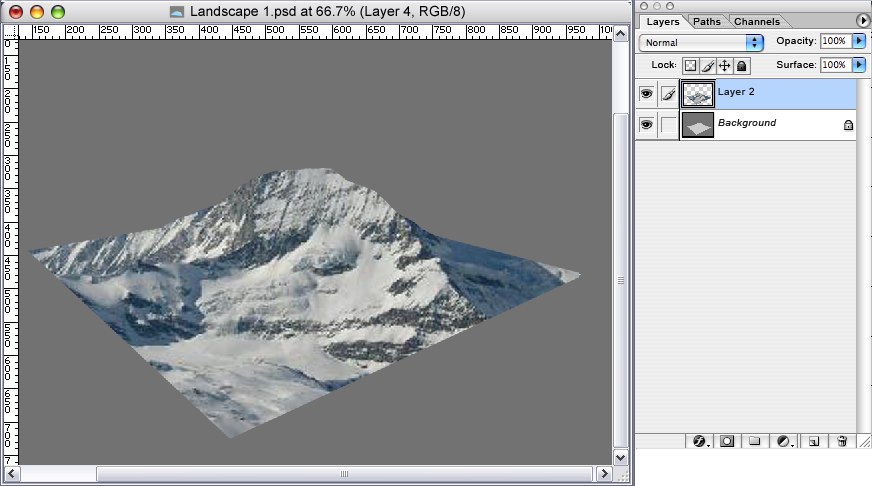
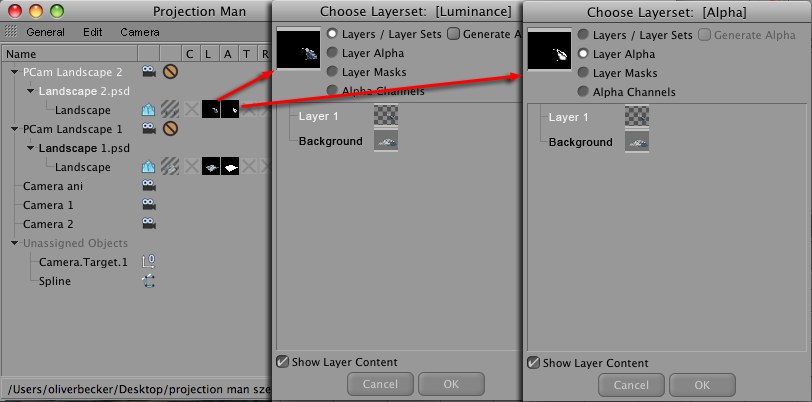
Create a new layer and color the object. The "background" layer only there for reference. Save the file and switch back to Projection Man. - Right-click on each of the channel icons and select "Edit Layerset". A dialog window will open for each image layer. Select the top layer in each window. Make sure that Layer Alpha is selected in the "alpha" window.
This completes the camera projection from the first camera’s perspective. - Double-click on the "Camera 2" icon. The active view has now been set to that of "Camera 2". Right-click on the landscape object and select New Projection Camera … / Coverage Render (see #3 above). This time a texture from the angle of view of "Camera 2" will be rendered and automatically opened in Photoshop:

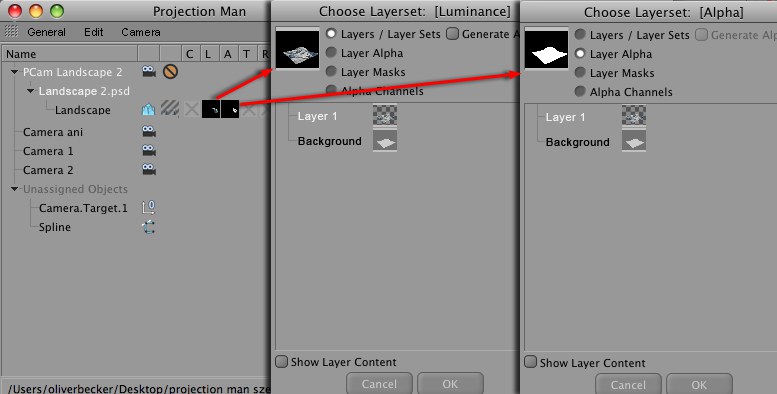
If you take a closer look at the background layer you will see that there are areas that have not been textured or where the existing texture is very distorted. Create a new layer and correct these areas. Save the image. - Now Right-click on both layers’ channel icons for the newly created projection and select "Edit Layerset". A dialog window will open for each image layer. Select the top layer in each window (multiple selections and the selection of entire layer sets is also possible). Make sure that Alpha Layers is selected in the "alpha" window (the painted layer will automatically be used as a mask, without having to manually create an alpha channel).
- Done. You can now switch to your original camera and travel around your landscape object without seeing any texture errors (areas not textured). If you should nevertheless notice any texture errors you can easily create an additional camera with a different angle of view and compensate for these problematic areas using camera projection.
Tip:
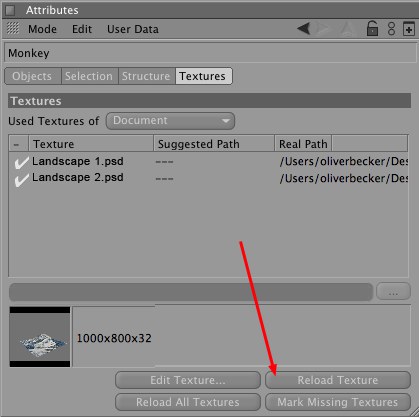
When working with Projection Man it is a good idea to undock the Attribute Manager window that is in the Project Info mode. This gives you a good overview of the textures used and their corresponding paths. More importantly, though, the "Reload Texture" button can be used to reload a texture that has been modified (and saved) in Photoshop.