Quickstart
Can’t wait to get started with Sketch and Toon? Then you’ve come to the right chapter. In these pages, you will learn the basics of how to use Sketch and Toon, and, most importantly of all, where to find the main controls and what they do in general terms.
Adding the Sketch and Toon post effect
All it takes to add the Sketch and Toon effect to your scene is a single menu pick. First you will need an object.
- Create a sphere.
- Choose Render / Edit Render Settings and click on the Effects button (make sure that Standard is defined as the renderer type). Select Sketch and Toon from the menu that appears.

Look in the Material Manager and you will notice a material has been added also. More about this material later … - Render the scene.
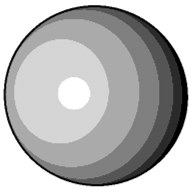
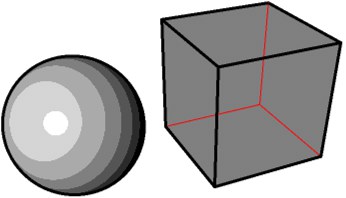
Congratulations! You just rendered your first Sketch and Toon effect. The sphere has a black outline and its shading has been simplified into bands.
The material that is added automatically when you add the post effect is called the Sketch material. This controls the look of the lines, such as their color and thickness. In a nutshell, the Sketch material is the material used by the post effect to draw the lines.
- In the Material Manager, double-click the Sketch material’s thumbnail to display its settings in the Material Editor.
- On the Color tab, choose a new color for the line such as shocking pink. On the Thickness tab, set the Thickness value to 20. Render the scene.

The sphere’s lines are now much thicker and use the new color. - the pink is truly shocking … On the Color tab, set the color back to black and on the Thickness tab, set the Thickness back to 2. Rename the material to black using the text box below the thumbnail.
The Sketch and Toon post effect is the main control center for the effect. Among other things, it controls the post effect shading for objects and which Sketch materials are used by the effect. To see this in action, you will need to create a second Sketch material.
- In the Material Manager, choose Create / Materials / New Sketch Material to create a new Sketch material. In the Material Editor, change the material’s thickness to 1 and color to red. Rename the material to red.
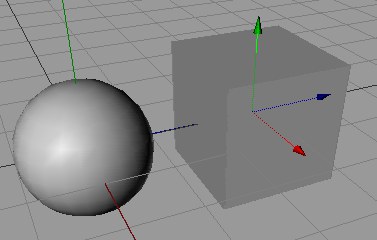
- Add a cube to the scene and move it next to the sphere in the viewport.
- Ensure the Sketch and Toon post effect is selected and click its Lines tab if it is not already selected.
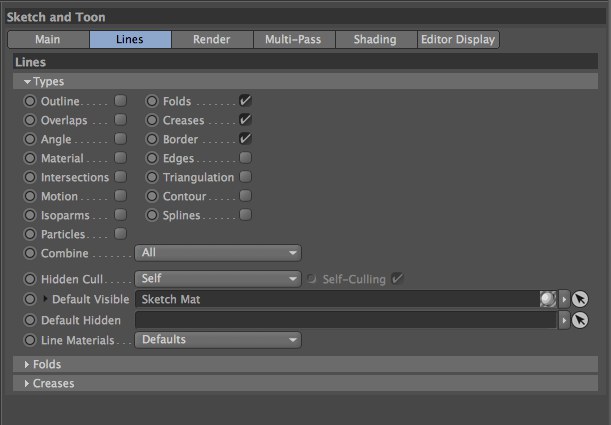
The Default Visible and Default Hidden boxes on this tab control which materials the post effect uses for visible lines and hidden lines respectively. You can see that the black Sketch material is being used for visible lines. Currently the Default Hidden box is blank, which means hidden lines are not drawn. - Drag & drop the red material’s thumbnail from the Material Manager into the Default Hidden box. Render the scene.
The red material is now used for the hidden lines in the scene (i.e. the lines that in real life would be hidden behind surfaces). If you were now to Drag & drop the red material into the Default Visible box, the red material would be used for both visible and hidden lines.
So among other things, the post effect controls which Sketch materials are used by the scene for visible and hidden lines.
Before going on to the next step, take a close look at roughly how many brightness bands the sphere has. You will be changing this in the following steps.
Controlling post effect shading
As mentioned earlier, the post effect also controls the post effect shading. You will find these controls on the effect’s Shading tab.
- In the render settings, on the Sketch and Toon post effect’s Shading tab, set Quantize to 15 and render the scene.
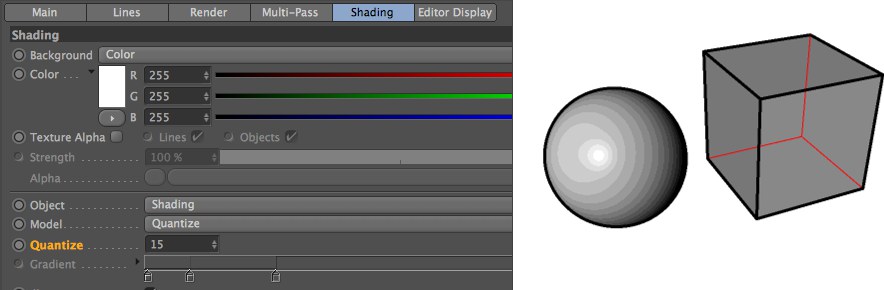
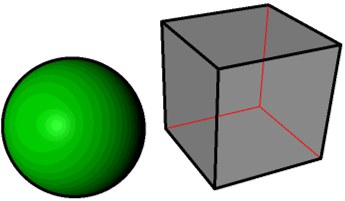
The Quantize value controls the number of brightness bands for the object (like the old Cinema 4D cell renderer). The sphere now has many more bands. - In the Material Manager, choose Create / Materials / New Sketch Material to create a new standard Cinema 4D material. Double-click the new material to display its settings in the Material Editor. On the Color tab, set the color to green. Rename the material to green.
- Apply the green material to the sphere and render the scene.
Sketch and Toon lets you shade the objects using standard Cinema 4D materials. The post effect quantizes the result of the Cinema 4D rendering. If you wanted a solid color, you could simply set Quantize to 1. - In the render settings, on the Sketch and Toon post effect’s Shading tab, set the Object drop-down list to Off and render the scene.
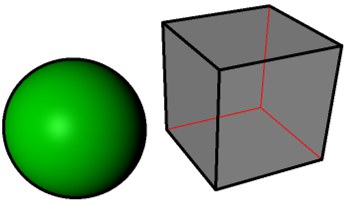
Setting Object to Off switches off the post effect shading for objects so that it does not affect the Cinema 4D’s rendering of surfaces. Likewise you could set Background to Off to switch off the post effect’s white background and use the background rendered by Cinema 4D instead.
Sketch and Toon includes four powerful channel shaders: Art, Cel, Hatch and Spots. These enable you to create an endless variety of effects. You can use these shaders in any material channel which accepts a texture, but in general they work best in the Luminance channel.
- In the Material Manager, choose Create / Materials / New Sketch Material to create a new material. Double-click the new material to display its settings in the Material Editor. Disable all material channels except Luminance and load a Point shader. Rename the material to spots.
- On the Luminance tab, click the Texture triangle button and choose Sketch / Spots to load the Spots shader into the Luminance channel.
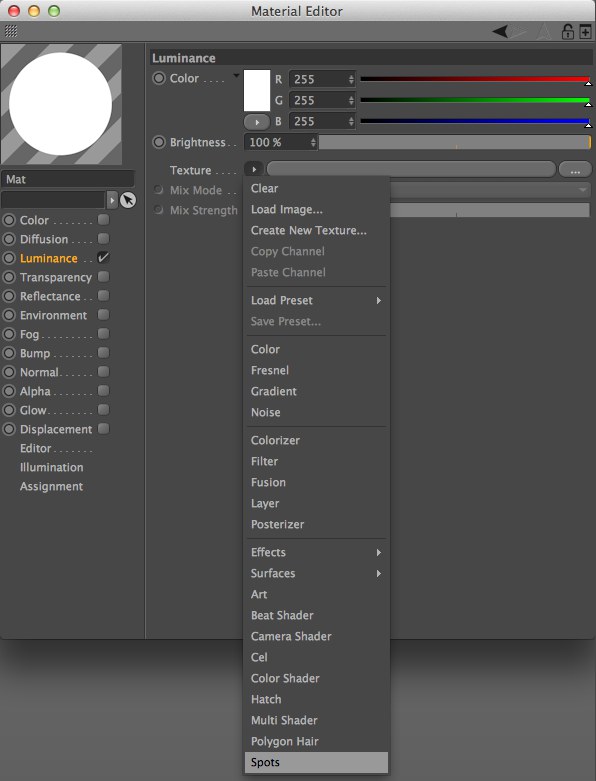
- Click on the Spots preview below the Texture triangle button to access the settings for the Spots shader. Set the Scale value to 30%.
- Apply the Spots material to the sphere. Render the scene.
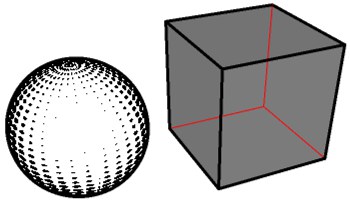
The Spots shader is ideal for a halftone dots effect. Note how the spots shrink the brighter the surface is to give a fantastic impression of light to dark shading.
Different styles for different objects
What if you want an object to use different settings to those in the post effect? For example, what if you want one object to use a different colored line? This is where the Sketch Style tag comes in.
It’s for objects that should use different settings to the scene-wide settings in the post effect.
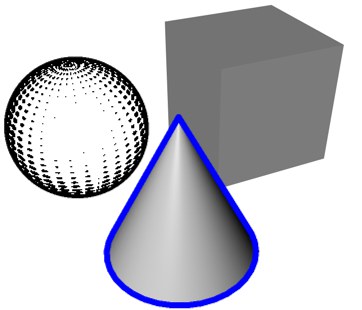
- Add a cone to the scene and move it in front of the sphere and cube.
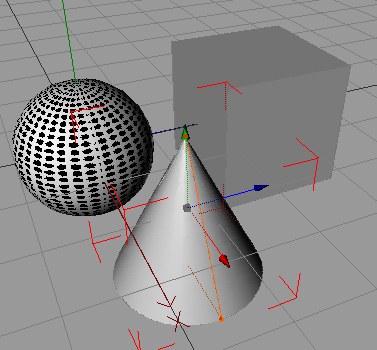
- Ensure the cone is selected and in the Object Manager, choose Tags / Render Tags / Sketch Style.
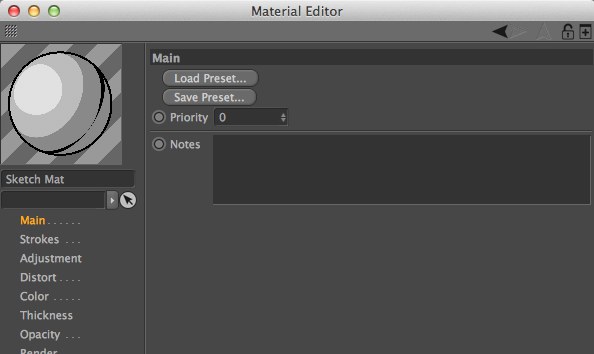
You will see a Sketch Style tag appear to the right of the cone in the Object Manager. Also, note that a new Sketch material has been created automatically (called Sketch Mat). - In the Object Manager, double-click the cone’s Sketch Style tag to display the tag’s settings in the Attribute Manager.
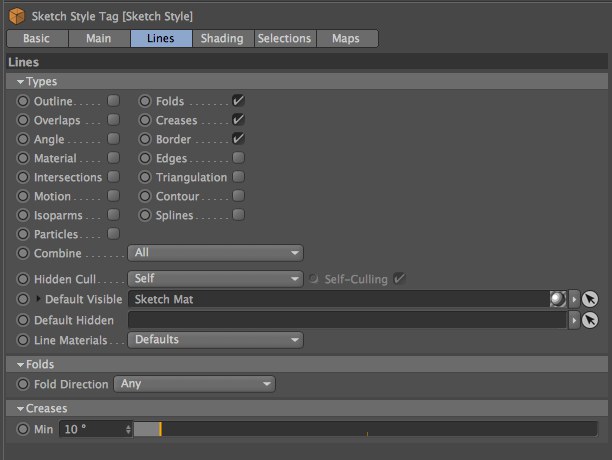
The Sketch Style tag has many similar settings to the post effect. It overrides the settings in the post effect for the object. In other words, the object will use the tag’s settings instead of those in the post effect.
On the Lines tab, you will notice the new Sketch material has already been assigned to the tag. As with the post effect, you can control which Sketch materials are used by dragging and dropping the materials into the Default Visible and Default Hidden boxes. - Edit the new Sketch material as follows: change its name to blue, give it a blue color, and change its thickness to 6. Render the scene.

- Select the cube and in the Object Manager, choose Tags / Sketch Tags / Sketch Render.
The Sketch Render tag has a few useful render options such as the ability to switch off lines for the object. - Double-click the cube’s Sketch Render tag to display the tag’s settings in the Attribute Manager. Disable the tag’s Allow Lines and Allow Shading options, and render the scene.
The post effect is now switched off for the cube.
This completes the QuickStart. You now know where the main controls are and what they do in general. To recap:
- The Sketch material controls the look of the lines.
- The Sketch and Toon post effect is where you will find the general scene-wide controls, such as which Sketch materials are used for visible and hidden lines.
- The Sketch Style tag is where you can set an individual style for an object to override the post effect’s style.
- The Sketch shaders are loaded as a channel shader and are best used in the Luminance channel.