FAQ
In these pages, you will find answers to commonly asked questions about Sketch and Toon.
Which viewport projection modes are supported by Sketch and Toon?
Not all projections are supported. The following are rejected by Sketch and Toon: Military, Frog, Bird, Gentleman.
How can I add lines to rounded edges on a Subdivision-Surface (SDS) object?
Select the edges on the low-res mesh where you want lines to be added. Create a Selection tag to store the selection (Select / Set Selection). Assign a Sketch Style tag to the object if it does not have one already, and on its Lines tag, enable Edges. On the Selections tab, Drag & drop the Selection tag into the Edges box.
I’m having problems with isoparms for a Subdivision-Surface object.
Isoparms come with a number of limitations. For example, culling may not be accurate. With Subdivision-Surfaces, the best solution is not to use the Isoparm line type. Instead use Edge lines and create a selection for ALL the edges on the low-res mesh, then follow the same procedure as for the Subdivision-Surface’s rounded edges tip above.
What can I do to spruce up outlines?
Use the Screen Angle modifier on the Thickness tab.
I want to create some marker pen lines, which line type should I use?
Contour lines are useful for blocking in marker pen lines. Look up contour.
I need help with my cartoon characters and have two questions for you: One, how can I smooth out lines? Two, which line types should I be using?
Here’s a tip for getting some extra lines in your sketch effects using the Angle modifier, and smoothing out the strokes to prevent that STRAIGHT sketch line style, especially on low poly objects. Check out these comparison images with and without Subdivision-Surfaces.
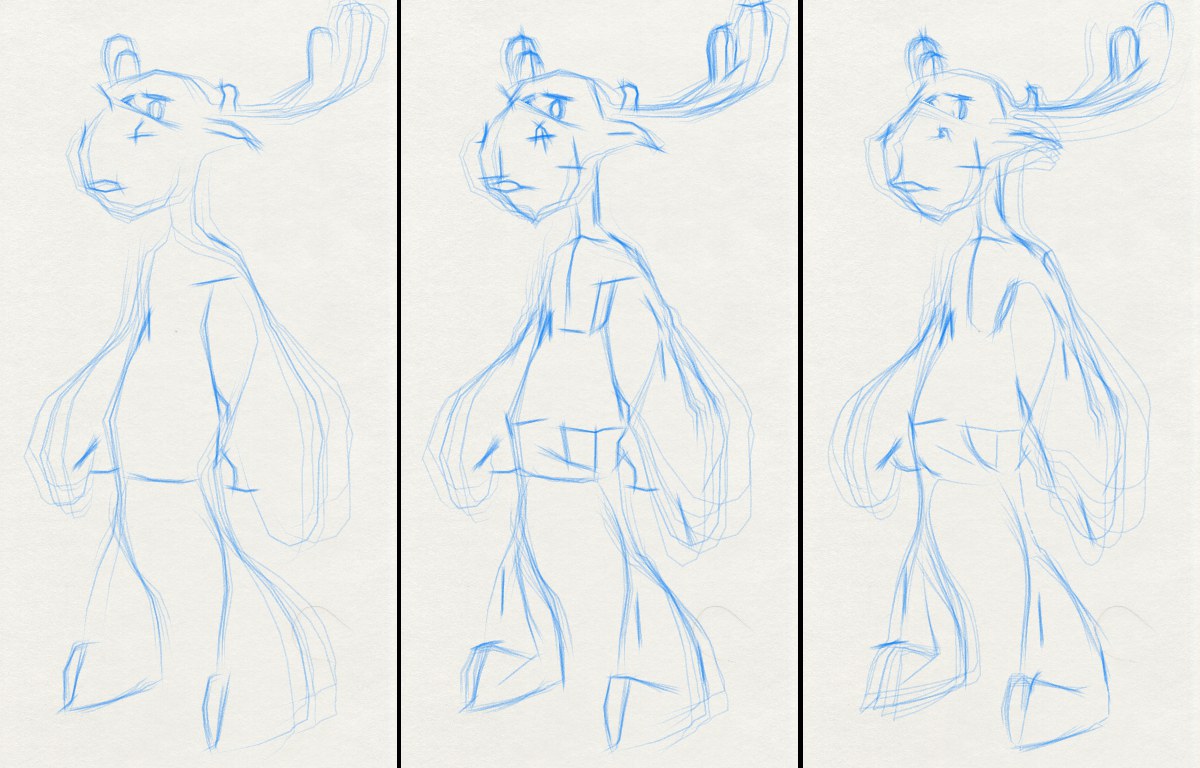 Folds, Folds and Angles, Folds, Angles and Curves
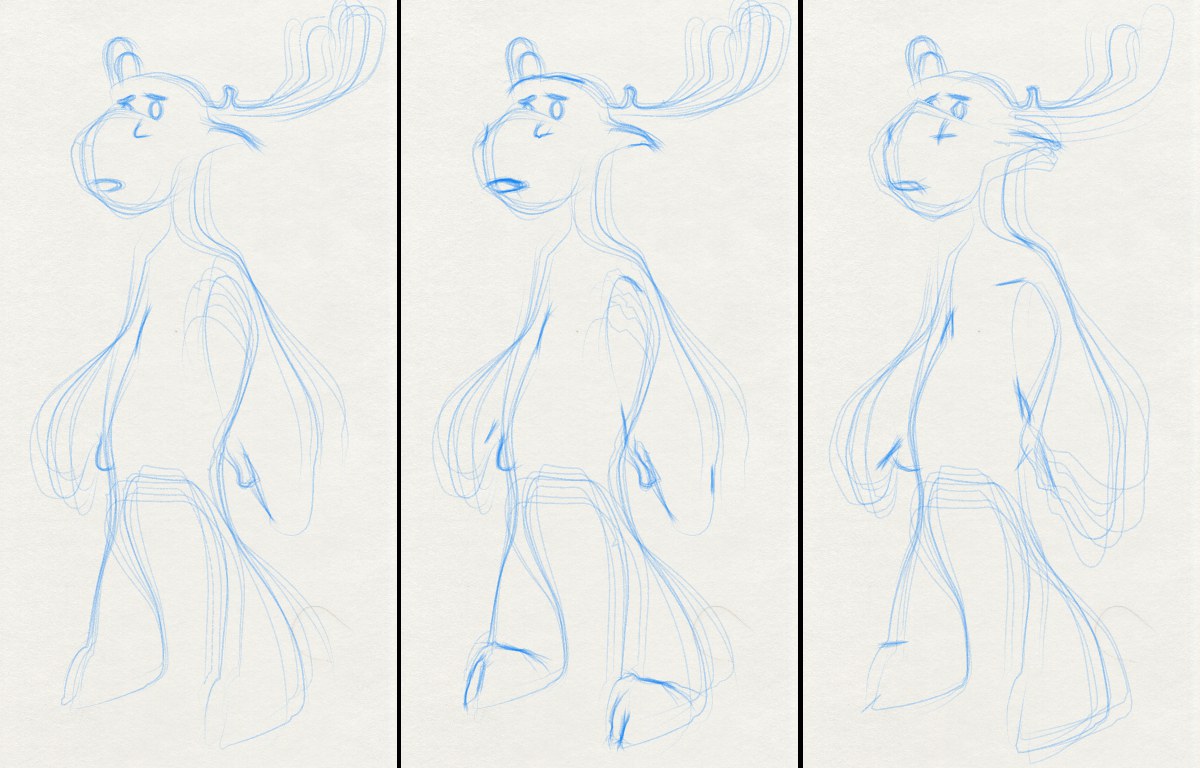 Folds, Folds and Angles, Folds, Angles and Curves
The left moose in both figures was created with Fold lines only. This is the most commonly used line type for a hard-drawn style. It produces an okay effect, but for a rough sketch the lines are a little too accurate in their placement; an artist may have some other quick strokes to represent volume and structure for instance.
This is where the Angle line type comes in handy. To create the extra lines for the center moose, Angle lines were switched on with Min and Max set to 31˚ and 50˚ respectively (note that the model has a Phong angle of 60˚). For the center moose without Subdivision-Surfaces, you can clearly see the effect in the extra detail for the mouth and hooves, and the volume or structure of the moose being represented in the chest and stomach areas. The effect is more subtle for the Subdivision-Surfaces moose because the model has been subdivided so the angles in many areas that were detected in the low-res may no longer fit in the specified range.
Last but not least is the addition of curves, which are to be found on the Sketch material’s Distort tab. For the right moose in both figures, the Curve Stroke option was enabled and Type was set to B-Spline (this type allows for extremely smooth flowing lines rather then straight angular lines). You can clearly see how the strokes for his stomach, armpit and muzzle are curved and smooth rather than straight and angular. In the case of the right moose with Subdivision-Surfaces, you can see that because of the smooth, simpler curves, settings such as overshoot used in this line’s material may shoot out in different directions as with the armpit and nostril.
Using curved strokes, especially on a low-res mesh, can help eliminate that low-res feel but allow for sketchier lines then would be found on a smooth high-res mesh. This combination of a low-res mesh, angles, and curved strokes set to B-spline can help to produce a more natural — yet at the same time rougher — sketch effect!
How can I speed up the antialiasing?
If you are using the Hatch shader or Spots shader with Cinema 4D’s Best Antialiasing (to ensure the texture is antialiased … ), switch the Antialiasing mode to Geometry and blur the hatch or spots texture using Blur Scale and Blur Offset.
How can I get rid of unwanted lines?
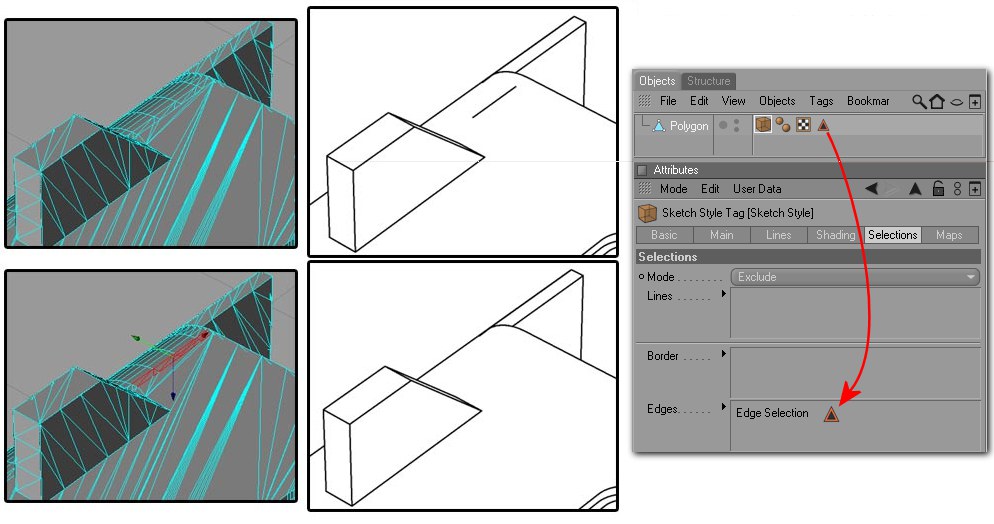
Select the edges or polygons for the problem area and exclude them from line generation using the Sketch Style tag’s Lines box (Maps tab) and Exclude mode.
How can I get rid of opacity overlaps?
On the Sketch material’s Render tab, set Self-Blend to Average. Try the Overwrite mode also. (Which mode is best usually depends on the texturing of the line).
I have two patterns which overlap in places, how do I get rid of the overlaps?
On the Sketch material’s Render tab, set Self-Blend to Overwrite. If one of the patterns disappears completely (center object), it has been overwritten by Sketch and Toon’s drawing order — to resolve, set the missing material’s Priority value (Sketch material, Main tab) higher.
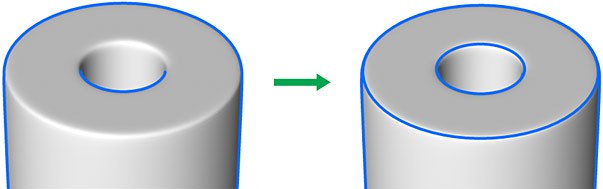
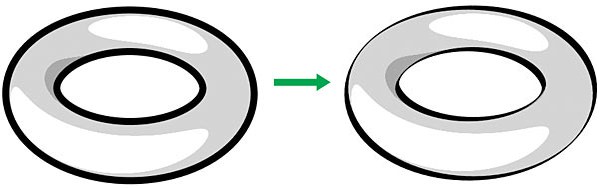
I’m having problems with a perfect sphere.
Convert the sphere to polygons. There are many limitations with perfect spheres!
I don’t like the random look Sketch and Toon has picked.
If the variations (such as clone, adjustment … ) are not as you would like, adjust the Variations Seed on the Sketch material’s Render tab. Disable the Static option if you wish these to change per frame.
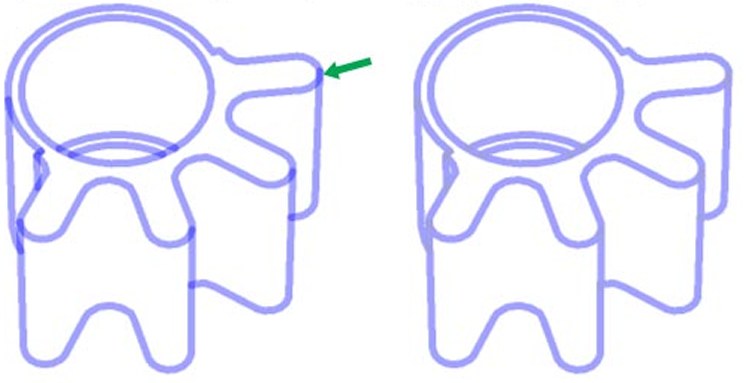
Gaps are appearing in the lines. Why?
Check the polygons in the gap area. Although Sketch and Toon does its best to work with non-planar polygons, it is sometimes better to split them into triangles that give the correct surface you intend.
I’m getting thin lines in the rendered image.
Use the Hidden Culling by setting it to either Scene or Children and so on. The fewer objects it has to cull against the better (e.g., Scene is slowest).
Another cause of thin lines can be objects too close together; try moving them apart slightly. An example might be a belt around a waist, or ring on a finger. If the objects are very close, then the lines may cull.
- Sketch and Toon does not support Render and Multi-instances. Disable this option for the respective objects.
- Sketch and Toon only supports Omni and Spot light types and the shadow types Shadow Maps (soft) and Raytraced (hard).
- The Sphere primitive can behave incorrectly if the Render Perfect option is enabled.