![]() Polygon Object
Polygon Object
Polygon Object
This creates an empty polygon object. Initially, all you will see in the view is its origin and axes.
You can later fill this object with points and polygons.
The polygon object can also be used as an alternative to the null object for grouping objects together.
A polygon is a triangle or a quadrangle. A triangle has the points A, B and C; a quadrangle has the points A, B, C and D.
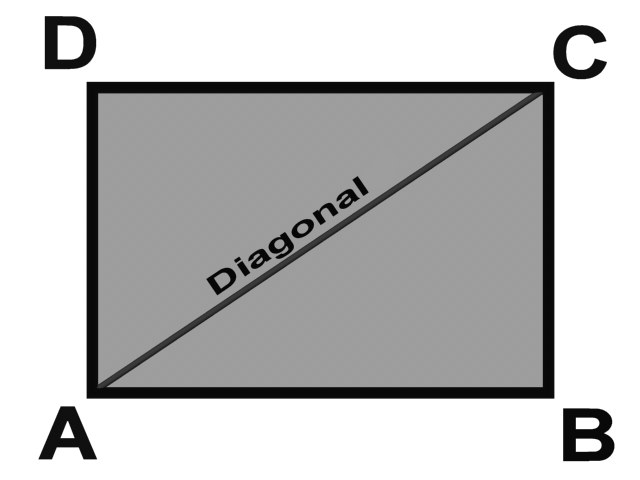 Figure 1: A perfect polygon.
Perfect polygons, like the one in Figure 1, are not that common, since the points may lie anywhere in 3D space. This is not a problem if the points are planar — i.e., if they all lie on the same plane, as in Figure 2.
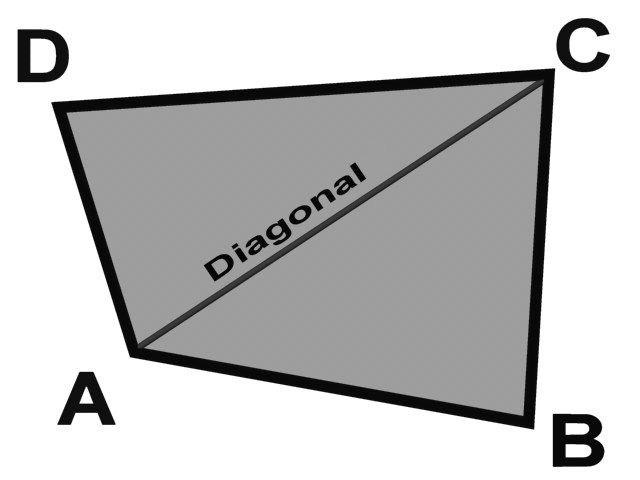 Figure 2: The quadrangle is no longer a rectangle. However, all the points are on the same plane — the quadrangle is still planar.
If the quadrangle’s points are not on the same plane, the quadrangle is said to be non-planar. In Figure 3, point B has been moved into the depth plane. Now, Cinema 4D must render this polygon as two triangles. This happens internally and usually has no negative effects. However, non-planar polygons can occasionally lead to unexpected effects and are generally best avoided.
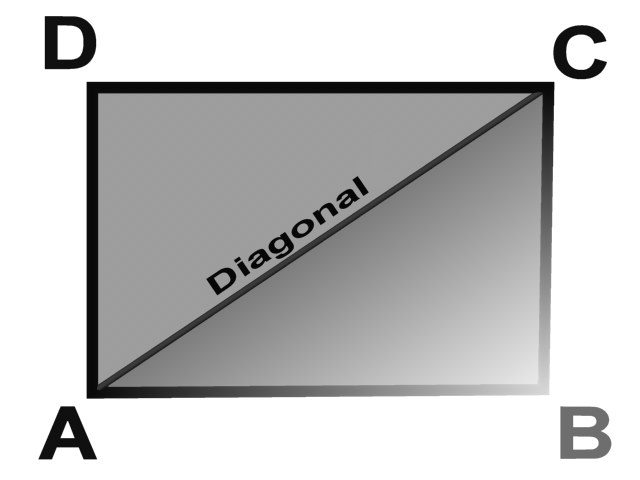 Figure 3: Point B has been moved into the depth plane. Now, the polygon is non-planar.
For planar quadrangles, if the interior angle at points B or D is greater than 180°, problems can occur when rendering — this is because the polygon overlaps itself, as in Figure 4.
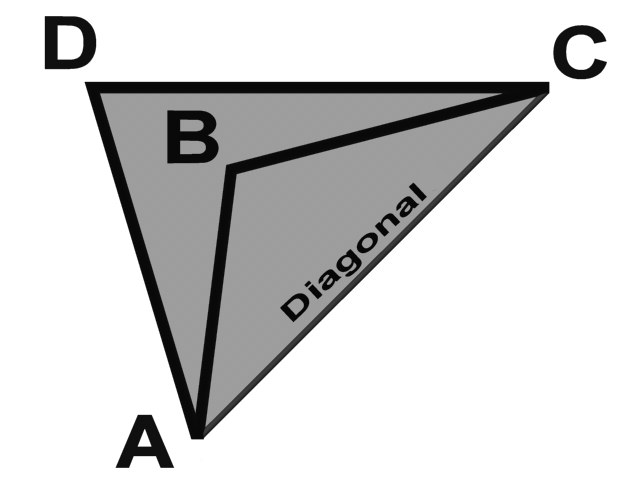 Figure 4: The angle at point B is greater than 180° — the polygon overlaps itself.
Another problem arises if all of the polygon’s points are on the same line. In this case, a surface normal cannot exist and the polygon is called a degenerated polygon, illustrated in Figure 5.
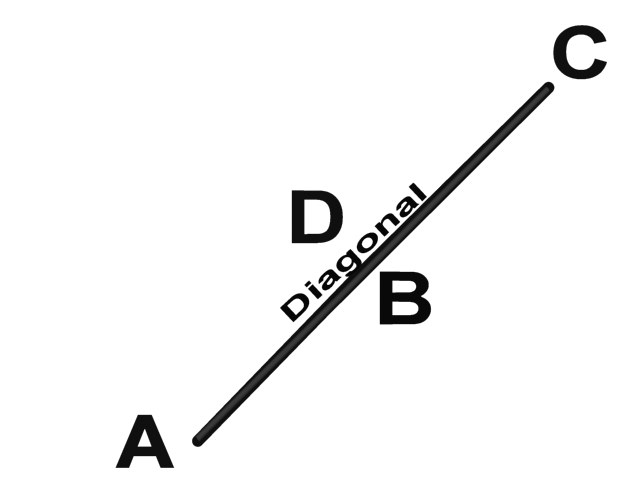 Figure 5: All the points for this polygon are on a line.
Polygons in Cinema 4D have their own coordinate system, as illustrated in Figure 6. You cannot see this system in the viewports, but it is important to be aware of it when using modeling tools such as Matrix Extrude.
The origin of the polygon coordinate system is located at the center of the polygons. The X axis is along the line between A and B. The Z axis is the normal. The Y axis is perpendicular to the XZ plane.
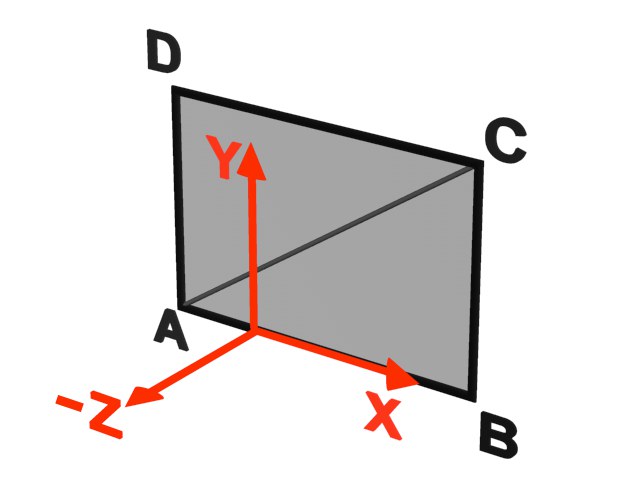 Figure 6: Polygons in Cinema 4D have their own coordinate system.
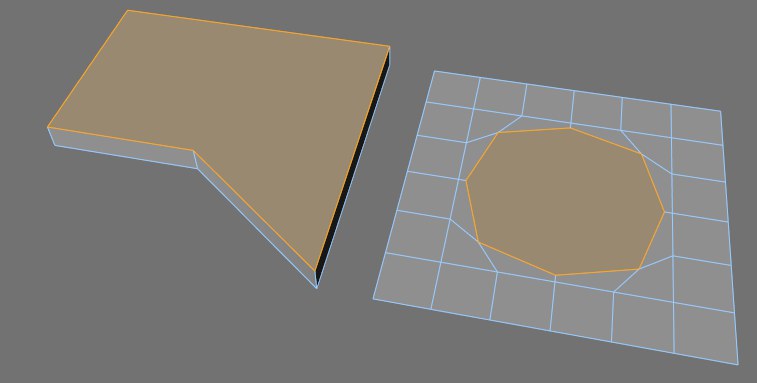 An n-gon is a polygon that has more than four corner points.
An n-gon (pronounced en-gon) is simply a polygon that has more than four corner points. N-gons can help to simplify the polygon modeling process.
Before n-gons were implemented in Cinema 4D, almost every time you cut a polygon, new edges would be created automatically on the neighboring polygons. These extra edges could make the object difficult to work with and slow down your workflow, because a manual rebuilding would often be required in order to clean up the mesh.
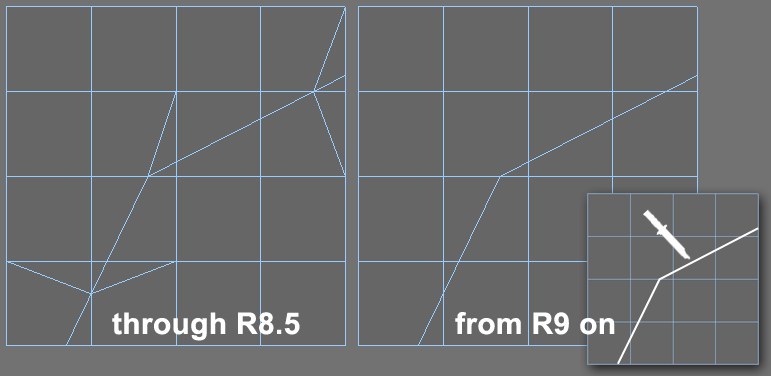
The following example demonstrates the advantage of using n-gons.
 Example
Suppose you want to bevel an area. First you cut around the area that you want to bevel (the inset picture marks the cut line). Above you can see the result of making the cut in an older version of Cinema 4D (left) and in the current version of Cinema 4D (right).
With the older version of Cinema 4D, notice how unwanted triangles have been created in the areas around the cut. These triangles will make it difficult, if not impossible, to select and bevel the desired area. A substantial rebuilding of the mesh would be required.
Thanks to n-gons (right picture), it is now much easier to recognize, select and work with the actual cuts.
N-gons change your workflow. Instead of having to clean up the mesh after each cut, you can now leave the cleanup stage until the end of the modeling process. But why do you still need to clean up the mesh if n-gons are so wonderful?
N-gons are one of the most powerful features in the 3D modeler’s toolbox. However, a perfect mesh should ideally be made up of triangles and quadrangles only, especially if the mesh is to be deformed or animated. Internally, n-gons will be triangulated automatically when you render, animate and so on. Because automatic triangulation is unlikely to produce the triangles in the best places, it’s up to you to ensure that the mesh is correctly structured.
Only you can ensure that the points and polygons of, say, a character’s elbow are in exactly the right places to allow the arm to bend cleanly.
Making parametric objects editable
Cinema 4D works mainly with parametric objects – objects that can be defined mathematically. Such objects include the primitives, spline primitives and Generators. These objects have neither polygons nor points. Instead, the surface is defined mathematically and is only converted to polygons when rendered.
To make parametric objects editable, i.e., to convert them into polygons or points, choose Mesh/Conversion/ Make Editable.
![]() Make Editable
Make Editable
![]() Polygon Object
Polygon Object
![]() Spline Object
Spline Object
You are free to use triangles, but be particularly careful when using them with Subdivision Surfaces — triangles can cause irregularities. Only quadrangles generate a totally clean Subdivision Surfaces .
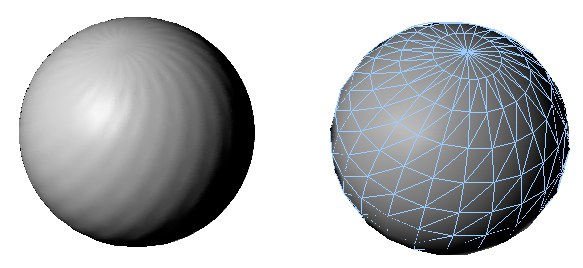 Here, triangles are responsible for the poor quality of the mesh.