![]() Sky Object
Sky Object
Sky Object
This command creates a SKY object. In contrast to the Floor object, the sky is an infinitely large sphere, whose center is the origin of the world coordinate system.
If you want to apply a texture (e.g., the 2D cloud shader) to the sky, you should use Spherical or Cubic projection. If the clouds appear too large, increase the repetition of the texture’s tiling and ensure Seamless is enabled.
Do the clouds seem a little artificial? The possible reason for this is that the clouds have the same tiling in both the X and the Y direction. Adjusting the repetition of the tiling on the Y axis, making them approximately twice as high as for the X axis, ensures that the clouds look somewhat pulled in their width and they appear nearer and more natural. Alternatively, you can use several floor objects for the simulation of cloud layers.
For the simulation of a starlit sky, the use of the cubic projection is recommended, as this will avoid unwanted distortions at the poles.
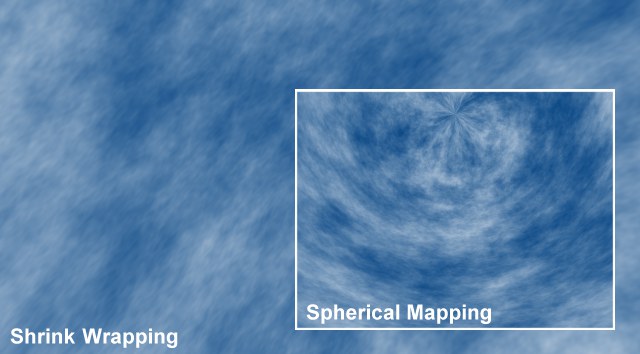
Aiming the camera directly up will display a problem — the cloud texture tends to gather at the zenith. You can fix this by assigning Shrink Wrapping.
By default, only the topmost SKY object in the hierarchy is used. If there are several SKY objects in your scene, you can control which one will be rendered using the Stage object.