Tag Properties
Sometimes it is useful to prevent objects from casting or receiving shadows, especially for technical illustrations. In such cases, disable these options.
In some instances, objects should be visible but their reflections not or an object’s shadow should be rendered but the object itself not. Of course this would be impossible in reality but it’s possible here.
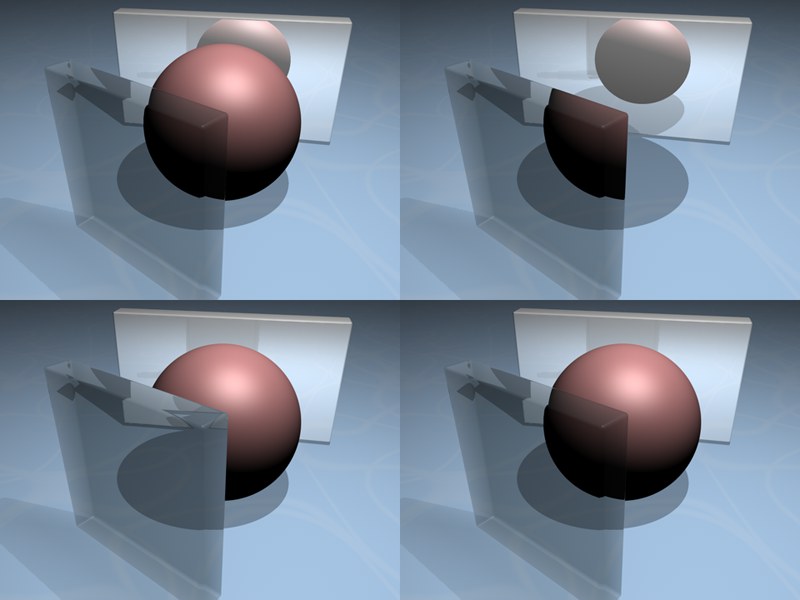
If Seen by Camera is active all first generation rays, i.e., the visual rays from the camera from which the scene is being viewed will see a given object. Note that a disabled Seen by Camera option will not hide the respective object from view entirely because it will, depending on the settings used, still be visible in transparent or reflective surfaces.
If Seen by Rays is active subsequent (higher) generations of rays will also be calculated, e.g., those of a reflection or refraction. These higher generation rays can in turn be applied separately in conjunction with the options described below (Seen by Transparency, Seen by Refraction and Seen by Reflection).
 From left to right: All options active; Seen by Camera deactivated; Seen by Rays deactivated; all options active, except for Seen by Reflection.
Enable this option if you want the object to generate global illumination. If you disable the option, the object will not generate global illumination. This setting has no effect unless Advanced Render is used (Cinema 4D Studio).
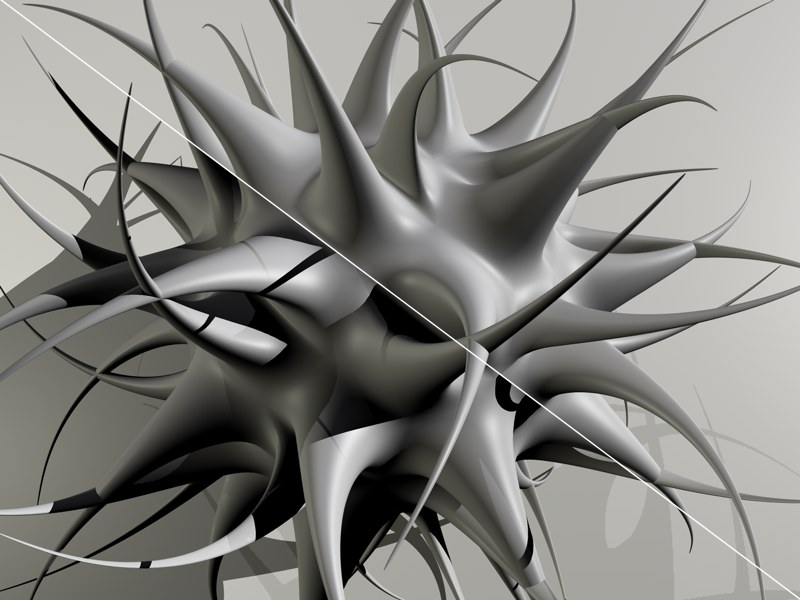
 Left, active Self Shadowing; right, Self Shadowing deactivated.
In some cases, it’s required that objects cast shadows onto other objects but not on themselves. Voilà, this is exactly what this option regulates – simply deactivate this option to eliminate self-shadowing.
This option will cause the object to be self-illuminated yet still receive shadows.
The object in question (in our example below, the floor) must have its own material.
Suppose you are creating a car for a website. The website uses a white background and you need to render the car so that it appears to cast a shadow onto the web page.

Compositing Background for HDR Maps
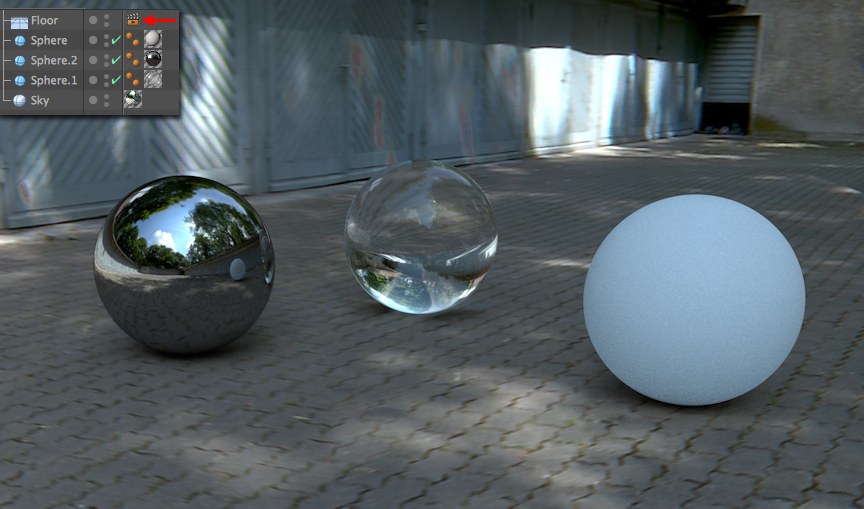
 Note the GI shadows under the spheres
Enable this option if you want to integrate rendered objects in a Project that was illuminated using GI and HDRI textures (must be assigned to a ![]() Sky object). The Compositing tag will then usually be assigned to a Floor object. Light and shadows from the GI illumination will then be combined with the background image (in our example with an HDRI texture applied to the sky).
Sky object). The Compositing tag will then usually be assigned to a Floor object. Light and shadows from the GI illumination will then be combined with the background image (in our example with an HDRI texture applied to the sky).
Using this option, individual objects can be excluded from the GI calculation. For example, multiple Sky objects can be defined in combination with the Seen by Camera and Seen by Rays options: One for direct visibility, one for reflected/refracted rays and one for generating Global Illumination.
This option relates to everything that influences transparency during rendering:
- Transparency from the Transparency material channel (Refraction = 1 results in no refraction effect).
-
Transparency from the Alpha material channel.
Note that when calculating a Blurriness, this effect can be disabled via the Compositing tag. In doing so the Seen by Rays and Seen by Refraction options must also be disabled in the Compositing tag (additional rays are required to calculate the blurriness effect in addition to the transparency ray).
If this option is deactivated, an object with this Compositing tag setting will not be visible when behind transparent objects. This option must be disabled if you want to hide objects that lie behind rendered transparent objects. See here for more details.
Choose from transparency and refraction. Refraction takes place when Refraction in a material channel’s Transparency channel menu is not equal to 1. Otherwise, Seen by Transparency will apply.
If this option is disabled, the object with this Compositing tag setting will no longer be visible behind transparent objects that have a refraction index.
Last but not least, an option for reflection: If this option is deactivated, the object with this Compositing tag setting will no longer be visible in reflective objects.
Here you can define whether or not an object should be included in Ambient Occlusion. If this option has been deactivated, the corresponding object will be completely invisible for Ambient Occlusion. That means:
- The object itself will not be darkened by other objects.
- The object will not darken other objects.
Antialiasing is defined globally in the render settings (Antialiasing page). To override the global settings for the tag’s object, enable Force Antialiasing and set Min, Max and Threshold to the desired values.
Activating this setting will do the following:
- The object to which the compositing tag is assigned will be colored with only the color defined in the Color setting. No shading or lighting will be applied.
- The object to which the compositing tag is assigned will not appear in the alpha channel (Render Settings … Save page).
So, what is this good for?
Such functionality can be useful for compositing (i.e. combining image elements). Imagine a scene in which a tornado is passing over a bridge. In a normal production pipeline, such a scene would be worked on by several team members. Let’s say artist A is assigned to the highly detailed bridge and artist B works on the tornado. When the scene is later composited, bridge and tornado must be brought together. In such cases (this one being a simplified example) it’s helpful to render the bridge and tornado using several Multi-Passes, in which the bridge, for example, can be defined as a matte object. Having all bridge elements in the rendering as a single-color matte mask is then very helpful when compositing the scene.
Matte objects are always then useful when areas of the image(s) should be covered without having to use alpha channels.