Table Of Contents
- Particles
- Emitter
- Thinking Particles
- X-Particles
- Importing Alembic Particles
- Shading
- Attributes
- Particle Attribute Reference
- Particle Material
- X-Particles
- Alembic Particles / Thinking Particles
- Caching Simulations
- Motion Blur
- Example: Rain
- Example: Houdini Particles
Particles
Redshift supports a number of different particle setups that can be rendered inside of Cinema 4D. These include the native particle system, particles imported in through Alembic files from programs such as Houdini, as well as plugins like X-Particles. These particles can be rendered out as simple instanced primitives, custom geometry, or using Redshift's native optimized sphere primitive. You can view the benefits of each one here.
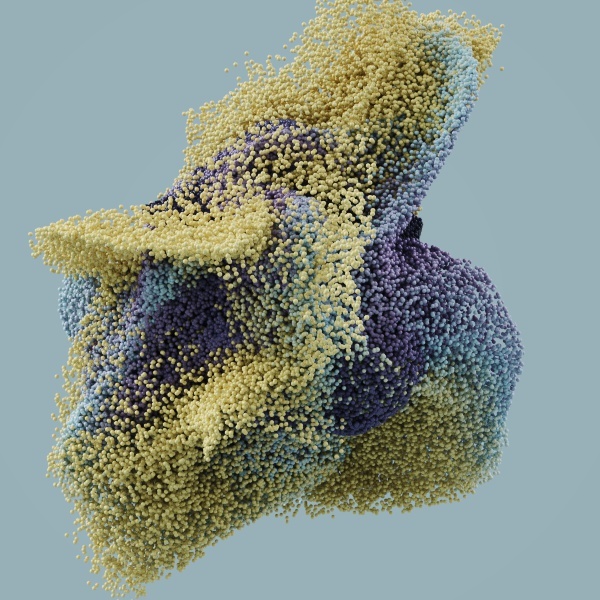
Imported particles rendered with motion blur
Redshift Object Tag
The Redshift Object Tag allows you to adjust different particle parameters, per emitter/source in your scene. This can be applied by right clicking our emitter and finding the Render Tags section.
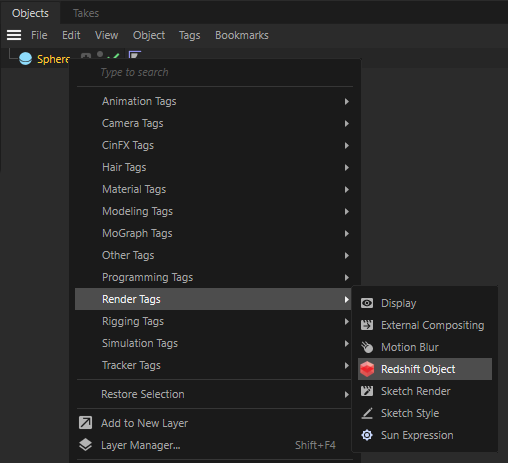
Redshift Object Tag
The Object tag can be applied to emitters, thinking particle setups, and as well as alembic file imports. Please note the Particles tab will ONLY show up when applied to those objects.
Particle Parameters
Redshift allows you to control the individual shape of each particle from a list of presets, as well as letting you define the particle with custom geometry we can drag and drop. We can also control the overall scale of our particles with the Scale Multiplier.
Mode
There are 5 different particle modes that are described below, including the visual and technical differences.
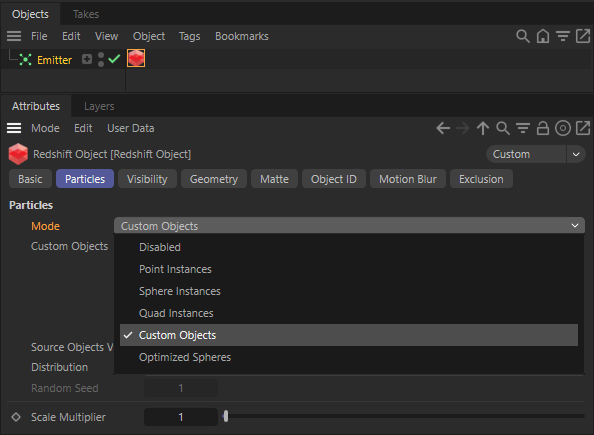
Redshift Object Tag
To avoid some confusion the Mode "Spheres" has now been renamed to "Optimized Spheres" as shown above.
|
|
|
|
|
|
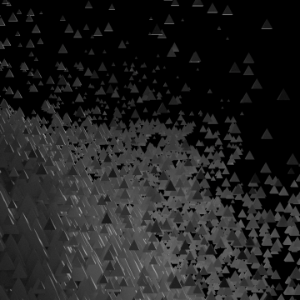
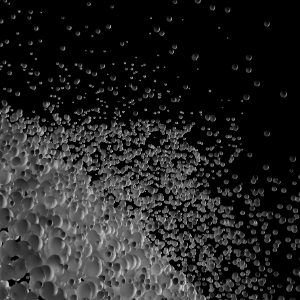
| Point Instances | Sphere Instances | Quad Instances | Custom Objects (Pyramids) | Optimized Spheres |


Important
Sphere Instance and Optimized Spheres mode look nearly identical, but the Optimized Spheres mode is Redshift's native "point" primitive. Sphere Instance is just a mesh sphere created with C4D and instanced with redshift.
Sphere Instances vs Optimized Spheres
The benefits of using the native sphere primitive (Optimized Spheres mode) is that it's very lightweight, even more so than an instance also it can go out of core. Instances are also fairly lightweight in terms of memory, but when you start getting into the millions you can run into out-of-VRAM problems. When working with extremely high counts of particles the Optimized Spheres mode is recommended.
Out of core means if your GPU runs out of memory, because of scene size, texture size, ect. it will use the system's memory instead.
Optimized Spheres may not be suitable for small detail scrutiny and artifacts like particle intersections may become visible when using them. If you notice this when using Optimized Spheres please switch to Sphere Instances instead.
Custom Objects
The Custom Objects mode allows you to drag drop objects that will be instanced throughout your particle setup.

Custom Objects Mode
The Distribution and Random Seed options only become available only during the Custom Objects mode. These are effective when using multiple objects.
Distribution
There are two options for distribution, Sequential & Random. Sequential will distribute our objects in a logical order. As you can see in the example below we have 3 different custom objects: Pyramid, Sphere, and Platonic. So the first 3 particles that come out will be a Pyramid, Sphere, and Platonic then repeat in that order every 3 particles. Random mode will randomly select through our custom objects for each particle and this will also allow us to use the Random Seed option as you can see in the example below.
|
|
|
|
Sequential |
Random |

Random Seed
Used only in conjunction with Custom Objects and Random distribution, allows you to randomize the distribution even further.
Scale Multipler
The Scale Multipler affects the overall scale of your particles.
|
|
|
|
| Scale multipler .05 | Scale multipler .1 | Scale multipler .2 |

Please note the Scale Multiplier is dependent on your scene scale, so these numbers might not always work if you. It is suggested to start with a small number and scale up to your desired size.
Emitter
Redshift supports rendering out particles generated from the Emitter inside of Cinema 4D. To get your particles to show up in the renderview all you have to do is apply a redshift tag to the Emitter and set the mode to Spheres. Then adjust the settings accordingly.
Standard Cinema 4D Particles
Tracers
You can render out tracers by adding a Redshift Object Tag and using the different Curve options shown below. For more information on Curve specific features, click here.

Redshift Object Tag
The Curve option will only appear on objects such as Splines,Tracers, XP Trails, and MoSpline.
Thinking Particles
Redshift supports rendering Thinking Particles inside of Cinema 4D. To render thinking particles make sure you have setup your particle geometry, demonstrated below.

Thinking Particles
Add a Redshift Object tag to your thinking particle setup to get them to render. All the particle parameters are described here.

Redshift Object Tag
X-Particles
Redshift supports rendering X-Particles inside of Cinema 4D. To render your X-Particles setups you need to add a Redshift Object Tag to your respected xpEmitters and adjust the particle settings. The particle parameters are described here if you need help.

Redshift Object Tag on xpEmitter
xpTrails
Redshift supports rendering xpTrails inside of Cinema 4D. To render your xpTrail setups you need to add a Redshift Object Tag and use the Curve options. For more information on Curvespecific features, click here.

Redshift Object Tag on xpTrail
Trail Colors
X-Particles 4 added support for extracting the per-trail color. For polygon-based curve primitives, the color value is available in the ShaderGraph through the RS Vertex Attribute node using the RSCurveColor attribute. For Hair strands, the color is available from the color output of the RS C4D Hair Attributes node.
Trail colors are available from X-Particles 4 build 690 or higher
Importing Alembic Particles
Cinema 4D supports importing particle setups from other programs, such as Houdini through an Alembic file. When importing an alembic file with particles, Cinema 4D automatically converts these to Thinking Particles, which can be rendered with Redshift as seen here. To import your particles go to File → Merge, then locate your Alembic (abc) file.
Importing Alembic file
Shading
Redshift supports a number of different attributes that can be used for shading inside the RS Shader Graph. You can access these differnt attributes via the shader graph through differnt
User Data Nodes by using the ![]() button to have a dropdown menu of differnt options. Alternatively, if you the know the attribute exact name you can type it in as well.
button to have a dropdown menu of differnt options. Alternatively, if you the know the attribute exact name you can type it in as well.
Note
Attribute Names are case and space sensitive.

Access Attributes
Attributes
Redshift supports attributes directly from X-Particles as well as attributes related to Thinking Particles (TP Data Channels). Also particles that are imported from other applications through an Alembic file (internally converted to Thinking Particles), also have there attributes imported. These can be viewed under Simulate → Thinking Particles → Thinking Particles Settings → Channels. For more information on importing particles click here.
Below is an example list of the imported attributes that can then be used in the Redshift Shader Graph.
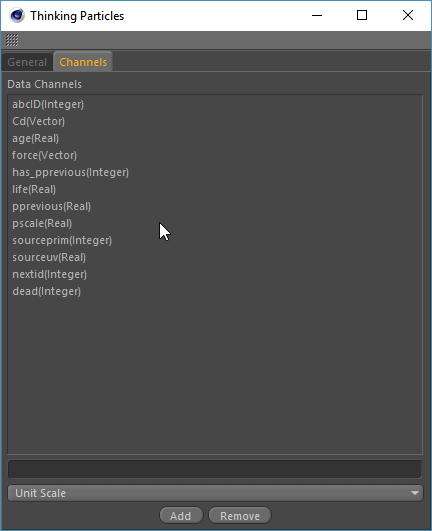
Thinking Particles Attributes Imported from Houdini
Note
These above attributes are not predefined, but are dependent on the application and parameters used to export the Alembic file
Important
The name of imported attributes must match exactly what is shown in the Data Channels list. In the above example the correct attribute name for life is life(Real) not life
Particle Attribute Reference
Redshift exposes the following built-in particle attributes
RSPID
-
Meaning: The particle ID
-
Type: Integer
-
Availability: Emitter / Thinking Particles / X-Particles
RSPAge
- Meaning: The particle current age
- Type: Scalar
- Availability: Emitter / Thinking Particles / X-Particles
RSPLife
- Meaning: The particle total life span
-
Type: Scalar
-
Availability: Emitter / Thinking Particles / X-Particles
RSPAgeNormalized
-
Meaning: The particle age remapped as a 0.0 to 1.0 value
- Type: Scalar
-
Availability: Emitter / Thinking Particles / X-Particles
RSPColor
-
Meaning: The color of the particle
-
Type: Color
-
Availability: Thinking Particles / X-Particles
RSPVelocity
-
Meaning: The particle velocity
- Type: Scalar
- Availability: Thinking Particles / X-Particles
RSPMass
-
Meaning: The particle mass
- Type: Scalar
- Availability: Thinking Particles / X-Particles
RSPSpinAxis
- Meaning: The particle rotation axis
- Type: Vector
- Availability: Thinking Particles
RSPSpinSpeed
- Meaning: The particle rotation speed
- Type: Scalar
- Availability: Thinking Particles
RSPSize
- Meaning: The particle size
- Type: Scalar
- Availability: Thinking Particles / X-Particles
RSPScale
- Meaning: The particle scale
- Type: Vector
- Availability: Thinking Particles
RSPAlignmentX
- Meaning: The X-Axis of the particle alignment matrix
- Type: Vector
-
Availability: Thinking Particles
RSPAlignmentY
-
Meaning: The Y-Axis of the particle alignment matrix
-
Type: Vector
-
Availability: Thinking Particles
RSPAlignmentZ
-
Meaning: The Z-Axis of the particle alignment matrix
-
Type: Vector
-
Availability: Thinking Particles
RSPRandomSeed
-
Meaning: The particle random seed
-
Type: Integer
-
Availability: Thinking Particles
RSPGroupID
-
Meaning: The particle group ID
-
Type: Integer
-
Availability: X-Particles
RSPDensity
-
Meaning: The particle density during fluid simulations
-
Type: Scalar
-
Availability: X-Particles
RSPRotation
-
Meaning: The particle rotation vector
-
Type: Vector
-
Availability: X-Particles
RSPDistanceTravelled
- Meaning: The distance traveled by the particle
-
Type: Scalar
-
Availability: X-Particles
RSPSpin
-
Meaning: The particle spin vector
-
Type: Vector
-
Availability: X-Particles
RSPTemperature
-
Meaning: The temperature of the particle
-
Type: Scalar
-
Availability: X-Particles
RSPFuel
-
Meaning: The particle's fuel amount
-
Type: Scalar
-
Availability: X-Particles
RSPFire
-
Meaning: The particle's fire amount
-
Type: Scalar
-
Availability: X-Particles
RSPSmoke
-
Meaning: The particle's smoke density
-
Type: Scalar
-
Availability: X-Particles
RSPExpansion
-
Meaning: the particle's expansion amount
-
Type: Scalar
-
Availability: X-Particles
RSPUVW
-
Meaning: The UVW coordinates of the particle
-
Type: Vector
-
Availability: X-Particles
RSPTransparency
-
Meaning: The particle's transparency value
-
Type: Scalar
-
Availability: X-Particles
Particle Material
The Redshift Particle Material is a preset material with a Color user data set to RSPColor (Particle Color Attribute) that is connected to the Diffuse channel. This will take your Particles default color and use it as the diffuse color of your Redshift Material.

Particle Material
You can shade particles with a regualr Redshift Material, the Particle Material is just a preset to save you a few clicks not a special material for only particles.
X-Particles
Here is an example of our X-Particles in the viewport then with the Particle Material applied. As you can see we are getting that same grayscale gradient as our viewport now in our Renderview. Because we are working in our regular Redshift Shader Graph we can use any nodes we want in our shading process. As you can see below we can remap our grayscale gradient with a Ramp to any colors we want. To do this we connect a Ramp Node in between our User Data color node and our RS material that came connected in our default Particle Material. We set the ramp source to Alt mode (which would be our user data node using our RSPColor attribute) and change the colors to a purple and gold color in our ramp gradient.
|
|
|
|
| Viewport X-Particles | Default Particle Material applied | Remapped Particle Material applied |


Another attribute we can use to shade our X-Particles is the RSPAgeNormalized. To use this we need a Scalar Data Node and set the attribute to Age Normalized. This will allow us to control our particle colors based on there age (How long the particle stays alive).

Scalar User Data Node
Add a Ramp node in between our Scalar User Data and Diffuse color and add a couple of colors to our ramp node. Make sure the ramp source is set to alt.

RS Ramp
As you can see now as we progress through our time line the particles are changing colors based off there age going from left to right on our ramp gradient.
|
|
|
|
| Timeline at 5 seconds | Timeline at 10 seconds | Timeline at 15 seconds |

Alembic Particles / Thinking Particles
Whether you are working with Thinking Particles inside of Cinema 4D or have imported particles through an Alembic file (more information here), Redshift supports a number of different attributes that can be used for shading. To look at all the attributes available for you to use, you can go to your Thinking Particles settings and look at the channels. Below is a particle system imported through an Alembic file from Houdini.

Thinking Partciles Data Channels
To shade these particles we are going to use the pScaleattribute inside our shader graph. So let's create a new Particle Materialand bring a Scalar user data node and set the attribute to pScale.

Scalar User Data
Next we bring in a Ramp node to remap our Scalar User Data. We want to connect this in between our Scalar User Data and our RS material and set the source mode to Alt. Then we are going to choose two different colors.
Remapping Scalar data
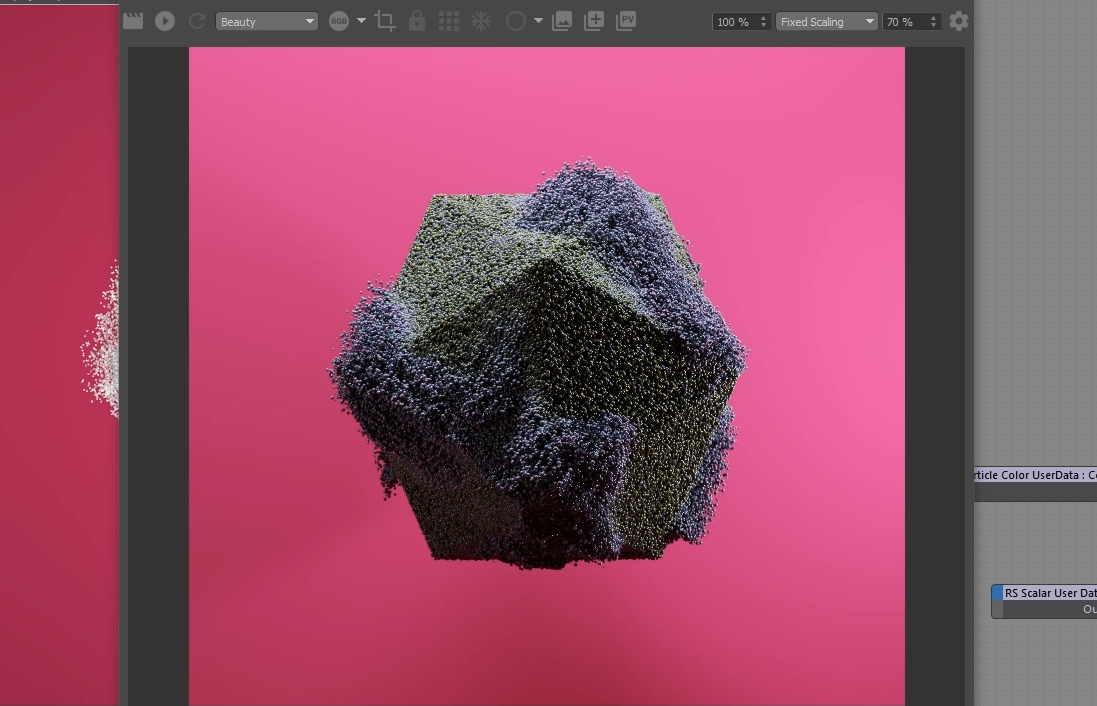
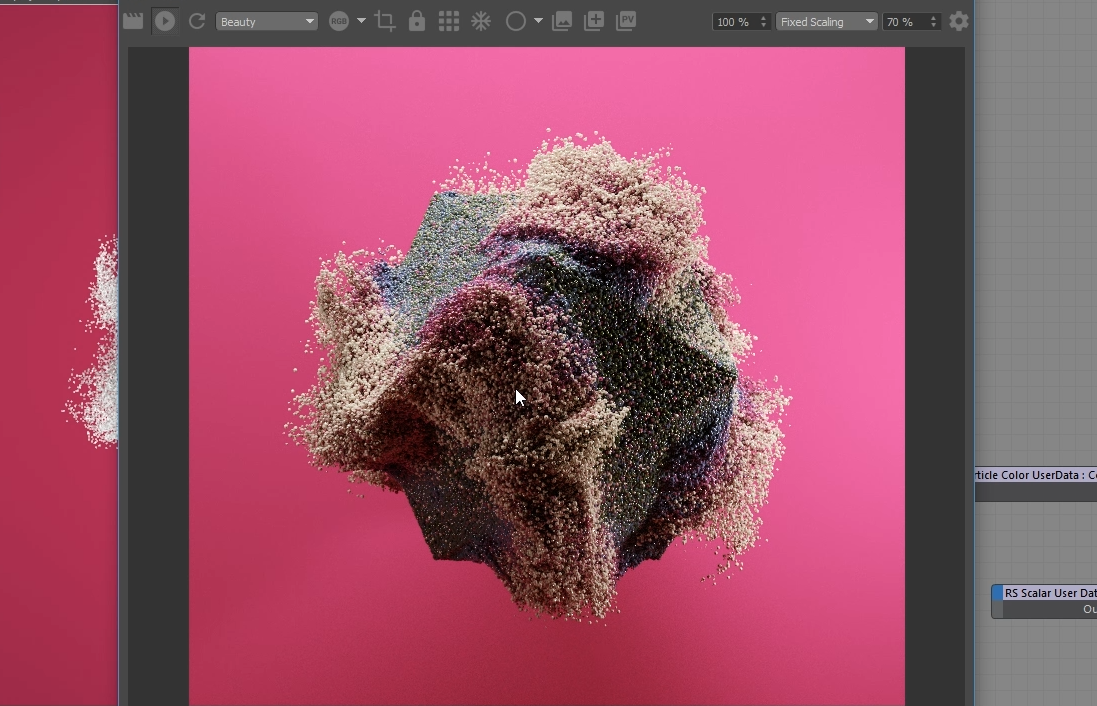
As you can see now the color is changing based on the size of our particles. The bigger particles in the middle stay green and the particles that are flying away and getting smaller are turning purple.

Particles shaded based on pScale
Any scalar value can be fed into a Ramp node to remap the colors from left (0.0) to right to (1.0). You can also use a change range to scale a real number to a scalar, for example a value from 0-300 can be remapped to 0-1.
Caching Simulations
Caching particle systems is essential, especially to get consistent results when using Motion Blur. Redshift needs to sample a scene before and after the current frame to determine the positions and trajectory of particles, to allow Redshift to do this we need to cache our particles. Below is the different ways to cache our setups inside of Cinema 4D.
X-Particles
To Cache your X-Particlesyou can create a Cache Object and choose your folder then click Build Cache.
Emitter
To Cache your Emitter particles you can go to Simulate → Particles → Bake Particles.
Thinking Particles
There is no Real way to bake Thinking Particles but there is a work around if you must. You can Create a cloner object and set the mode to Object then go to your Thinking particle settings and drag the TP group to your cloner.
Next we are going to make a sphere and drag it under our Cloner and turn on render instances. Now we can right click our cloner object and use a mograph cache tag then bake.

Another Option is to Export your thinking particles as an alembic file and re-import them into your file.
Motion Blur
We can enable motion blur on our particles by going to the motion blur settings and checking the box. You can view the specific Motion Blur section here.

Motion Blur Tab
As you can see below we have our particles with different frame durations for stronger motion blur effect.
|
|
|
|
| No motion Blur | Motion Blur enabled Frame Duration:2 (Default) | Motion Blur enabled Frame Duration:5 |


If you are getting inconsistent motion blur results make sure to bake your simulations.
Example: Rain
We can can setup a basic rain system with particles and Motion Blur inside of Redshift and Cinema 4D.
First let's set up an emitter with a few modifiers.
C4D Emitter
Next add a Redshift Object Tag to our emitter and adjust a few of our settings. We are going to make the particles pretty small and we are going to use the optimized sphere mode to emulate real rain.

Redshift Object Tag
Now we want to add a water like material to our emitter. Just a basic refractive material.
Material Settings
Before we enable Motion Blur we want to bake our particle simulation.
Bake Particles
Now we're going to enable Motion Blur and adjust some of the unified sampling settings.

Redshift Settings
You can now merge this setup with any of your scenes.

Example: Houdini Particles
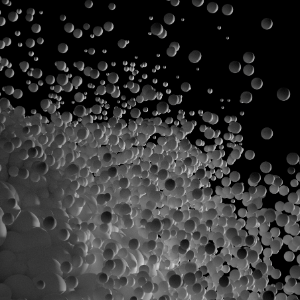
We can take particles generated in Houdini, bring them into Cinema 4D and then render them with Redshift. When you import particles from Houdini with an alembic file the particles are automatically converted into Thinking Particles. More information on that here.
So first we are going to locate our Alembic file that we exported from Houdini and merge it into our current scene.
Now we are going to add our Redshift Object Tag and adjust the some of the parameters.

The Scale Multiplier is dependent on the scene scale in Cinema 4D and Houdini.
Next we are going to setup our material for our particles. First lets check our available attributes, under our Thinking Particle settings, to use for shading. Check here for more information.
Now we're going to set up the material. We're using a User Scalar Data node and the age(Real) attribute connected to a Change Range node. That is then connected into a Ramp node to remap those values to colors we selected.

Setting up pScale
Let's set up our pScale attribute to effect our scale of our particles.
First we need to add an Xpresso tag to our particles and open up the Xpresso Editor.

Next we need a couple of nodes to complete our setup. First we need to bring in a P Pass node, and then go to our Thinking Particle Settings and drag in our group.

Then we need two more nodes, the GetData node and SetData node.Then we need to expose the pScale parameter on the GetData and the Size parameter on our SetData node. We connect the P Pass to our GetData node, then connect our pScale(Real) on our GetData to our SetData's Size parameter. We also need to connect our P Pass to our SetData in the Particle parameter. Note that you might need to reset your timeline for the scale to become effective.
51a5.gif)
|
|
|
| No pScale (all particles same size) | pScale Setup |