Table Of Contents
- Introduction
- Verifying the Installation
- Verifying System GPUs
- Creating a simple scene
- Selecting Redshift as the renderer
- Our first render
- Creating a Redshift Material
- Adjusting the material settings
- Editing Materials
- Editing the Material Shader
- Interactive Preview Rendering - IPR
- Creating a Redshift Light
- Creating a Physical Sky and Sun
- Creating a Redshift Camera
- Adding Lens Effects to a Camera
Introduction
In this section we are going to walk through the basics of Redshift by making a simple scene, applying materials, setting up lights and a camera and rendering it.
Verifying the Installation
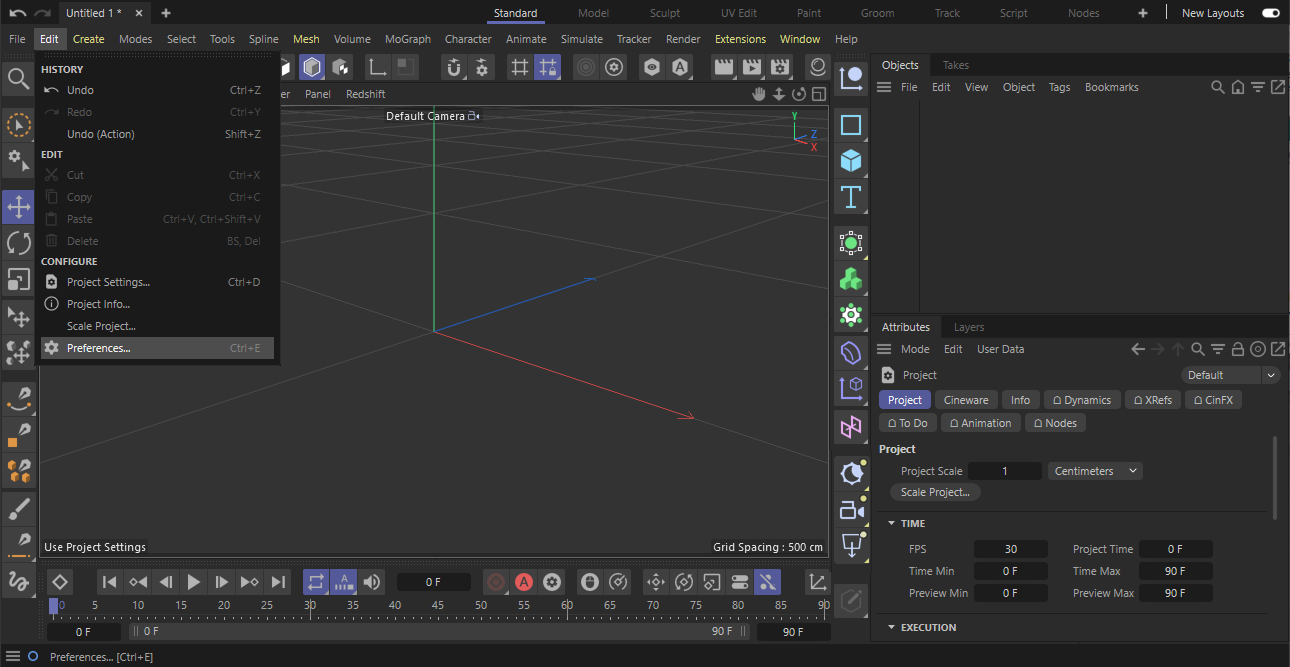
First of all let's make sure that Redshift has installed correctly by looking at the Redshift Preferences which are are available in the Cinema 4D Preferences window. Select the Preferences... from Cinema 4D's Edit menu.
When selected, the Redshift Preferences are available in the Renderer category of the Cinema 4D Preferences. Here you can also find the installed version number of Redshift in the About category.
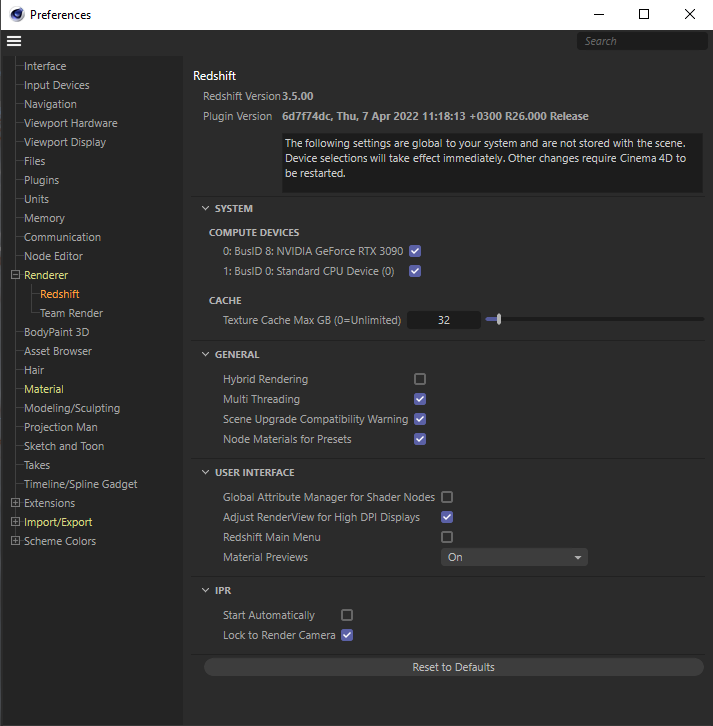
Verifying System CPUs and GPUs
Redshift can use CPUs, GPUs or both for rendering, so make sure, that all available hardware is detected in the System > Compute Devices category and activate all devices that should by used by Redshift.
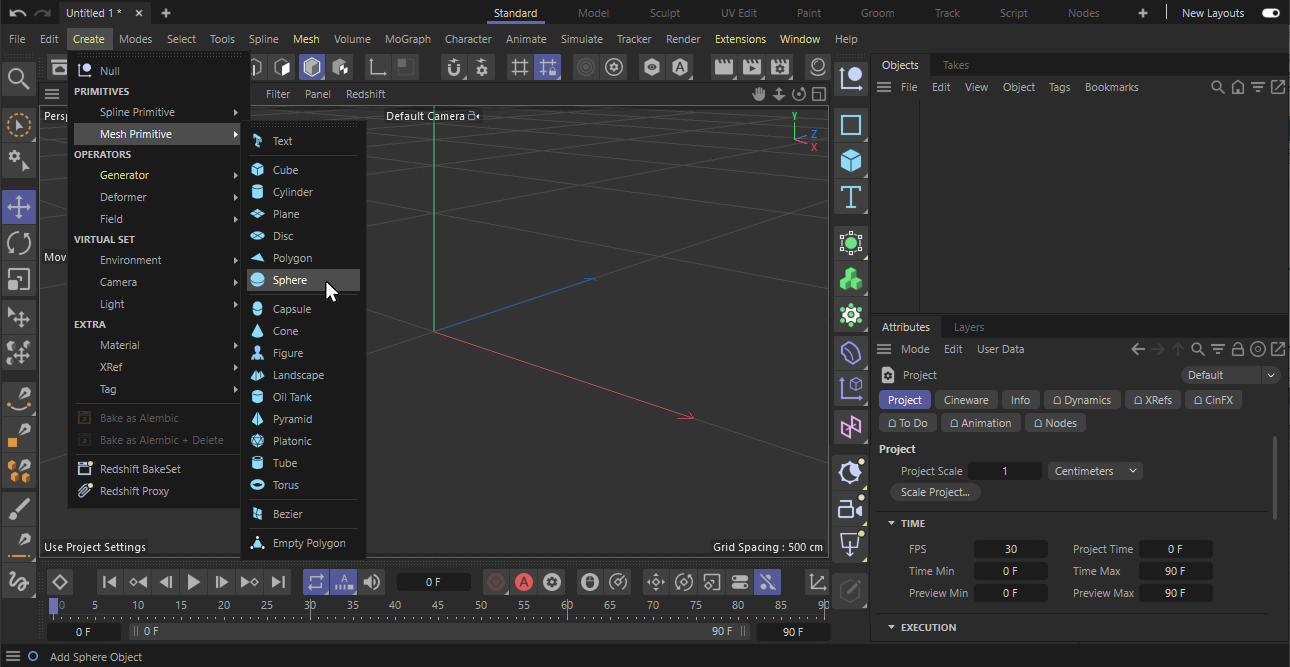
Creating a simple scene
From the Create menu select Mesh Primitive and then Sphere to add a sphere to our blank scene.
Selecting Redshift as the renderer
Next we need to tell Cinema 4D to use Redshift as the current renderer. To do that, we open the Render Settings window by selecting Render from the Cinema 4D's menu bar and then Edit Render Settings...
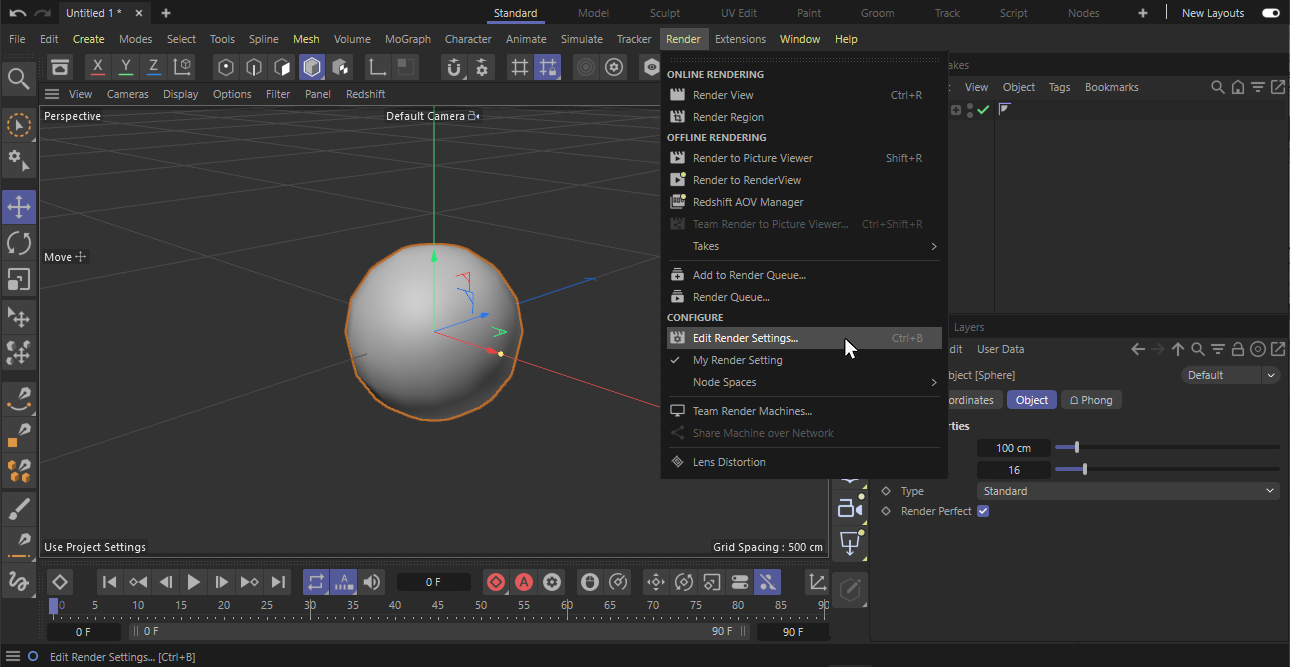
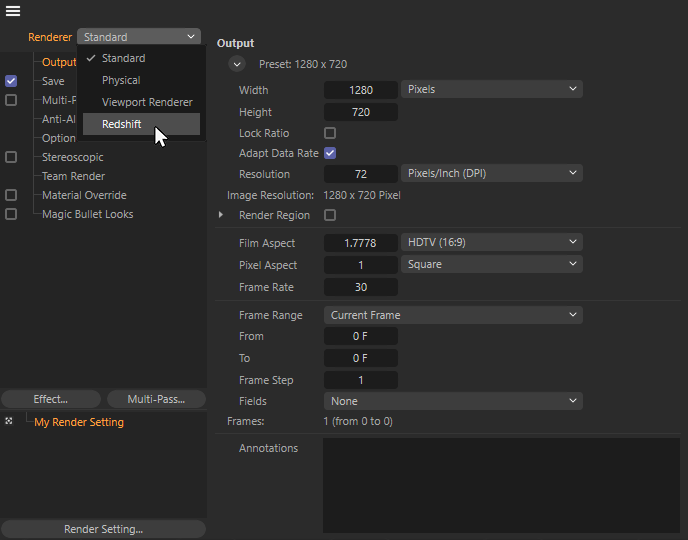
Then in the Render Settings window we select Redshift from the Renderer selection drop-down box.
Only with Redshift as the active Renderer, you can see all Redshift commands and objects in the Cinema 4D menus.
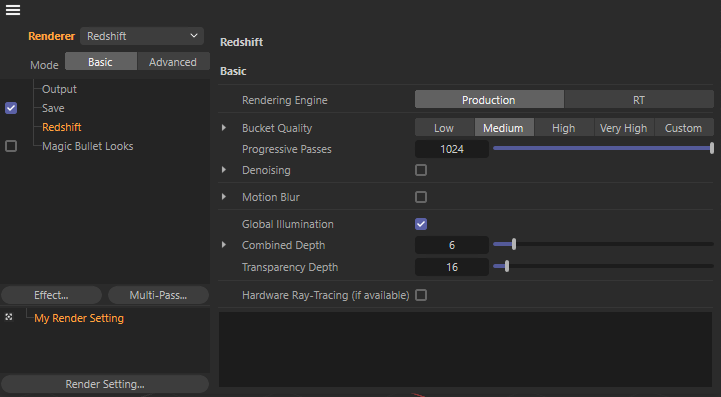
We can now select the new Redshift entry from the left side of the Renderer Settings window. This will reveal the Redshift render settings for our scene.
Our first render
Now, we are all set, to render our simple scene. From the Render menu in the main menu select Render View to render our object in the viewport.
You should see something like this:
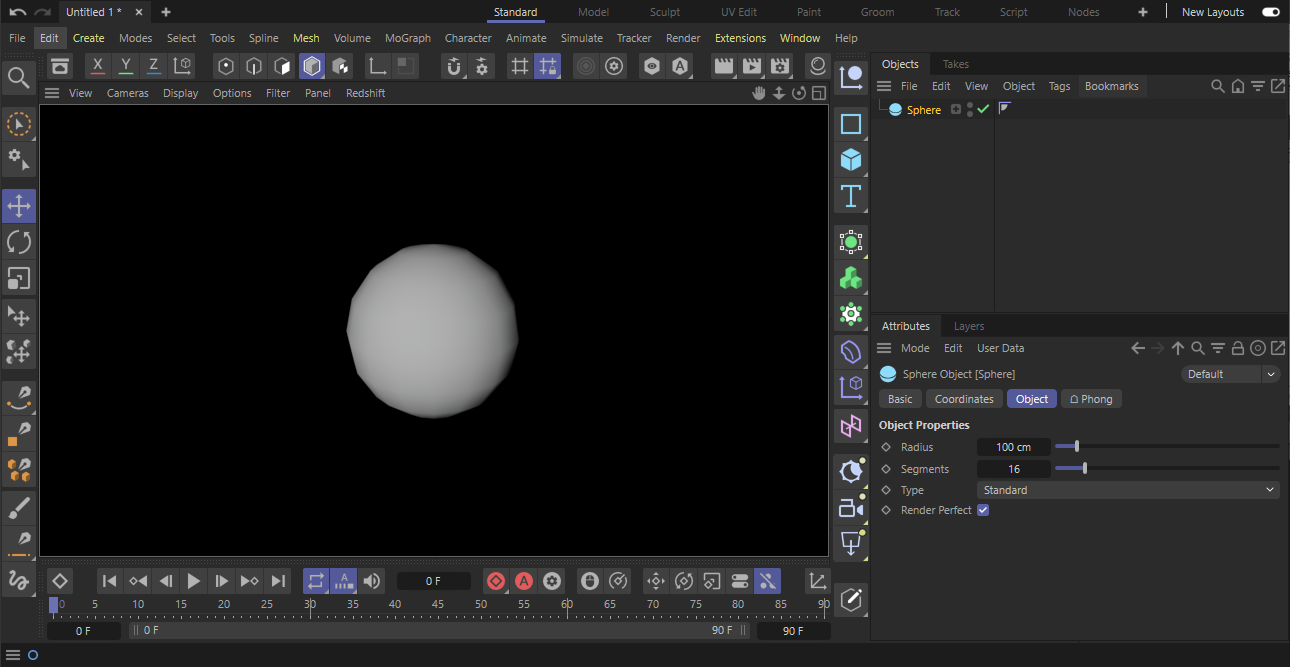
Not very exciting.
Let's see if we can make things more interesting by adding materials.
Creating a Redshift Material
Hold down the left mouse button on the + icon in the Material Manager to open the material menu. In the Materials group select the Material option, which is the standard material for Redshift.
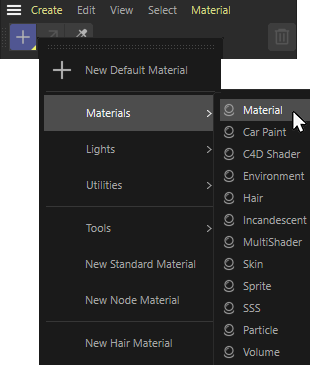
This will create a material based on Redshift's RS Material physically correct shader.
Assigning a material
Drag and drop the new material from the Material Manager onto the sphere in the viewort or alternatively on the object in the Object Manager.
Adjusting the material settings
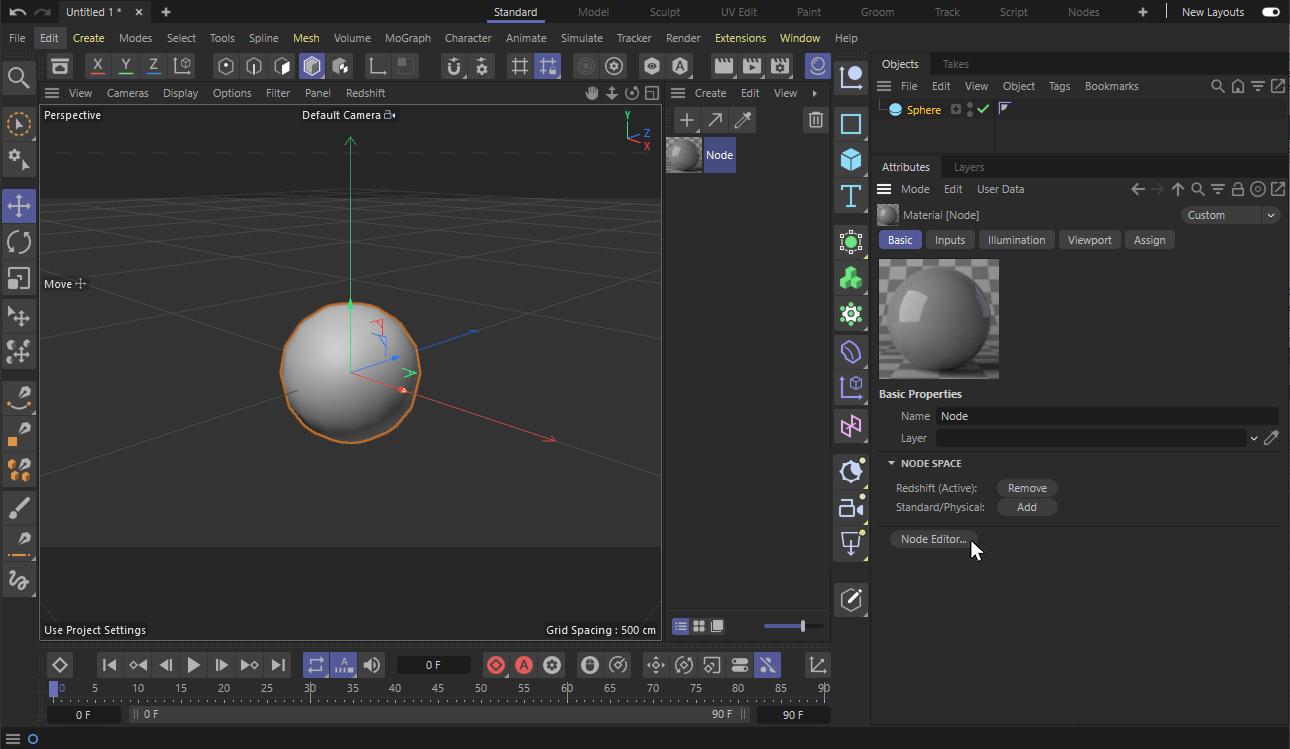
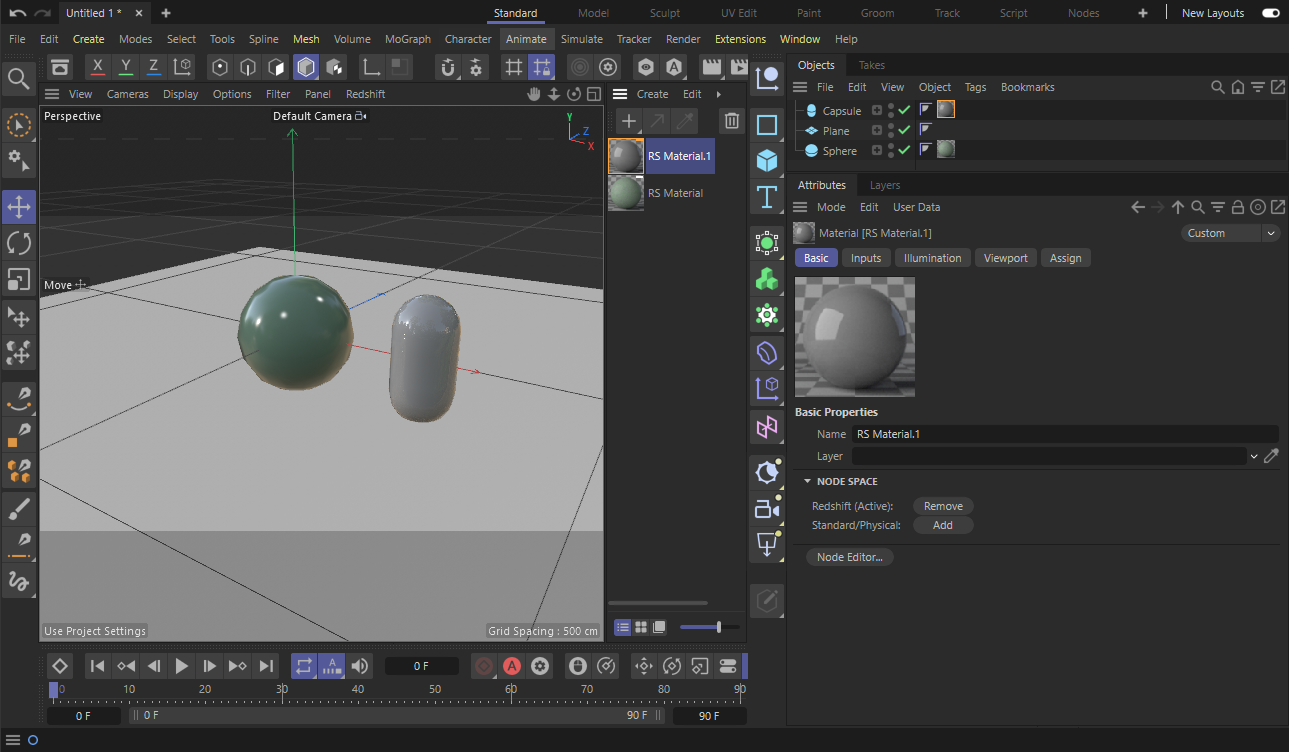
Select the Redshift material from the Material Manager and select the Basic tab in the Attribute Manager. There you can find a button to open the Node Editor for this material, to edit its settings.
An even faster way would be to double click on the material preview in the Material Manager to open the Material Editor. Here you can find all settings of the material and also a button to open the Node Editor for that material.
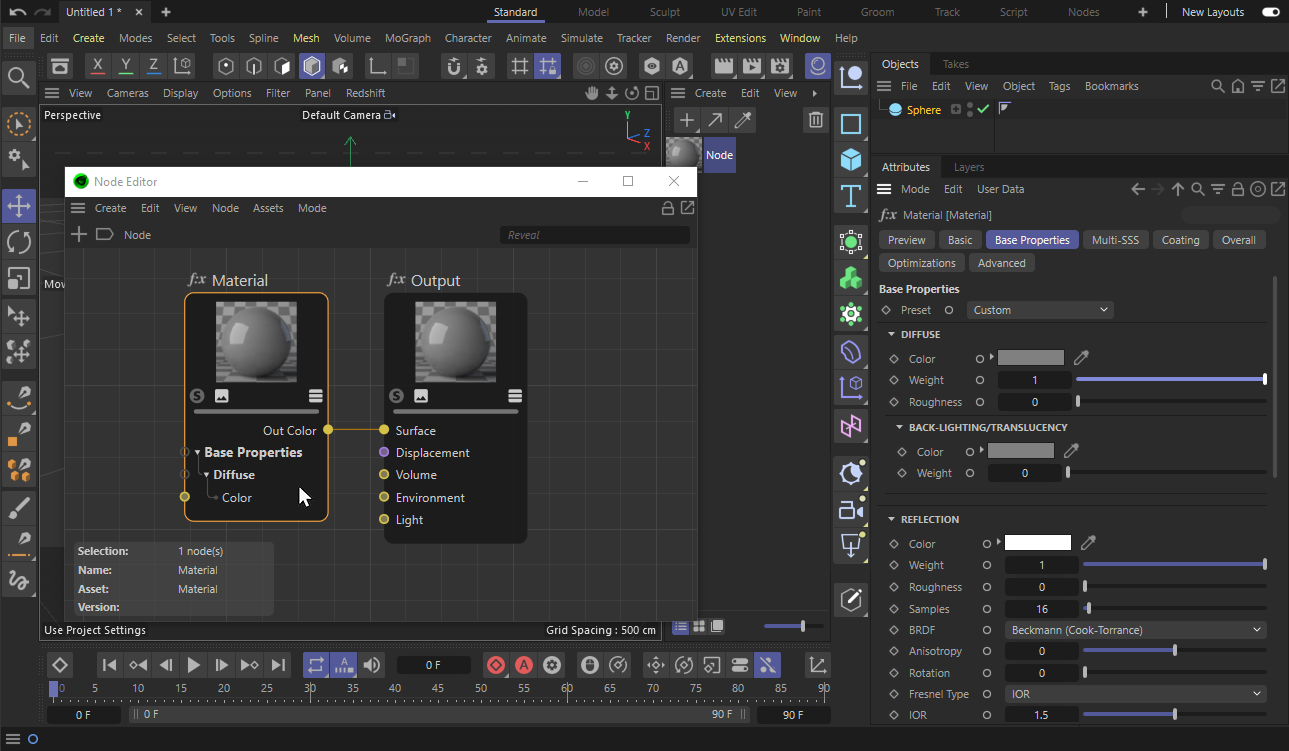
The Node Editor opens as a separate window and shows the two nodes, that define the Redshift standard material. Click on the Material node to select it and to see its settings in the Attribute Manager.
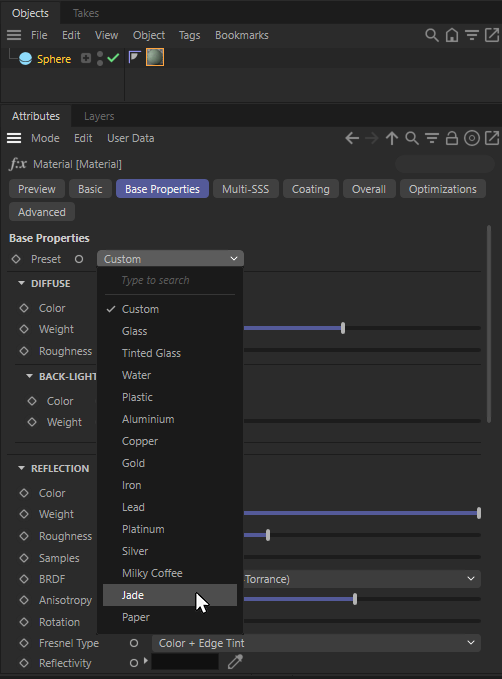
In the Attribute Manager select the Jade preset from the Base Properties tab. Note that the material preview updates to reflect the changes.
Now, render the scene again, to see our new material.
Editing Materials
First lets add a couple more objects to the scene to make it slightly more interesting. Add a Capsule object and a sufficiently large Plane object to act as a floor for our other objects. Create another Redshift material, leaving all the settings in their default state, and assign it to the capsule object.
Now our scene would look something like this
Select the capsule material and open the Node Editor for it.
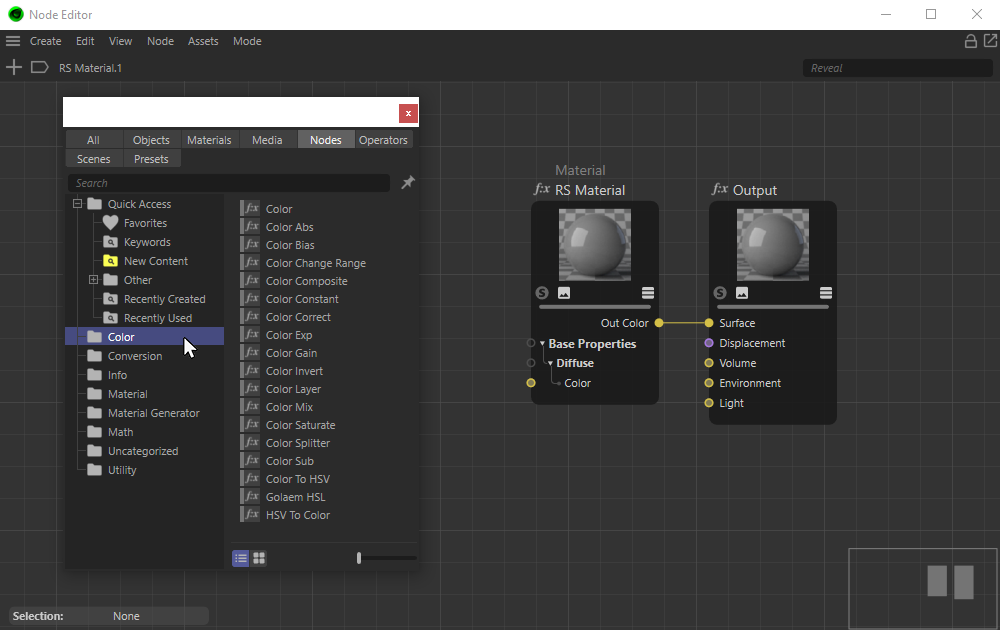
You can already find all settings of a material in the Material Editor. However, to have have access to all options of the material creation, you should open the Node Editor to customize your materials. In Redshift materials are constructed by connecting
Shader Nodes together. To add new nodes to the Node Editor you can use the Asset Browser.
The fastes way to open the Asset Browser is by double clicking to an empty space in the Node Editor.
From the Nodes tab of the Asset Browser you have access to all Redshift nodes. Just double click on a listed node or drag the node directly to the Node Editor to add it to the opened material.
Editing the settings of a node is done by clicking on a node to select it and then configuring its parameters in the Attribute Manager.
Almost all available nodes offer input ports on their left side and output ports on their right side. By connecting these ports - just "draw" a connection between the node ports by holding down the left mouse button - you can exchange values between nodes. In the example shown above you can see, that the Material node outputs color information that is used for the Surface of the material at the Output node. The Output node is always the last node in every Redshift material node setup and collects all data that the materials need to show.
Editing the Material Shader
Let's try changing the color of the shader. Select the RS Material node, and then, in the Basic Properties tab of the node's attributes change the Color parameters of the Diffuse section. Render the scene to see your changes.
Now let's make our boring gray material into something more interesting by adding a Texture!
Adding a Texture
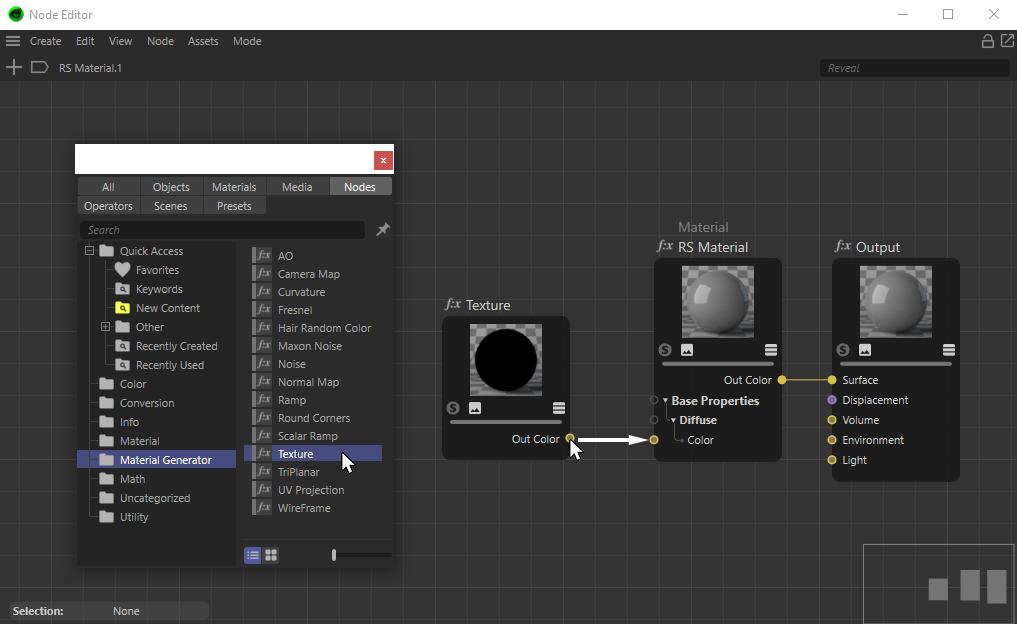
Open the Nodes > Material Generator category in the Asset Browser and drag a Texture node into the graph. This will create a texture sampling node. Now let's connect its Out Color port to the Diffuse Color input port of the RS Material shader. Just hold down the left mouse button while clicking on the Out Color port and moving the cursor over the Diffuse Color input of the RS Material node. After releasing the left mouse button a connection between the two ports is drawn. By double clicking on an existing connection you can delete it again, if needed. To add other input or output ports to nodes, just right click on a node and choose the desired port from the Add Input or Add Output menus.
Let's tell the Texture shader node, the file we want to use. Select the Texture node and in the General settings tab, set the texture's Path parameter by clicking the three dots button and picking a texture file from your system:

Tip
You can also create a new Texture node and load a bitmap to it by dragging a texture directly from the Asset Browser or from the File Explorer / Finder to the Node Editor.
Now let's render again to see the results:

Interactive Preview Rendering - IPR
Editing the scene and clicking "Render" every time is not only counter-productive, but also slow for complex scenes. Wouldn't it be nice if we could get some quick feedback on our scene, without having to stop our flow? Actually this is one of the many features of Redshift as you can activate interactive rendering directly in your viewport from its Redshift menu. If you prefer to have the interactive preview in a separate window, you can also open the Redshift RenderView from the Cinema 4D Window menu and use the ▶ button there to start the rendering. Check the RenderView page, for more info.

Now with the IPR active, move the viewport camera around, move an object, or try changing some material parameter. All changes will be reflected in the viewport.
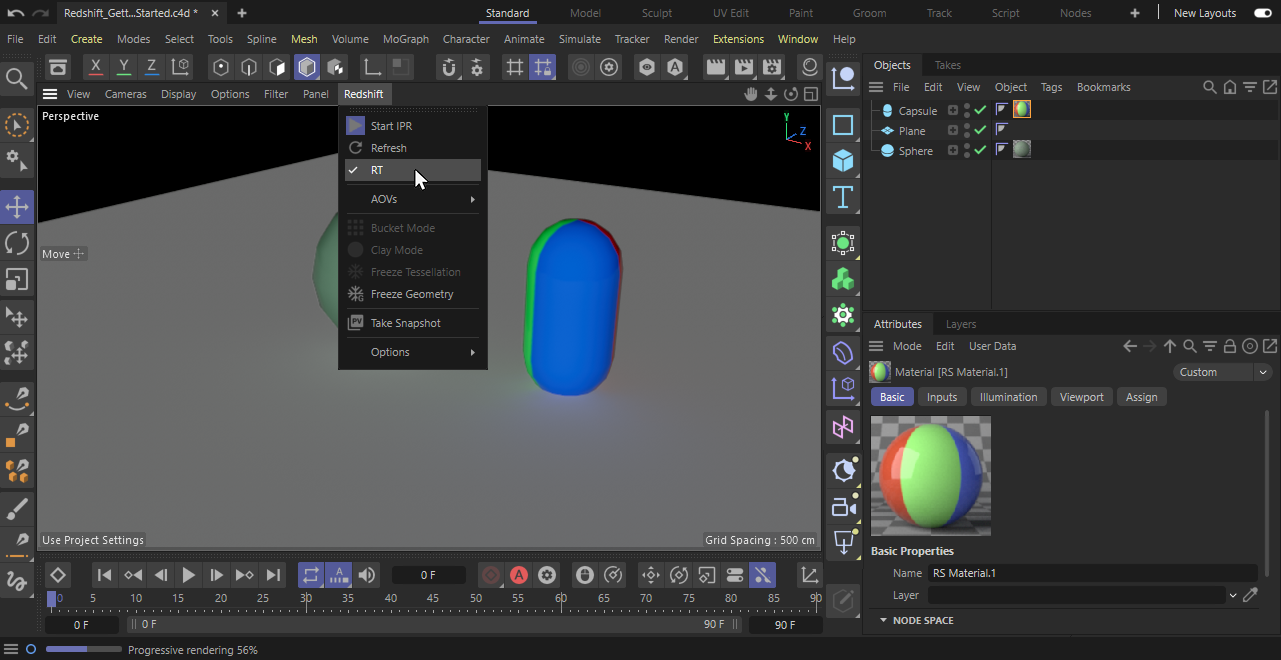
As a second interactive rendering mode you can also activate the Redshift Realtime engine, which can be even faster than the standard IPR mode. You can find the RT option just next to IPR in the viewports Redshift menu. You have to activate Start IPR first to get access to the RT option.
Currently RT rendering doesn't support all Redshift features yet (such as volume rendering), but for standard materials and setups it works faster than the standard IPR and can deliver even lower noise levels. Learn more about RT rendering here.
Creating a Redshift Light
Our scene so far has only very simple lighting. Let's make it more dramatic by adding a Redshift Light.
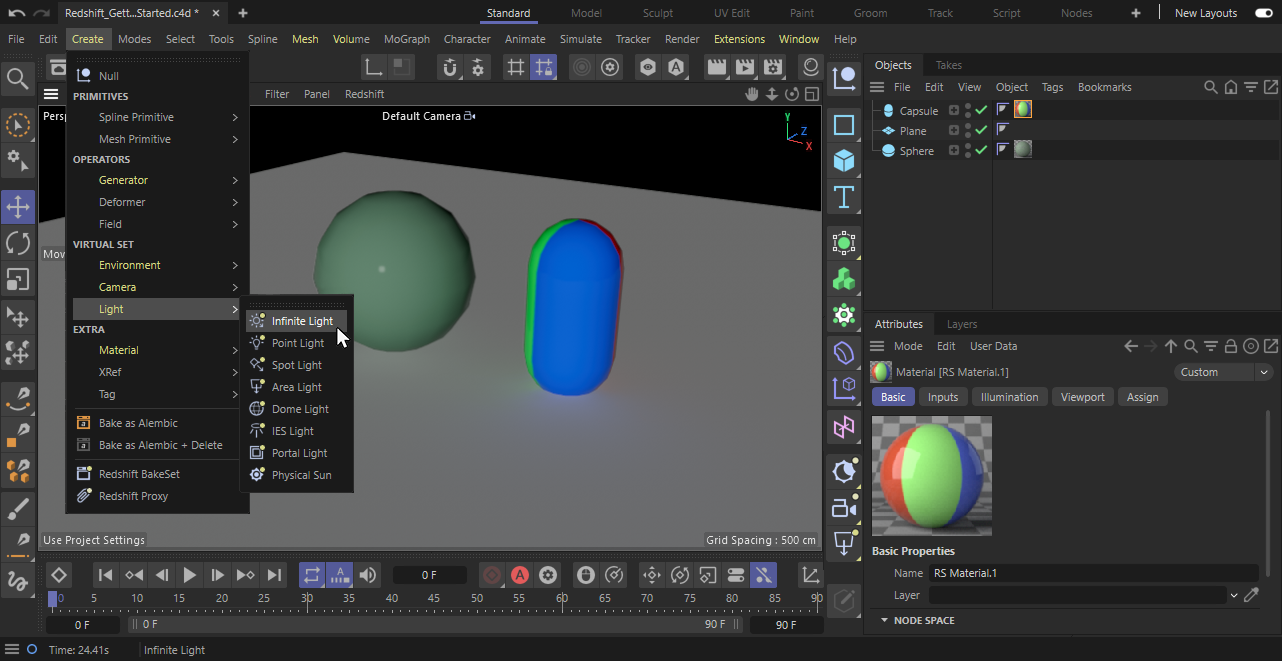
From the Create menu, select Infinite Light from the Light sub-menu.
The position of this type of light doesn't change the illumination. Just rotate the light to control the direction of the incoming light for your objects. Let's take a quick look at the basic parameters of this object in the Attribute Manager.
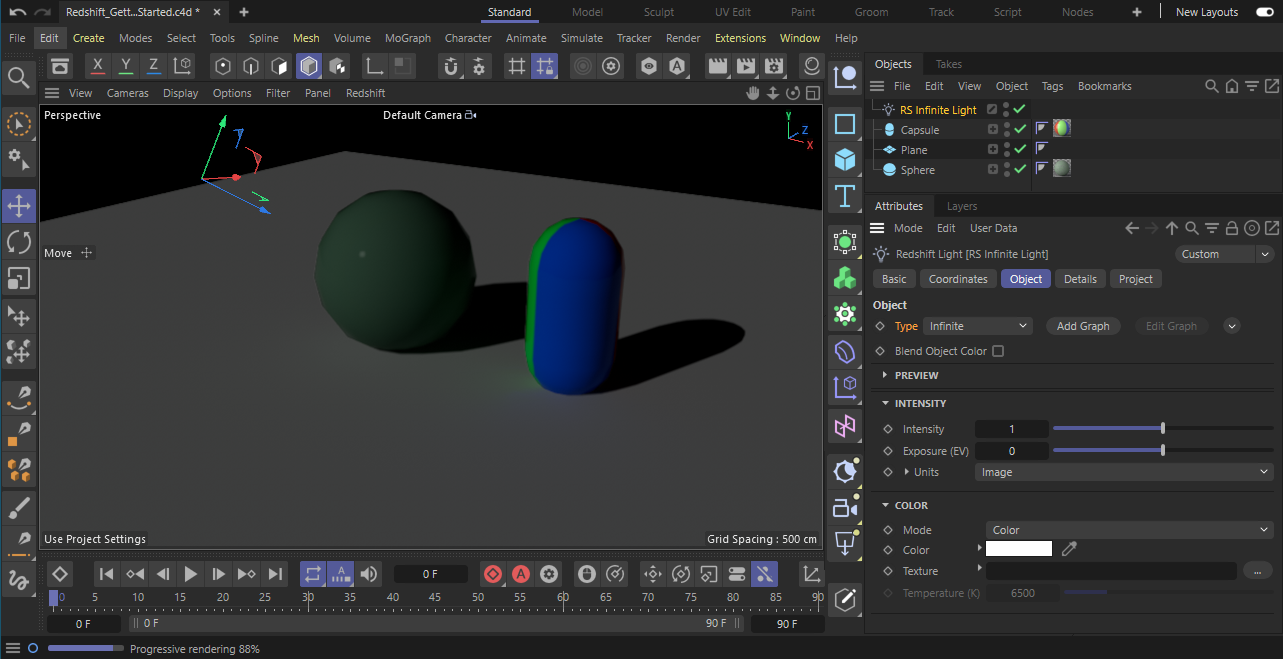
Looking in the Object tab of this object, we see that this light is actually an Redshift Light where its Type has been set as Infinite. You can easily switch between different light types by changing the Light Type parameter. Below you can also find other typical settings to control the color or intensity of the light.
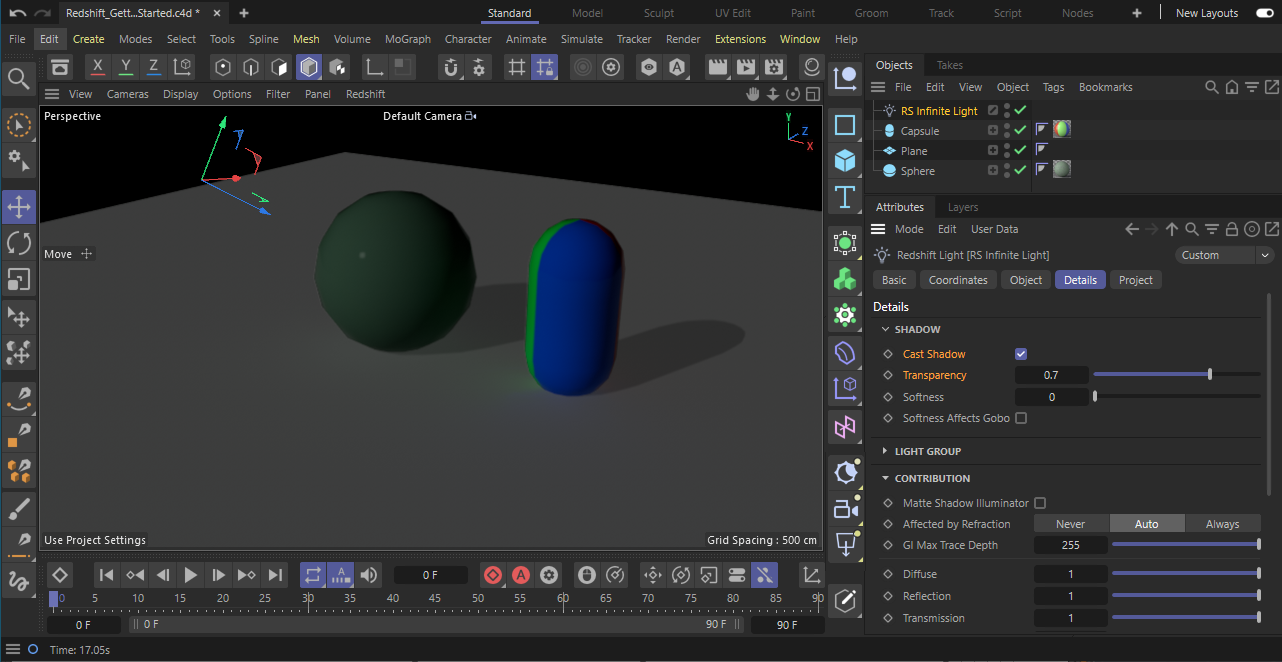
Next we tweak the shadows of this light a bit by clicking on the Details tab.
Here you can find the shadowing settings. You could deactivate the shadow calculation here or tweak the intensity of the shadows by adjusting the Transparency setting.
Creating a Physical Sky and Sun
How about we go one step further with the lighting? Let's add a Physical Sun and Sky to give our scene a more realistic look.
First let's delete the Redshift Light, because it will not be necessary once we have a Sun object.
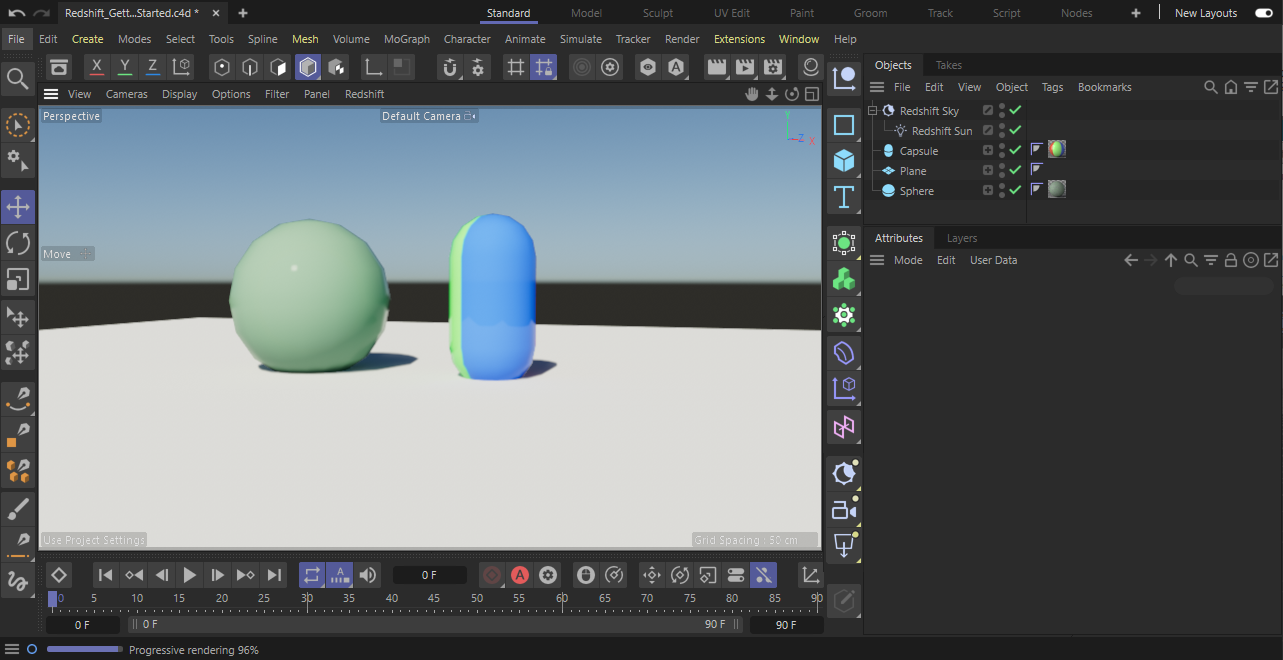
Then in the Create > Environment menu select the Redshift Sun & Sky Rig.
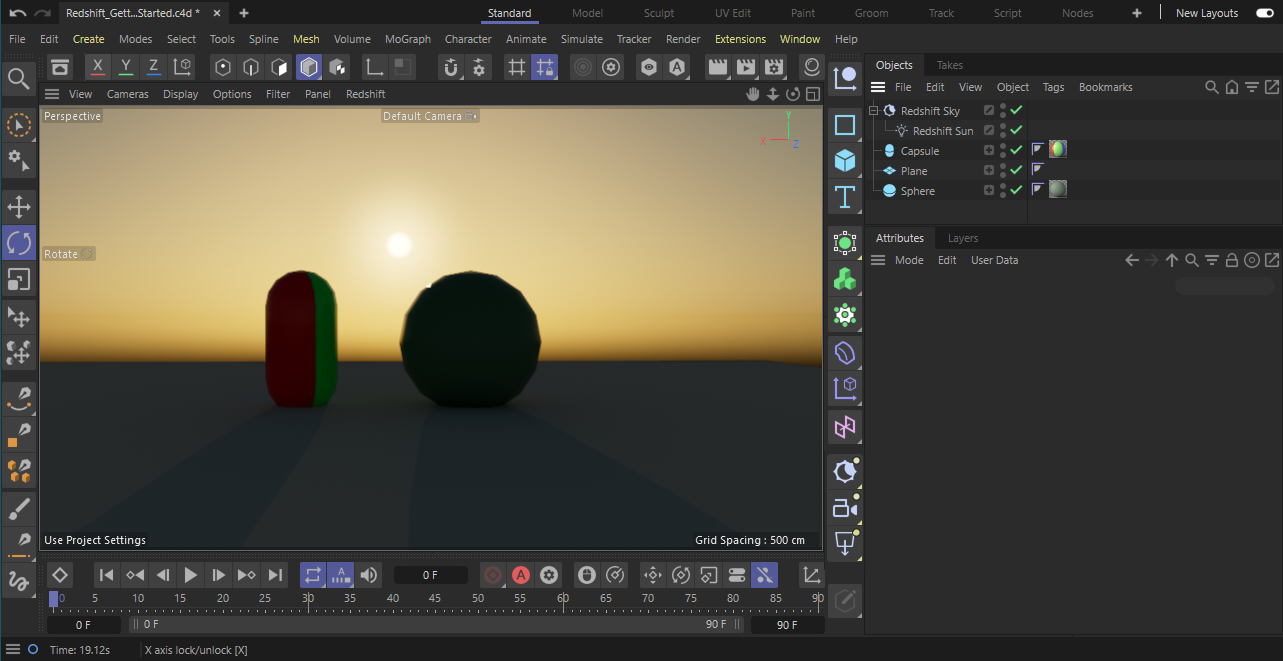
Let's rotate our viewport camera towards the horizon and check our interactive rendering in the viewport to see how it looks.
Tip
A Redshift Sun object can be rotated and animated just like an Infinite light. Changes to the Sun's direction will also affect the behavior of the Physical Sky.
So, let's bring the sun into view by selecting the Redshift Sun object and rotating it until it faces our viewport.
You can try changing the parameters of the Redshift Sun and Redshift Sky objects, and see what other results you can get.
Creating a camera with Redshift settings
Let's experiment a little with this render, by changing the camera type to one of the Redshift cameras.
First let's create a Redshift camera object. Be sure to have your Perspective viewport active and then open the Create > Camera menu to select the Standard camera. The new camera will now match our current viewport.
Then activate the camera by clicking on the camera activation icon to the right of the new camera object in the Object Manager. Now our viewport is looking through our new camera.
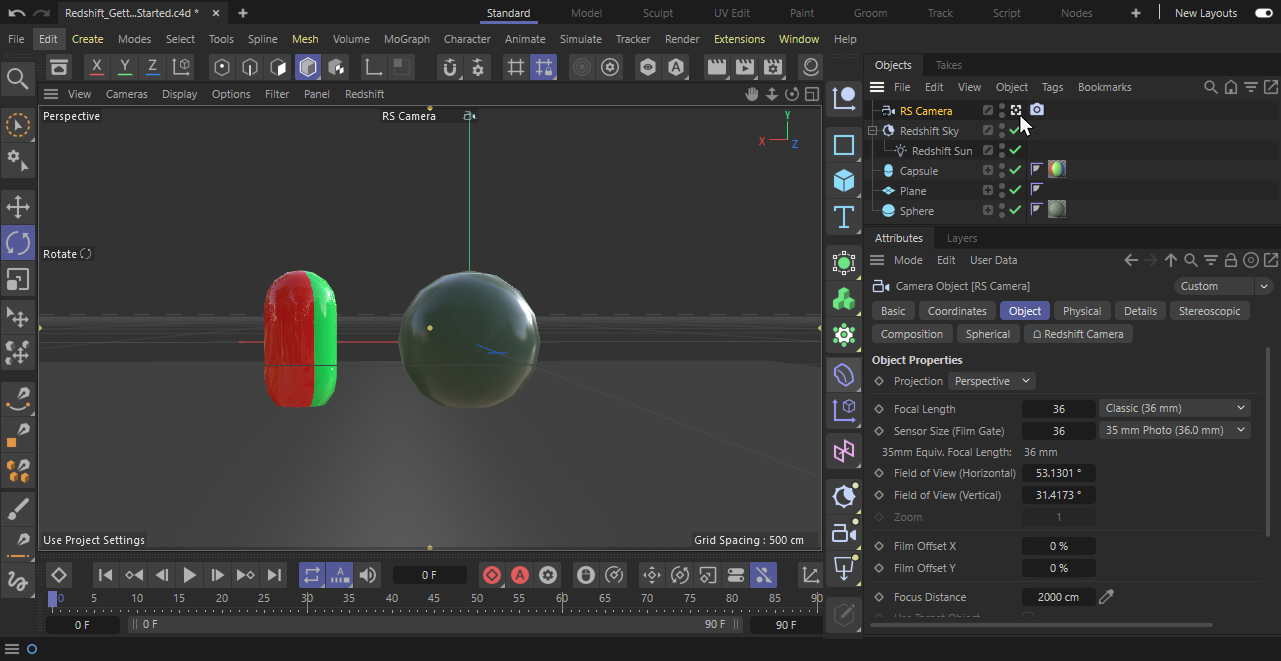
In the Attribute Manager you can find all Redshift specific settings in the Redshift Camera tab, Let's check out some of the parameters.
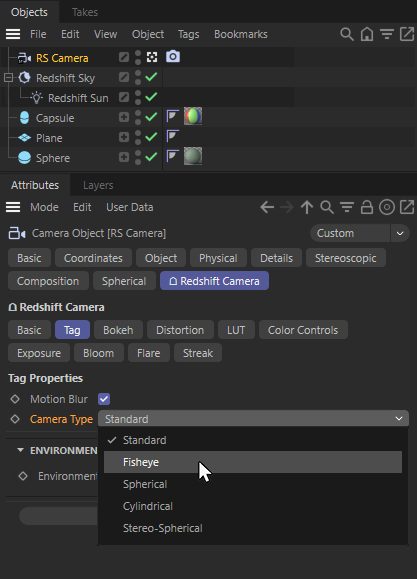
With Camera Type you can override the camera type from the standard Cinema 4D one to one of the Redshift ones.
Let's change it to "Fisheye".
Now our render camera uses a Fisheye-type lens, and looks like this in the Redshift RenderView.
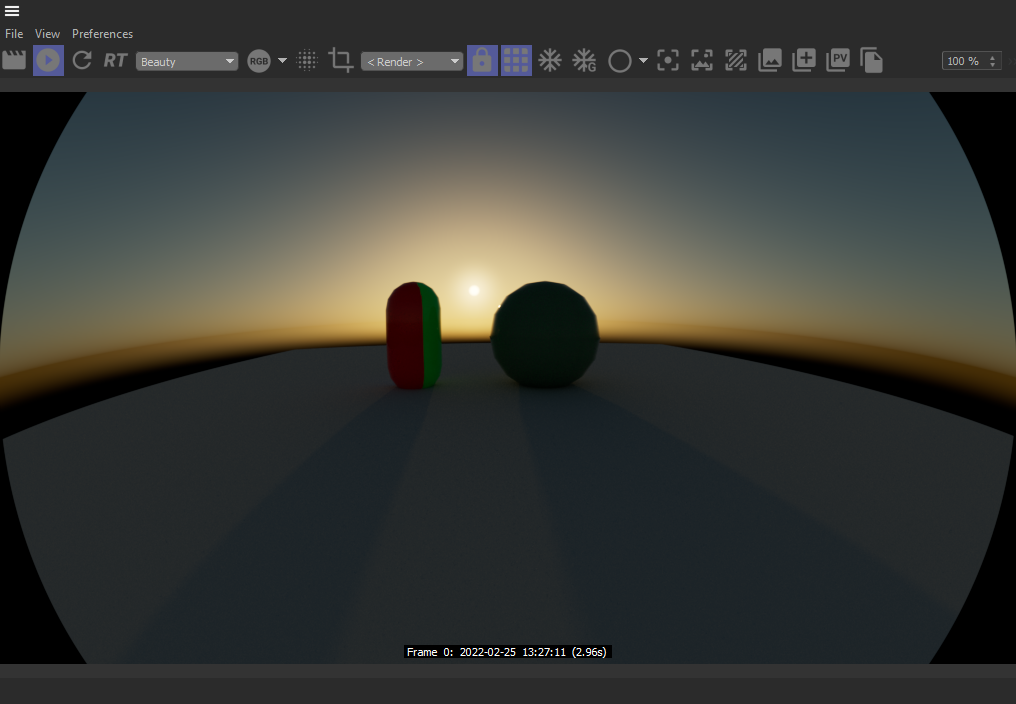
Try the different camera types and experiment with their parameters.
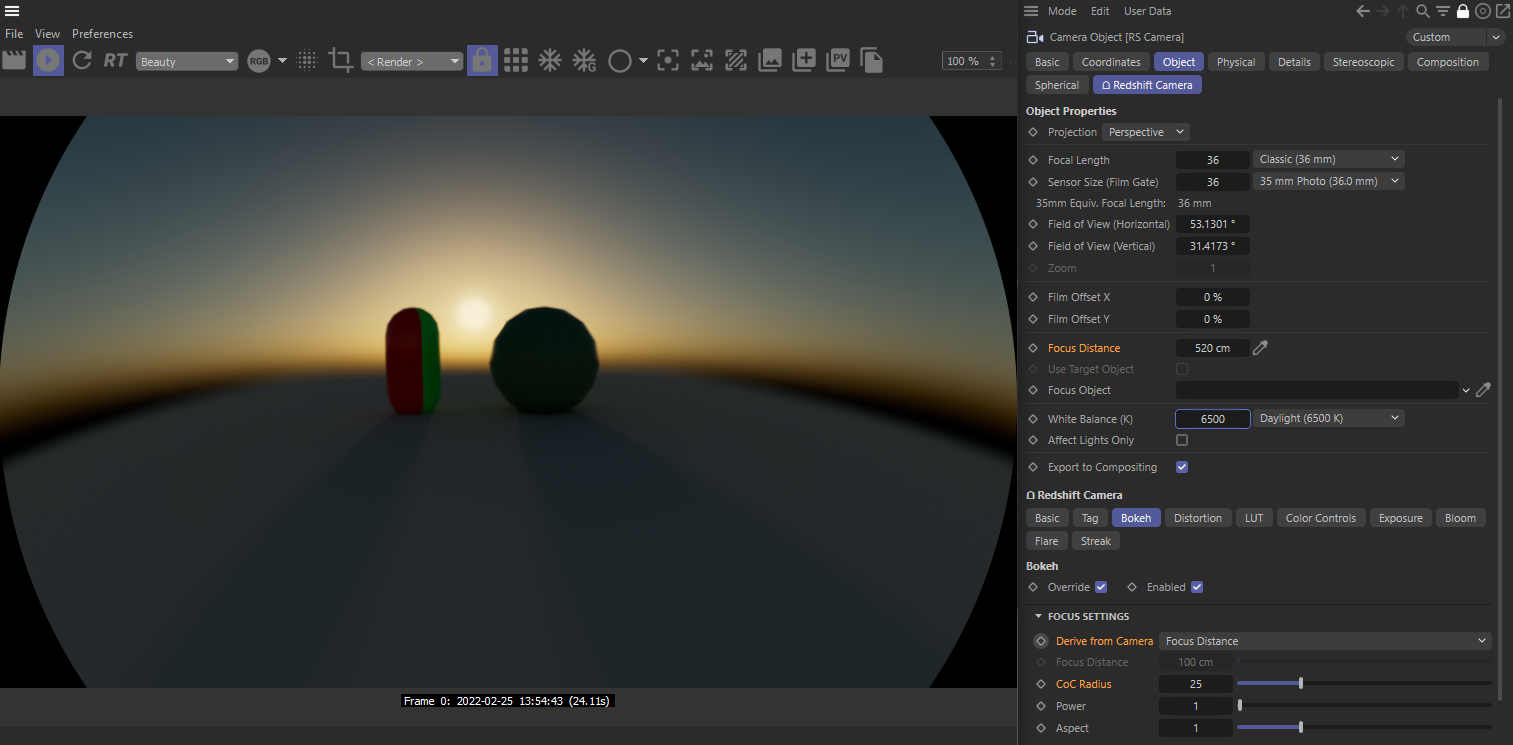
Adding Lens Effects to a Camera
We can also add lens effects to our Redshift camera, via the Bokeh, Distortion, LUT, Color Controls, Exposure, Bloom, Flare and Streak tabs.
For instance to add some depth of field to our rendering, we adjust the Focus Distance and switch the Derive from Camera menu in the Bokeh tab to Focus Distance. This way the Focus Distance of the camera will be used by Redshift. The blur radius of out of focus elements can now be controlled by the COC Radius that is also a part of the Bokeh settings.