Table Of Contents
- Introduction
- Primary And Secondary GI Engines
- Main Global Illumination Settings
- Recommended Settings
- Pros and Cons of the Different Techniques
Introduction
In real life, light photons originate from light sources, they bounce off a number of surfaces, have their colors modified by these surfaces and eventually reach our eyes. In computer graphics, Global Illumination (GI) attempts to simulate those photon bouncing interactions. This simulation adds realism to lighting and helps achieve more life-like images.
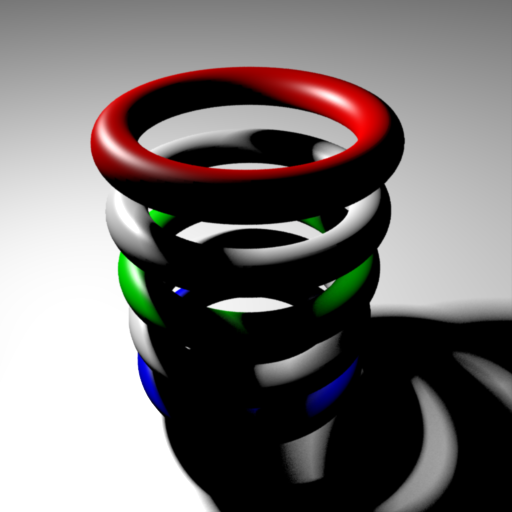
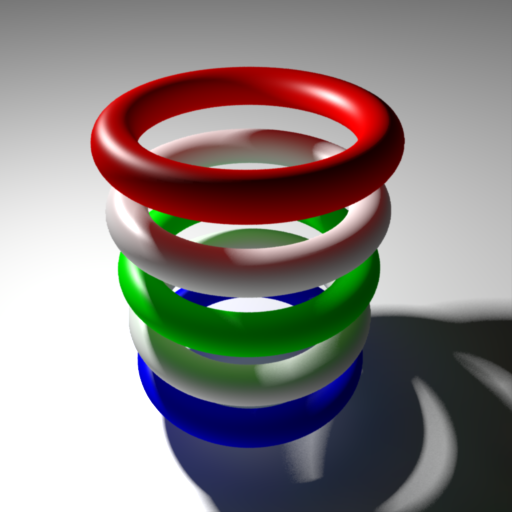
GI can have a profound effect even on extremely simple scenes, as shown below:
|
|
|
| Without GI | With GI. Notice the color bleeding. |
Light that reaches object surfaces without any bounces is referred to as direct lighting. Once light has bounced off one or more surfaces it is referred to as indirect lighting. So what GI essentially computes is indirect lighting.
When a photon hits a rough surface, it gets scattered around randomly. This is called Diffuse Global Illumination. When a photon hits a strongly reflective or refractive surface (like mirror or glass), it tends to have a more predictable bounce direction. Because of this, photons bouncing off reflective/refractive surfaces tend to get 'clumped' together and form interesting lighting patterns. These patterns are called Caustics. Global Illumination, in general, refers to both of these effects: Diffuse GI and Caustics
The image shown above is lit using Diffuse GI, while the image below uses Caustics.
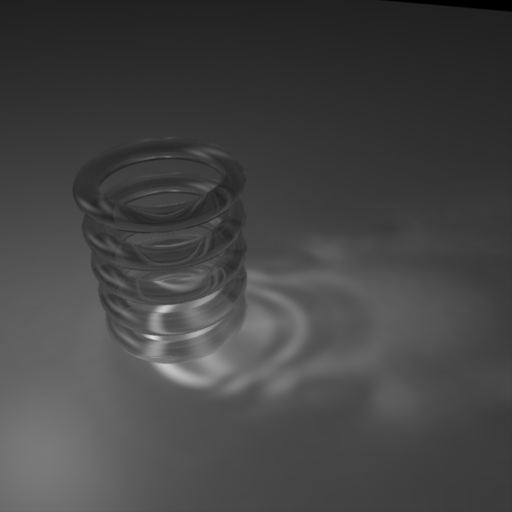
Caustics
Redshift treats Diffuse GI and Caustics separately.
Diffuse Global Illumination can be achieved with a combination of the following techniques:
- Photon mapping
- Brute-Force
- Irradiance caching
- Irradiance point cloud
Caustics, on the other hand, can only be achieved with
- Photon mapping
In Redshift, all of these techniques are called "GI Engines". Each GI Engine has its pros and cons. These are listed further down in this document.
Primary And Secondary GI Engines
Among the techniques mentioned above, photon mapping is the only one that works similar to how lighting works in real-life, i.e. it shoots photons from the lights. All the other techniques work the reverse way: they shoot rays out of the camera, bounce them around and eventually hit a light.
When these camera rays hit an object, the primary GI Engine is used. If GI requires multiple bounces, the secondary GI Engine is used for these bounces. The figures below show how this happens when you enable "brute force" for both primary and secondary GI engines.
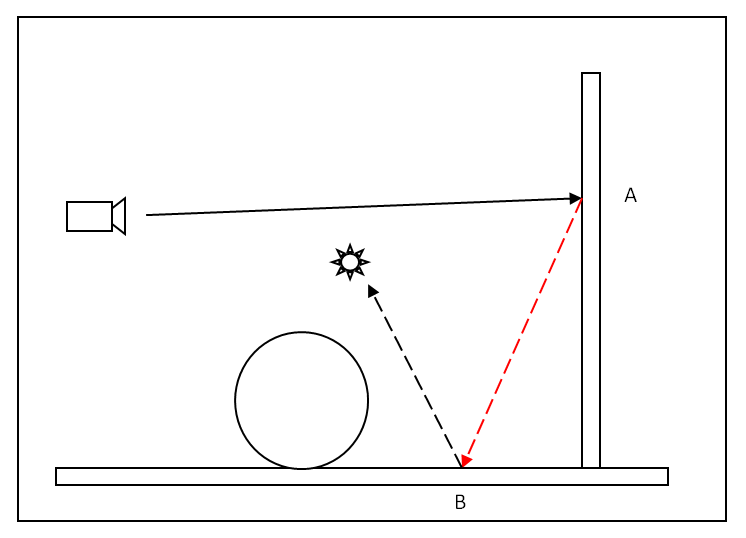
Zero GI Bounces. Camera shoots a ray and hits wall (point "A"). The primary GI engine is used and shoots another ray of which is shown in red. This way, direct lighting on the floor (point "B") affects point "A".
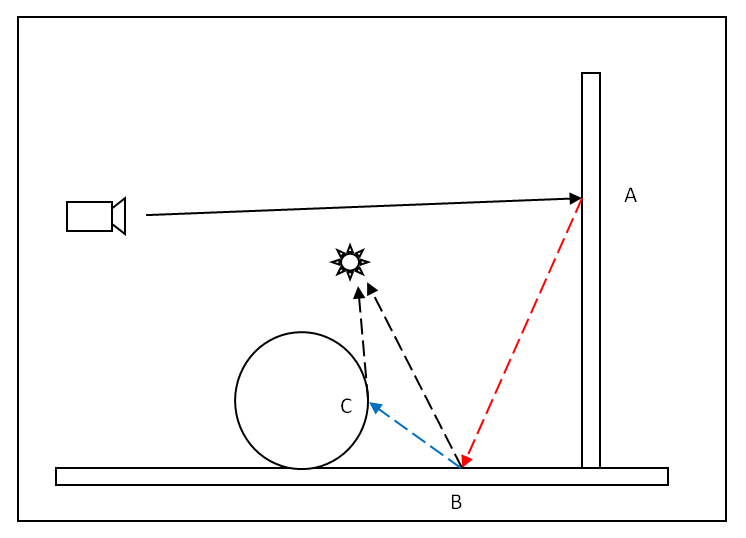
One GI Bounce. The processing now goes a bit further. Point "B" uses the secondary GI engine to gather illumination from the sphere by shooting a single ray (shown in blue). This way, the direct lighting of the floor (point "B") and the sphere (point "C") affects point "A".
Shooting photons from the lights or shooting rays from our eyes are, in some ways, equivalent. If you flip the direction of all the arrows above it's as if lighting came from the light source, bounced off the sphere, floor, wall and then reached the camera!
So why have separate primary and secondary GI engines? The results of primary GI lighting are directly visible to the camera so needs to be as high-quality as possible. Secondary GI lighting, on the other hand, often represents a smallest part of the final lighting so it can afford to be of somewhat lower quality (think "blurrier" or "noisier") without introducing significant visual artifacts. Approximating secondary GI like that has significant performance and, sometimes, quality advantages!
Please note that the examples above only show what happens with "brute force". Other GI engines do different things for points A, B, C. These are described in more detail under each technique's documentation.
Main Global Illumination Settings
GI Engines and Number of Bounces
The starting point for enabling GI is selecting the primary and secondary GI Engines and specifying the number of GI bounces.
Introducing more GI bounces in your scene will often make your lighting brighter - and the rendering slower. It also tends to "wash out" the lighting a bit, too. For these reasons users sometimes choose to limit the number of bounces.
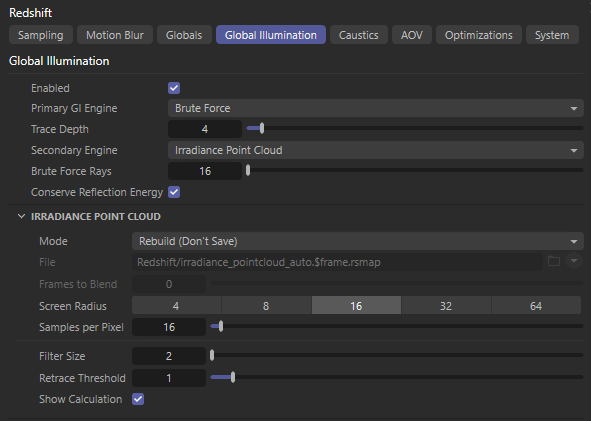
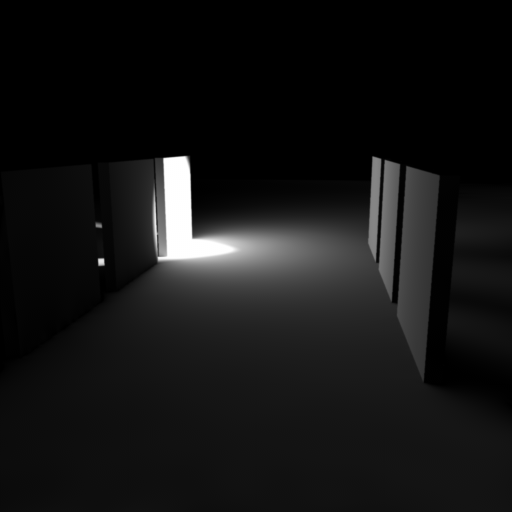
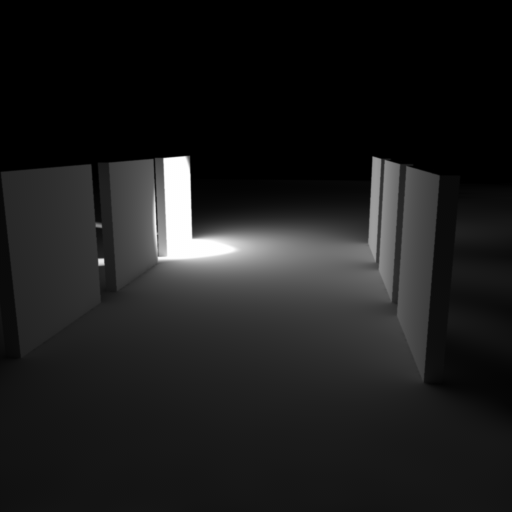
The scene shown below contains a few vertical tiles, one of which is lit with a strong spotlight. The biggest visual difference (for this particular scene) is between 0 and 1 GI bounces. Note that these images were rendered using Irradiance Caching for the primary GI engine and Irradiance Point Cloud for the secondary GI engine.
|
|
|
|
|
Zero GI Bounces. The right tiles are lit by the direct |
One GI Bounce. The indirect lighting on the right tiles is |
Two GI Bounces. The indirect lighting of the left tiles is |

Conserve Reflections Energy
Redshift does not currently support reflection ray sampling during Global Illumination calculation, which can lead to a loss of energy. Checking the 'Conserve Reflections Energy' option enables a cheap trick which adds the reflection energy that would be lost (i.e. the reflection color tint) to the diffuse color tint of materials during GI calculation. This gives the illusion of reflection ray bounces contributing to GI, which can be particularly noticeable with strong or colored material reflections.
After you've selected your primary and secondary GI engines and specified the number of GI bounces, you'll need to configure them. Please refer to the topics listed below for more information:
Recommended Settings
Sometimes users are overwhelmed by the multitude of choices and ask for the best settings.
While different scenes will have different requirements, we've found that a good starting point is this:
- Set the Primary GI Engine to "Brute-Force"
- Set the Secondary GI Engine to "Irradiance Point Cloud"
- Set the "Number of GI Bounces" to 2 or 3
- If your scene need caustics (for glass or mirrors), please refer to the caustics section of the photon mapping topic.
As a rule of thumb, try to remember the following points regarding GI quality:
- Scenes containing several (not too strong) lights can typically get away with fairly low GI settings (number of rays, number of samples, etc)
- Scenes that contain very few, very strong lights will need more aggressive GI settings. For example, the "single lit tile" scene above required many rays to get a clean result because it was almost entirely indirectly lit and using only a single very strong light.
- Outdoor scenes that are lit with environment shaders (like "physical sky") can typically get away with fairly low GI settings
- To summarize all of the above: lots of lighting contrast requires higher quality settings, lower contrast can get away with lower quality settings
Pros and Cons of the Different Techniques
For more information of how the individual techniques work, please look at their respective pages
Photon Mapping
This technique works similarly to how light behaves in real life. In one stage, it shoots photons from light sources, bounces them around the scene and stores them on surfaces. Then, on a second stage, the renderer uses these photons to render the final image.
Pros
- Provides a very good degree of control
- For reasonable numbers of photons, it renders fast
Cons
- Photon mapping is an outdated technique
- Photons have to be stored in GPU memory so too many photons can be prohibitive in terms of memory usage
- There are a few settings to tweak and some experimentation might be needed to get a clean result
- Processing time and storage may be wasted for photons that will not end up being visible to the camera
Brute-Force
Brute force works the opposite way to photon mapping. Instead of shooting photons from the light, it shoots a number of rays from each surface and bounces the rays around.
Pros
- Very accurate
- No flickering in animations
- It's easy as it only has one setting to tweak ("Num Rays")
- Does not require any storage so the final image resolution and scene detail does not matter
Cons
- It's the slowest technique. But due to Redshift's speed, it's more practical compared to other renderers.
- Unless many rays are shot per pixel, it can produce grainy images – especially in difficult lighting situations
Irradiance Caching
Global Illumination often changes slowly over surfaces. This means that several pixels next to each other could 'share' the same value which, in turn, means that we don't need to compute a separate GI value for each pixel! Irradiance caching takes advantage of this fact and computes GI similar to Brute-Force but at sparse points around the image, which means that the computation takes much less time.
Pros
- Can produce smooth images several times faster than Brute-Force
- The results can be saved to disk for each animation frame. So if you are tweaking things like antialiasing, glossy num rays, num area light samples and other quality parameters (not related to GI), you can simply load the GI results and iterate quickly.
- Lots of scenes have large parts that are mostly flat. For example: walls on an architectural interior. Or the surface of a car. The irradiance cache will have a significant performance benefit on these scenes.
- Increasing the final image resolution often does not increase the irradiance cache time linearly –depending on scene complexity and irradiance cache settings. I.e. going from 1280x720 to 2560x1400 (i.e. 4 times more pixels), you might find the irradiance cache processing time taking less than 4 times longer
Cons
- The Irradiance Cache Points are computed during a separate rendering pass so interactive feedback is not possible.
- While shooting too few rays with brute-force shows up as grain, shooting too few rays for the irradiance cache shows up as "splotches" and flickering in animations. These can be even more visually distracting than grain.
- There are several user parameters that control things like point spacing. Settings these correctly is important for splotch-free and flicker-free results. Learning how to use these settings often involves trial-and-error.
- If the scene has a lot of detail (example: foliage covering a big part of the screen) then too many points might have to be created. This invalidates the benefits of the irradiance cache and also puts a big burden on memory resources because the points have to be stored. For these scenes, brute-force might be a better choice.
Irradiance Point Cloud
The Irradiance Point Cloud can only be used as a secondary GI engine. Its purpose is to provide faster and cleaner secondary lighting to the primary GI engine. You might have seen similar techniques on other renderers called "Importons", "Irradiance Particles" or "Light Cache". While Redshift's Irradiance Point Cloud works differently to these techniques, it serves the same purpose which is to improve the quality and efficiency of multiple-bounce GI.
Pros
- Helps make Brute-Force and Irradiance Caching faster and cleaner
- Certain very difficult lighting scenarios can only be rendered with this technique! (i.e. they would take an extremely long time with purely brute force techniques)
Cons
- Requires some storage (but, typically, not much)
- There are a few settings to tweak so a bit of experimentation is required.
- Only provides a benefit when multiple bounces are needed, if the scene contains lots of lights or when the lighting conditions are difficult