Table Of Contents
Introduction
This shader simulates the scattering effect of skin. In real life, skin is made up of three distinct layers:
- Epidermis - defines the skin tone and waterproof layer
- Dermis - contains tough connective tissue
- Subcutis (hypodermis) - made up of loose connective tissue, fat and blood vessels
To model this, the Redshift skin shader has three equivalent translucent, sub-surface scattering layers:
- Shallow Scatter - defines the pigment/skin tone of the skin
- Mid Scatter - defines the dermis layer
- Deep Scatter - defines the thick, subcutis layer
Redshift also simulates the 'waterproof' oily property of the top-most epidermis layer by having a 'Primary Reflection' control. A 'Secondary Reflection' layer is also available for added sheen from, for example, oily cosmetic products, or for clear-coat effects.
Note that as with all Redshift materials, the reflection layers are energy conserving, meaning with stronger reflection color and weights, the underlying diffuse scattering contribution will appear weaker.
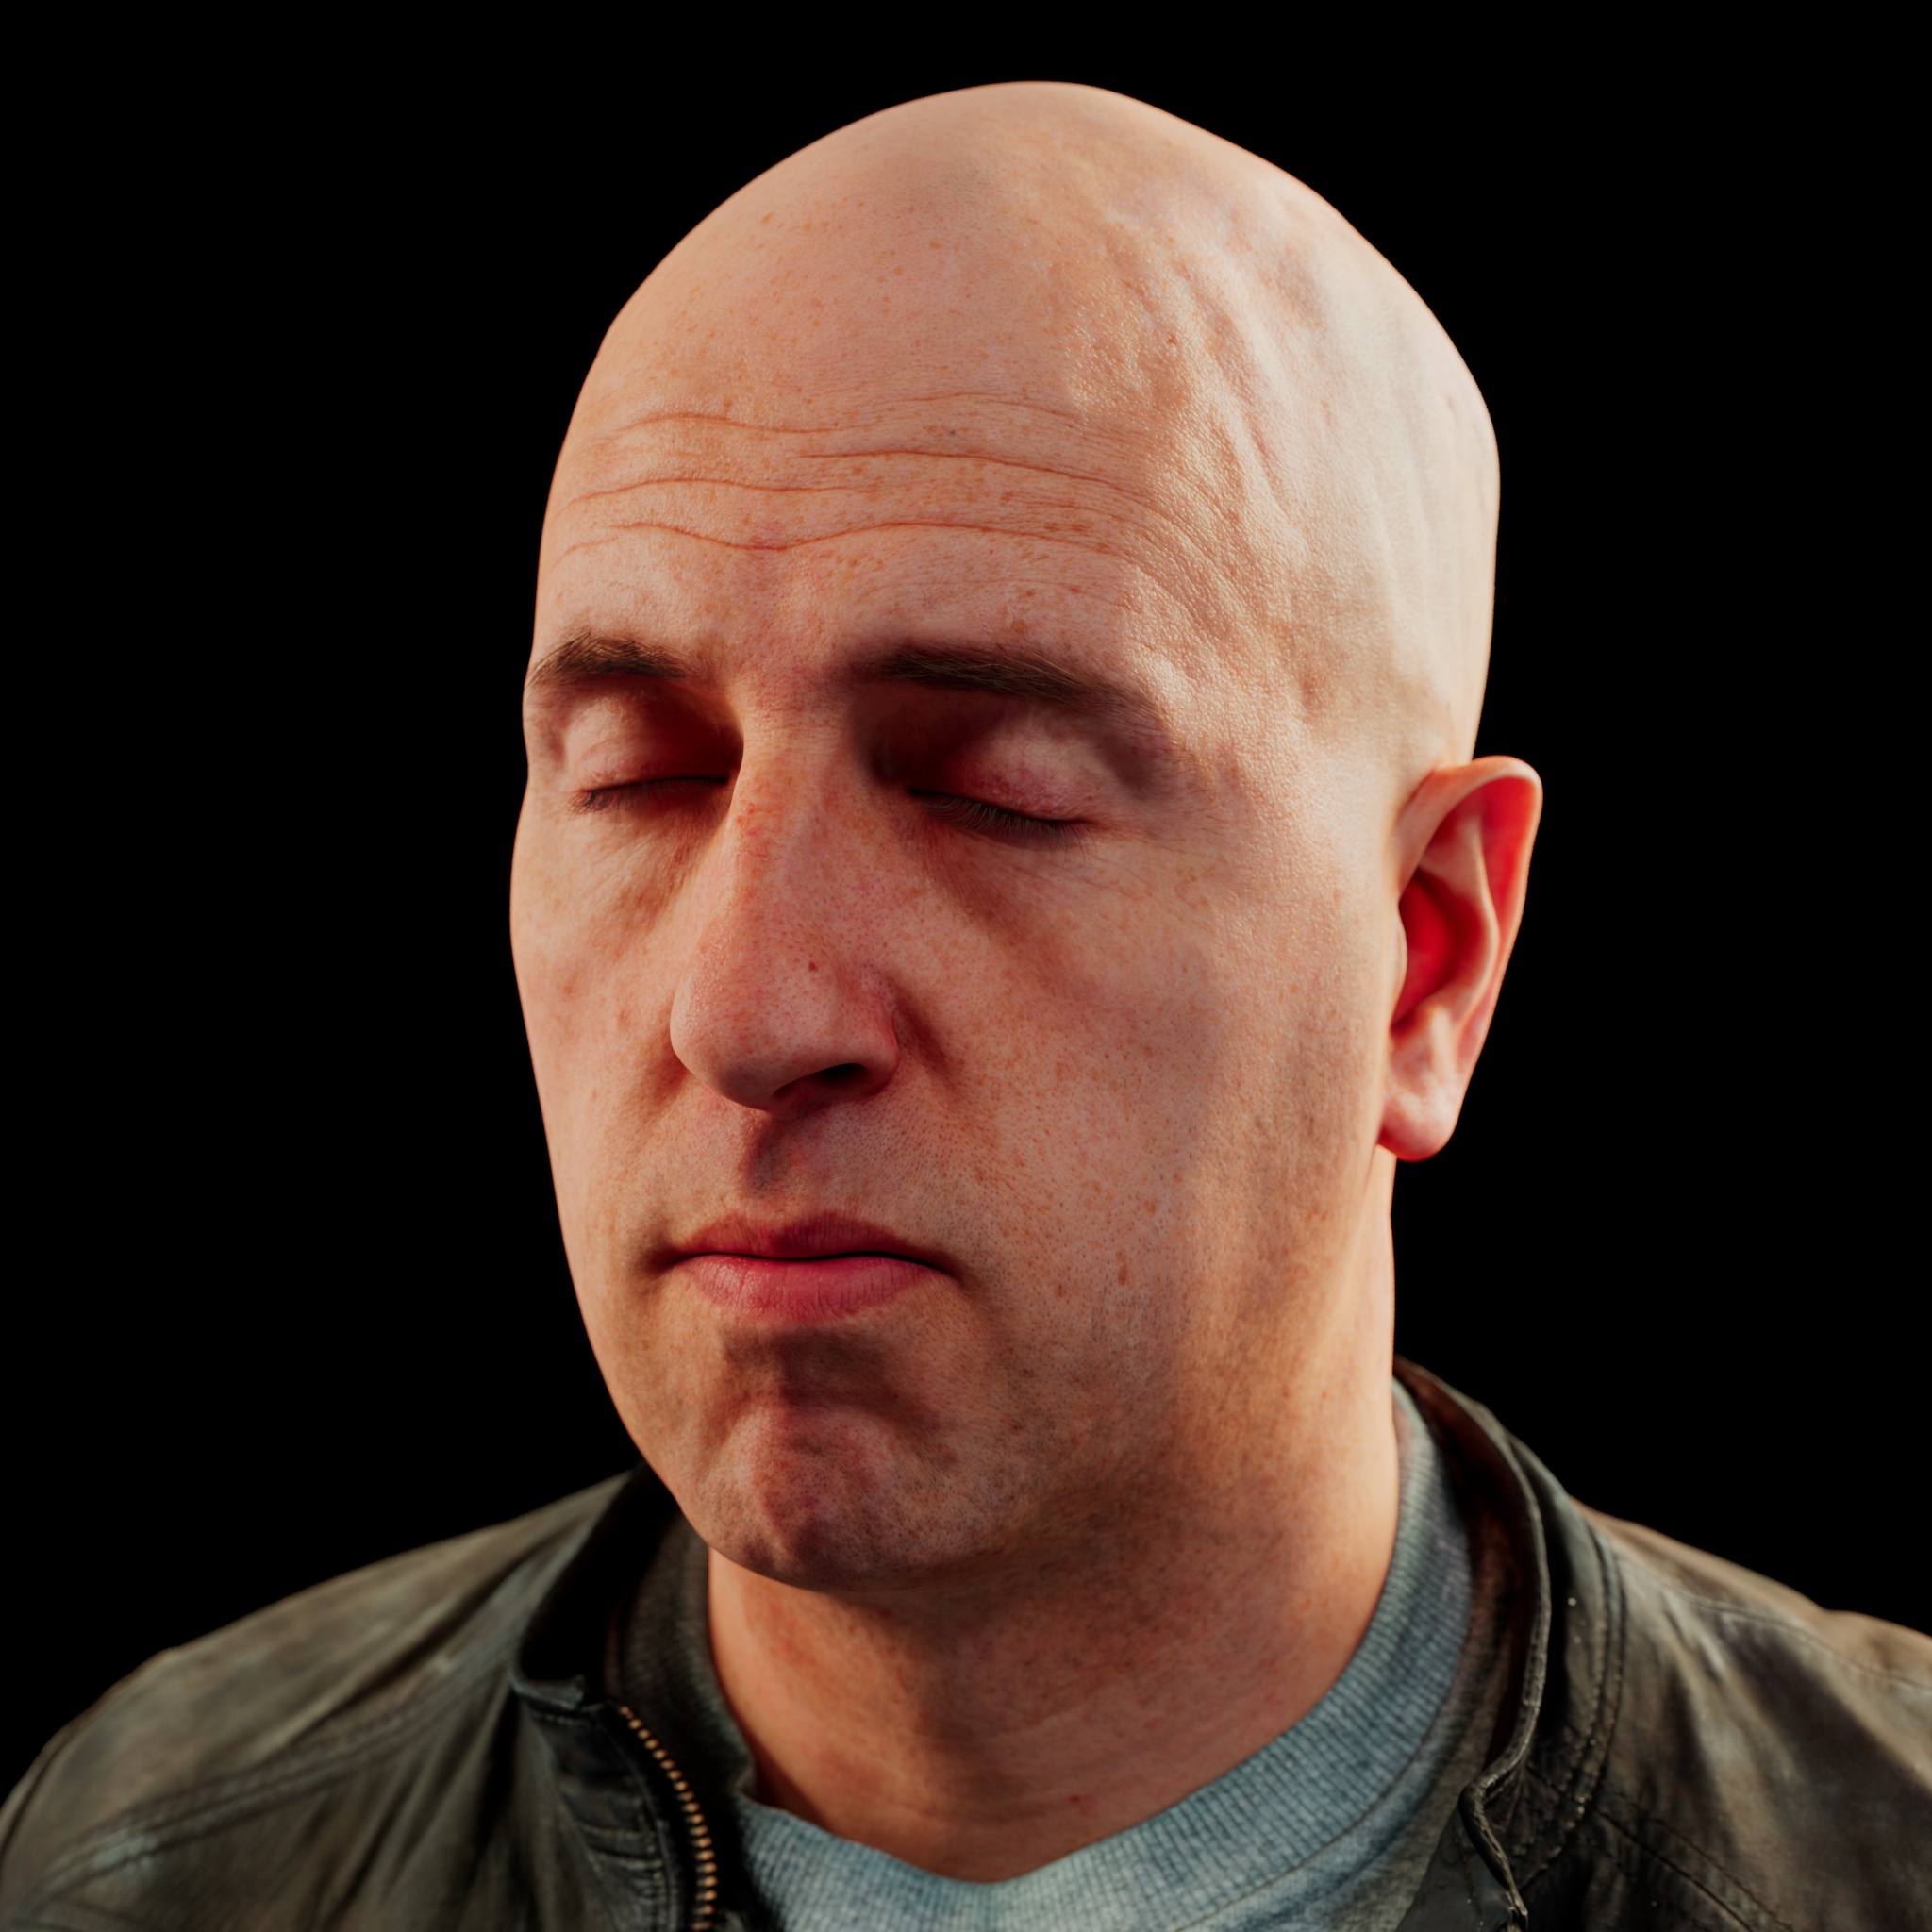
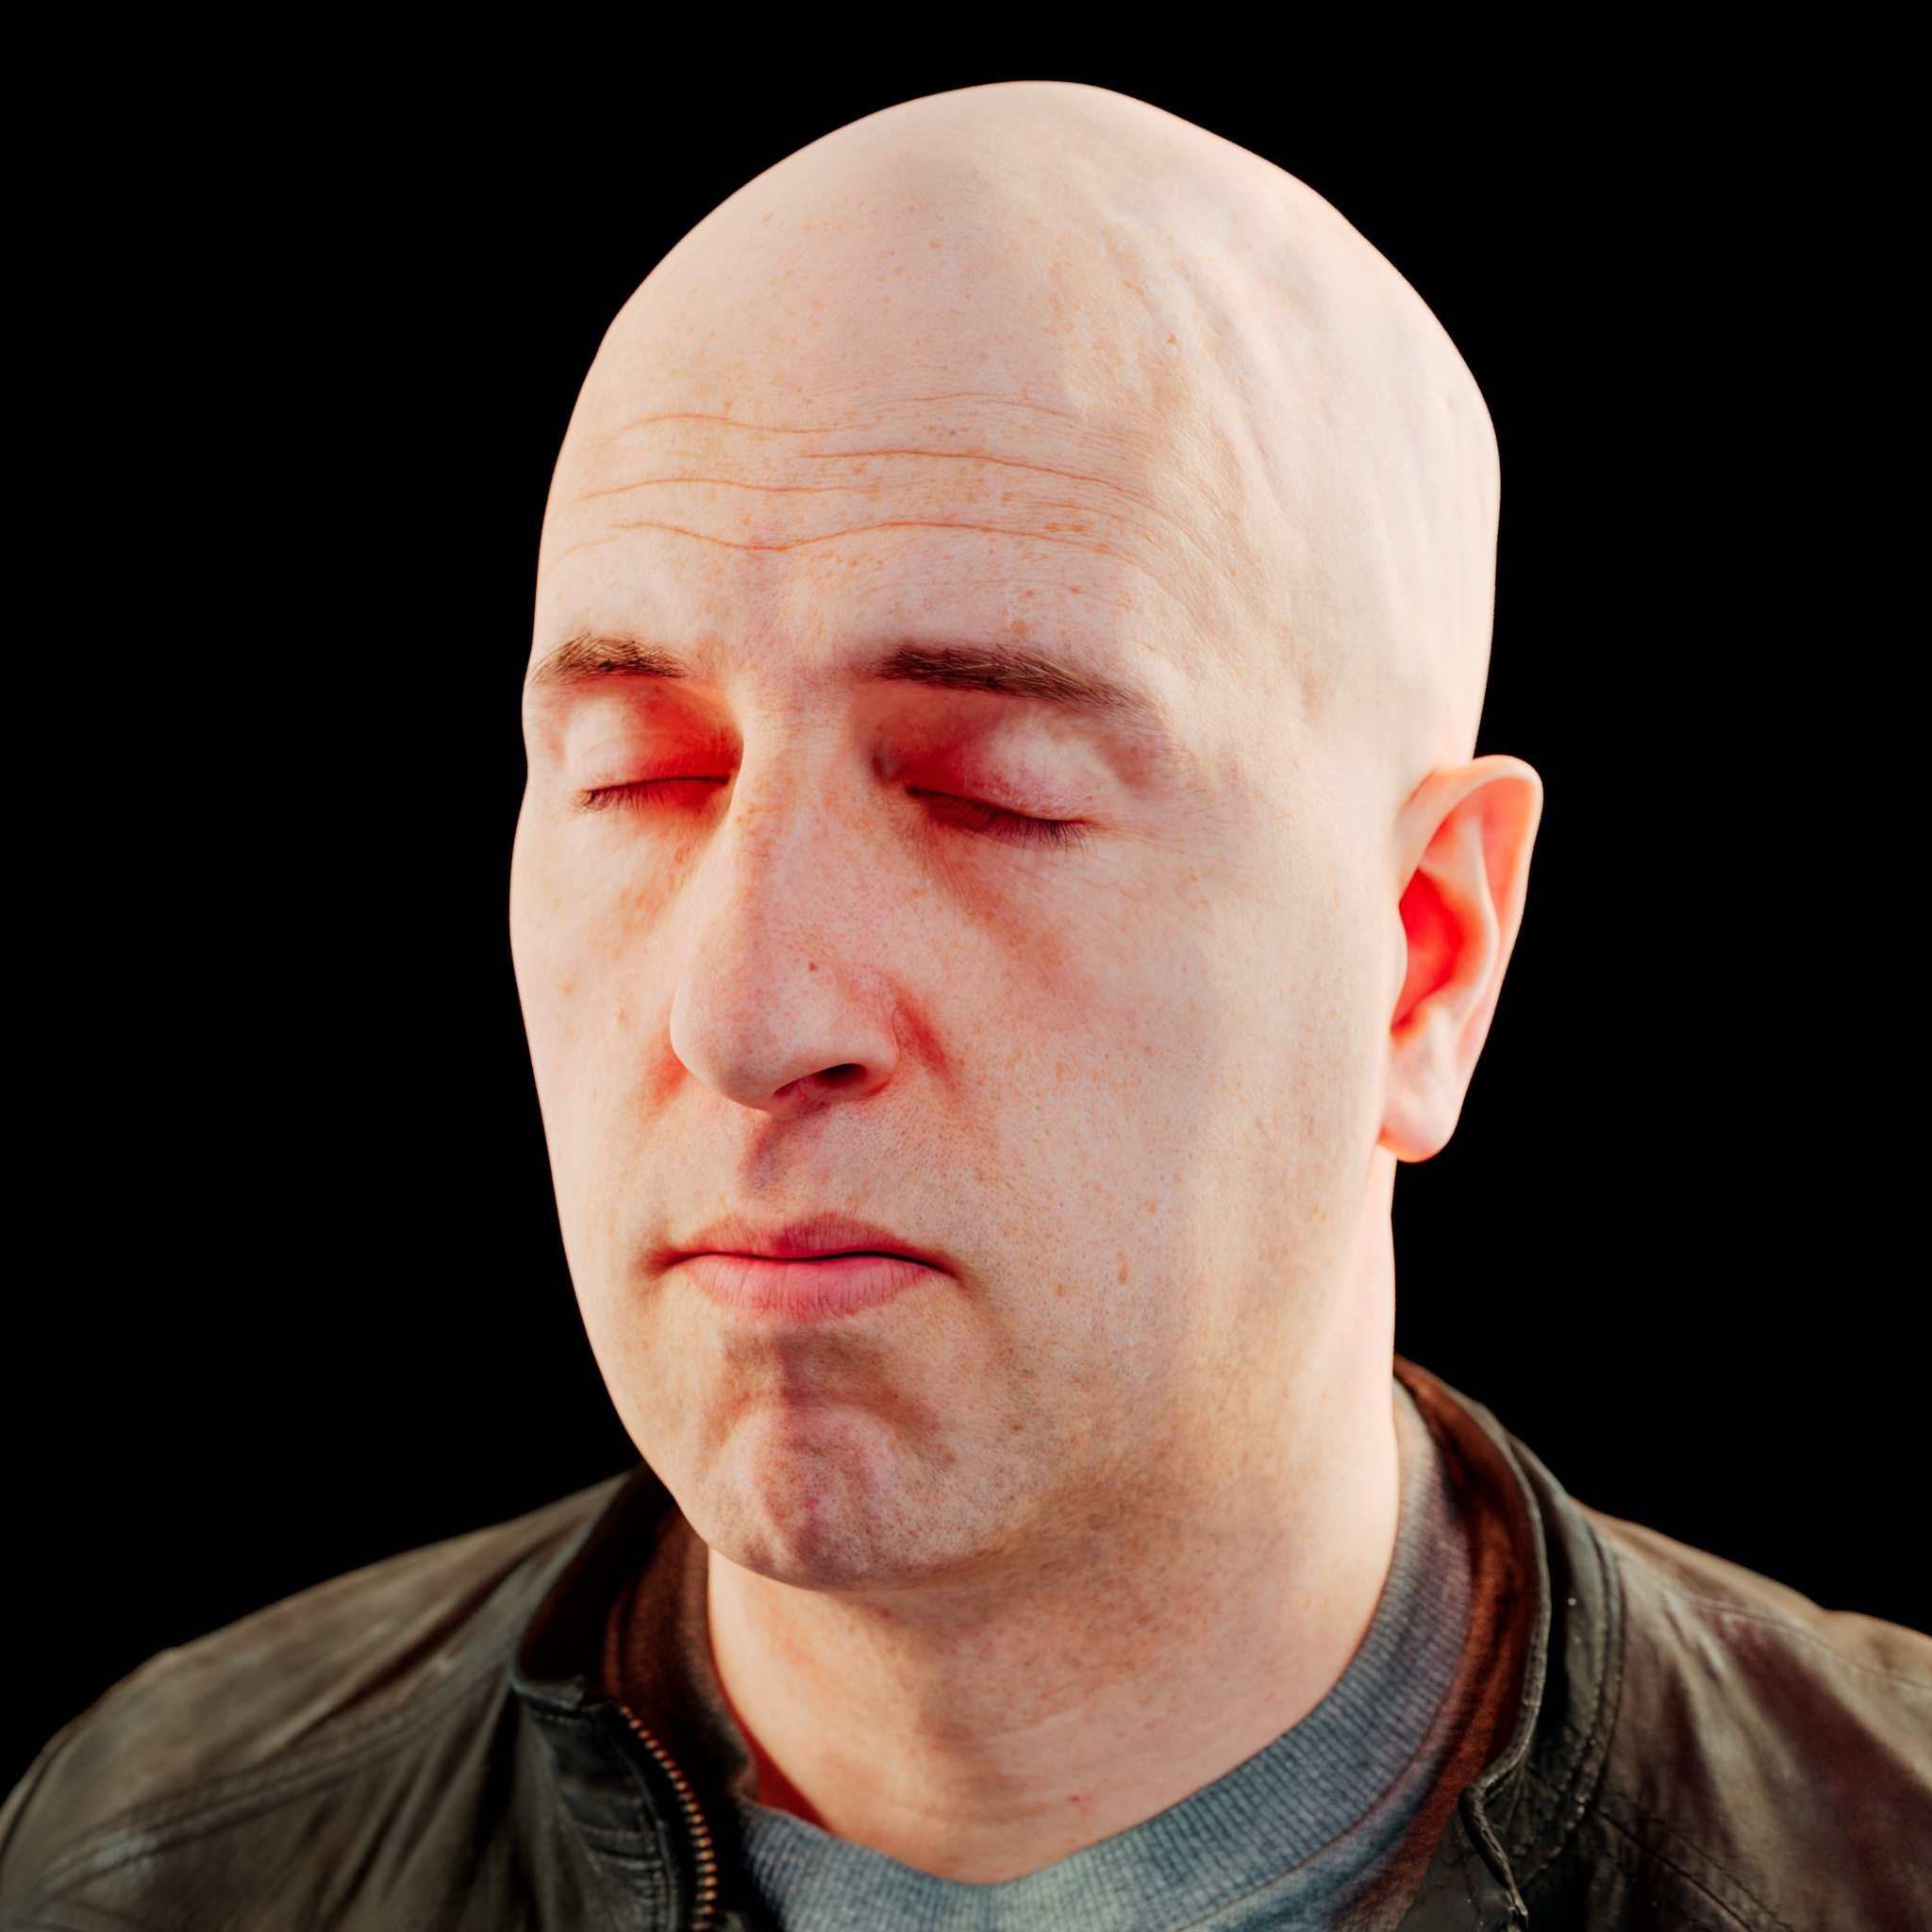
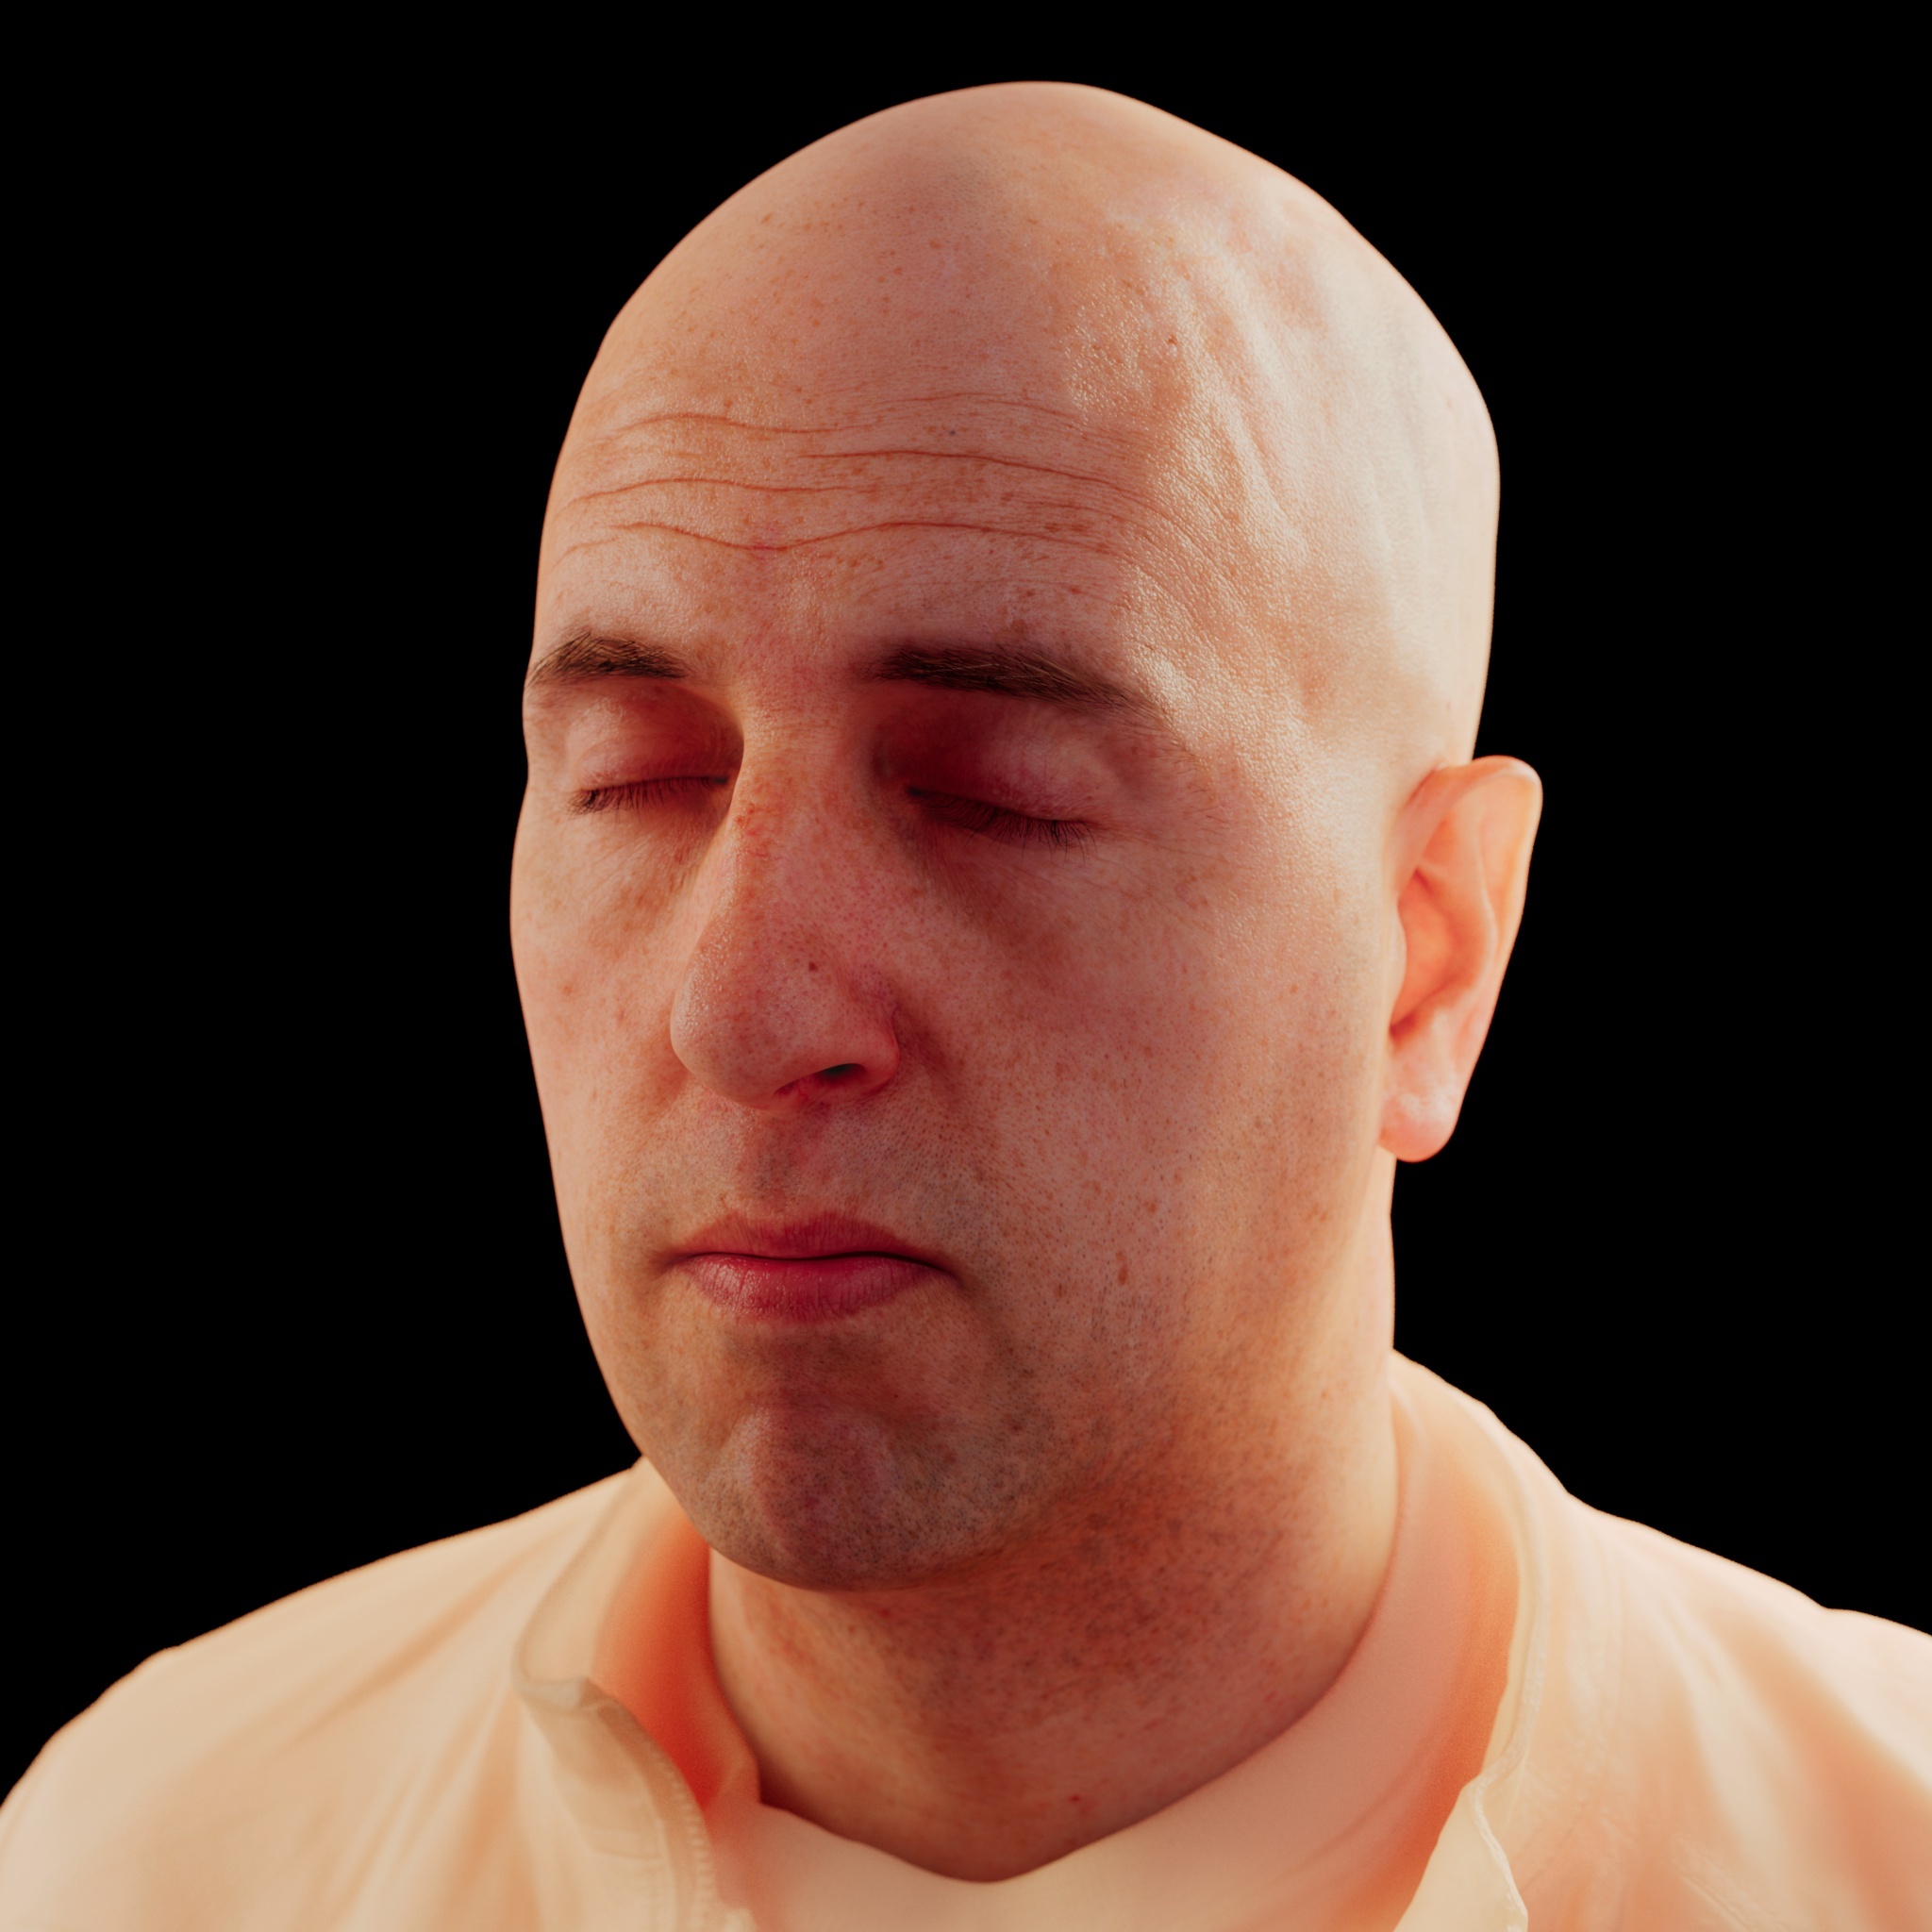
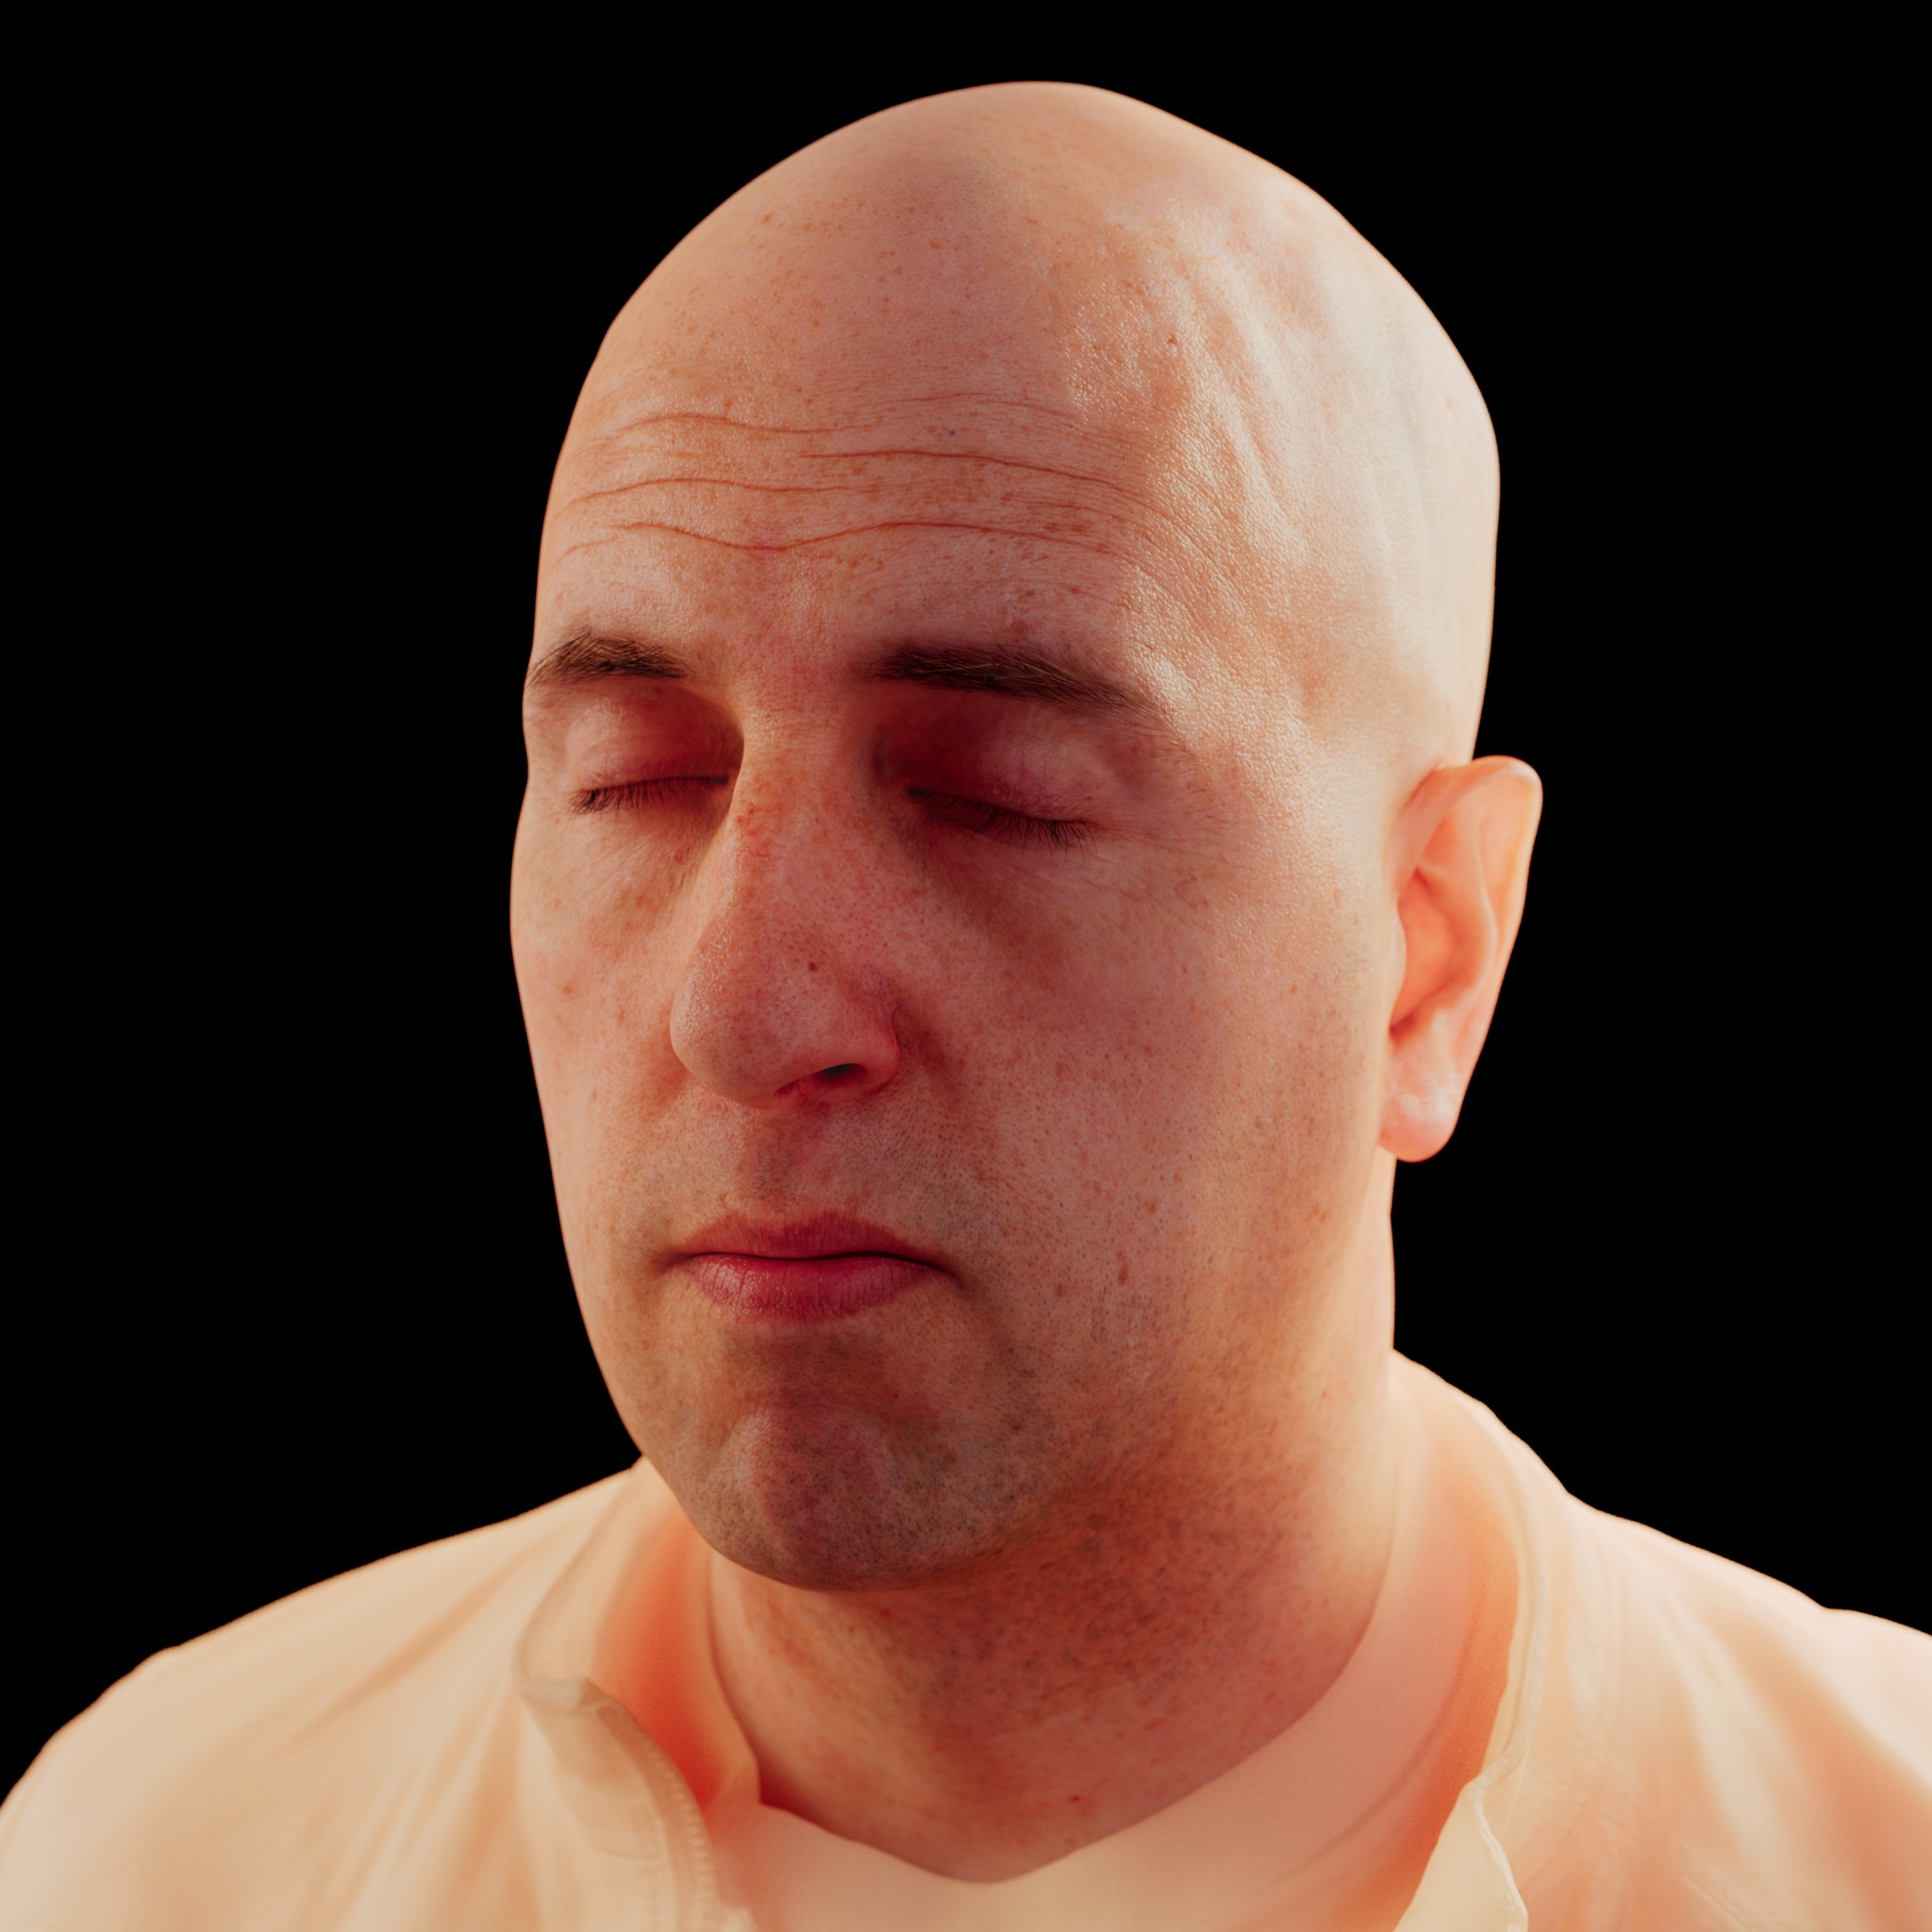
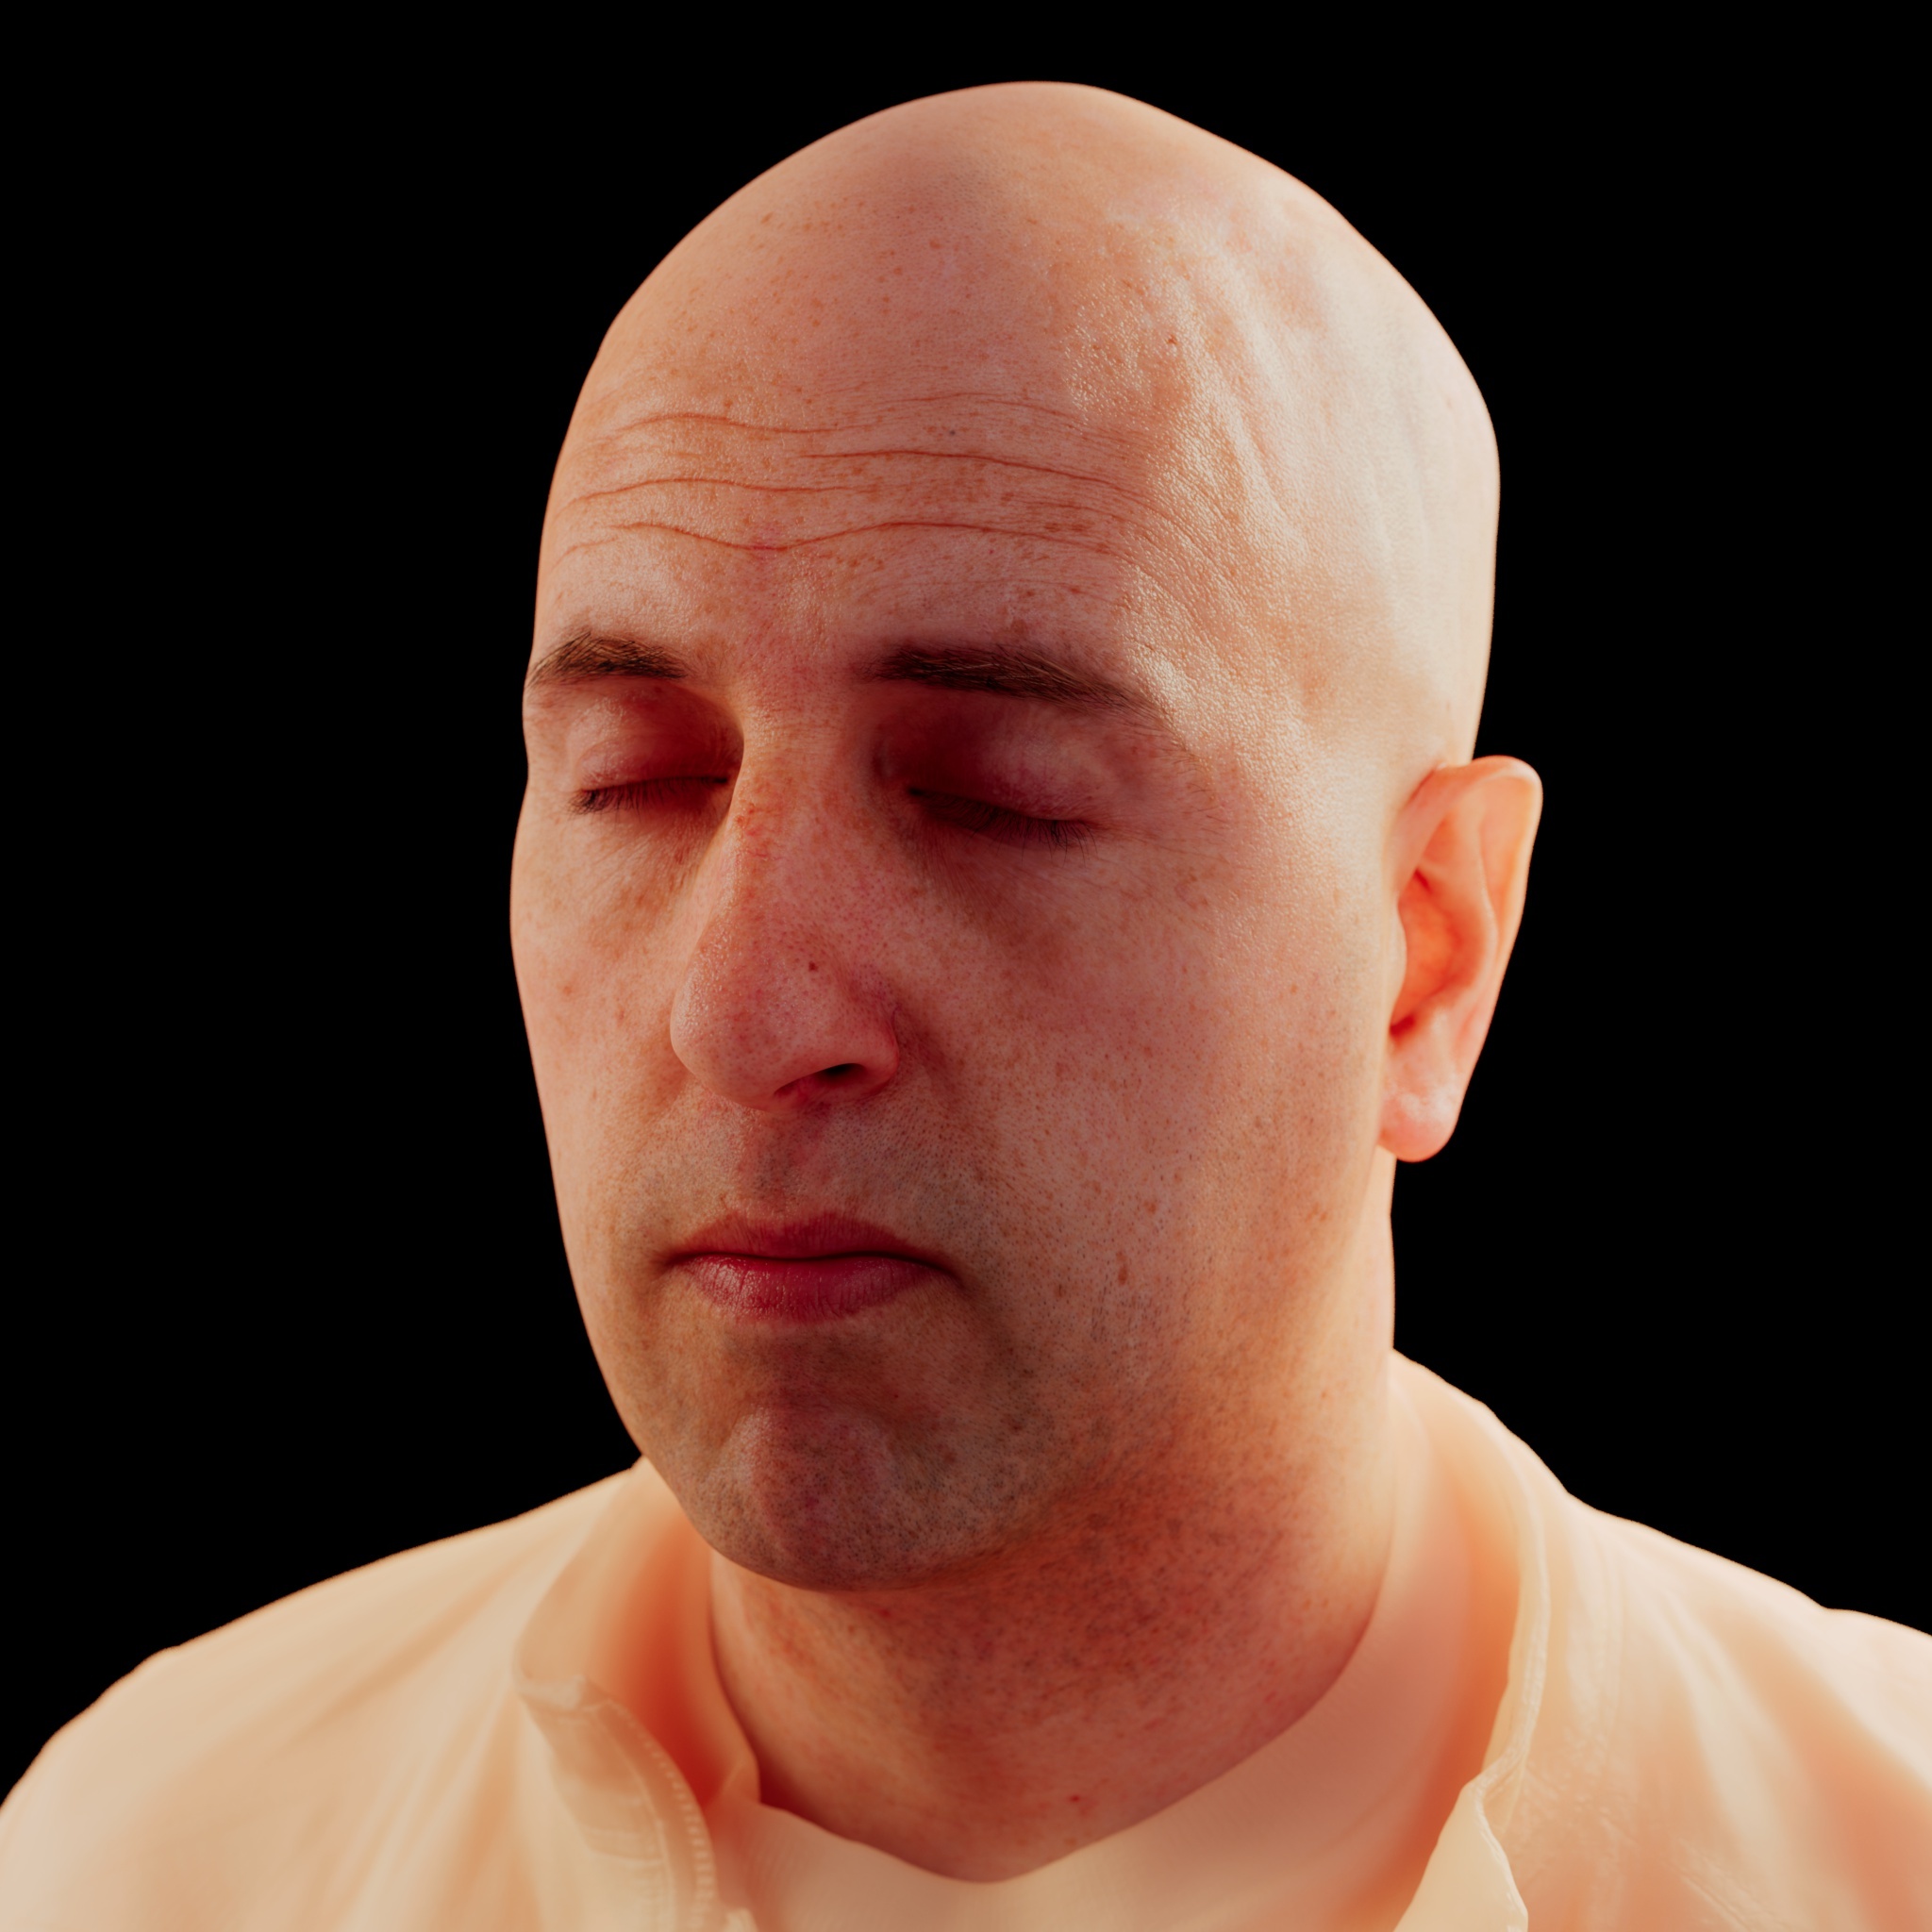
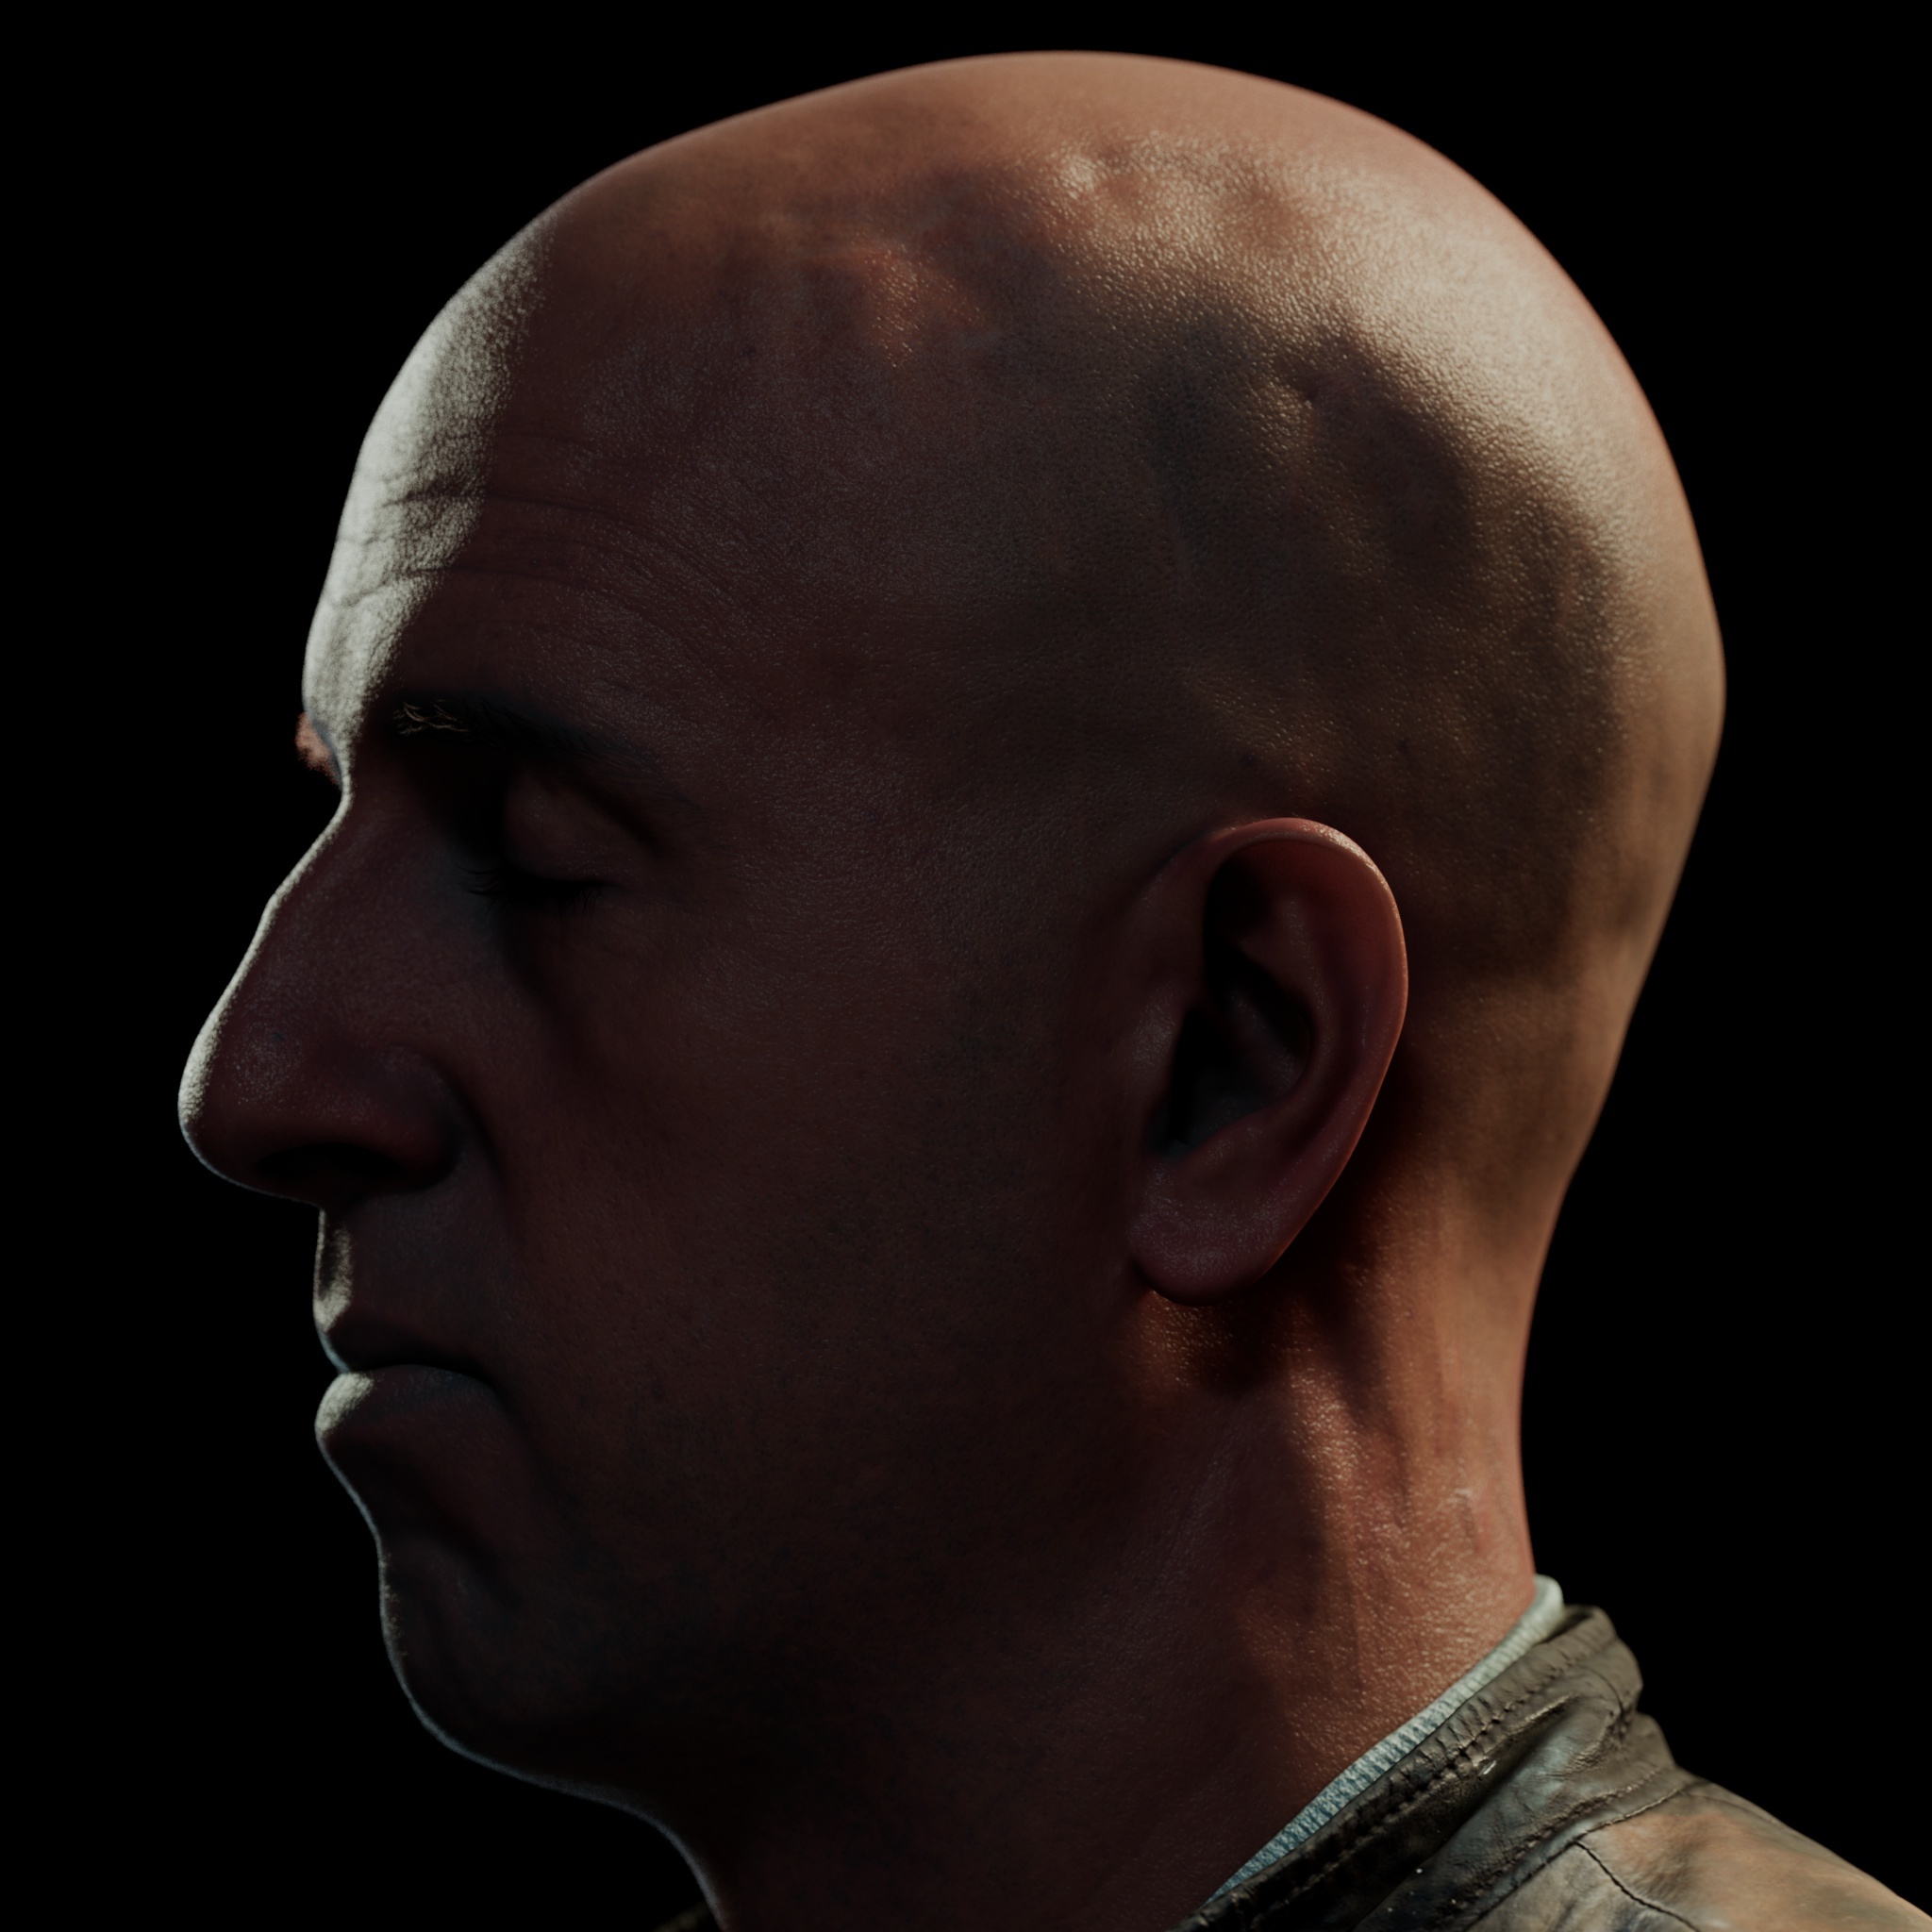
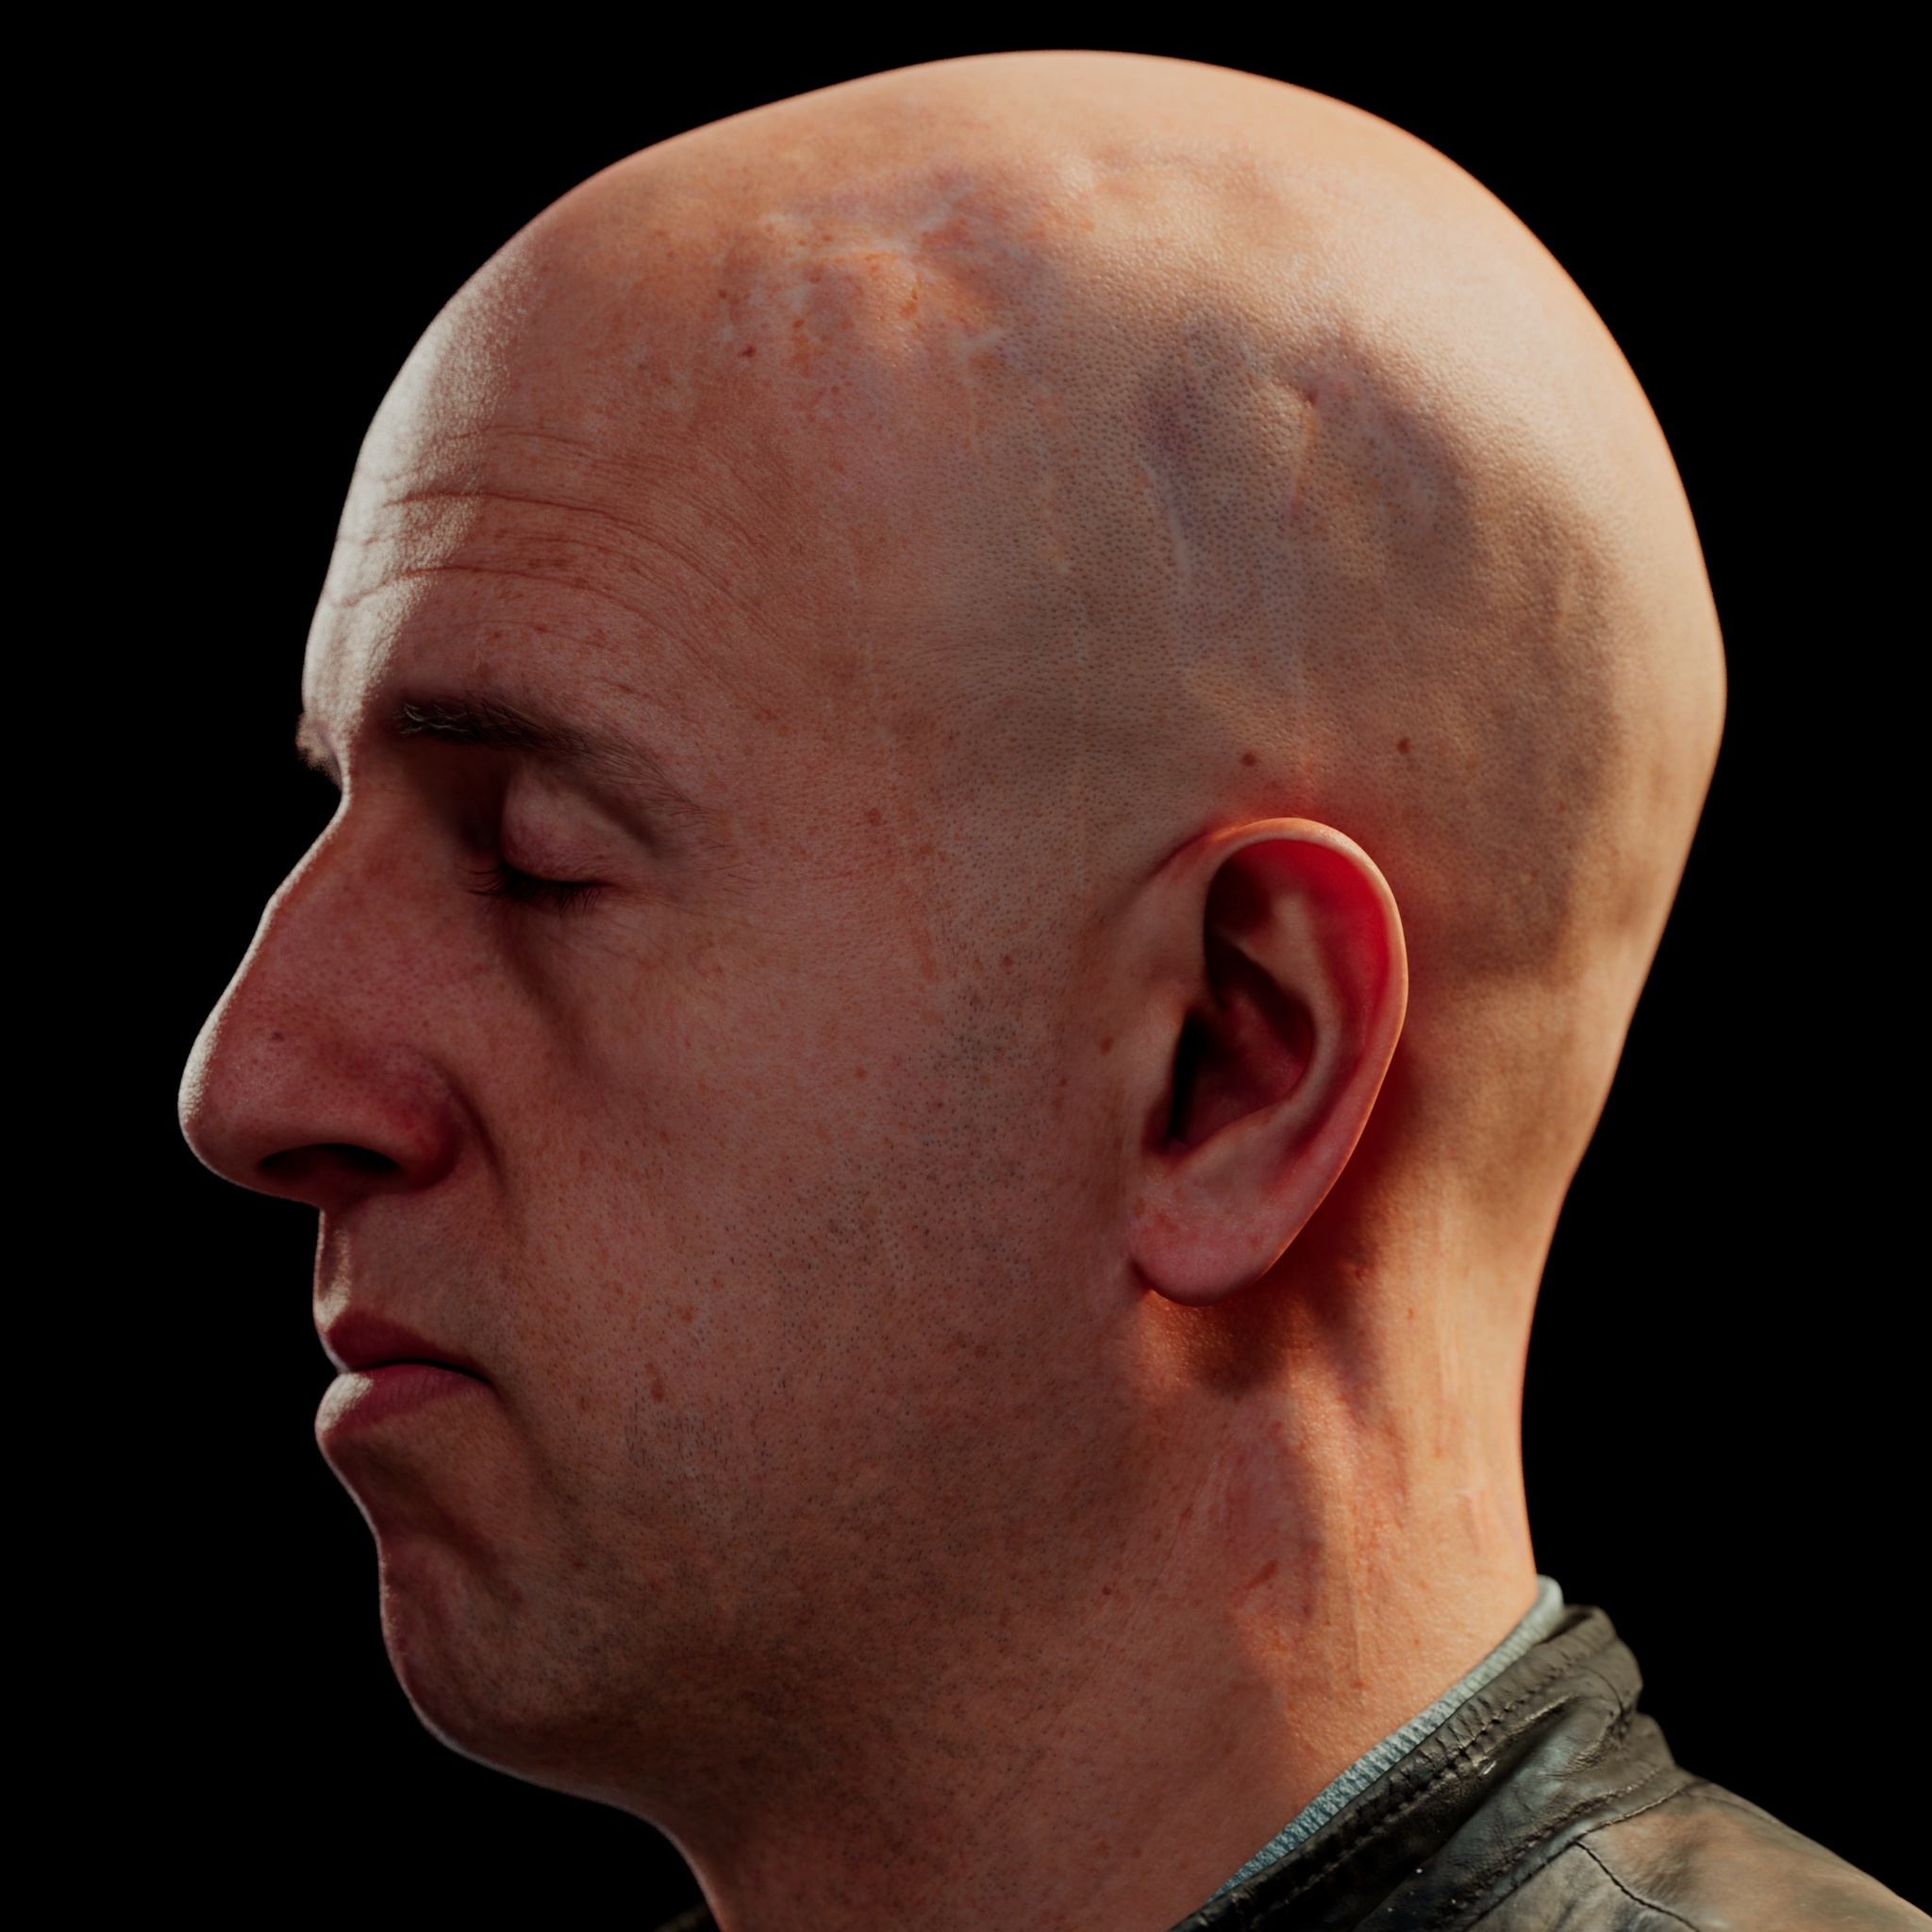
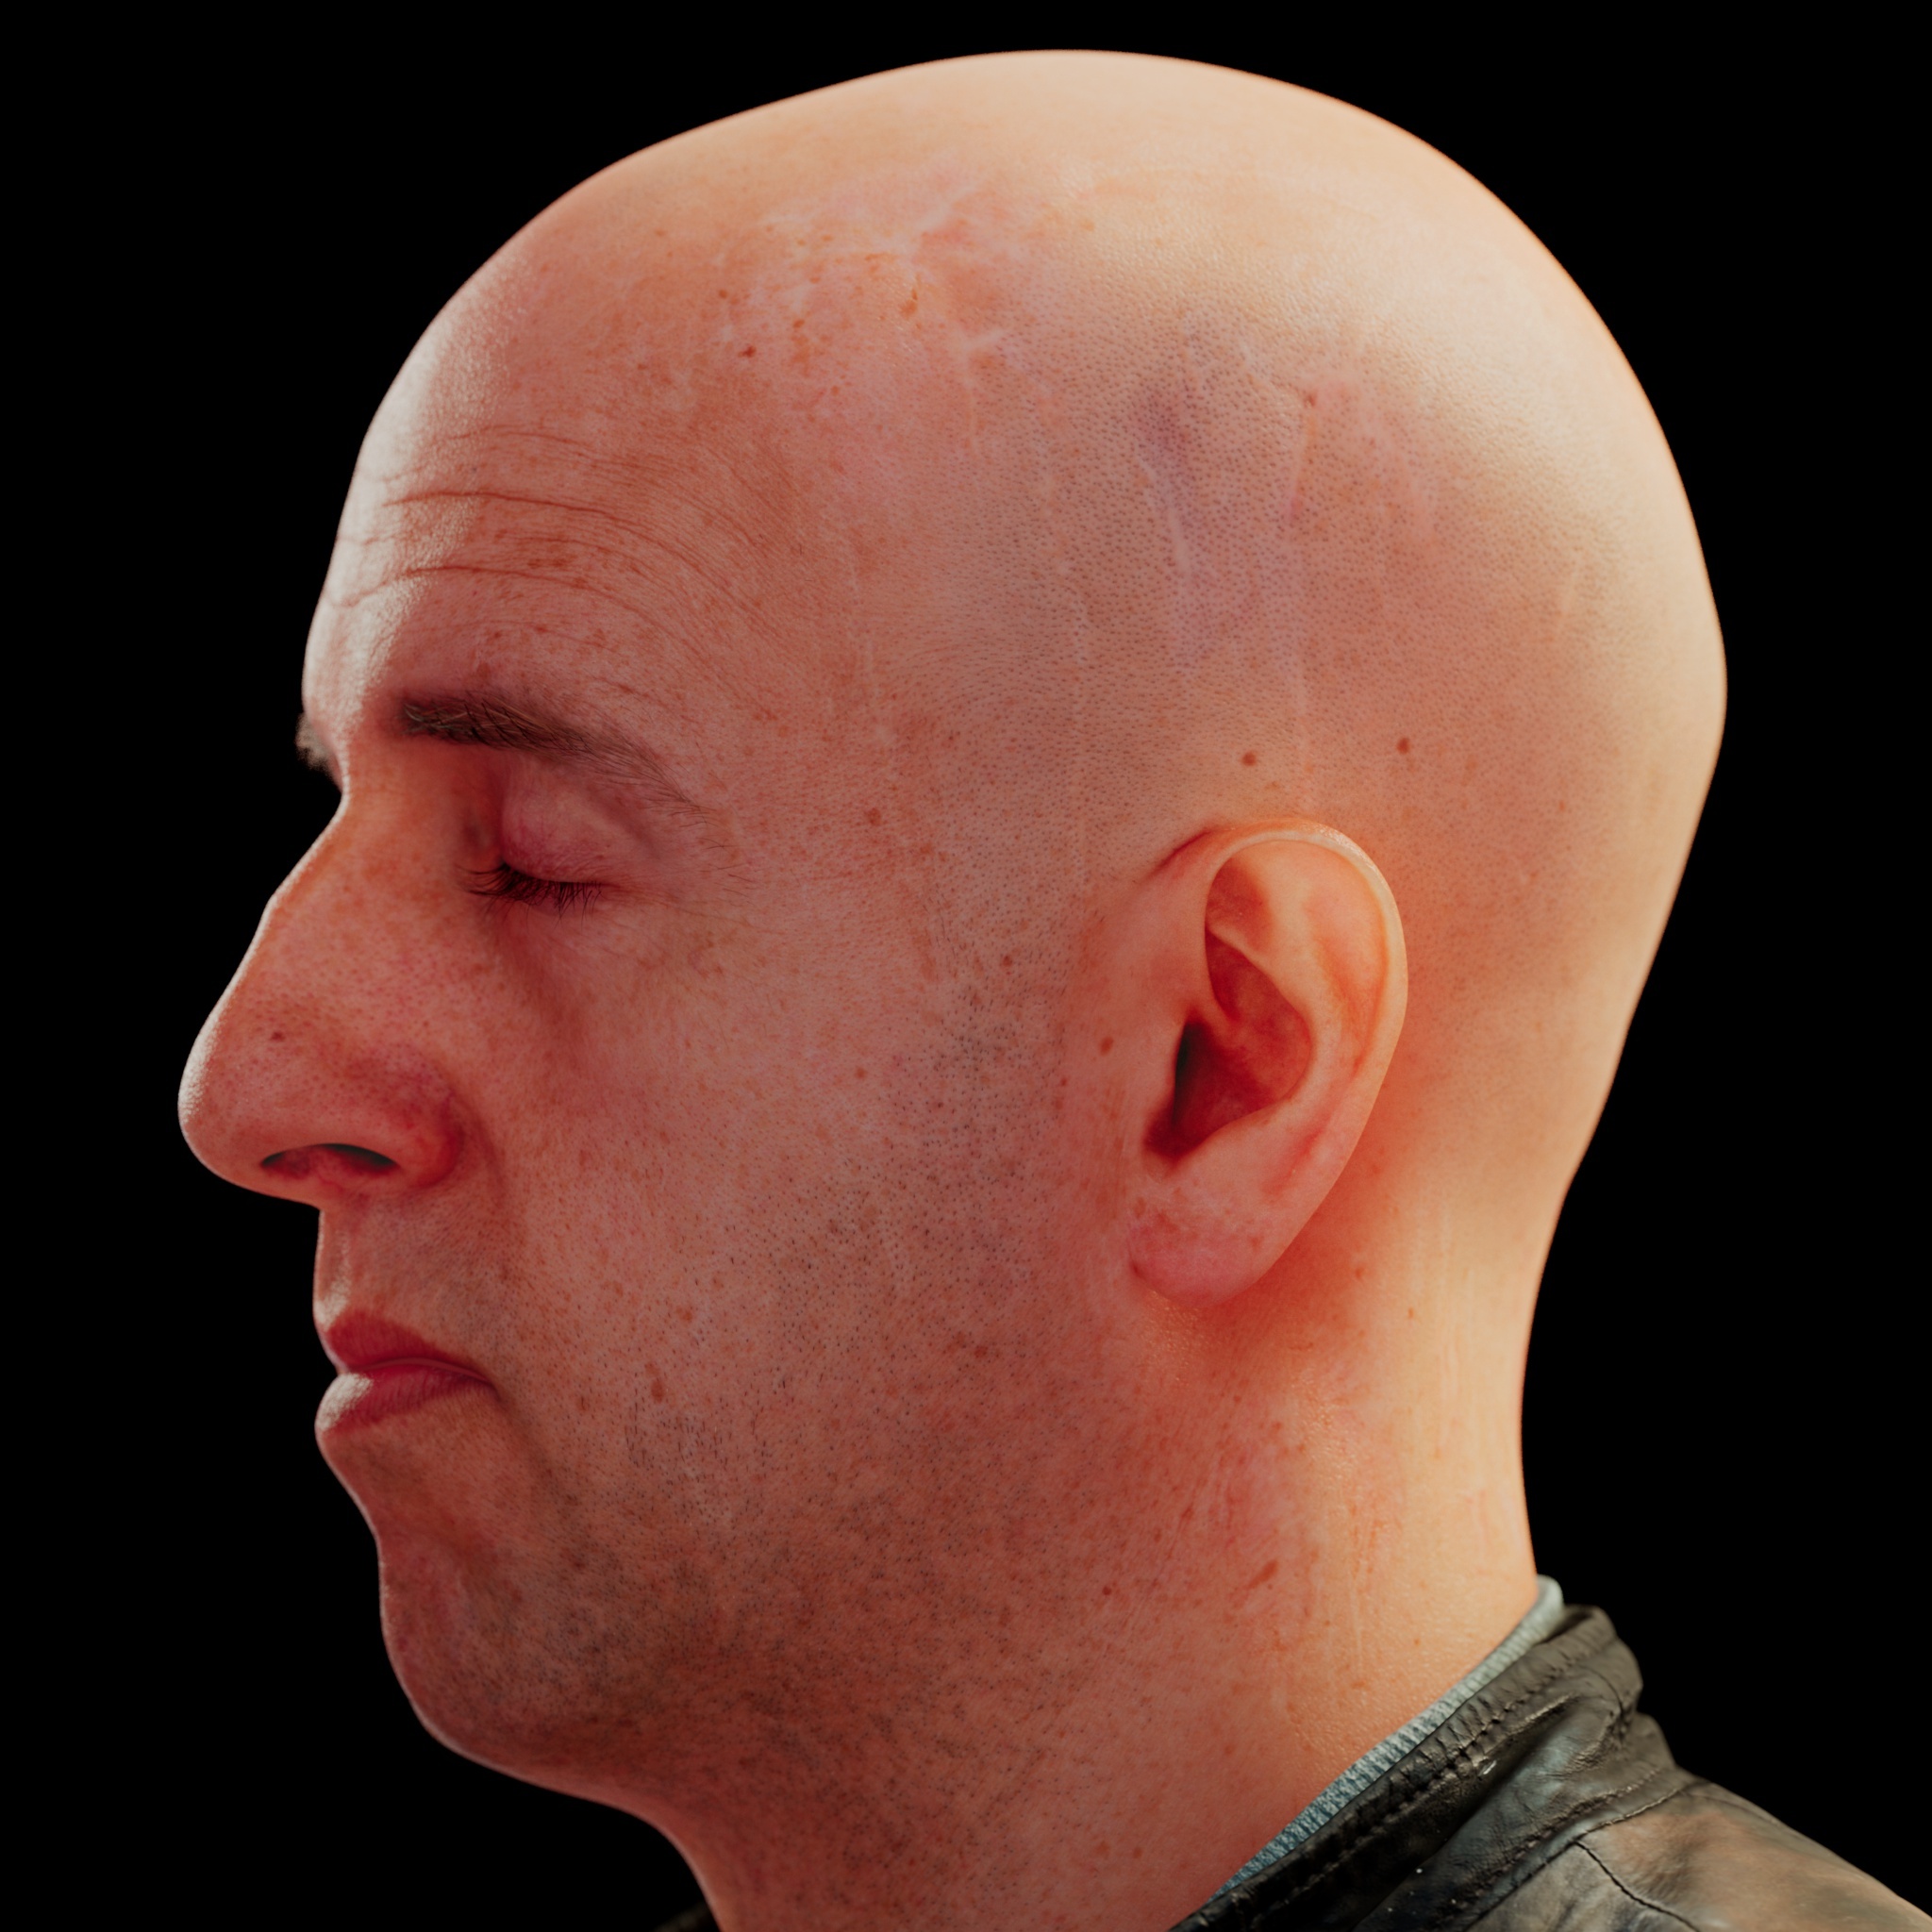
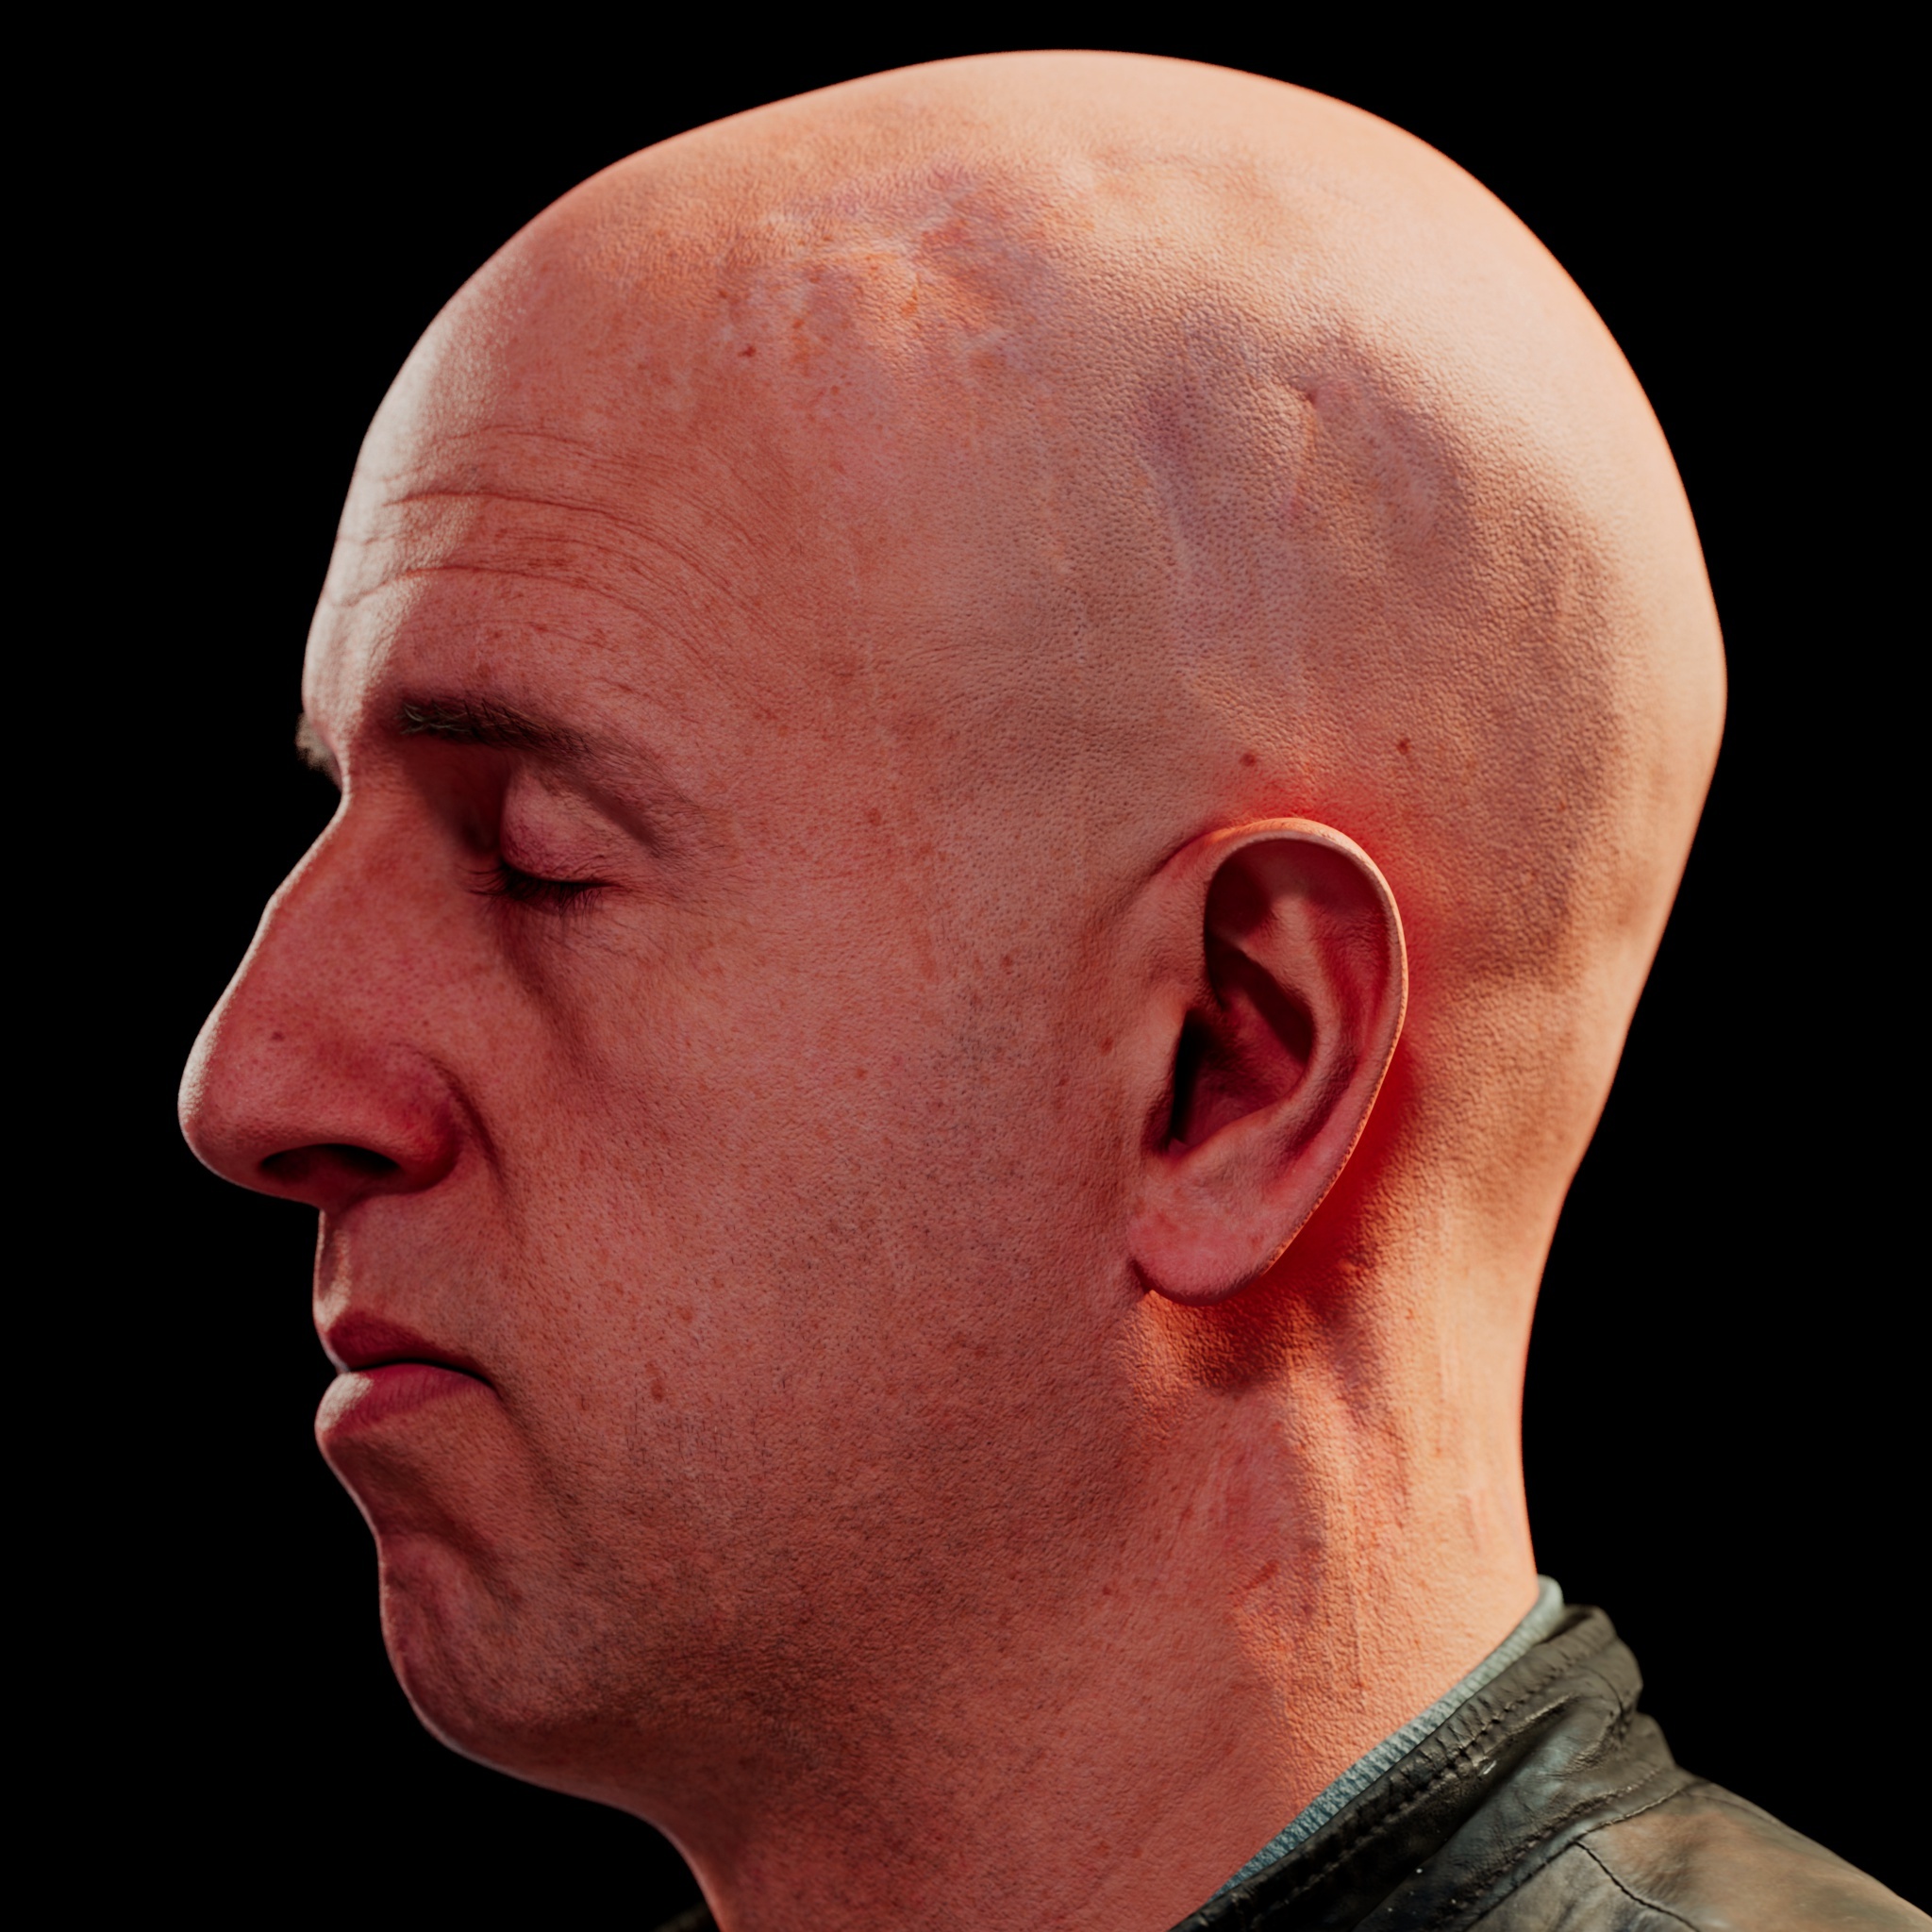
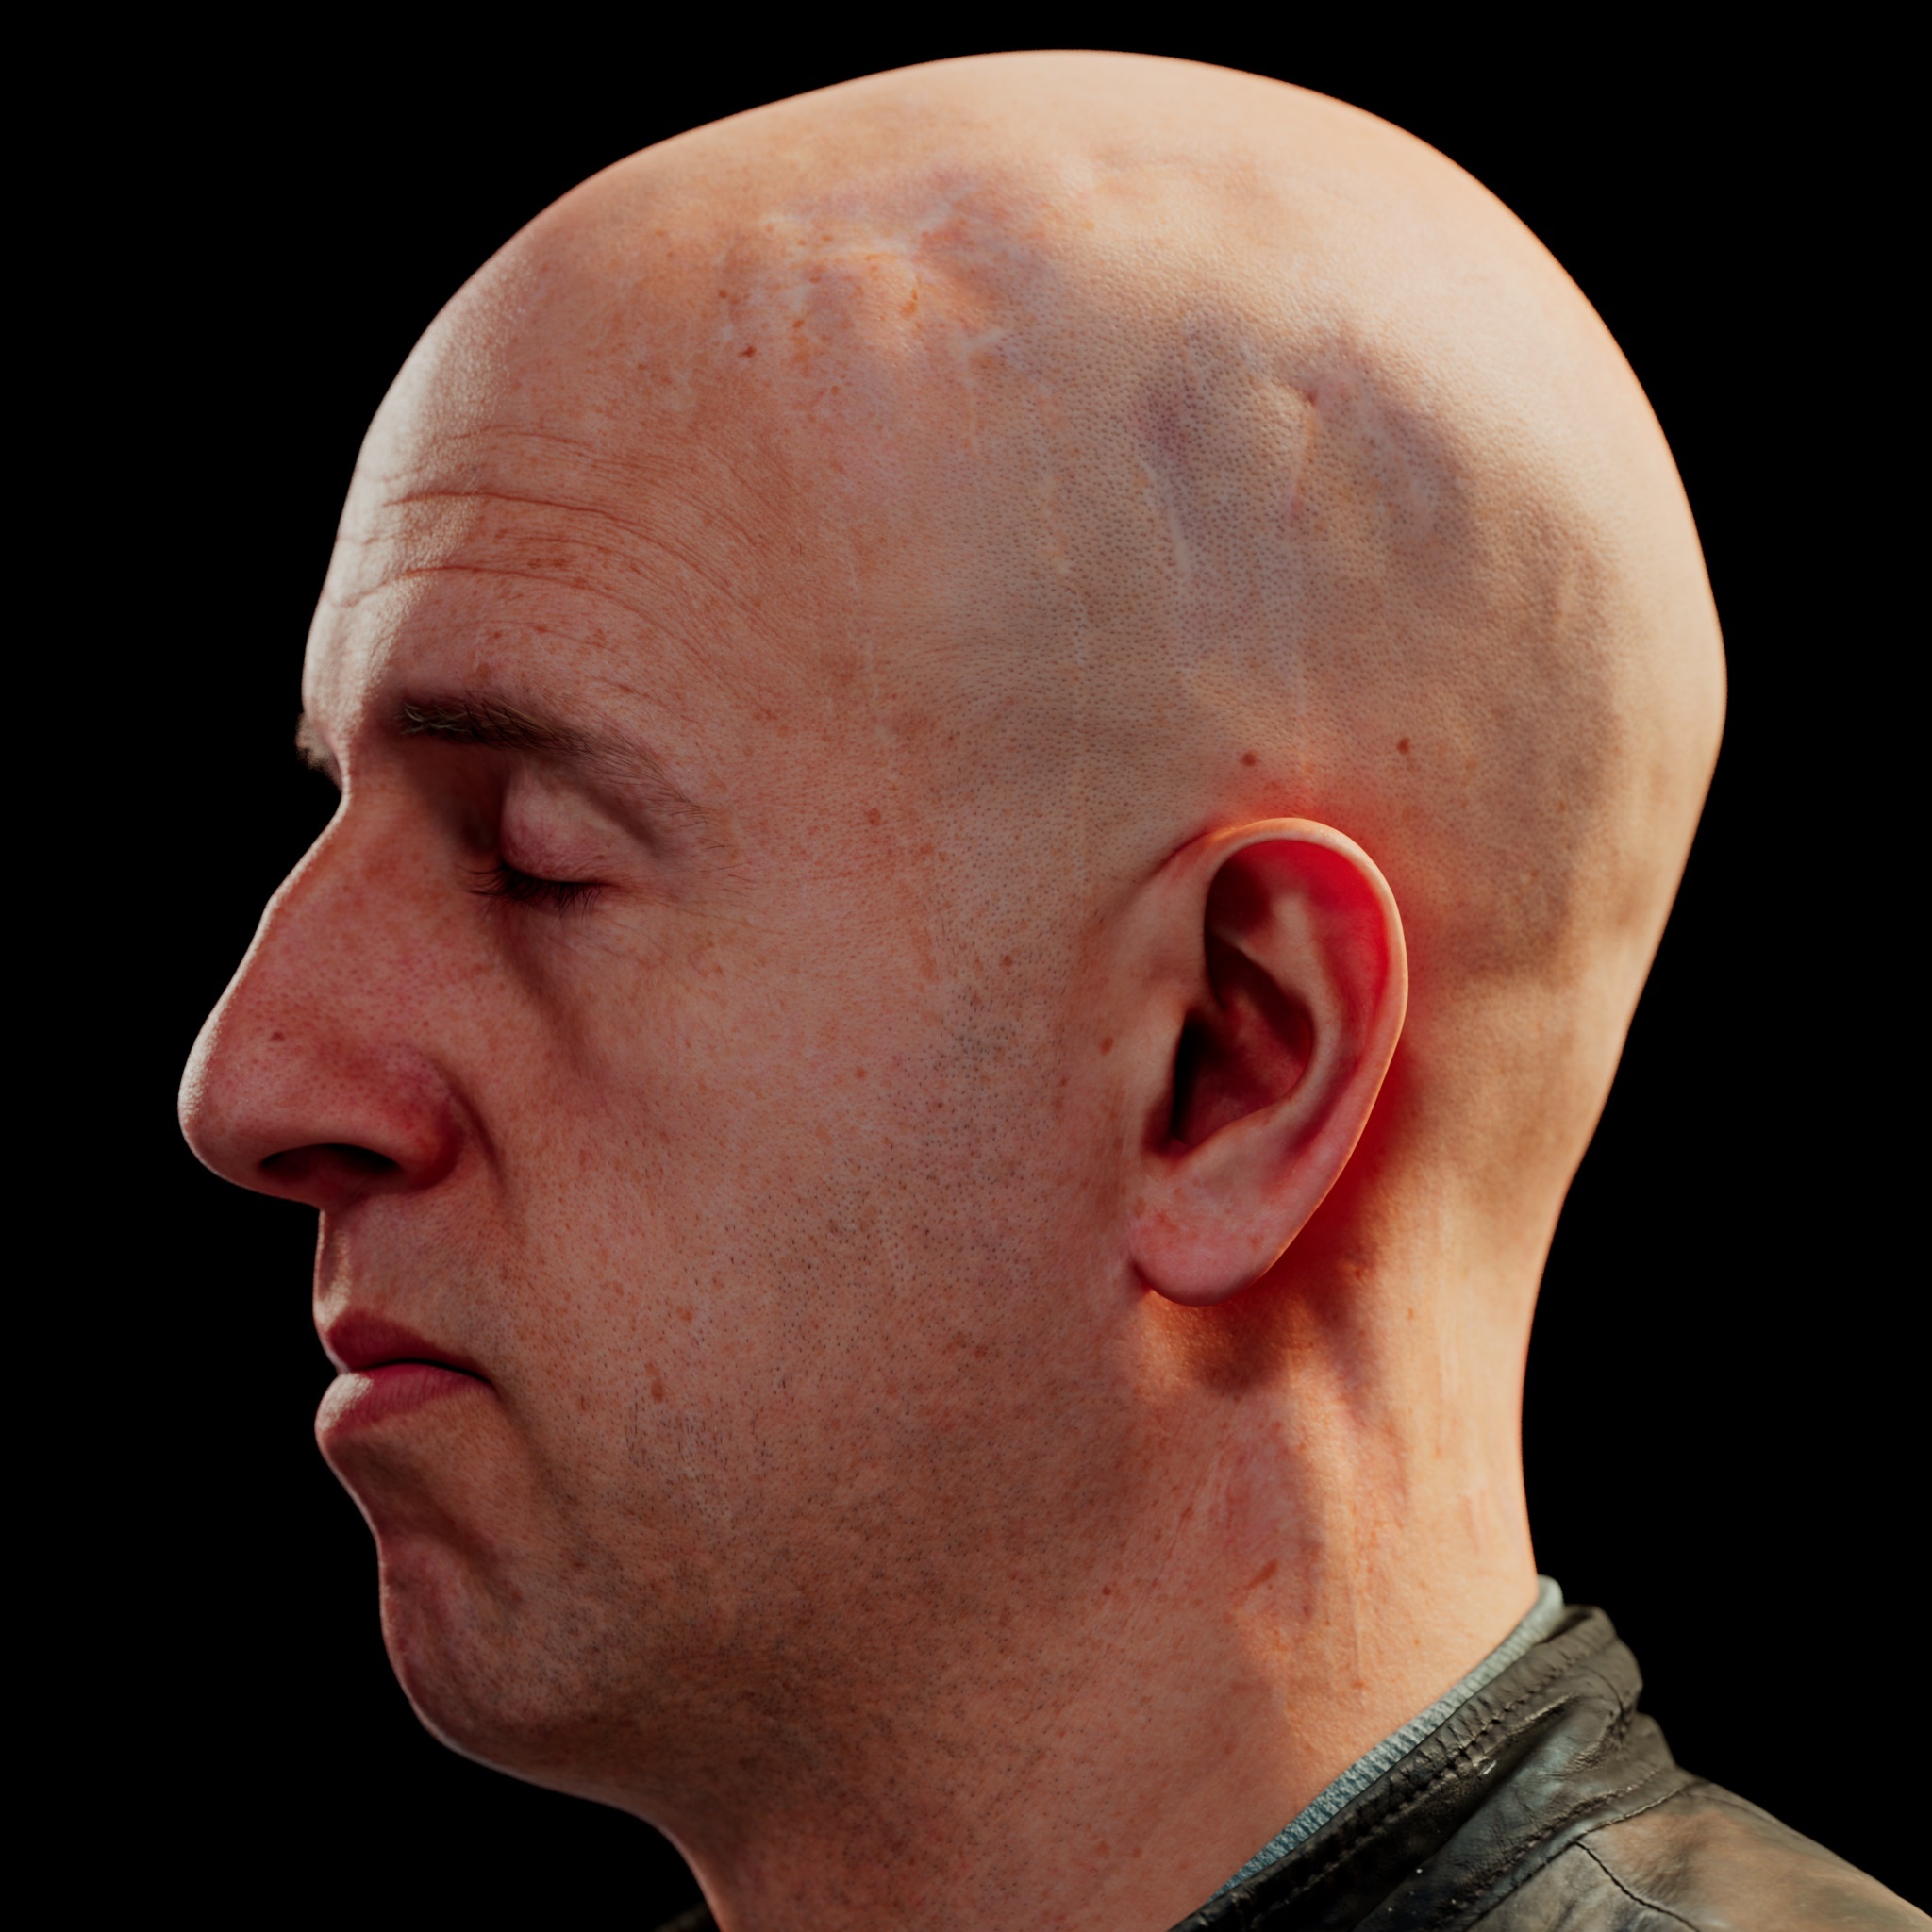
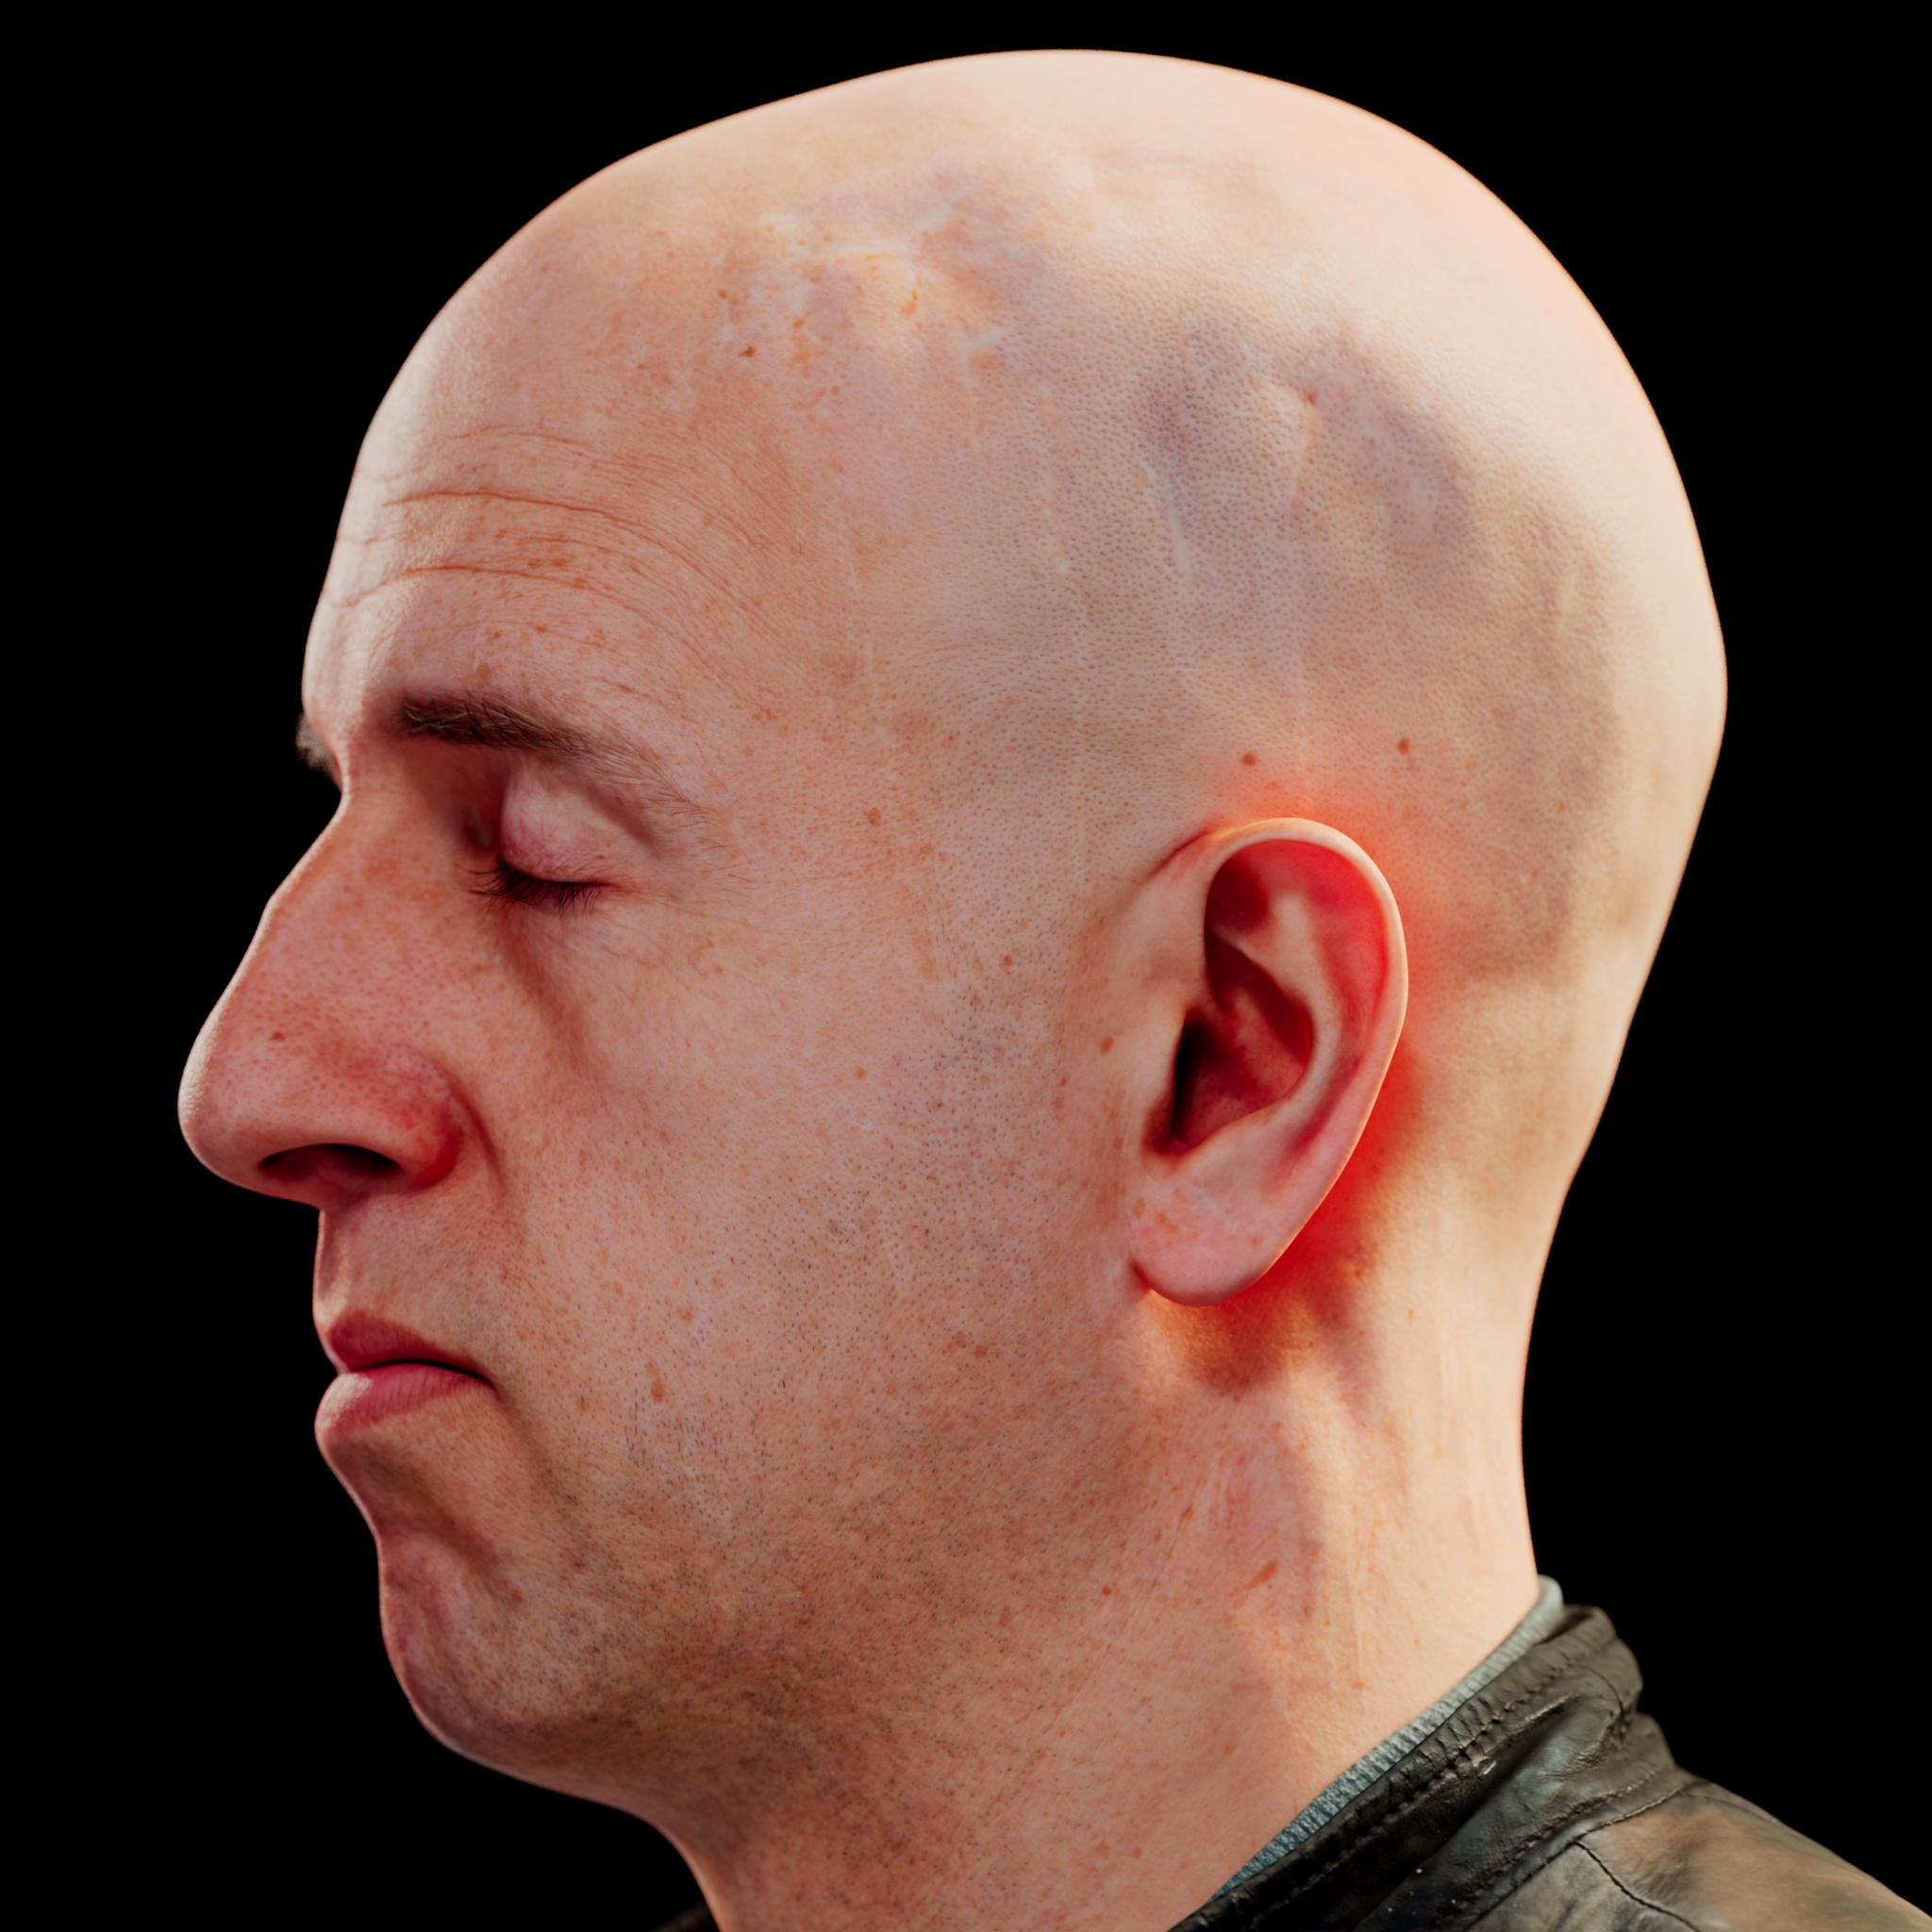
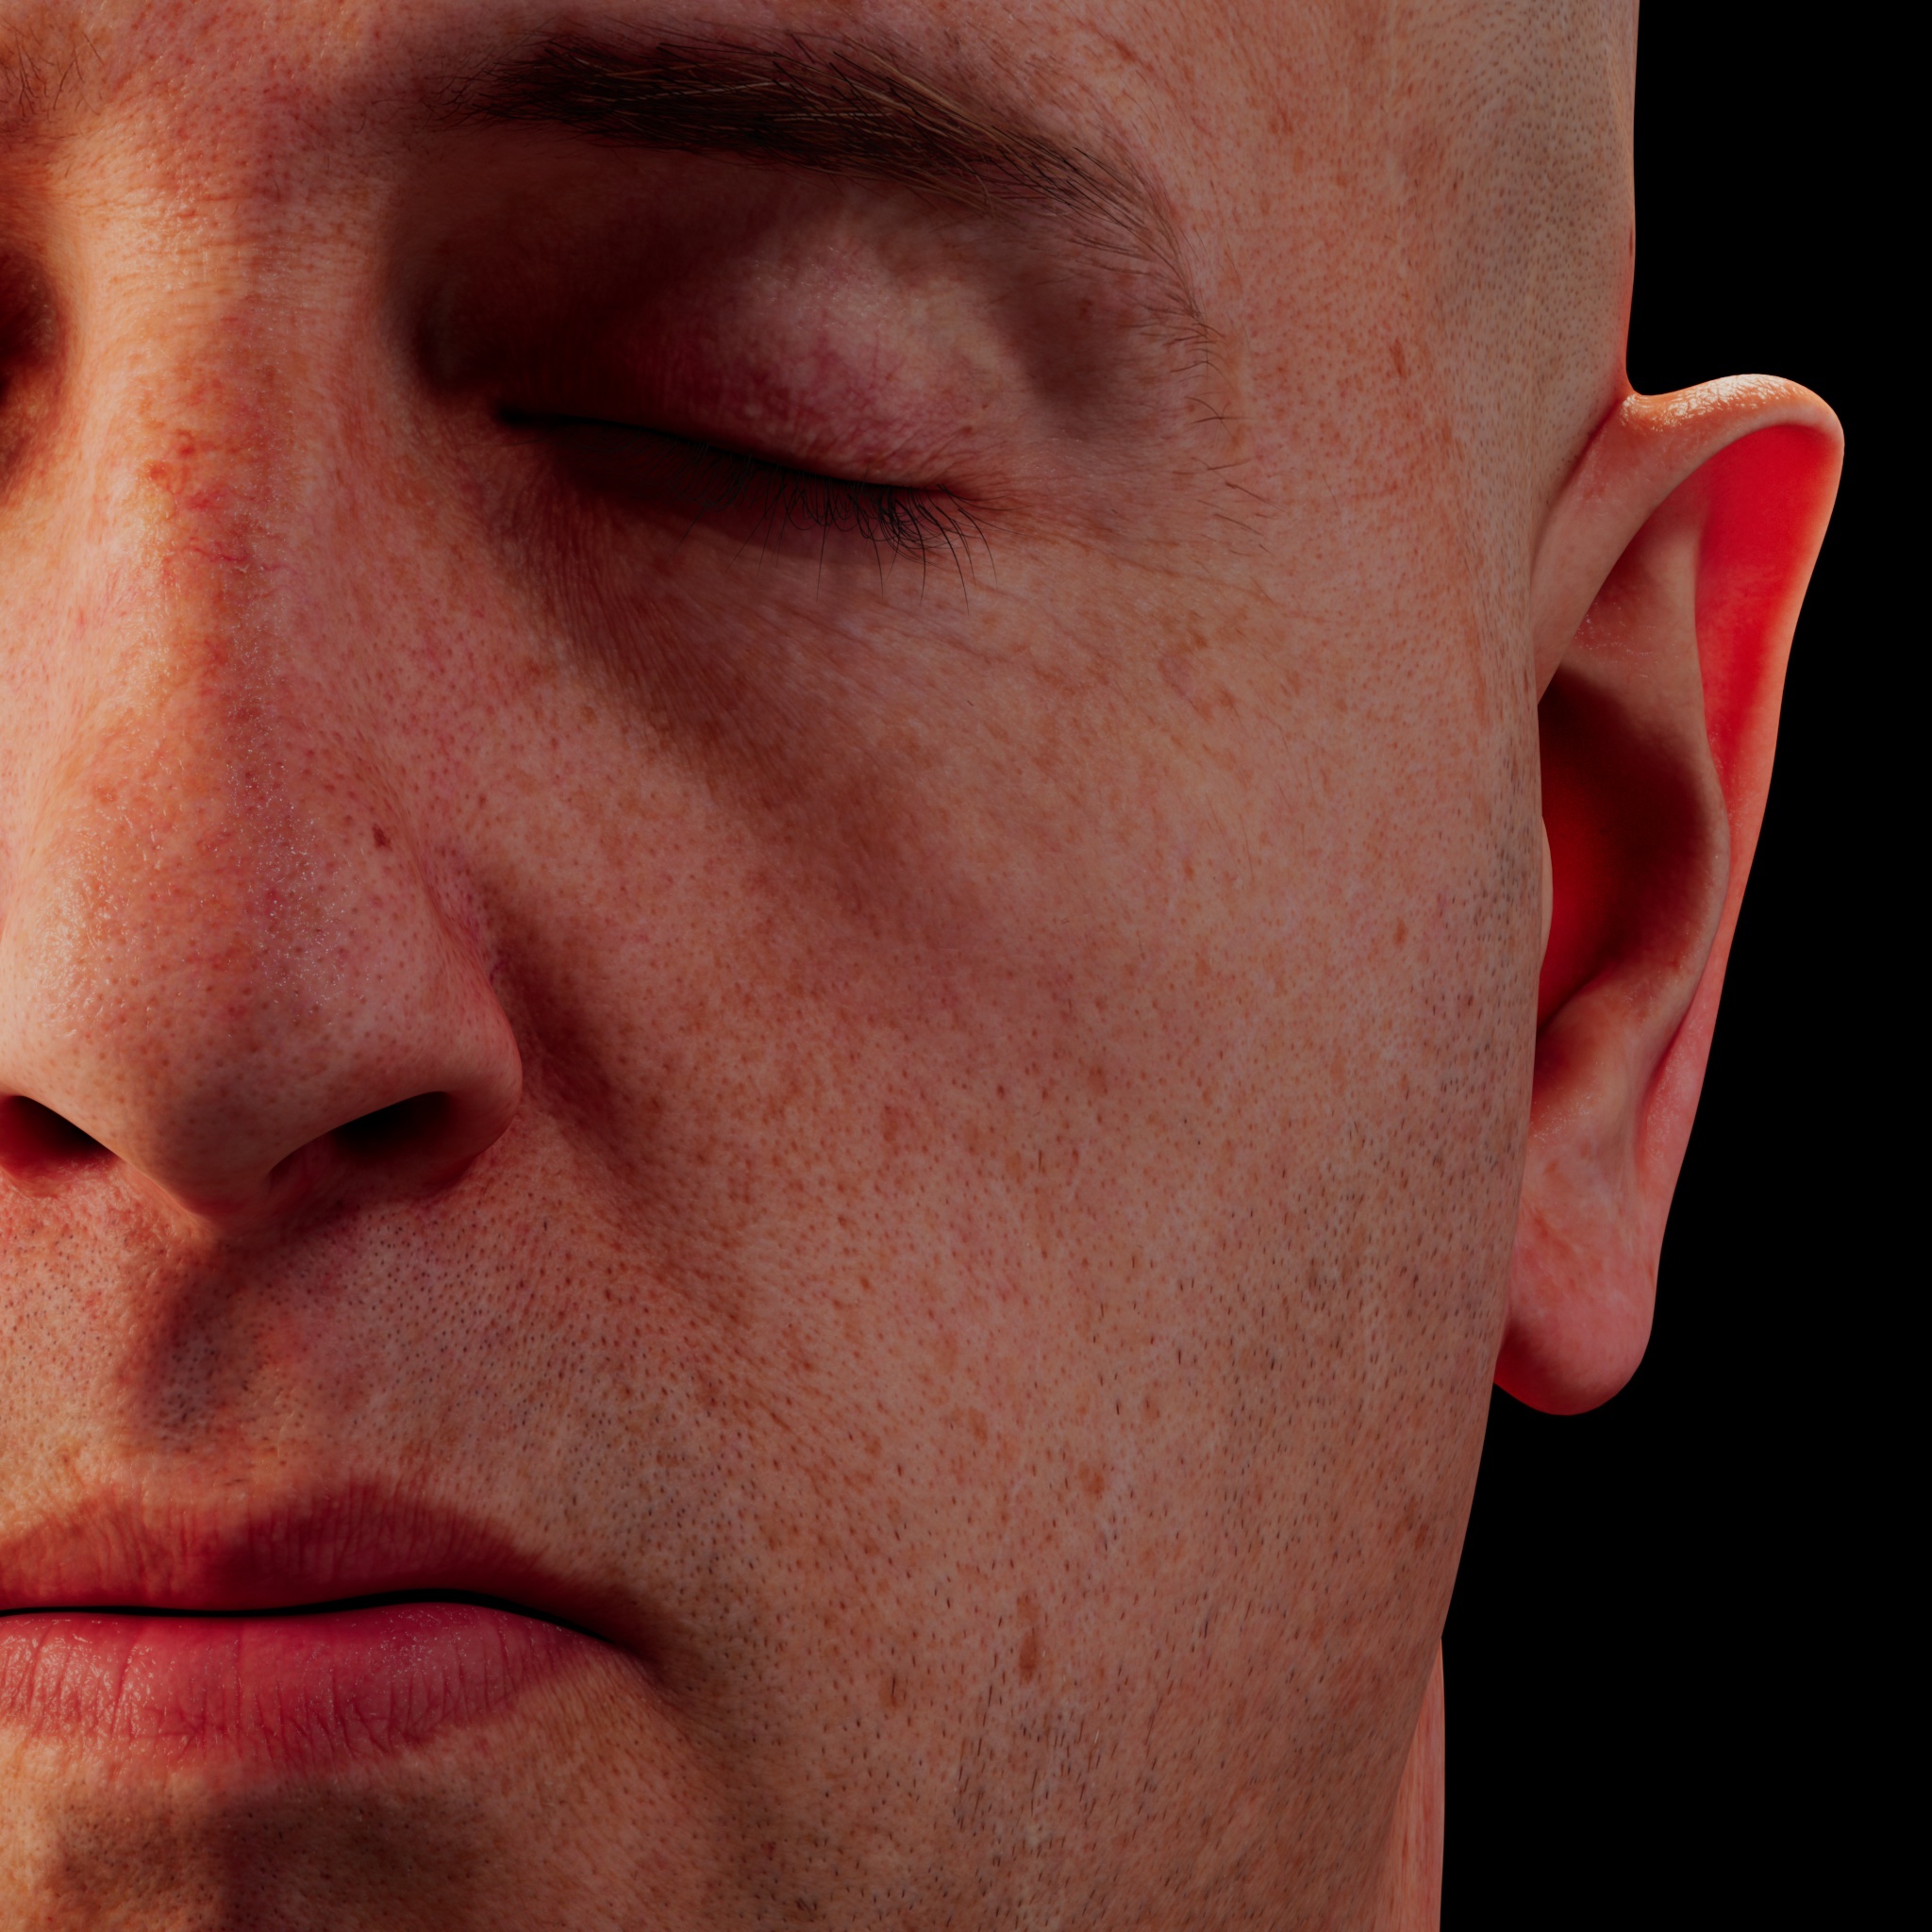
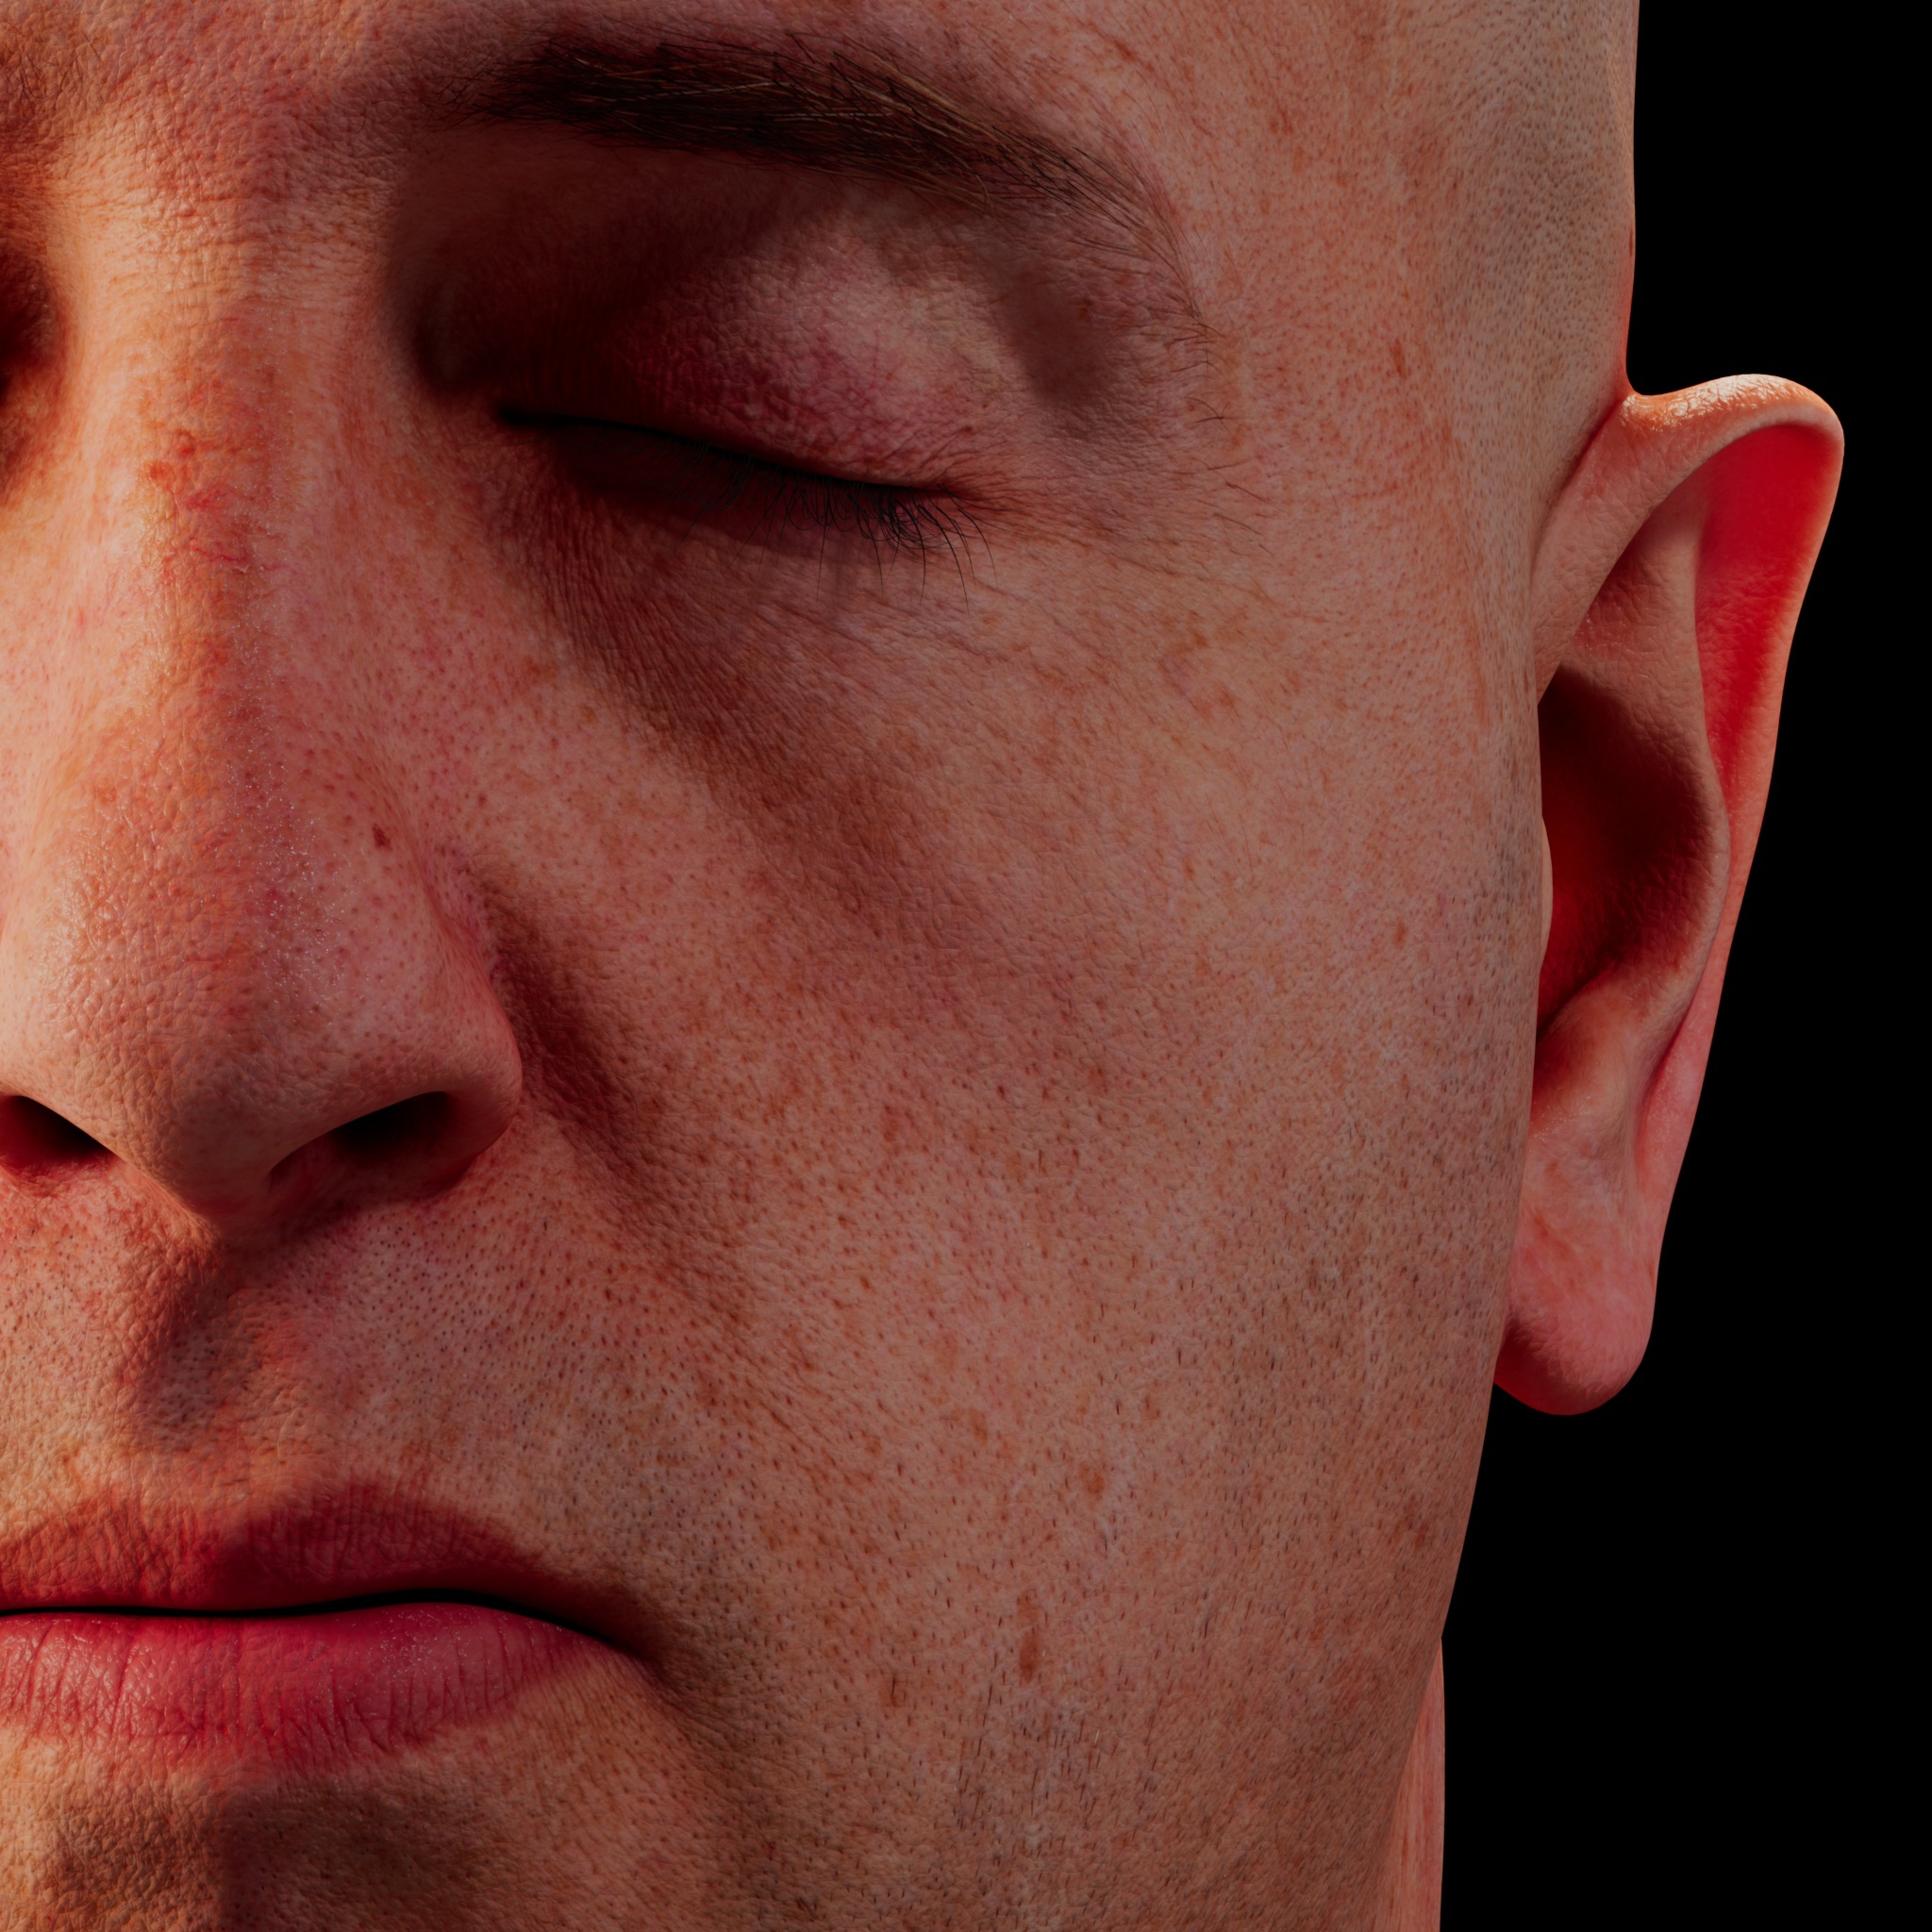
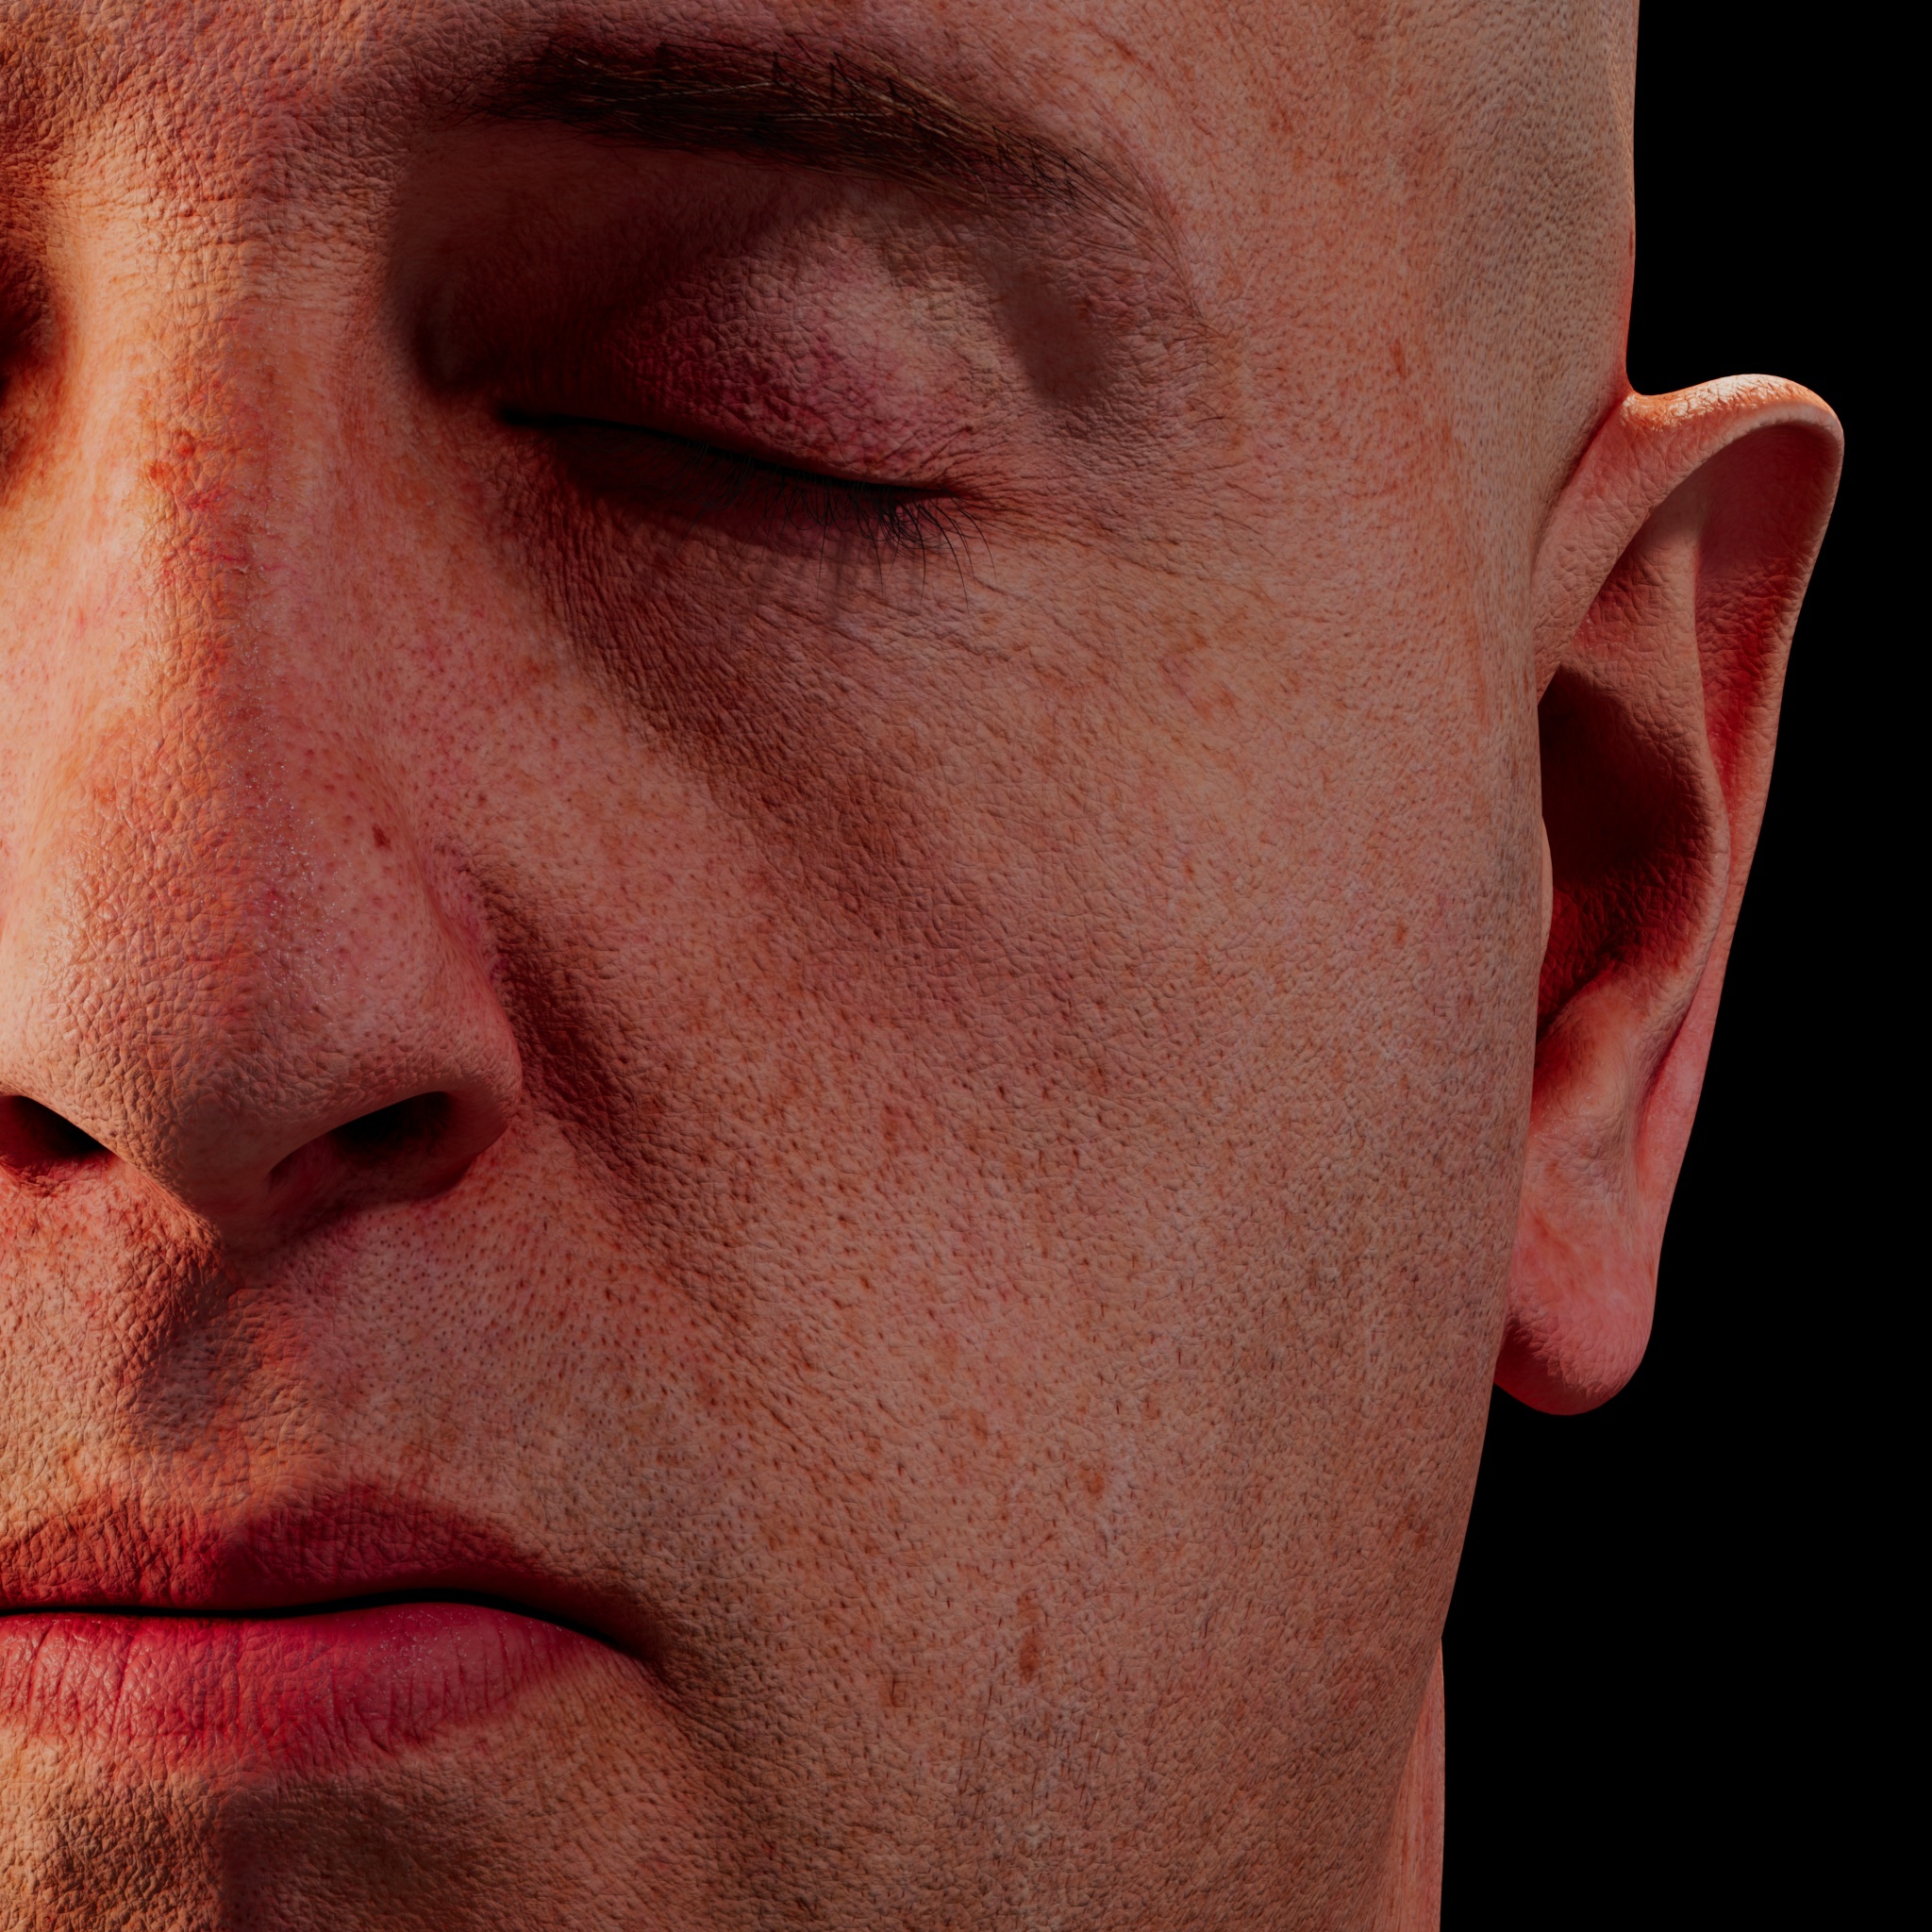
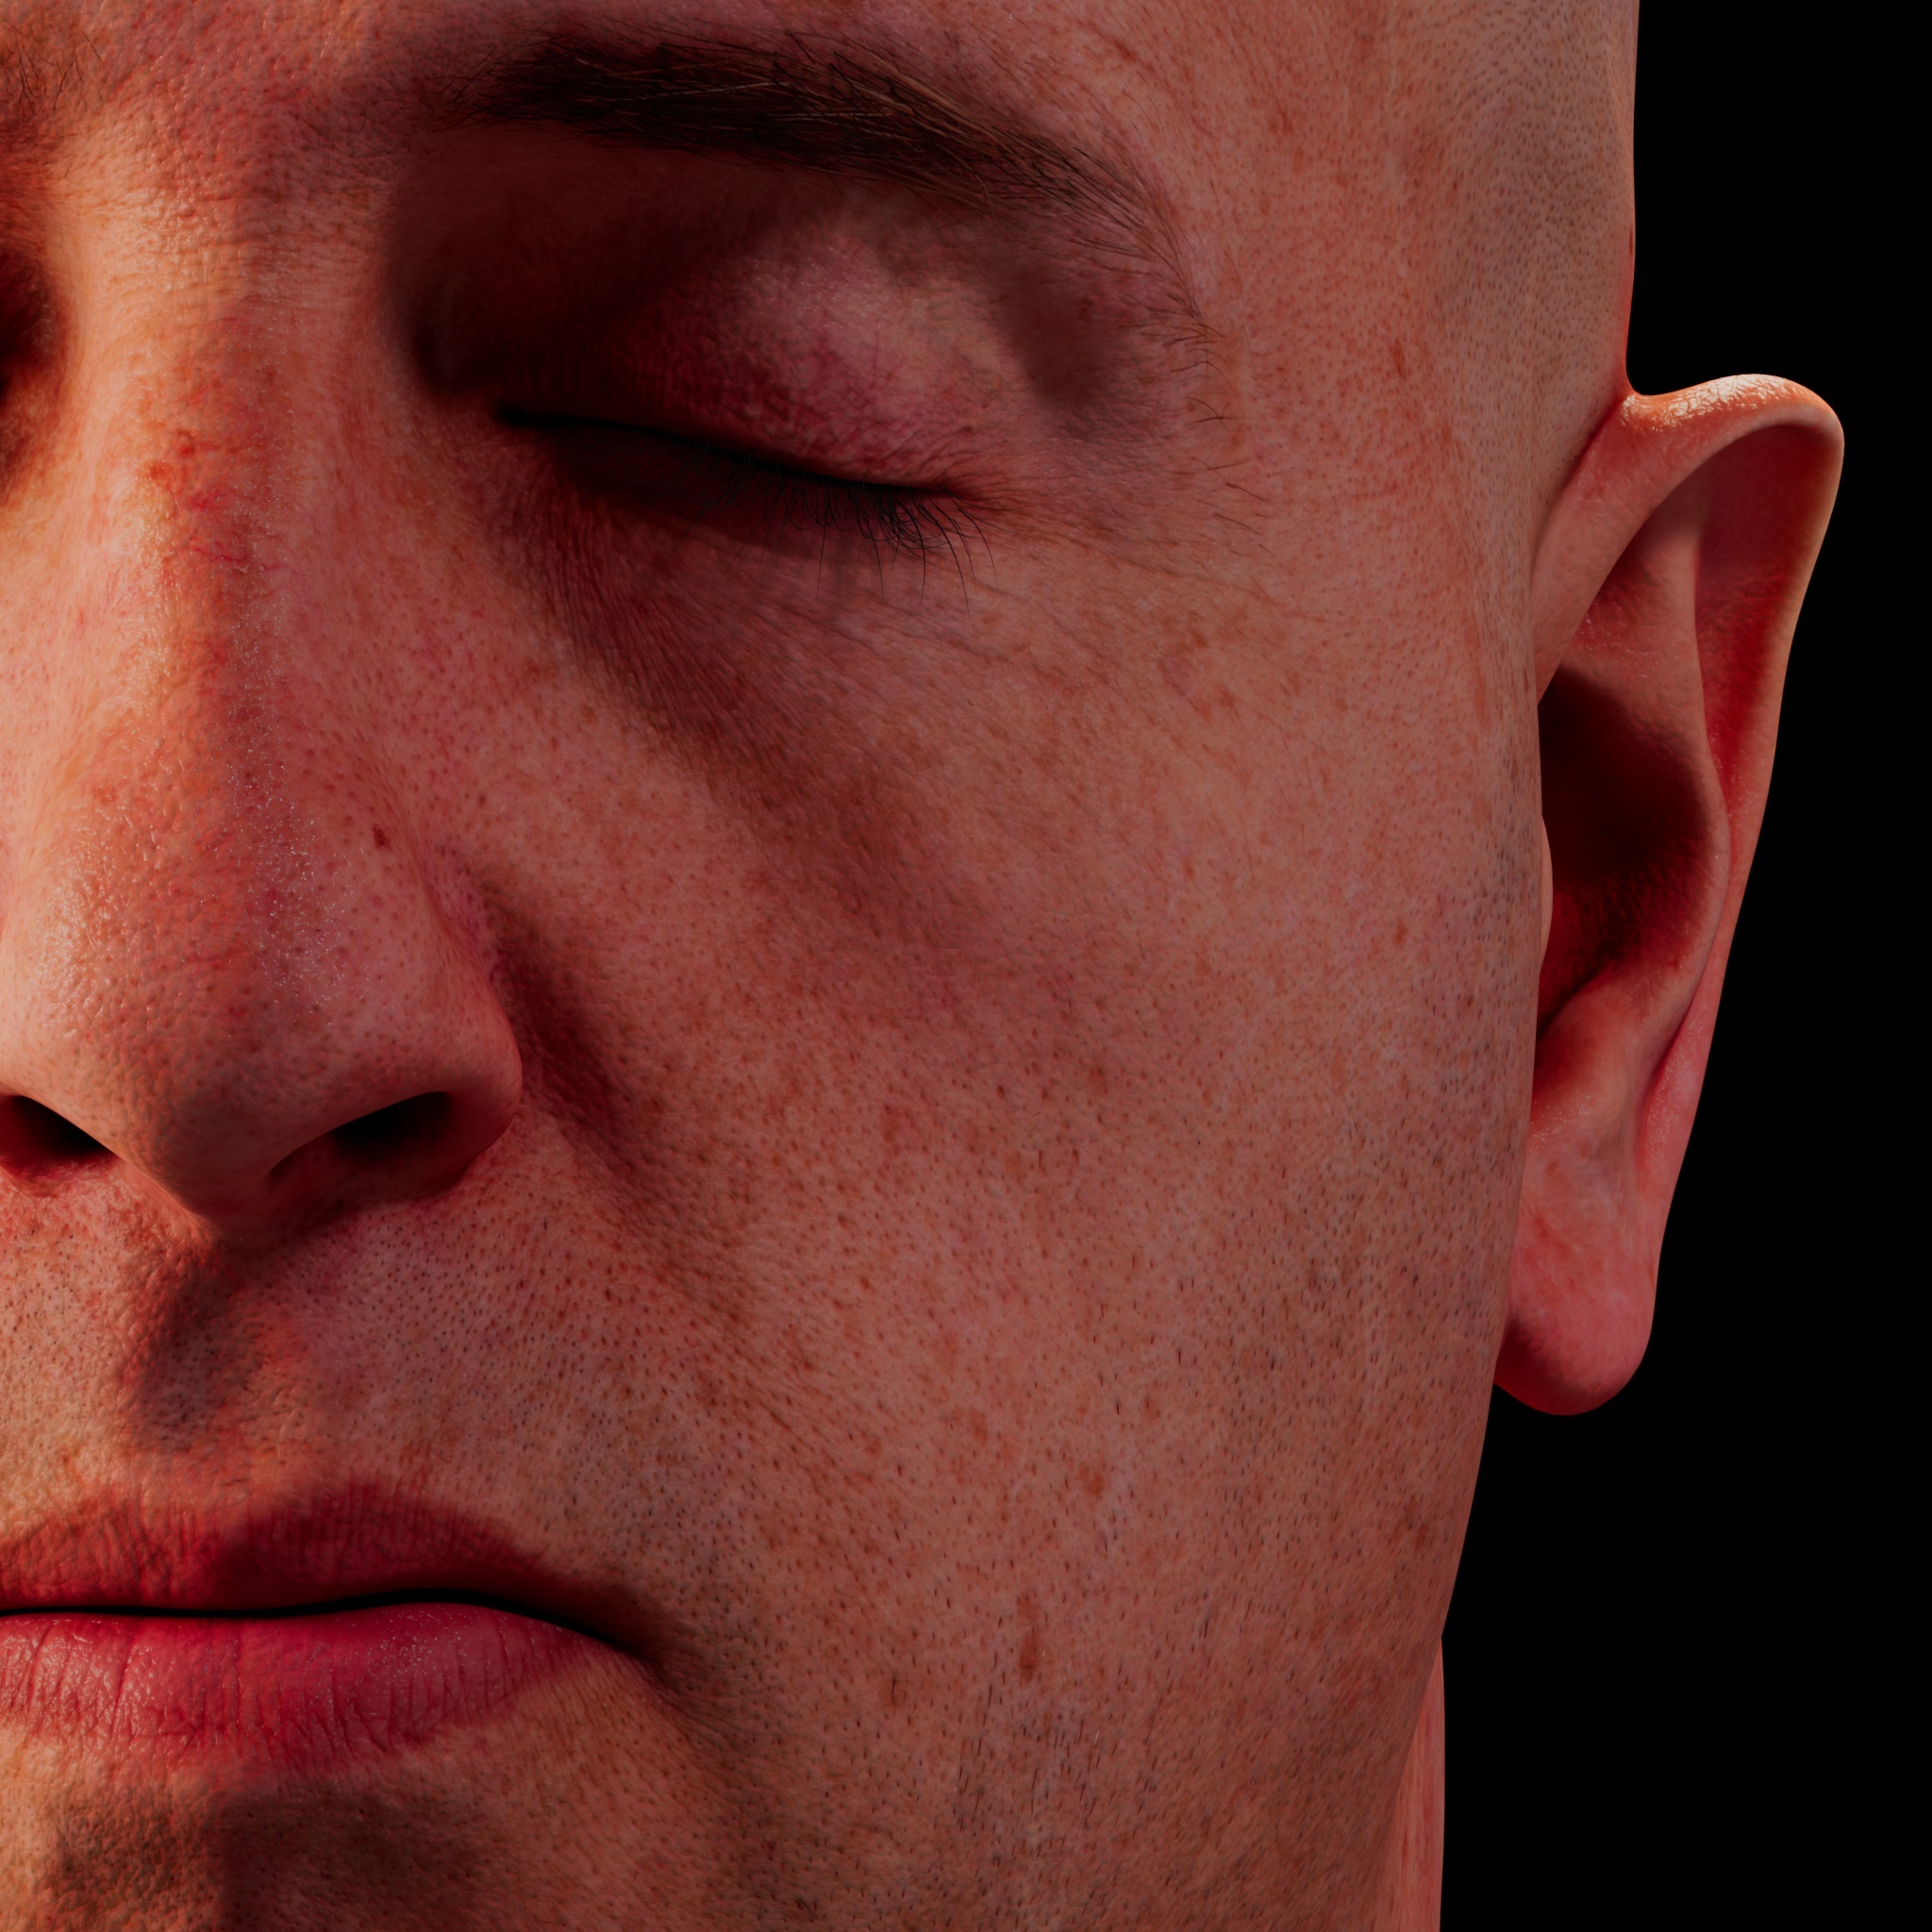
Free head model, courtesy of 3D Scan Store, with a textured skin shader material, illuminated by two area lights and a dome light
You can see how sub-surface scattering of light affects thin parts of the model (the ear) versus the thick part of the model (the head).

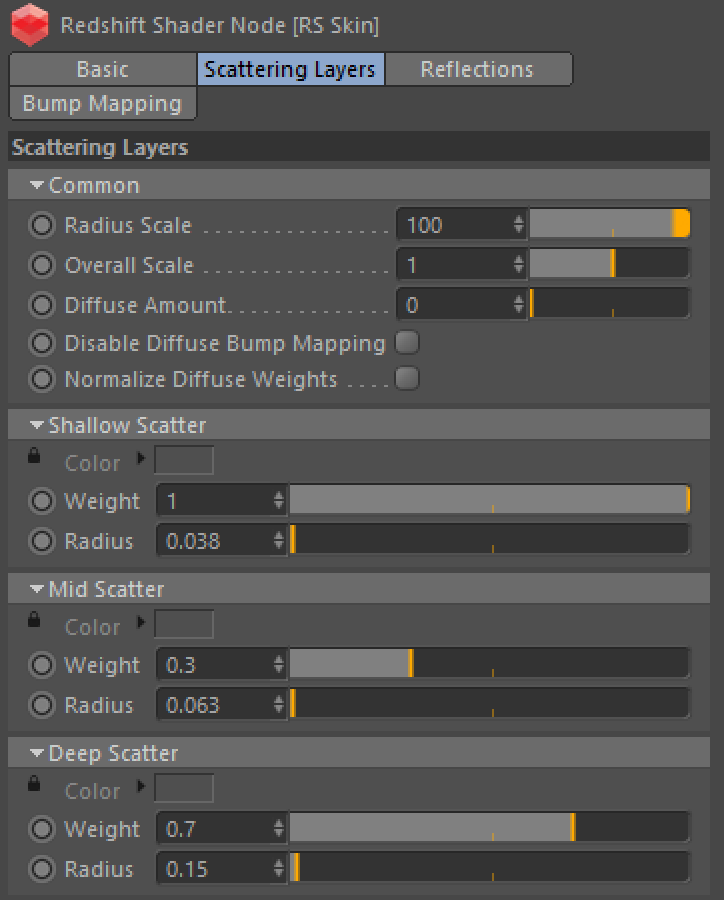
Scattering Layers
Each layer uses sub-surface scattering to compute a diffuse lighting result and the results are blended together based on each layer's individual weight.
The Shallow Scatter layer is the thinnest, so it should have the smallest Radius, yielding an almost diffuse scattering response. The Deep Scatter layer is the thickest layer, so it should have the largest radius, adding the blood tone under the skin.
For physically correct results, the sum of the layers should not exceed 1.0 ( see the 'Normalize Diffuse Weights' parameter). For more information about sub-surface scattering in general you can refer to the documentation on our sub-surface scattering material shader.
Note that by setting the weights of the Mid and Deep Scatter layers to 0.0, this shader can be used as an alternative to the regular sub-surface scattering material shader.
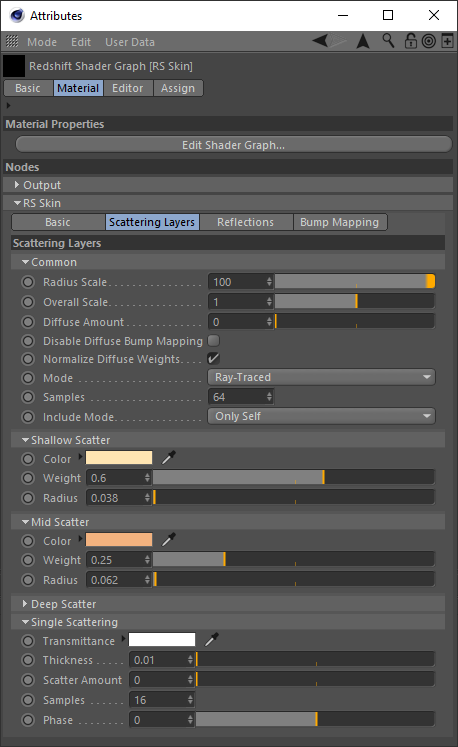
Common
Radius Scale
Allows you to adjust the strength of the scattering effect for all the layers. Lower values means scattered light is absorbed quicker, yielding a more diffuse look. Conversely, higher values yield a more translucent look.
The sub-surface scattering effect is heavily dependent on object scale. Use this parameter to quickly tune the effect based on object scale until it is visually pleasing.
|
|
|
|
|
Radius Scale: 1 |
0.1 |
10 |

Overall Scale
Allows you to adjust the overall brightness of all the scattering layers.
Normalize Diffuse Weights must be disabled in order to push SSS brightness above 1.0, otherwise you will see no brightness change.
|
|
|
|
|
Overall Scale: 1 Normalize Diffuse Weights: Enabled |
0.1 Enabled |
2.0 Disabled |
Diffuse Amount
Controls how much of the SSS effect you get. A value of 0.0 means that you'll only get subsurface scattering. On the other hand, a value of 1.0 will make this surface behave as a perfectly diffuse surface without any SSS. This parameter is useful for materials that need a weaker SSS effect.
|
|
|
|
|
Diffuse Amount: 0.1 |
0.5 |
1 |

Disable Diffuse Bump Mapping
This option allows you to switch to using the default un-bumped surface normals for diffuse lighting calculations.
In the examples images below note how when this option is enabled the overall SSS effect is smoothed out since the geometry is much smoother than when the diffuse bump map is used when disabled.
|
|
|
|
Disable Diffuse Bump Mapping: Disabled |
Enabled |

Normalize Diffuse Weights
In order to be physically correct, by default Redshift shaders conserve energy by not emitting more light than they receive. When this parameter is checked, we apply physical correctness by ensuring the sum of the weights of each layer do not exceed 1.0.
When this option is un-checked we leave the weights alone, which can result in brighter, but not physically correct results.
Even with Normalize Diffuse Weights disabled you can manually keep the scatter weights below 1 in order to conserve energy.
In the examples below notice how in the 2nd group of images with scatter weights of 0.5 / 0.15 / 0.35 the results look identical because the combined weight does not exceed 1. However in the 1st group of images, with Normalize Diffuse Weights disabled the SSS is noticably brighter since the scatter weight exceeds 1.
|
|
|
|
Normalize Diffuse Weights: Enabled Shallow / Mid / Deep Weights: 1 / 0.3 / 0.7 (= 2) |
Disabled 1 / 0.3 / 0.7 (= 2) |
|
|
|
|
|
|
|
Normalize Diffuse Weights: Enabled Shallow / Mid / Deep Weights: 0.5 / 0.15 / 0.35 (= 1) |
Disabled 0.5 / 0.15 / 0.35 (= 1) |


Mode
- Point-Based
- Point-Based (Legacy)
- Ray-Traced
You can use either point-based or ray-traced multiple sub-surface scattering in Redshift and both have their own advantages and disadvantages. In quite a few cases the techniques should look similar to each other but there are situations where the differences will be readily apparent, this is primarily due to the normalization of light that occurs when using point-based mode. Ray-traced mode does not normalize the light which can lead to differences that are most notable on thin objects or objects with more surface detail.
Point-Based (Legacy) mode is not recommended, especially if you’re planning on switching between ray-traced and point-based SSS techniques for the Redshift Skin shader.
Prior to adding ray-traced SSS to Redshift (before v2.5.57) a bug with the “Redshift Skin” shader was discovered that made parts of the lighting overly saturated and, in some cases, harsh. The “legacy” point based technique has no ray traced equivalent and it provided only as a means of compatibiliby with older scenes that made use of it.
If your scene is setup to use point-based SSS shaders and you render in progressive mode it will automatically use ray-traced SSS during progressive renders. This way you can actually see the SSS effect in progressive mode (and not just the diffuse texture) and tweak settings interactively - while still using point-based for the final (bucket) rendering.
Please note that due to the differences in the two modes that the final result can differ when comparing progressive ray-traced SSS to the bucket rendered point-based SSS.
Point-Based
-
Faster and smoother
-
Less detailed / accurate
-
Does not work in progressive mode
-
Requires a “prepass” stage
-
Higher chance of flickering in difficult lighting situations.
-
Not possible to isolate SSS effect on a particular object which can result in unnecessary “light bleeding” artifacts.
Ray-Traced
-
Slower and noisier
-
More detailed / accurate
-
Works in progressive mode
-
The higher the scatter radius the more samples are needed for clean results.
-
Possible to isolate SSS effect between objects or have it affect all objects. Please see here for more info.
|
|
|
|
|
Mode: Ray-Traced |
Point-Based |
Point-Based Legacy |

Samples
This controls the number of samples cast for Multiple Sub-Surface Scattering rays. Higher numbers will reduce noise issues but will take longer to render.
Ray-Traced only
In the images below the sample difference is most noticable in the ear.
|
|
|
|
|
Samples: 4096 |
128 |
512 |


- All Objects : All other objects participate in the SSS effect.
- Only Self : Contain the SSS effect in the same object only.
Ray-Traced only.
Point-Based SSS mode will always more closely resemble Ray-Traced mode in All Objects Include mode. It is not currently possible to separate SSS objects from one another in when using a Point-Based SSS mode. The Point-Based image below is provided as an example for comparison.
Notice the difference between the different methods around the collar and neck in the images below. To make the difference more prominent a Redshift Skin shader is applied to the jacket part of the model and the Radius Scale for both the head and jacket shaders has been increased to 10.
|
|
|
|
|
Include Mode: Only Self SSS Mode: Ray-Traced |
All Objects Ray-Traced |
(Not Applicable) Point-Based |
Shallow / Mid / Deep Scatter Layers
Color
This is the color of the scatter layer.
The final blended color of all 3 layers depends on the weight and radius of each layer.
|
|
|
|
|
|
Shallow Scatter Color: Red Weight: 0.33 |
Mid Scatter Color: Green Weight: 0.33 |
Deep Scatter Color: Blue Weight: 0.33
|
Combined Result Scatter Colors: Red / Green / Blue Weights: 0.33 / 0.33 / 0.33 |


Weight
This is a multiplier of the scatter layer color and can be used to adjust the brightness / strength of the layer.
This value is multiplied by the 'Overall Scale' parameter.
|
|
|
|
|
|
Scatter Colors: Weights: 0.0 / 0.0 / 0.01 |
Scatter Colors: Weights: 0.0 / 0.0 / 0.1 |
Scatter Colors: Weights: 0.0 / 0.2 / 0.1 |
Scatter Colors: Weights: 0.6 / 0.2 / 0.1 |


Radius
This parameter is scene-scale related. It controls how deep light can travel within this surface. If the value is high, light can go deeper which creates a softer effect. Smaller values, on the other hand, mean that the light reaches extinction early which creates a harder more diffuse effect.
This value is multiplied by the 'Radius Scale' parameter.
|
|
|
|
|
|
|
Scatter Colors: Radius: 0.1 / 0.1 / 0.1 Weights: 0.33 / 0.33 / 0.33 |
Scatter Colors: Radius: 0.1 / 0.1 / 0.5 |
Scatter Colors: Radius: 1.0 / 0.1 / 0.5 |
Scatter Colors: Radius: 1.0 / 2.0 / 0.5 |
Scatter Colors: Radius: 2.0 / 2.0 / 2.0 |


Single Scattering
Transmittance
Describes the sub-surface attenuation color. A color of black means full light absorption, yielding a solid material, while a color of white means light rays will pass right through without being absorbed. Dark colors can be used to describe denser materials.
Thickness
This acts as a scale of the absorption effect, with a value of 0.0 meaning no absorption and larger values meaning stronger absorption and thus denser-looking materials.
Scatter Amount
Acts as a scale of the scattering effect, with a value of 0.0 meaning no scattering and larger values meaning more scattering and thus denser-looking materials.
Samples
This is the maximum number of samples shot for single scattering rays. More samples will mean less noisy looking single scattering, but can affect rendering performance.
Phase
This describes the anisotropy of the scattering effect, for forward and back scattering. Forward scattering requires values between 0 and 1, which means rays will scatter away from the light source. Back scattering requires values between -1 and 0 which means rays will scatter back towards the light source.
Scattering Options in Detail
The 'Overall Scale' allows you to adjust the brightness of all the layers together, so you can quickly fine tune the intensity your diffuse lighting for the overall material.
Note that the 'Overall Scale' is applied prior to any layer weight normalization (see 'Normalize Diffuse Weights'). This means if your layer weights sum to a value greater than 1.0, you may need lower 'Overall Scale' values than expected in order to see a difference.
|
|
|
|
|
This is an example of dimming the overall diffuse |
'Overall Scale' set to 0.3. |
'Overall Scale' set to 1.0 |

The 'Radius Scale' allows you to adjust the strength of the scattering effect for all the layers. Since sub-surface scattering is heavily dependent on the scale of the object, you can use this option to quickly adjust the scattering effect until it is visually pleasing. Smaller values mean quicker absorption of light, resulting in less scattering effect and a more diffuse look. With larger values you get a more translucent look.
|
|
|
|
|
This is an example of lower the overall sub- |
'Radius Scale' set to 4.0 |
'Radius Scale' set to 2 0.0 |

For physical correctness, the 'Normalize Diffuse Weights' should be left enabled. This will ensure the material does not reflect more light than it receives. However, if you want better control over the overall layers brightness or want your material to be more emissive than physically correct, you can disable this option.
Below is a side-by-side example showing the difference in lighting with the 'Normalize' option disabled, using the default layer weights of the material.
|
|
|
| With 'Normalize Diffuse Weights' enabled, the weights are proportionally re-balanced, so we are guaranteed 'physically correct' lighting. |
With 'Normalize Diffuse Weights' disabled, the lighting is brighter, but may no longer be 'physically correct' if the sum of the layers is greater than 1.0 as it is in this example. |
The 'Diffuse Amount' lets you control how much of the overall sub-surface scatter effect you want, versus pure diffuse lighting. When the 'Diffuse Amount' is set to 1.0, there will be no sub-surface scattering. Equally, when set to 0.0, there will be only sub-surface scattering.
|
|
|
|
|
With 'Diffuse Amount' set to 0.0. |
With 'Diffuse Amount' set to 0.5. Half the amount |
With 'Diffuse Amount' set to 1.0. The head is now |
Now let's take a look at how each layer can contribute to the scattering effect. While the differences can be subtle at times, they are noticeable.
|
|
|
|
|
Initially, the mid and deep scattering layers have |
Now adding the middle scattering layer radius |
Adding the deep scattering radius (0.15) |


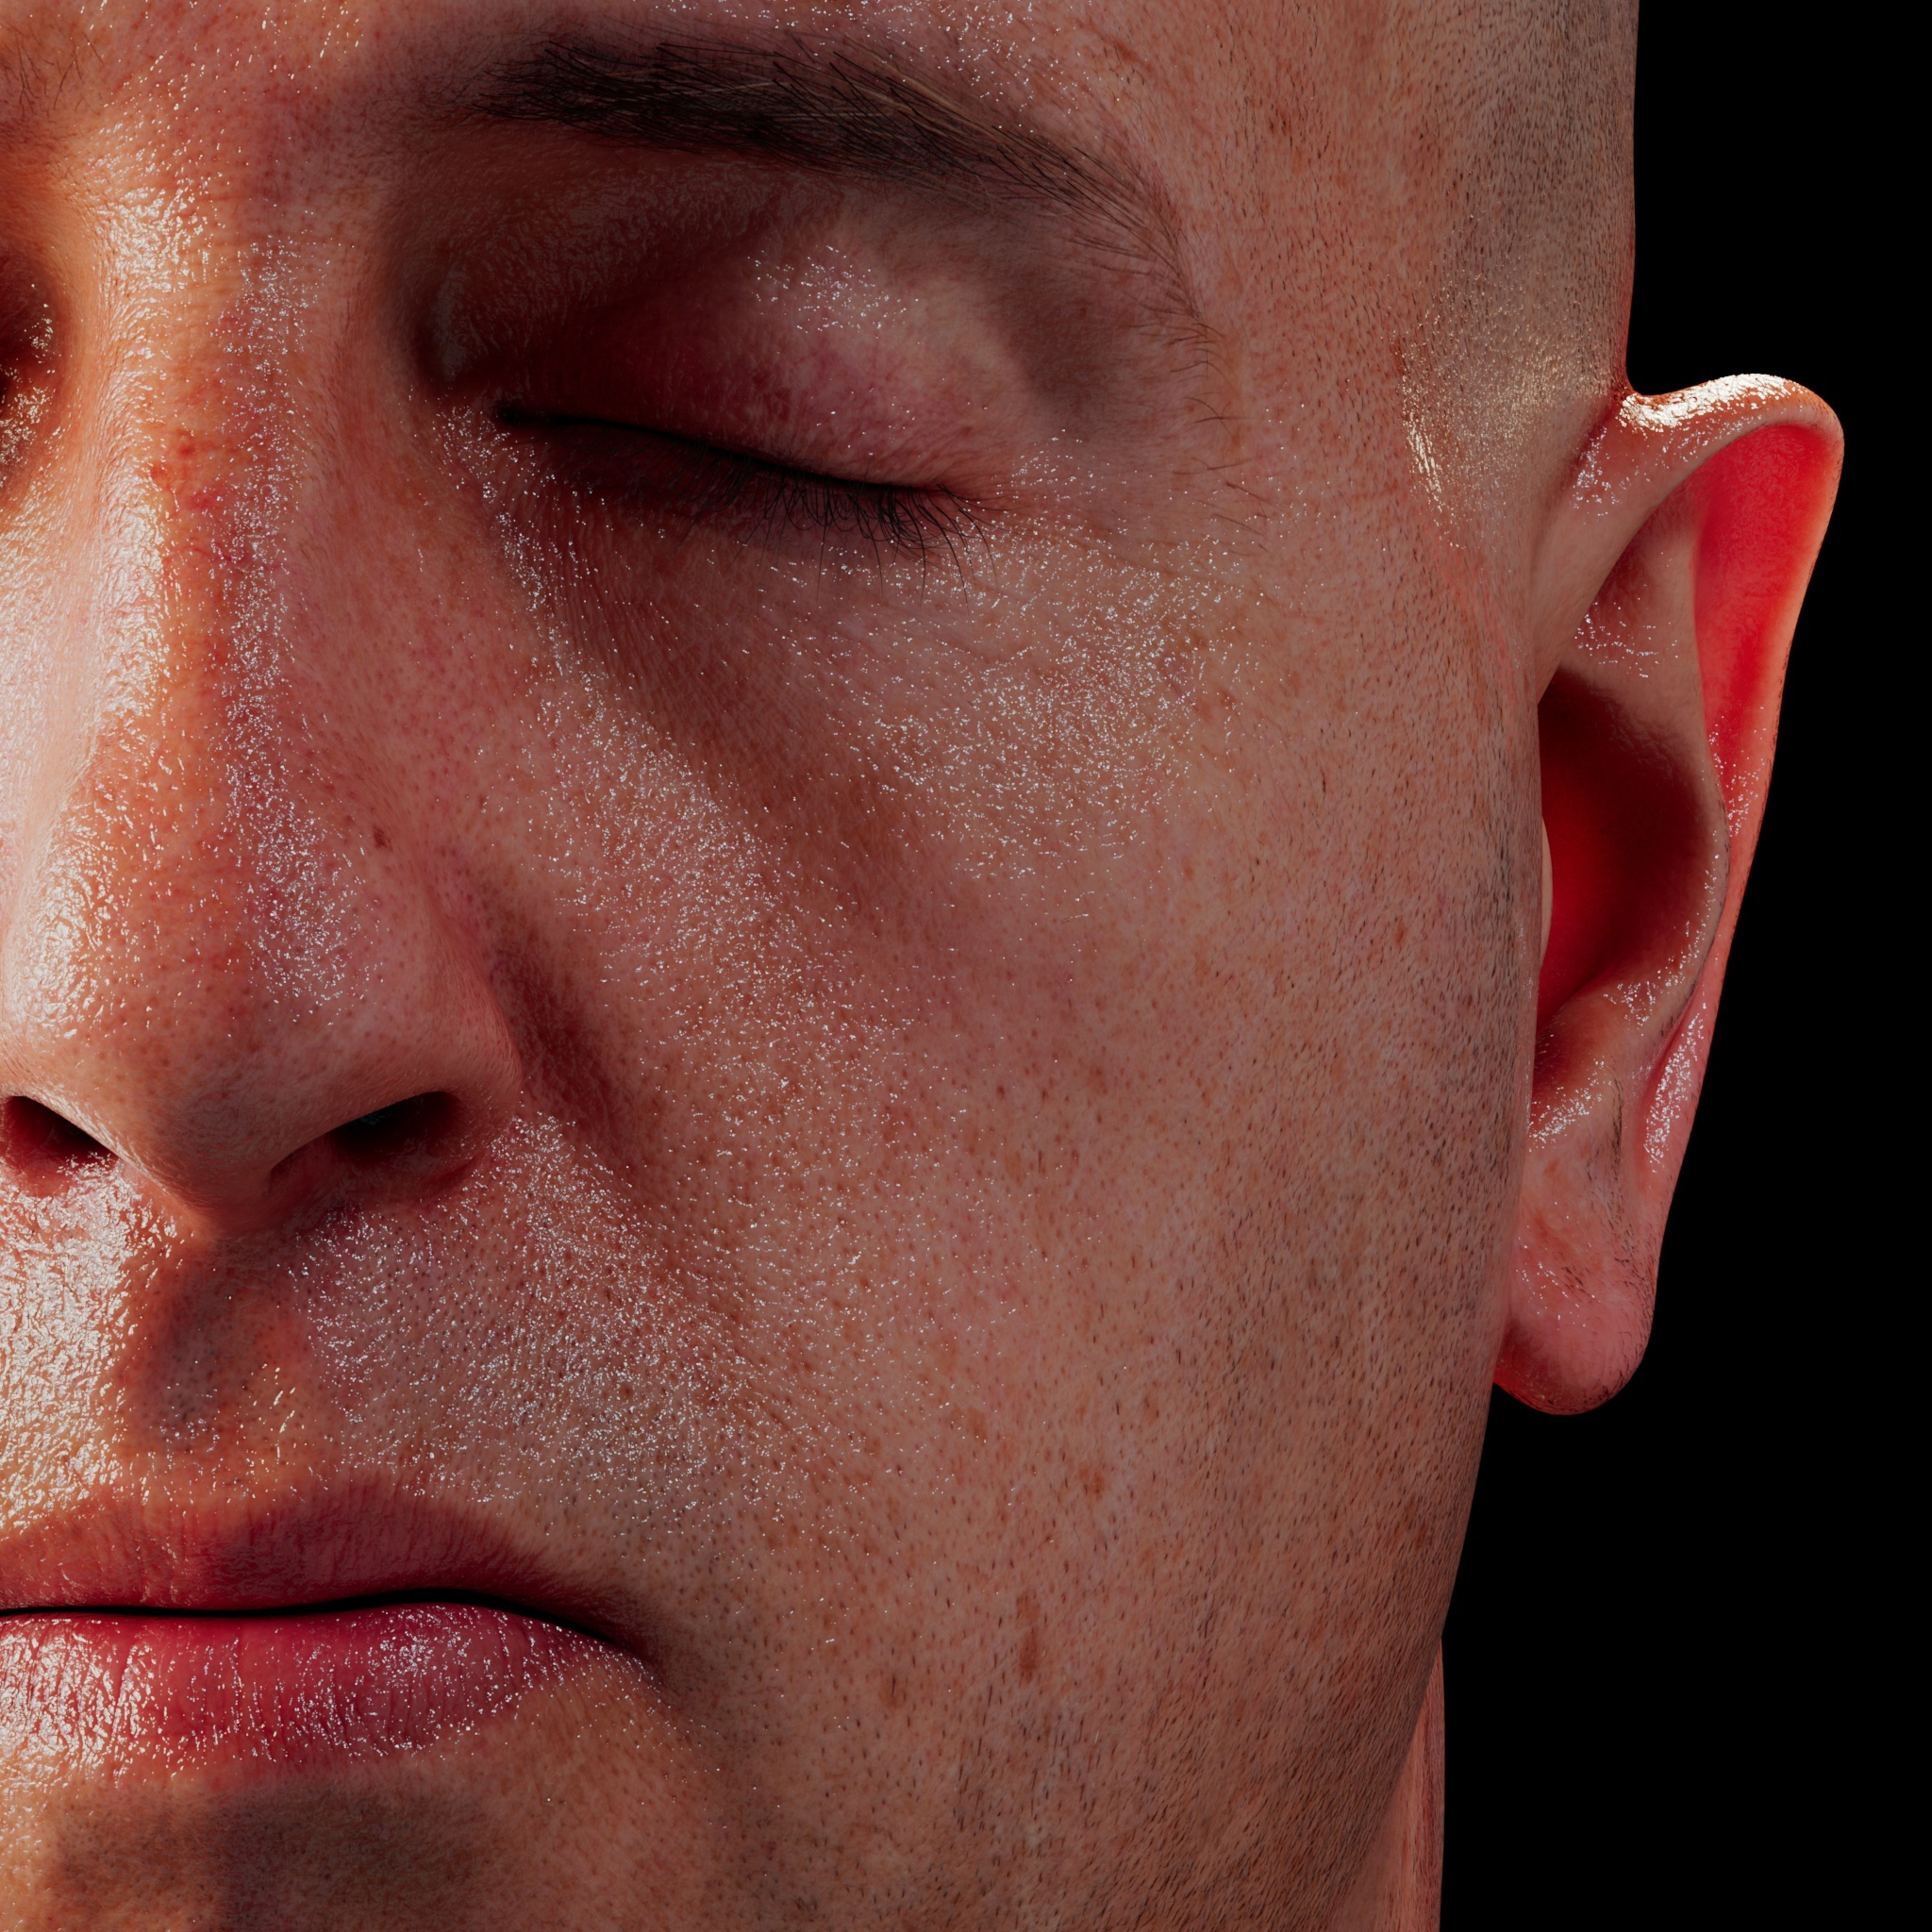
Reflections
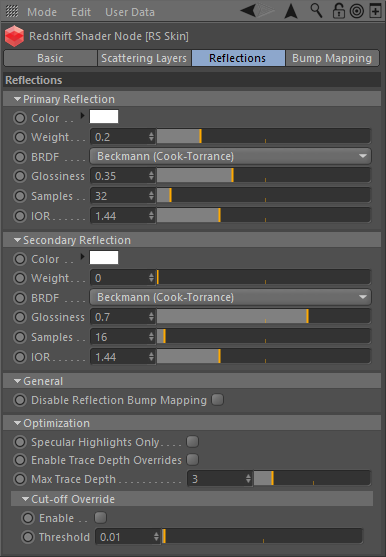
Primary / Secondary Reflection
Color
This defines the color of the reflection.
Weight
This scales the overall amount of the reflection.
BRDF
Allows you to choose the technique for simulating physically correct rough reflections. Beckmann is generally considered the standard for a good range of materials, but GGX has a wide specular tail, which is good for chrome materials.
- Beckmann (Cook-Torrance)
- GGX
- Ashikhmin-Shirley
Glossiness
This controls the glossiness, or roughness, of the reflection. A glossiness of 1 means almost mirror reflection, while a glossiness of 0 means very rough, almost diffuse reflection.
Samples
This defines the number of samples to use for the reflection. More samples means less noise.
IOR
The index of refraction which is used to compute the view-dependent Fresnel reflectivity effect. Reflections with an IOR value closer to 1.0 will have less facing reflectivity. The recommended default value is 1.44.
General
Disable Reflection Bump Mapping
This option allows you to switch to using the default un-bumped surface normals for direct and indirect reflection rays.
Optimization
Specular Highlights Only
This optimization option will disable indirect reflection ray tracing of the environment and just capture specular reflections of lights.
Enable Trace Depth Overrides
This enables the Max Reflection Trace Depth parameter. When not enabled, the global trace depth will be used.
Max Trace Depth
This parameter controls the trace depth for reflection rays shot from this material. If the reflections of a material are not very defined (meaning: they are blurry because of the glossiness parameter or have a low weight), then multiple reflection bounces can be a waste of rendering time. This parameter allows the user to reduce the trace depth and speed up rendering.
Cut-off Override Enable
This parameter allows you to override the global cut-off setting for reflections.
Cut-off Override Threshold
When the reflections of a material are very dark (because of low "Weight" or "Color" values) they contribute very little to the final image. This parameter defines what is considered "very dark" at which point no more reflection rays will be shot - which will speed up rendering. Scenes containing very strong lights might need this parameter set to very low values such as 0.0001 in order to avoid early termination of tracing which can produce a grain-like effect.
Reflection Settings in Detail
Below are some examples of how different reflection settings can affect the look of the material.
|
|
|
|
|
When the 'Glossiness' is set to 1.0, you will get a |
Lowering the IOR to 1.2 shows reduced facing |
Lowering the IOR to 1.0 kills the |


Bump Mapping
Add Bump Input To Material Bump
Skin Example
There are various tutorials on the web for different renderers that describe how to use texture maps for the sub-surface scattering layers. The tutorials that describe how to map three sub-surface layers also apply reasonably well to the Redshift skin material.
Although the best results can be gotten using dedicated textures for the layers and reflections, here we show a simplified example, using a single diffuse texture that can be manipulated to add color detail to the shader, while still maintaining the sub-surface effect.
The first step is to de-saturate the texture, then adjust its contrast to darken the dark details (such as facial hair). Once you have that texture you apply a red tint for the deep scatter color, a green-ish tint for the mid scatter color (so the sum of which becomes a deep orange) and simply use the diffuse texture for the shallow scatter layer. You can also use the de-saturated texture for the reflection color.
Below is an example showing the different layers, with its appropriate weight, and the other layers having a weight of 0.0.
|
|
|
|
|
|
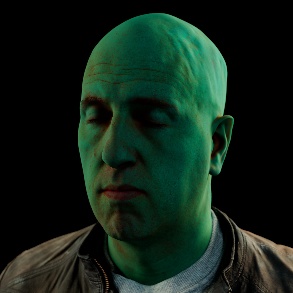
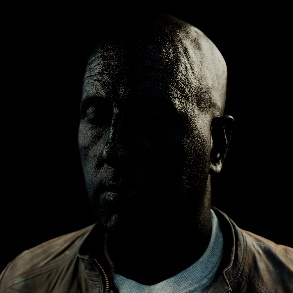
Deep layer, tinted red. |
Mid layer, tinted green. |
Shallow layer, containing the |
Reflection layer. |

Below now shows the layers successively summed together, by setting the layer weights to their appropriate values.
|
|
|
|
|
|
Deep layer. |
Deep and mid layer. |
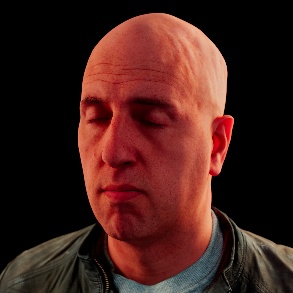
Deep, mid and shallow layer, |
All layers, with reflections. |


Below is an example shader graph and the values used to create the images above.
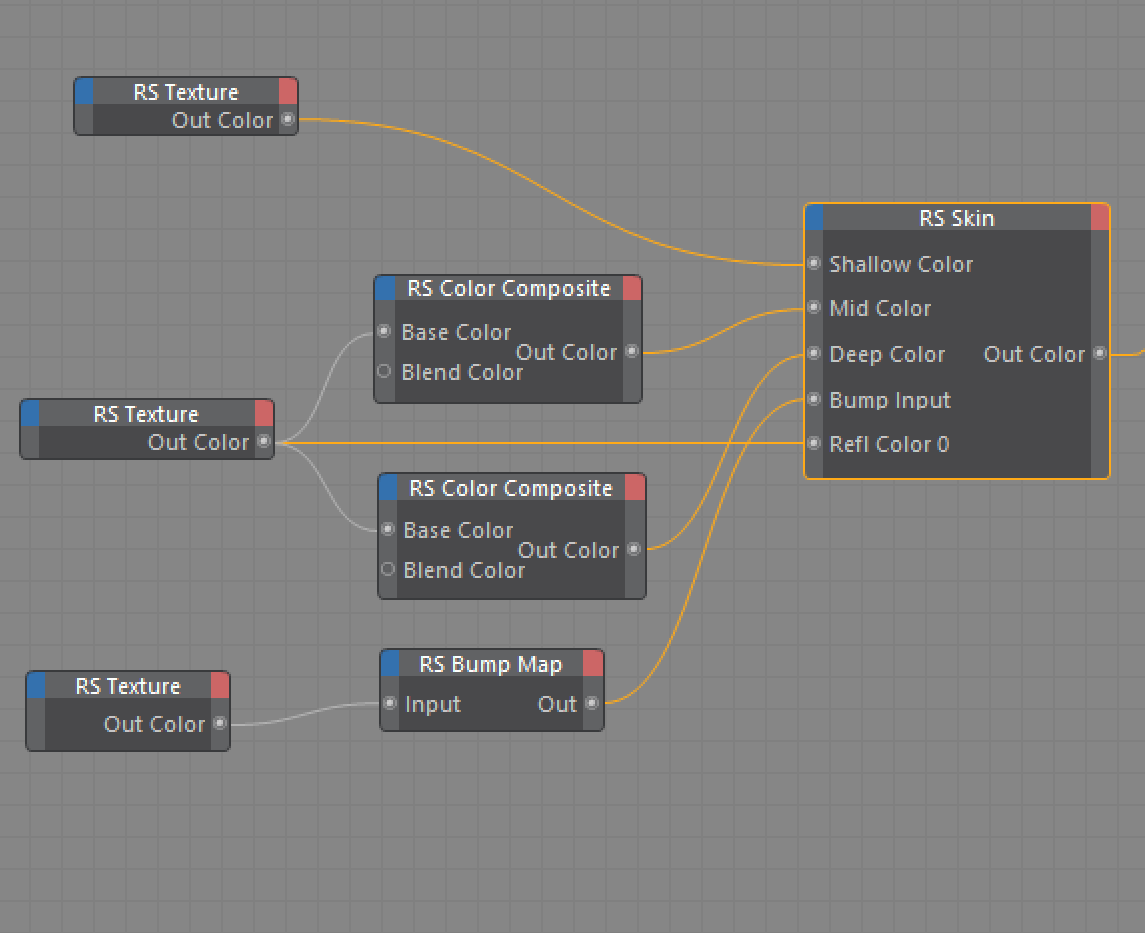
Shader graph
The tints for the mid (top) and deep (bottom) texture layers.
The skin shader and its weights. Note how the 'Normalize Diffuse Weights' option has been disabled for better color control of the layers.