HDRI
Introduction
What exactly are HDRIs (High-Dynamic Range Images)?
HDRIs are ideal for use in combination with GI and to recreate very natural and realistic lighting situations. HDRIs also have a big impact on the realism of reflections because they can produce reflections on objects that are much brighter than reflections caused by normal textures.
In short, HDRIs are images with a very high brightness range, much higher than normal RGB images, which are limited to a brightness range of 8 bits (256 variations) per color.
Standard RGB images have the limitation of the brightest possible color being a 255/255/255 white. If you use such an image in combination with GI to illuminate a scene, even the brightest white will not be bright enough to simulate a real lighting situation. The resulting renderings often look flat and lack contrast. That's because in reality the difference between a dark light (e.g., candle flame) and a bright light (e.g., sun) is too big to be represented within an 8-bit RGB image.
However, using a HDRI, the sun could have a brightness value of, say, 6000% that is taken into account by the GI algorithm and when rendering reflections. This results in beautifully and realistically illuminated scenes.
The following pictures illustrate the tremendous difference that HDRIs can make (all HDRI © Paul Debevec):
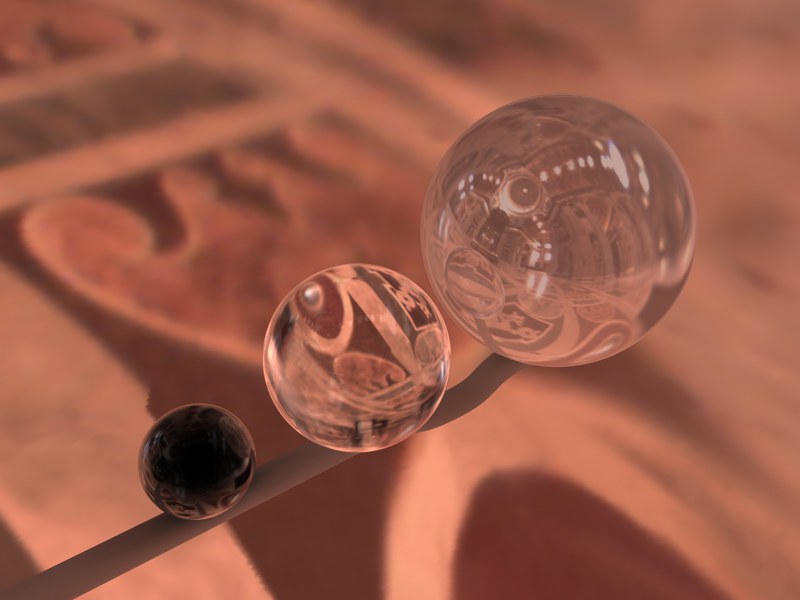 Without HDRI. Without HDRI.
|
 With HDRI. With HDRI.
|
Try re-rendering your old scenes with HDRI. You will be surprised by how much of a difference HDRIs can make!
There are three main types of HDRI:
- HDRI Latitude/Longitude
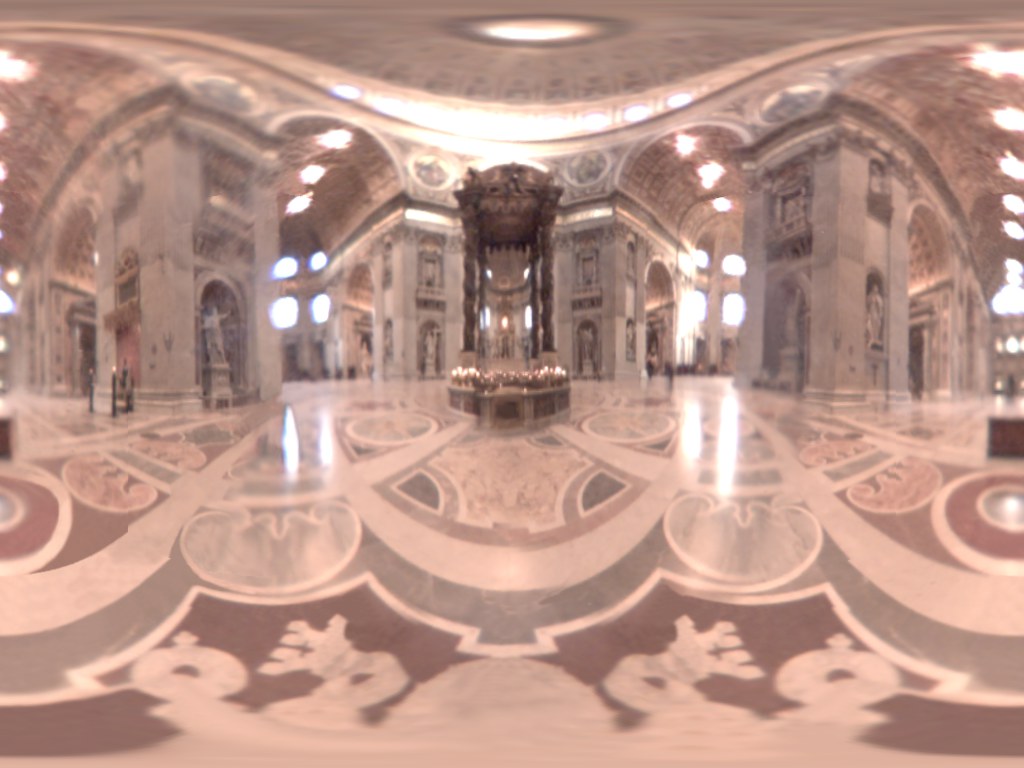
These images are distorted in such a way that they can be mapped onto a sphere (or a Sky object) using spherical mapping which produces perfect results.
This type of HDRI works best in Cinema 4D. Other types of HDRI can be converted to this projection type as described later in this chapter.
- HDRI Light Probes
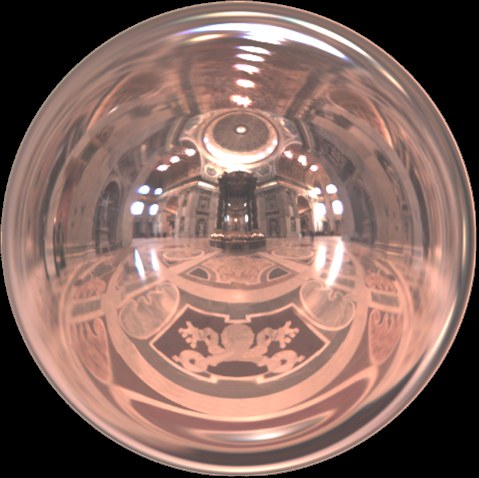
These HDRIs are generated by taking pictures of a reflective sphere.
- HDRI Horizontal/Vertical Cross.
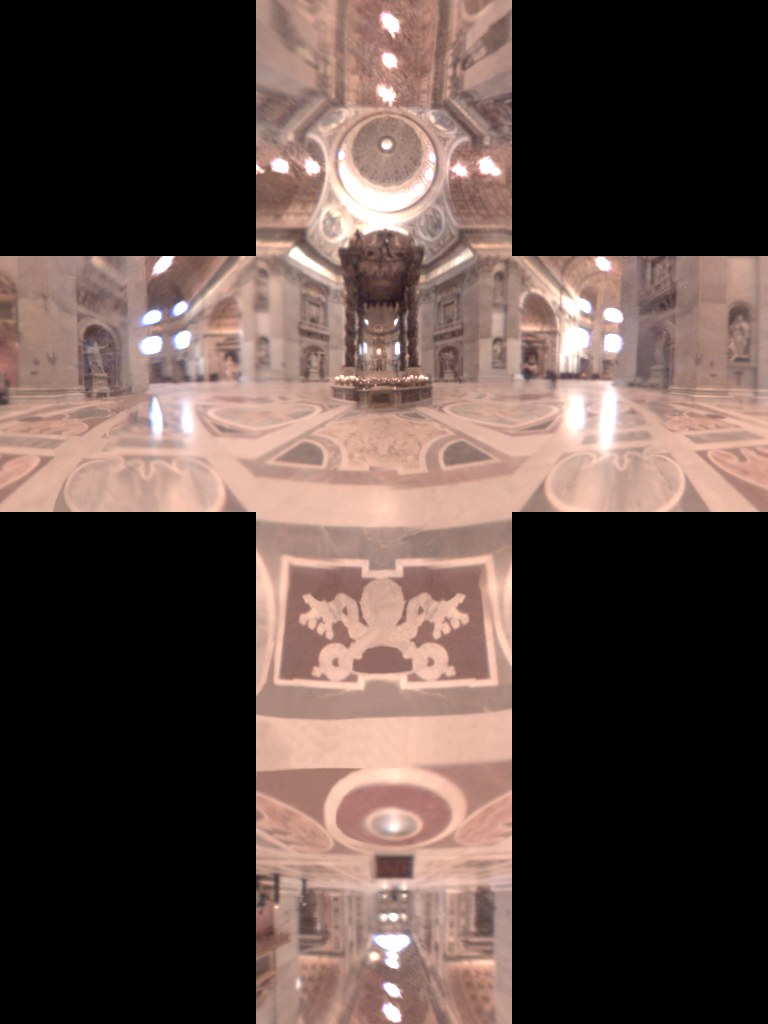
These HDRIs are laid out like an unfolded cube and are designed to be mapped onto a cube that surrounds the scene. In Cinema 4D, however, we recommend using the Latitude/Longitude type instead.
Usage
HDRIs can be used as textures in the Color channel or Luminance channel of materials. When using a Sky object, you can use it in either of these channels. For spheres used as environments you must use the Luminance channels.
Depending on the intensity of the HDRI texture, the scene may be too dark or too bright. You can adjust the HDRI brightness in the following ways:
- Using the Intensity, Gamma parameter in the render settings (GI page) and the Global Illumination Generate/Receive options on the Illumination page of the material that uses the HDRI texture.
or by directly changing the brightness of the HDRI texture:
- The Brightness slider on the Color or Luminance page (whichever one the HDRI is loaded into) of the HDRI material. The brightness can also be set higher than 100% by setting the Mix parameter to Multiply and by manually typing in a Brightness value. (You can fine-tune the HDRI further still using Cinema 4D's Filter shader.) You should use this method if you are using the HDRI as a visible background image because the first method only changes the amount of light cast by the image, not the brightness of the image itself. The first method also does not change the brightness for reflections.
- The texture interpolation type also affects the brightness of the HDRI. MIP mapping, for example, softens the texture which enlarges the bright areas of a HDRI and results in brighter renderings.
For example, this lets you use a very blurred HDRI texture for lighting and the original HDRI texture for reflections.
However, when using this method, you will probably still want your reflections and background to be as crisp and sharp as possible. So it is a good idea to use two Sky objects — one for generating GI and the other just for the reflections and as a background. Both Sky objects must have a Compositing tag assigned. For the one which is used for GI, disable the options Seen By Camera and Seen By Rays. For the one which is used for the reflections and as a background picture, disable the Seen By GI option.
Some HDRIs come as Probe or Cross projection types. To get the best result in Cinema 4D, these should be converted to Latitude/Longitude (spherical) maps and projected onto a SKY object. For this purpose there are two plugins included — Convert HDR Cross and Convert HDR Probe — which are available from the File menu. Choosing one of these commands opens a file selector. Select the HDR Probe or Cross image that you want to convert.
The image will be converted to a Latitude/Longitude map and saved in the same folder with the extension _con.HDR added to the file name. As soon as the HDRI has been converted you will see it appear in the Picture Viewer.