Align Normals
![]()
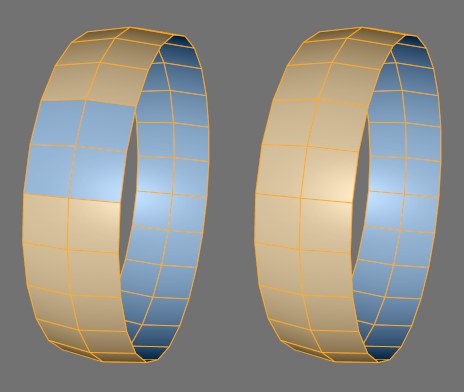
When creating surfaces you may sometimes inadvertently create surfaces whose Normals point in the wrong direction. Using Align Normals, you can quickly correct the direction.
 Deviating Normals are oriented to the "mainstream".
Several limitations were removed with the introduction of Cinema 4D R19. These are, among others:
- N-gons are now handled properly when the primary polygon orientation is evaluated (as indivisual polygons and not as x sub-polygons).
- Branching polygons (polygons with edges that belong to more than two polygons) will be handled correctly.
Options
This command has the following options:
Normals: If an object has Normal tags with vertex Normals, this option decides if the vertex Normals for the polygons to be aligned should also be reversed or remain exactly as they were saved in the tag.
Why are Normals needed?
Cinema 4D cannot easily recognize an object's inner and outer surface without extra information. A basic sphere has an inner and an outer side, but only one surface level, which can be confusing. We need a better definition. Let's define this single surface level to have an inner and an outer property. Outer designates, in principle, the direction in which the surface Normals point and inner is therefore the opposite direction. This plays a role with texture projection, where you can project textures from only the front or the back.
So, if as many Normals point one way as the other way, how do we decide which is the outer surface? We could either choose randomly or, perhaps, look at the first polygon in the sequence and use its normal as the basis of our calculation — Cinema 4D does the latter.
Why change the direction of the Normals? As described above, the direction of the Normals defines the interior and the exterior of an object. This is important, among other things, for displaying an object in the viewport. Occasionally, when building certain objects, a situation can arise in which some polygons seem invisible. This can happen if ![]() Backface Culling is on and the reason is as follows. To save on processor performance you may have enabled backface culling for your scene; this is where only the polygons visible from the front of an object are displayed in the viewport. The polygons positioned directly at the back of an object are not drawn.
Backface Culling is on and the reason is as follows. To save on processor performance you may have enabled backface culling for your scene; this is where only the polygons visible from the front of an object are displayed in the viewport. The polygons positioned directly at the back of an object are not drawn.
When displaying a sphere and other volume objects in the Gouraud Shading mode you may notice no difference, simply because you do not see the back of the sphere anyway. But should you select all the polygons of this sphere and reverse the Normals (see next section), you will now see only the back of the sphere; the front is now transparent since you have inverted the sphere. The inside is now the outside, and this becomes invisible because of the backface culling.
Should you find yourself inadvertently in a situation like this you should switch off backface culling and reverse the Normals of these polygons.
The adjustment of these Normals also plays an important role with tools such as Smooth Shift and Extrude. These model tools always move in the direction of the Normals by default. If you should need to move several surfaces with different normal alignments using Smooth Shift you will obtain useless results, since the surfaces are moved in their own respective — and opposite — directions.
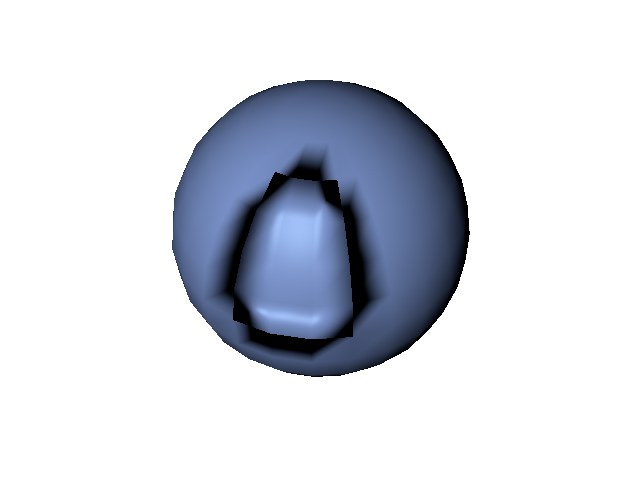
Another important factor is smoothing with a disabled Angle Limit option (see Phong tag). Cinema 4D determines whether or not to smooth edges based on the angle with which adjoining surfaces lie to each other. If the Normals of two adjoining surfaces have opposing orientations Cinema 4D will receive conflicting angle data, which can result in unwanted results:

Also, when using the Displacement material channel, the angle of the Normals plays an important role.