Compare Menu
All commands (with the exception of AB Define can also be found in the context menu that opens when your right-click on the dividing line.
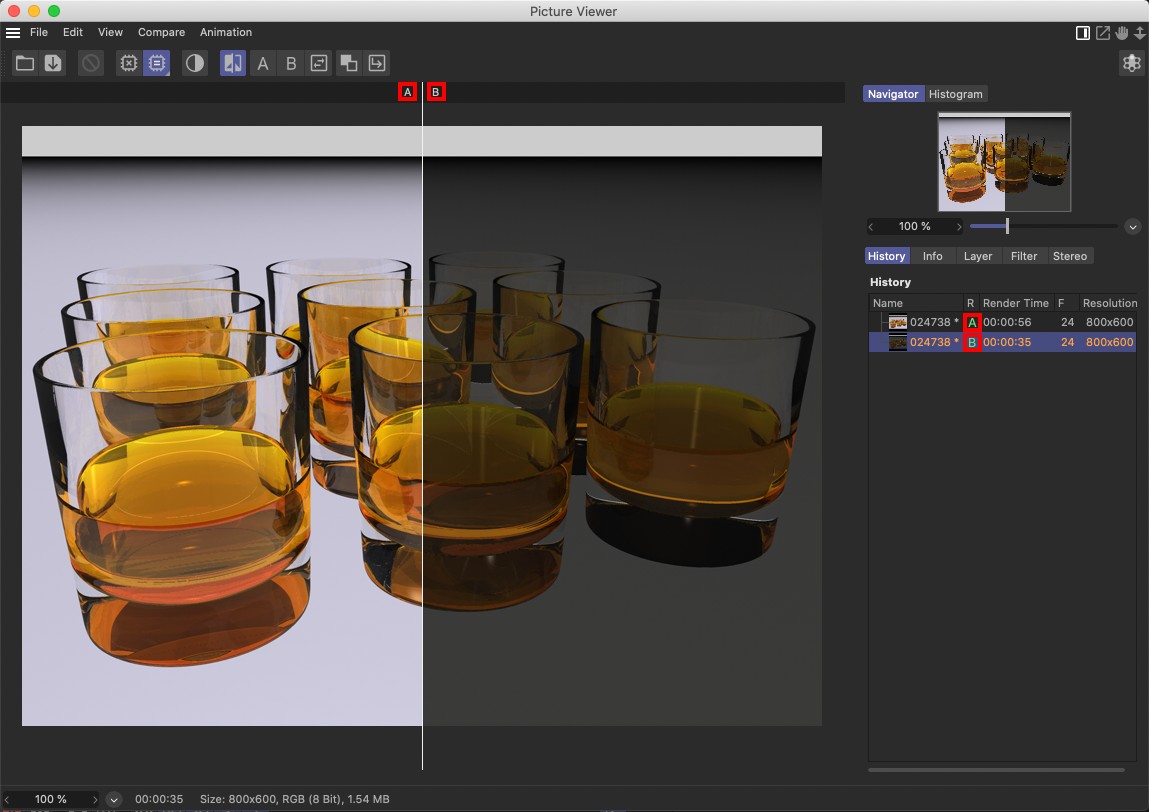
 A comparison of two images in Difference mode (insert) and with a vertical dividing line.
Two images can be compared directly in the Picture Viewer. This comparison mode can be enabled or disabled using the AB Compare option. The images to be compared are selected in the History tab's list and defined by the following two options.
Note that only images with the same resolution can be compared using this option.
Use these options to define the images to be compared.
Note that image sequences can be assigned as A or B and played back by either sliding the Timeslider manually or simply clicking on the Play button.
Enabling this option lets you compare rendered frames from 2 separate image sequences, synchronized, while the respective animations play.
Proceed as follows to compare individual frames of two separate animations:
-
Enable AB Compare and Animate Second
- Select any image in image sequence 1 and mark this image by clicking on the A button; select an image in sequence 2 (logically at the same time location as A in sequence 1 – otherwise a temporal offset will occur) and mark this image by clicking on the B button.
Use this command to switch the images being compared in the preview window.
In this mode, no dividing line will be drawn between the two images. The images will lie (internally) over one another and differences will be set off by color. In black regions the pixels of the two images are identical. The more colorful the region the greater the pixels of the two images differ.
Use this command to switch between a horizontal and a vertical dividing line.
Alternatively you can Shift+click directly on the dividing line in the image view.
Use this command to display or hide the dividing line. The line can also be moved when hidden.
Use this command to turn the A|B marker at the top of the dividing line on or off. This marker displays which image is set to A and which to B and on which side of the dividing line the respective image lies - left/right/top/bottom - depending on whether the dividing line is vertical or horizontal.
Using this command, a stereoscopic image can be created using two images (no image sequences!) loaded into the Picture viewer that were created using the left and right perspective views of a stereoscopic camera.
This is how it's done:
- Load the images into the Picture Viewer
- Select the left image and click on the A button; select the right image and click on the B button.
- Select the Create Stereo Image From AB command.
- In the Picture Viewer's Stereo tab, select the type of stereoscopic image you want from the Interactive Merge menu.
- Save the stereoscopic image (the save dialog window will already have Interactive Merge defined).
More information can be found under Stereoscopic