Key Properties
Cinema 4D sound rendering lets you use keys to adjust the volume and balance of your Sound tracks (similar to most video editing applications). When in Dope Sheet mode, the curves below the Sound track (when opened) show the progression of your sound file's volume and balance.

The key is located at this time in the animation.
Activate this option if you want to protect a key from inadvertently being edited.
Use this setting to mute a key. When a key is muted, any interpolation or change in value(s) between the muted key and the subsequent key will not take place. Once the animation reaches the next key, values will instantly jump to those contained in that key. Muting a key turns the animation for that key off until the next key is reached.
See Breakdown.
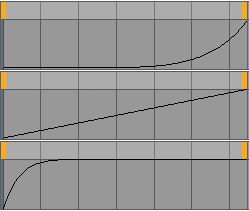
 Bias setting top to bottom: 0, 40, -100. .
Use the Bias setting to adjust the interpolation between keys. Bias can be used to accelerate or slow morphing between keys.
Normally interpolation only takes place between neighboring keys. Activating the Soft setting will possibly cause keys before or after neighboring keys to be taken into account as well.
Example
PLA animation is also referred to as "vertex animation".
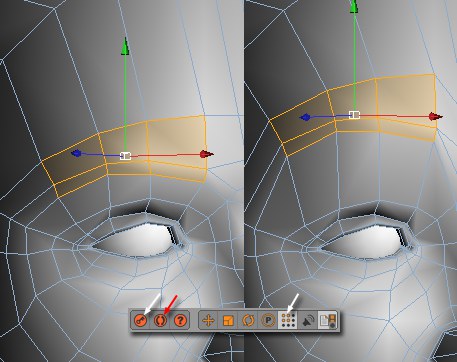
 Switch to the PLA record mode and create PLA keys at different times in the animation (red arrow marks the Autokeying mode).Head: © Bunk Timmer
Proceed as follows if you want the face to raise an eyebrow:
-
Select the corresponding points or polygons and create a PLA key.
- Move the Timeslider to a different point along the Timeline. Move the selected points or polygons and set another PLA key. That's it. Play the animation and see how the eyebrow rises. Of course you can also use this method to just as easily make the figure move its mouth, wiggle an ear or twitch its nose.
You can also use Autokeying, which will save you some clicks on the Record button.