Material Override
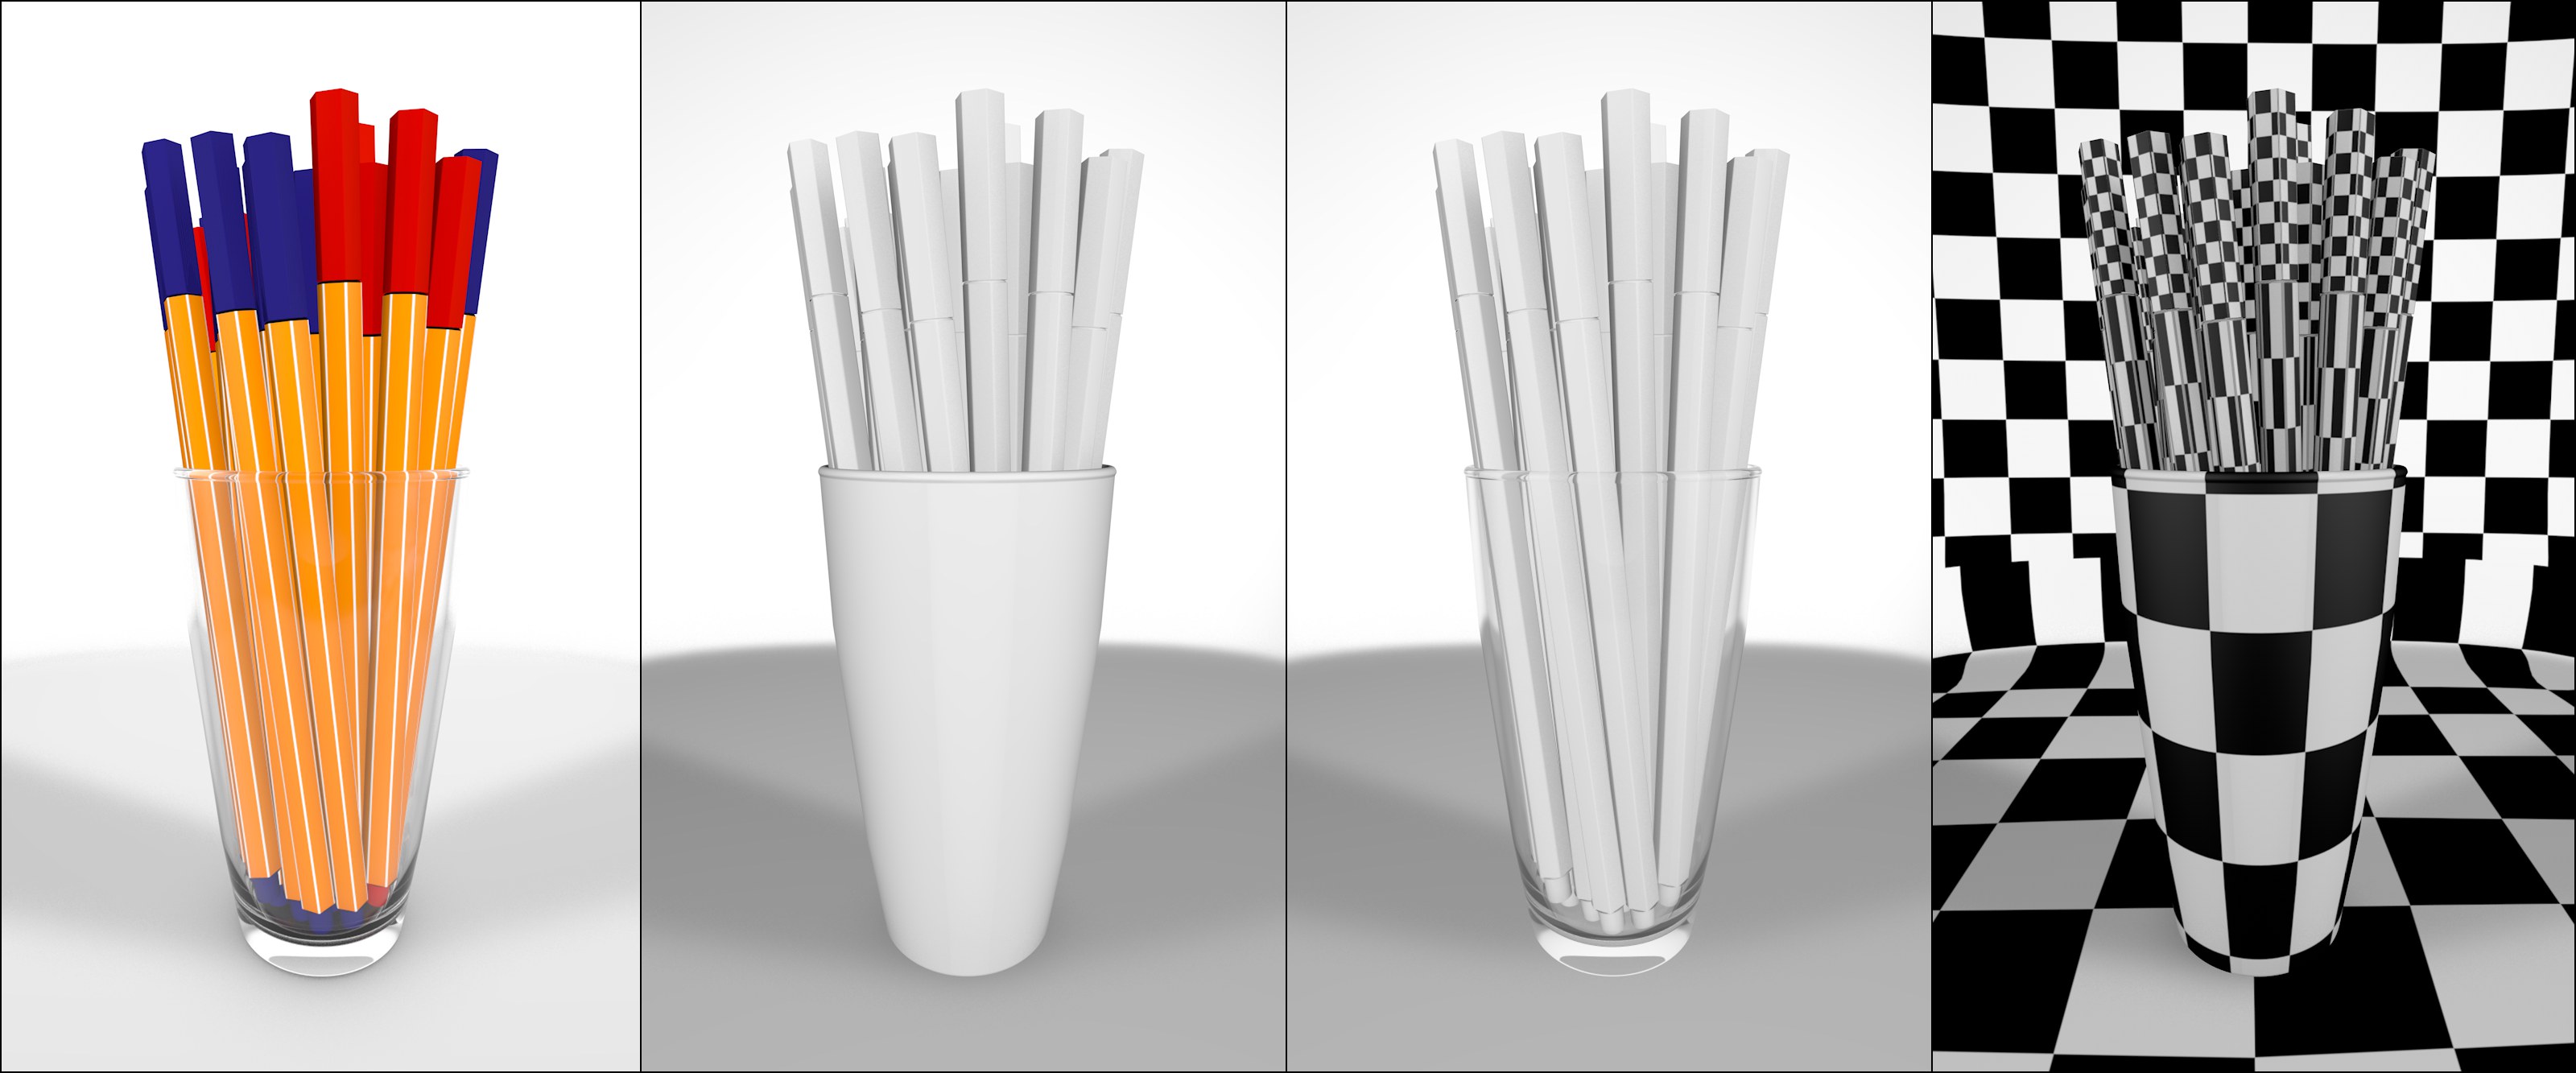
 From left to right: normal rendering; materials replaced with a gray material; transparency masked out; materials replaced by a texture (e.g., to quickly check the UV maps).
Despite great-looking textures, it is sometimes necessary to render a Project very simply by replacing all existing materials with a simple one - also known as clay rendering. This is exactly what the Material Override function does. All materials in the Project will be replaced by a material defined here. Projection types defined in Material tags will not be affected. You can exclude individual materials from being replaced, just as you can prevent material channels from being affected.
Note that for internal reasons even "empty" Material tags (those without an assigned material) will use the single override material.
Drag the replacement material into this field. It will only be used during rendering and will not be used for the Viewport display. If this field remains empty, the color defined in the Project Setting's Color setting will be used and otherwise a default material will be used.
If you want to exclude materials from being replaced, select the desired mode and drag the materials you want to include or exclude into the Materials field.
If not all material properties should be replaced and only specific channels should be excluded (such as Transparency (2nd example from the right in the image above) or Displacement), enable the corresponding option here. These channels will then be assumed by the original material. Note that the Diffuse Color option includes the Color AND Diffuse channels!
