Object Properties
General Settings
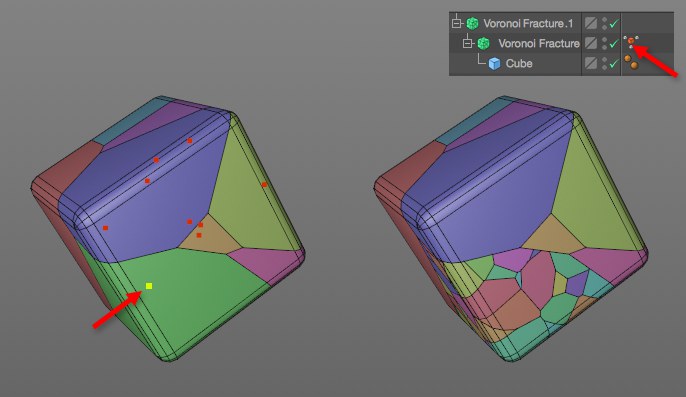
 The green fragment belongs to a MoGraph selection and will be further fragmented by Voronoi Fracture.1.
Let's say you want to further fragment certain fragments. For example, if the cube in the image above should fall on its lower corner causing additional fragmentation, it would be practical to restrict this fragmentation to a specific part of the cube. This is exactly what this setting does: It restricts the Fracture Voronoi object's effect to MoGraph Selections.
Drag a Child object's MoGraph Selection tag into this field and the additional fragmentation will immediately affect the selection only.
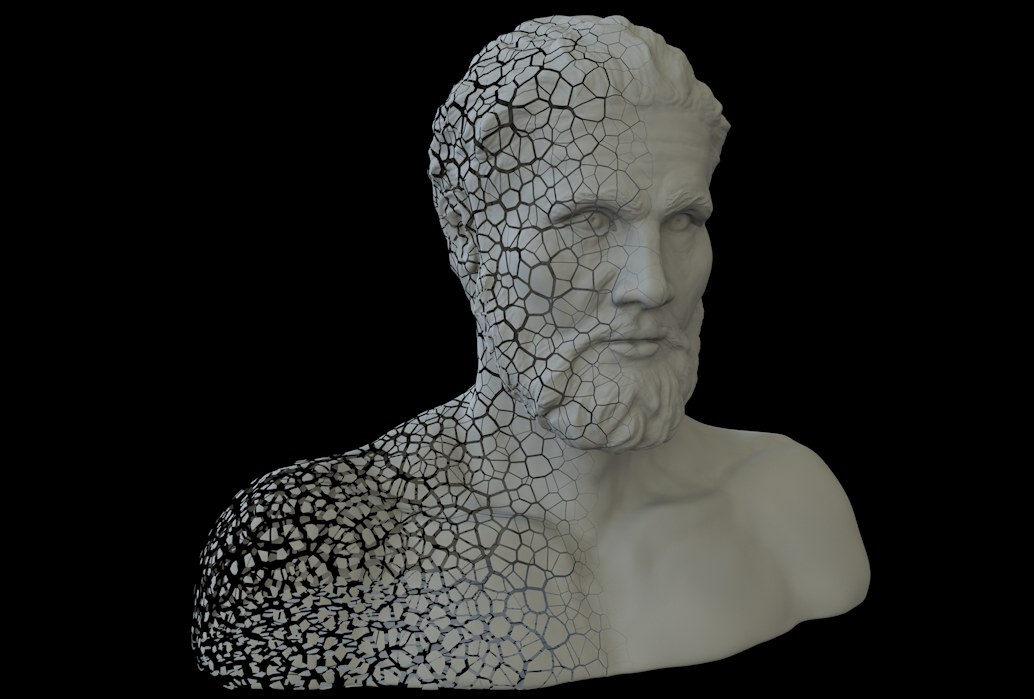
Mograph Weightmap tags can be placed into this field (see also previous Selection description; same setup). The greater the weighting, the more the fragments will be fragmented. For this to work, the Create Points per Object option (Sources menu) must be enabled.
This option can be enabled (default setting) to colorize the fragments for better differentiation.
A lot of new geometry is created when an object is fragmented. Cracks that run through polygons, break edges that run beneath the surface, etc. This new geometry will always be triangulated if this option is disabled. If this option is enabled, Ngons will be created from triangles that lie on the same plane and border each other.
If you want to create gaps between fragments’ edges, this value should be set to greater than 0. Fragments will push themselves away from neighboring fragments equal to the distance defined here, which means that the actual gap between fragments’ edges will be equal to twice this value. If gaps are large enough, some fragments can end up being ,devoured’.
Gaps can be used to create interesting visual effects and a tiny gap can be useful in conjunction with Dynamics to avoid collisions at the starting point of a simulation. Note that Offset Fragments does not work in conjunction with the Connect Fragments function.
If Offset Fragments is greater than 0, i.e., spacing between neighboring fragments, enabling this option will create a mesh the size of the spacing:
 From left to right: disabled, enabled Invert option, then additionally enabled Hull Only option and finally a defined Thickness.
The mesh will then internally only be made up of one object and not many fragments.
Note that mesh is hollow.

During the fragmentation process, broken surfaces and pieces (with volume) will be generated beneath the original object surface. This option should be enabled if, for whatever reason, you want to prevent this from happening. The fragmented objects can be viewed as a type of fragmented eggshell.
If Hull Only is enabled, this setting will define a volume within which the hull fragments will be extruded in the direction of the Normals. Smaller values are recommended to avoid mesh intersection. Negative values can be used to extrude in the opposite direction.
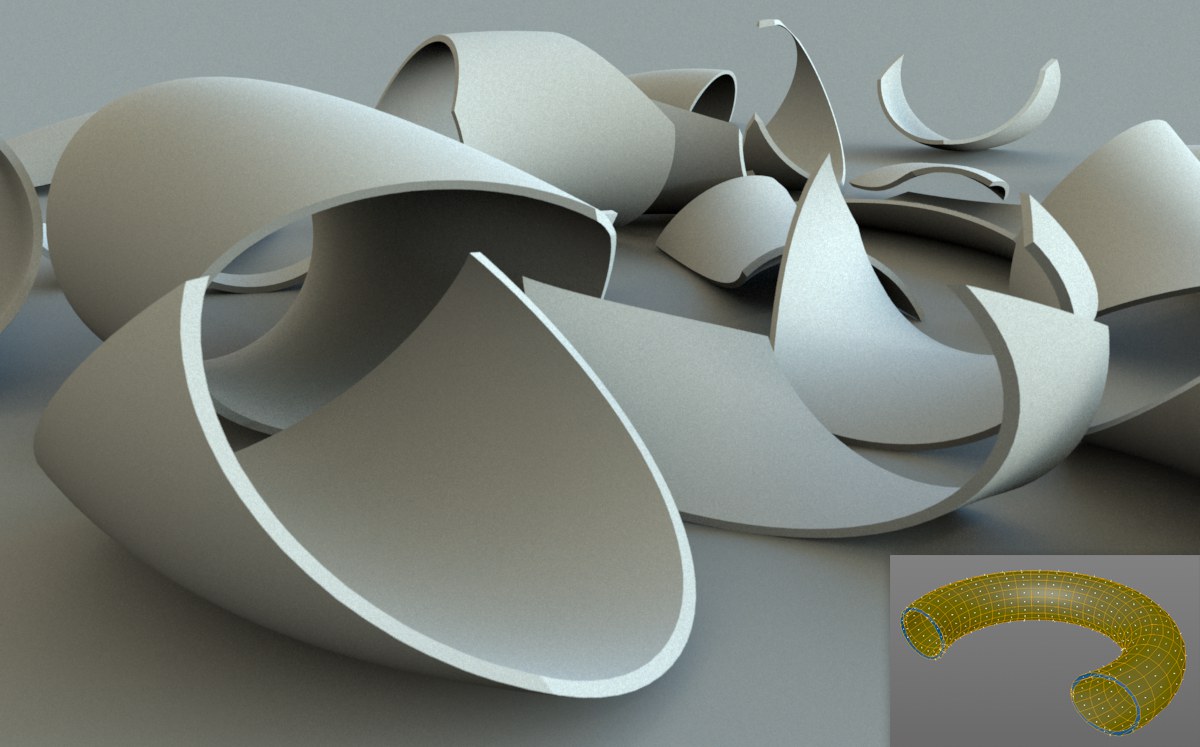
 The Hollow Object option can be used to break down hollow objects: a double-walled ring can be turned into a pile of rubble (the cut ring at the bottom right serves to help illustrate the required polygon orientation).
This option is specially designed for use with hollow objects such as a double-walled cube or a chocolate Easter bunny, i.e., closed bodies with an outer shell (note the Normals orientation of the inner wall; these Normals must point in the opposite direction towards the outside wall, i.e. to the inner cavity). Enable this option to break down these types of objects. For other objects that are made up of numerous separate polygons, enabling this option can lead to unwanted results - so only enable this option for hollow objects.
Note also the Cloth Surface object with which hollow objects can be created.
If this option is disabled, open meshes (meshes that do not have a closed volume such as spheres with holes, planes, etc.) will not be fragmented as volumes but will be fragments as if Hull Only were enabled (see above).
If this option is enabled, Cinema 4D will internally attempt to close holes and open shapes and fragment these using the volume created. This does not always work with predictable results and, depending on the object, only as a hull (see also Hull Only). A mesh optimization will subsequently be done (points with a common position will be melted).
 Scaling fron left to right: 0.2, 1, 3 and 20.
These three settings can be used to stretch (value greater than 1) or squash (values less than 1) the Voronoi cells each (or a combination of all) in a specific direction. The fragments will deform in the defined direction. This is, for example, ideal for shattered wood or crystals.
Fracturing objects can be a prolonged process depending on the object's complexity and the number of fragments generated. The already fractured object can be saved with the file, which means that the object does not have to be fractured again with the scene is reopened. Note that the file size will increase accordingly.
Depending on the complexity of the objects, render times can increase if the Voronoi Fracture settings are modified, which can affect the workflow. In such cases, the Autoupdate Settings option should be disabled. To implement modifications you can then click on the Update button.
If the Voronoi Fracture object has a clone-generating object as a Child object, which in turn is animated using Effectors, this option defines if the animation should be taken into consideration by the Voronoi Fracture object (option enabled) or not (option disabled). The former is very render-intensive, i.e., slow, and can therefore be disabled. Note that clicking on the Update button will not update the animation.
