Object Properties
Here you can select either the legacy Instant Mesh or the new one from ZBrush, the ZRemesher algorithm. The latter is recommended because it produces better results across the board - even if render times are somewhat longer. Especially when working with organic shapes, it automatically recognizes edge loops and can display these with impressive quality.
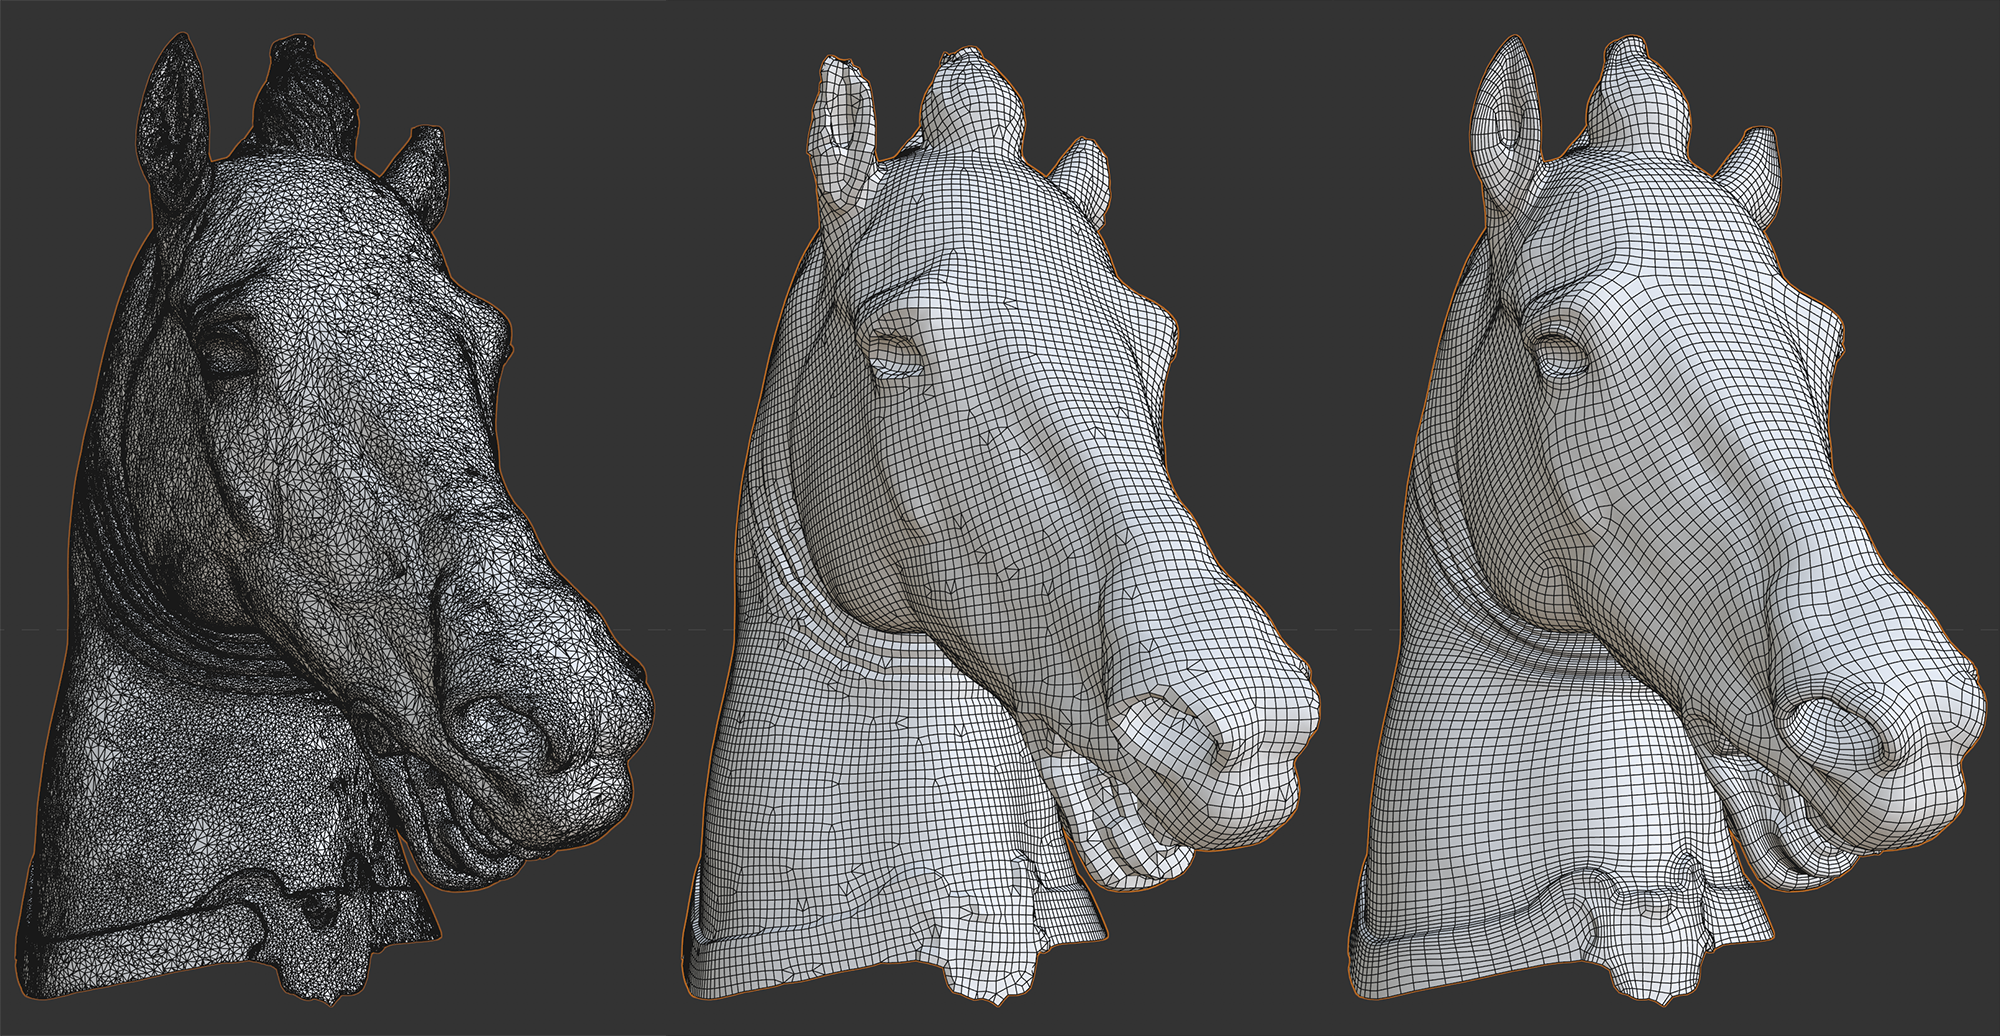 From left to right: Scanned original mesh, Instant Mesh, ZRemesher.
These options can be used to define the number of polygons and the polygon density of newly-created objects. The lower the polygon density compared to the original mesh density, the more details of the original object that will be lost, which can even lead to a complete loss of the object's structure.
The Remesher therefore also provides a polygon reduction function (see also Polygon Reduction Generator).
Here you can define the polygon mesh density relative to the polygon mesh density of the original object. A value of 100% will produce approximately the same number of polygons as the original object. Smaller values will produce correspondingly fewer polygons and vice-versa.
Here you can define the absolute number of polygons to be created. Note that this is a target value, which may not be reached, i.e., the actual number of polygons will lie near this value.
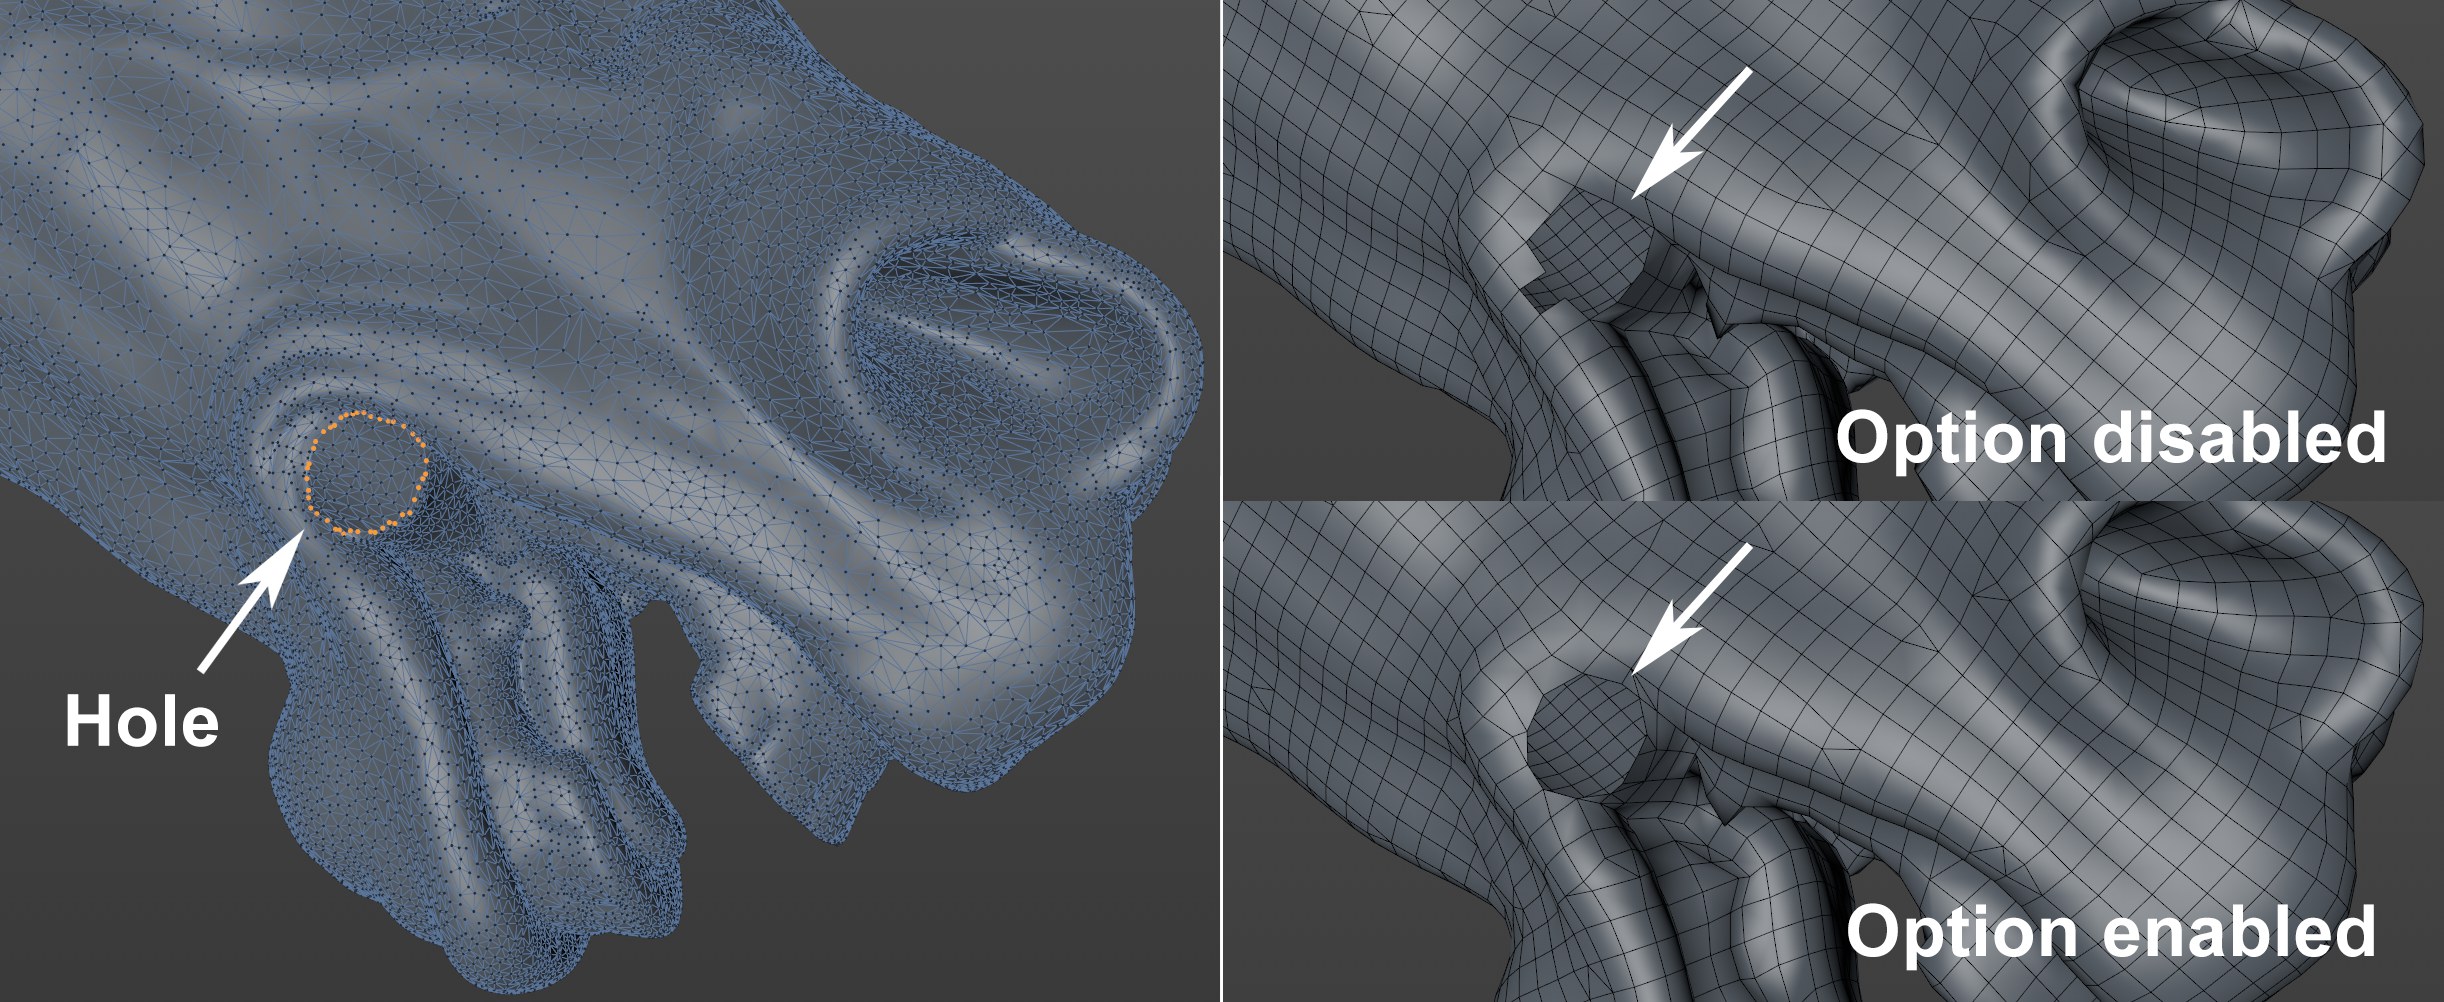
If your object is not made up of a closed volume, and has edges or holes, enabling this option can ensure that the approximate edge is maintained. This works better the more dense the mesh is. If this option is disabled, no smoothed edge will be produced.
The Keep Creases function promises more than it can keep. The original object's hard edges should be maintained but this only works for those edges that match the edge flow due to the limitations of the algorithm used.
The Edge Angle function is the angle between 2 neighboring polygons that defines the deviance of one polygon from the plane of the other polygon. Only from this angle on will hard edges be maintained.
This setting can be used to smooth or relax the mesh in a subsequent step. This will look similar to this:
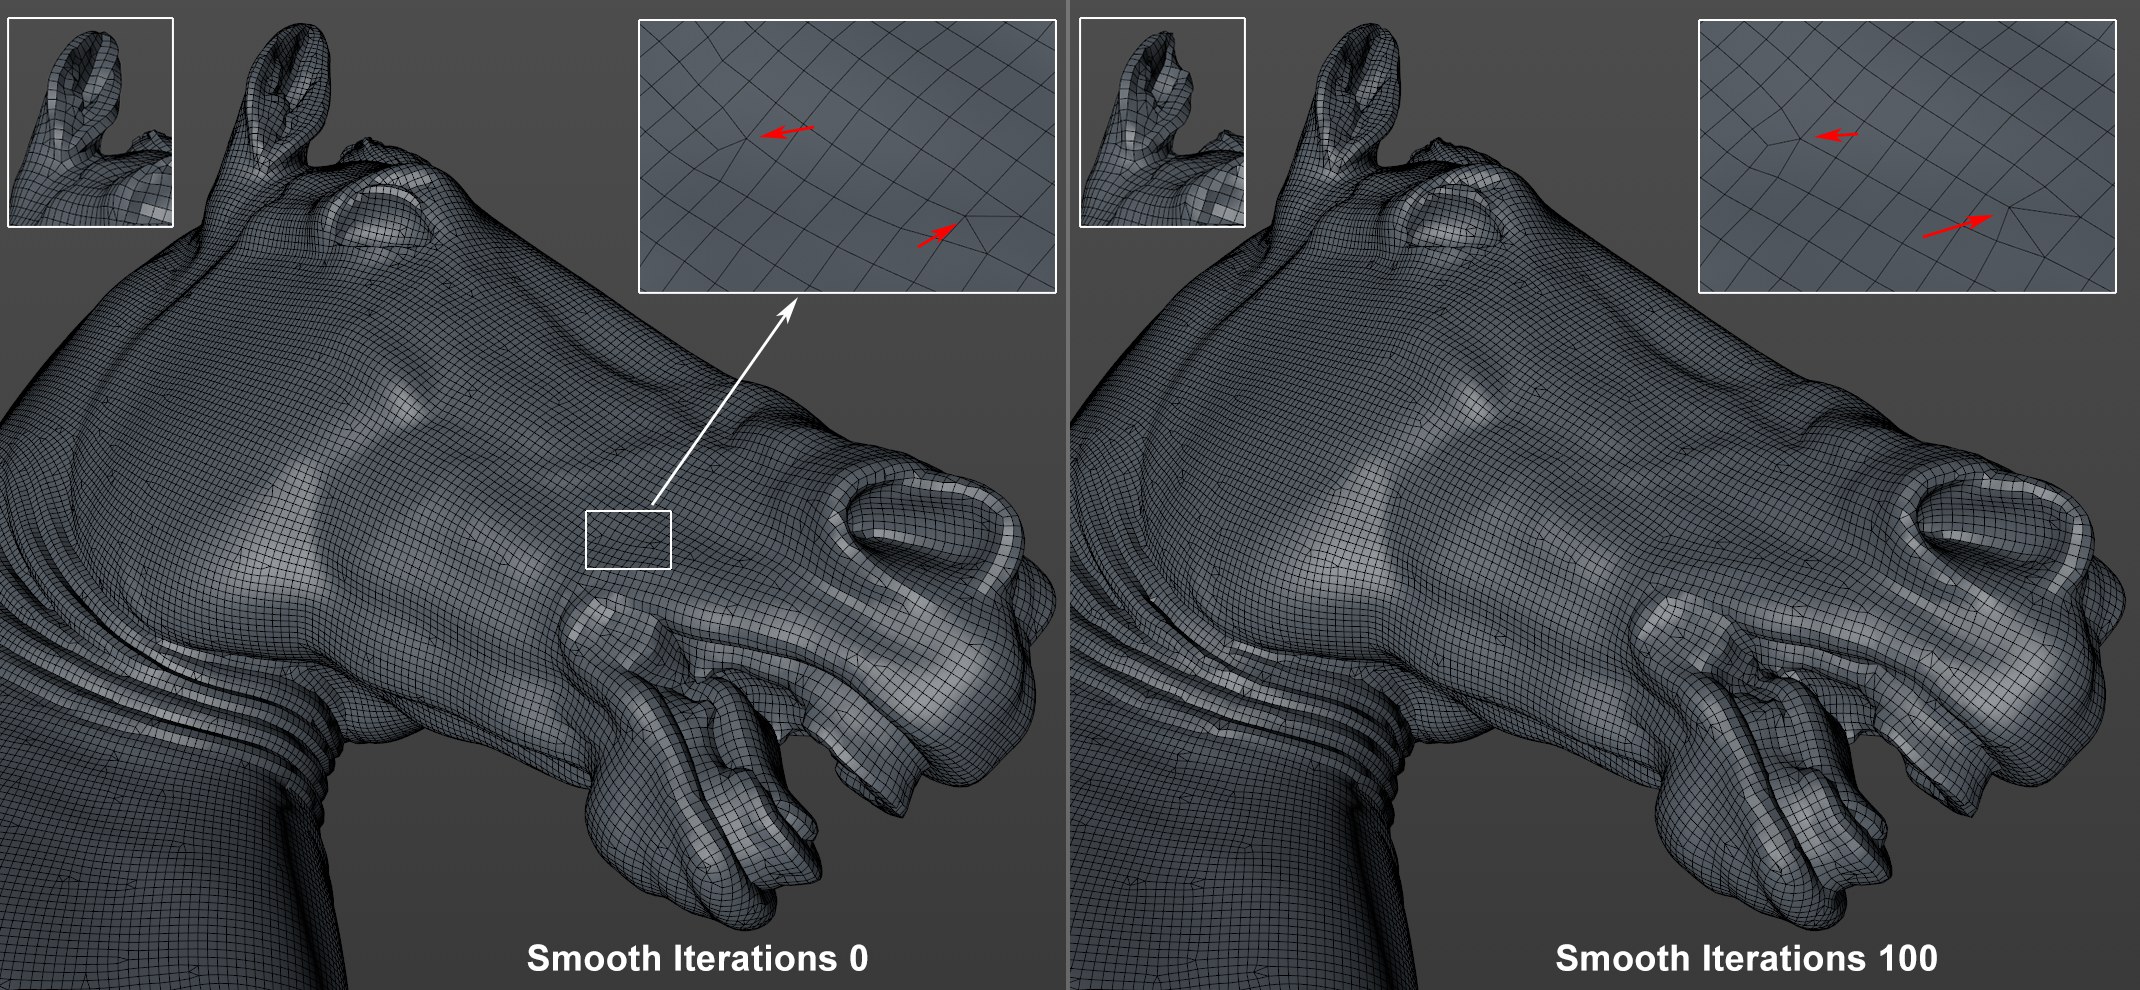
However, increasing values will be correspondingly detrimental in conjunction with larger curvature (see horse's ear), in particular in combination with lesser density.
If Polygon Type is set to Quad Dominant, triangles will still be created here and there. This option can be enabled to weed these out. The mesh will then be subdivided in a subsequent step using a Catmull-Clark algorithm (similar to Subdivision Surfaces Type OpenSubdiv Bilinear).
The number of polygons will, of course, increase dramatically - approximately fourfold.
A Vertex Map can be placed into a Density Map. For example, apply painting with 100% weighting where you want to produce a very tightly-woven mesh (e.g., set Density Scale to 200% to produce double mesh density at a particular location). If the painted regions should have a lower resolution, set Density Scale to 50%, for example.
This is a very useful function for maintaining details in certain regions.
Enable this option if a large divergence from the defined polygon count is permited.
The reason for this: If you've concentrated polygon density in a specific region using the Adaptiveness setting, you might get non-homogenous meshes. Enabling this option will compensate for this when the polygon count is increased.
This setting can be applied when increasing the mesh density in high-detail regions. Logically, the mesh will become correspondingly less homogenous and polygons will deviate from their square shape to rectangular.
Note in conjunction with this that the number of polygons defined in Target Polygon mode can be greatly exceeded as long as Adaptive Count is enabled.
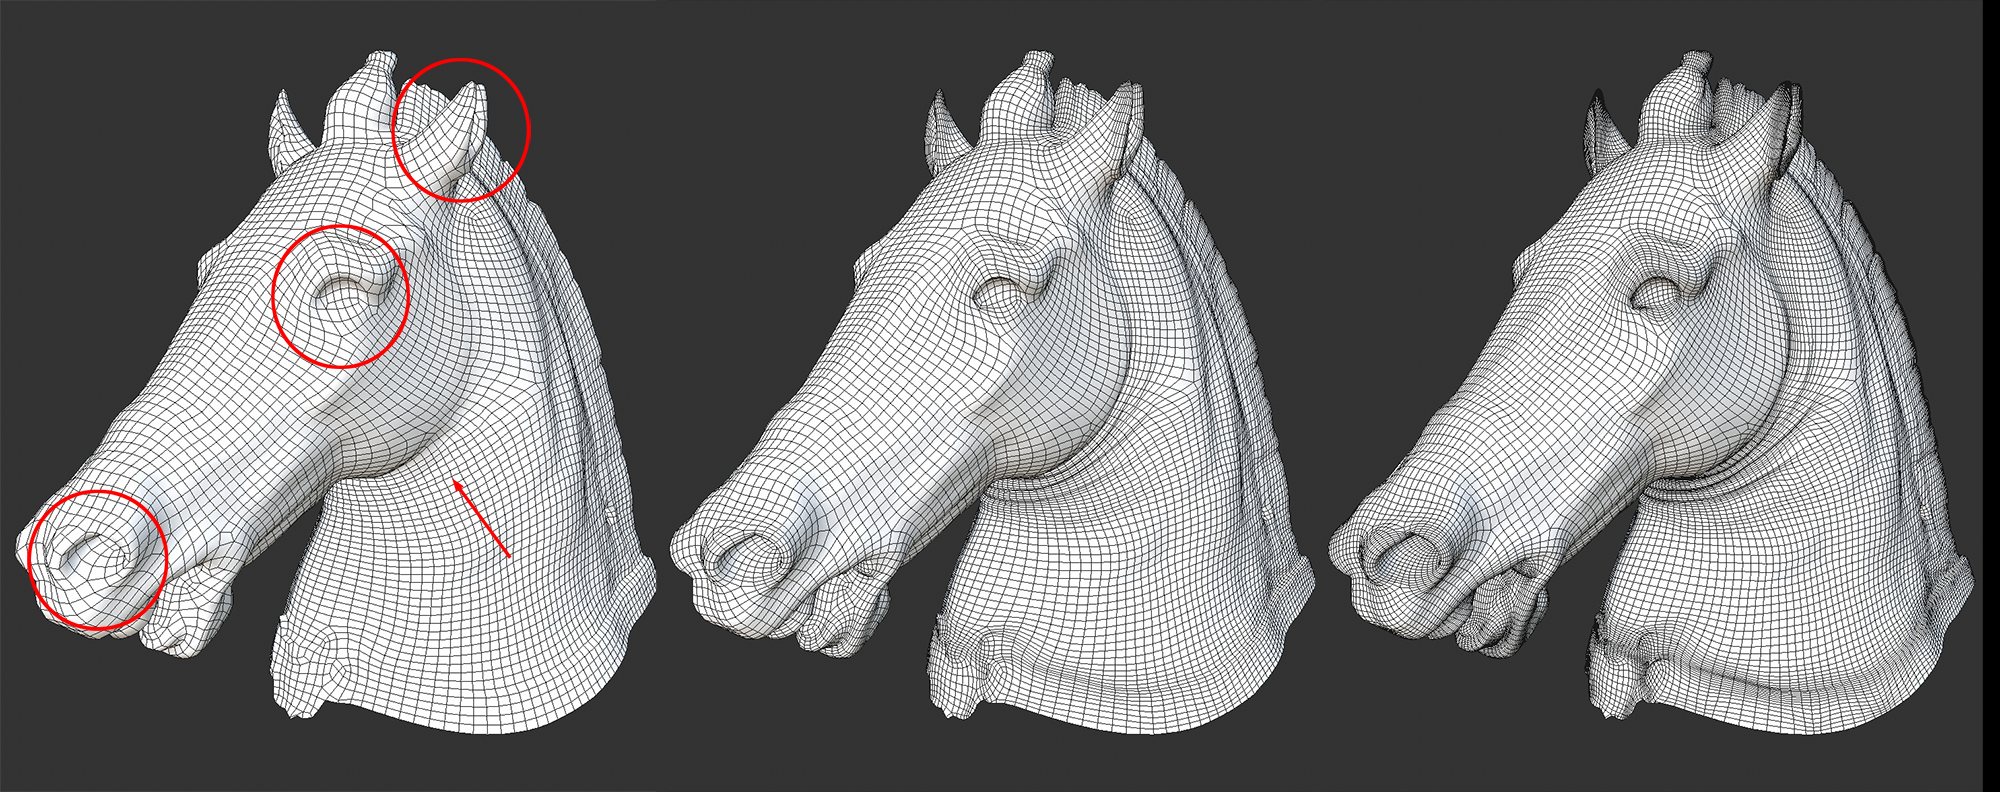 From left to right: 0%, 50% and 100% for Adaptiveness. Note the marked regions.
In the image above, you can clearly see how this works: in areas in which the level of detail is higher and where the surface is curved more strongly, additional polygon bands are added (nostrils, eyes, ears, wrinkles along the neck), and smoother surfaces (e.g., between nostrils and eyes) remain unchanged.
The higher the Adaptiveness value, the finer the mesh will be in the respective regions.
For models of a technical nature, many hard edges are used. These are very important for defining contours. There are several options available for defining if and how these are detected and maintained.
-
Auto: Angle divergences are used to automatically determine what should be detected as a hard edge.
-
Shading: Here you can define if a Phong tag, Normal tag or Break Phong Edge (see
 Break Phong Shading) should be detected as a hard edge. A manual edge selection can also be defined (see next setting). Use this mode if you're using imported CAD models.
 -
None: Only edge selections you created manually will be detected as hard edges (see next setting).
Drag an Edge Selection tag into this field. The respective edges will be defined as hard edges and given special consideration (see previous Hard Edges setting).
If you're original mesh is a scanned, symmetric object you can use the ZRemesher algorithm by activating the bounding box axis in whose direction the symmetry exists. The ZRemesher result will be mirrored on perpendicular plane, which will give you a perfectly symmetrical mesh (mirroring will take place on the negative axis)..
If you don't want to rely on the automatic mesh generation, including edge flow, splines can be used to define the edge flow direction interactively. The ![]() Sketch tool in particular can be used for this. Enable the 3D Snapping and Polygon Snapping settings:
Sketch tool in particular can be used for this. Enable the 3D Snapping and Polygon Snapping settings:

With this you can paint on the spline object surface. Drag the spline into the Flow Splines field and the edge flow will orient itself to this spline.
This can, for example, look like this:
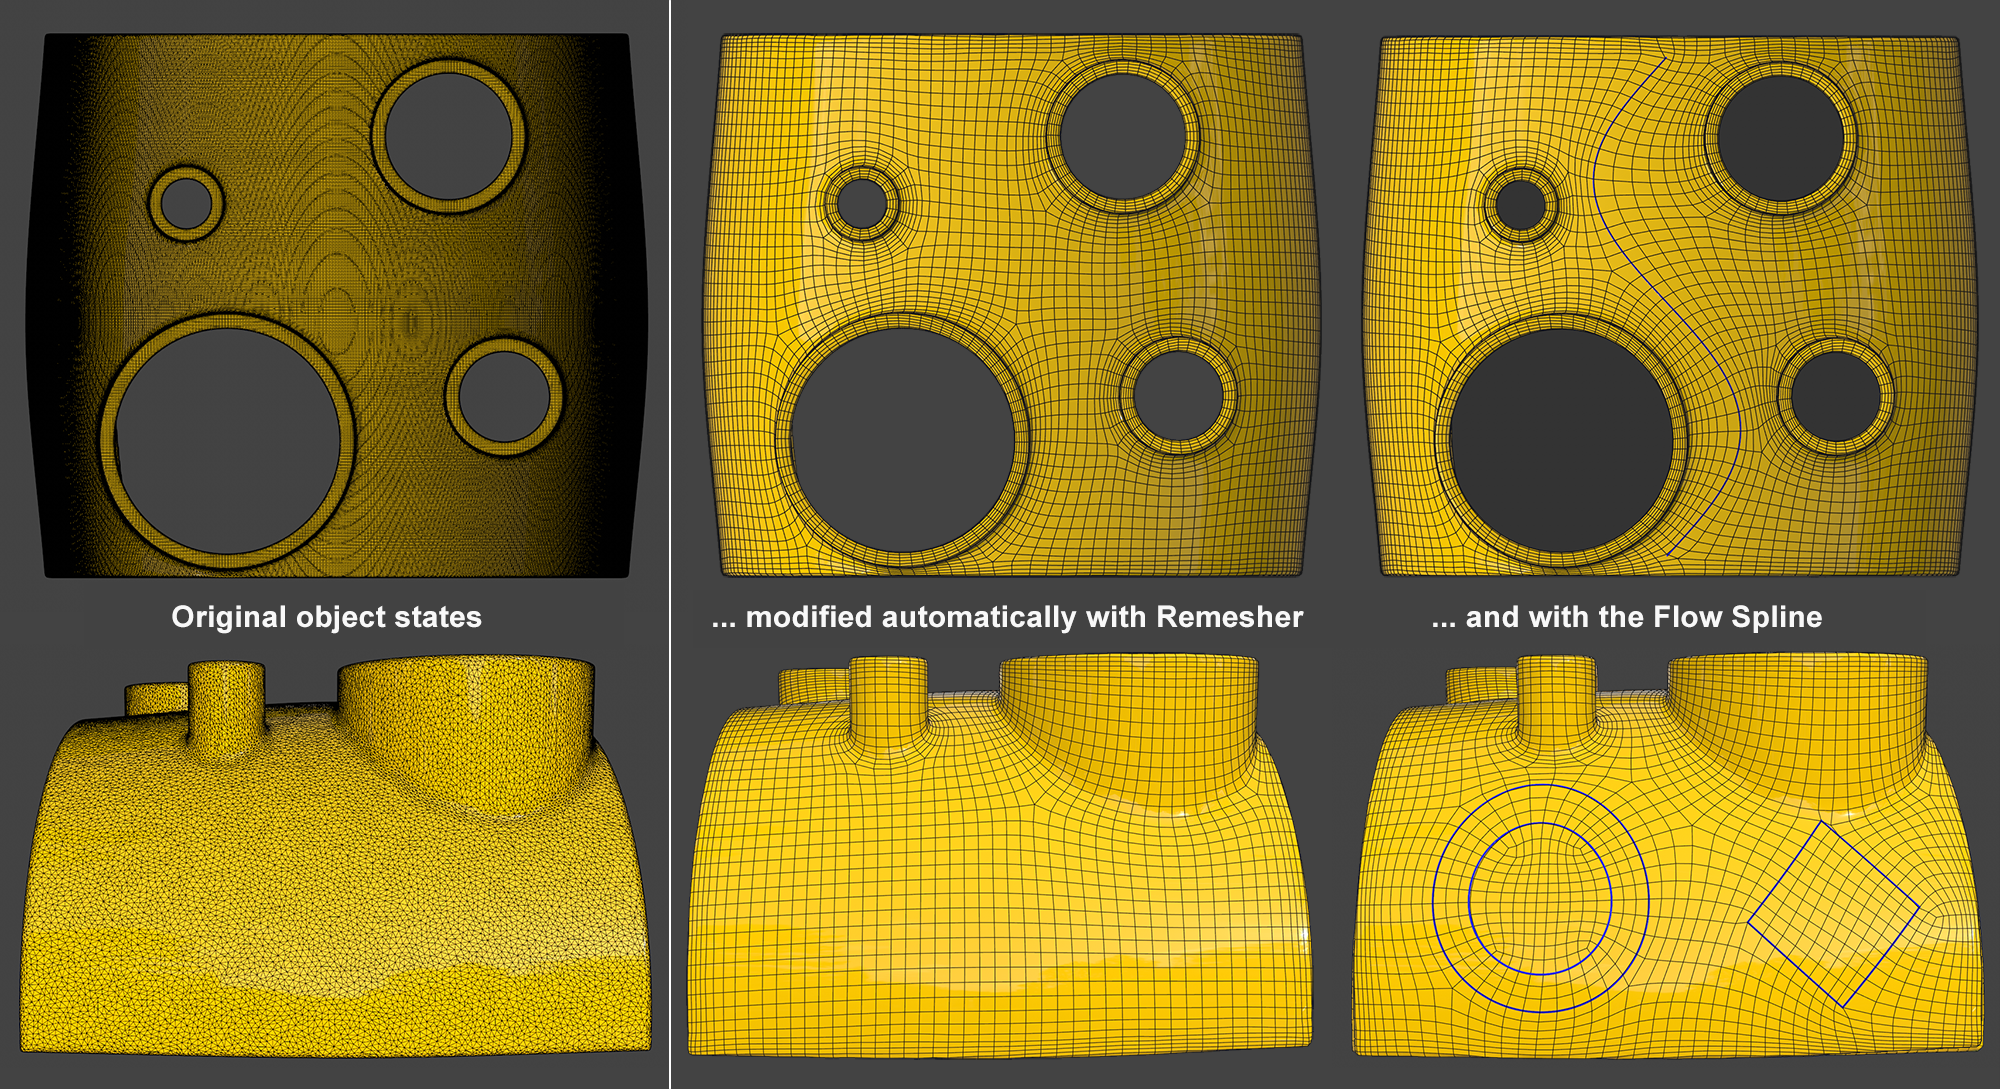 Flow Splines control the edge flow.
The edge flow does not always follow the spline perfectly but as precisely as the algorithm allows. Note that splines with multiple segments can also be used.
Parametric splines cannot be used.
Instant Mesh
The following settings only apply to the Instant Mesh algorithm.
Here you can define which type of polygon should be created:
- Quad Dominant: As the name suggests, quads will dominate since it's almost impossible to avoid triangles from being created. Quads of a similar size will be created and triangles will only be created at the poles.
- Triangles: Only 3-sided polygons of similar size will be created.