PyroCluster - VolumeTracer

How is smoke, dust and haze created digitally?
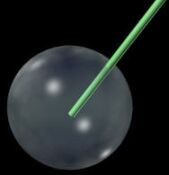
In the image below you can see the secret to realistic 3D volumetric effects. A single ray penetrates the cloud's mass. This is only a single ray. PyroCluster uses many such rays to achieve a volumetric 3D effect. As the rays penetrate deep into the volumetric mass, fractal calculations are made at each step along its path, where necessary, within the volumetric mass. Your CPU will catch fire faster than anything you animate since it will be crunching a mass of numbers it has never had to crunch before. calculating volumetric effects quickly is something that just does not happen.

PyroCluster gives you complete control over the volume tracer engine, which in turn lets you influence the speed with which the volume effect will be rendered. The volume tracer is accessed just like any other Cinema 4D material. All you have to do is add at least two materials to your scene - PyroCluster Material and Volume Tracer Material. To do so, select the respective points from the Material Manager's Create / Materials menu: New PyroCuster Material and New PyroCluster Volume/ Tracer Material.
In order to improve render times for volumetric PyroCluster effects, the use distance values should be adjusted accordingly. So, how do you know what value is correct? This is an issue that all volumetric fractals have to deal with - and a cloud of smoke is a pretty big 3D fractal. You can never know in advance how the result will look. Many settings work in correlation with and are influenced by other settings and can have dramatic effects on each other and thus the final look of the effect.
Use Distance saves the day!
There's a single rule of thumb that should be followed to ascertain the correct distance. The distance defines to what degree the 3D space will be subdivided for the purposes of locating PyroCluster volumes in your scene. Lower values generally result in longer render times. If you have the impression your scene is taking too long to render, changing this value will most likely help.
Here is an example that you may be able to use as a reference:
Let's say you've created a Project with numerous clouds in the sky. You've defined very large volumes (radii) in order to achieve a 3D look for the clouds. Each cloud has a radius of 2000 units. If you leave the World Step Size set to its default value of 0.5 you will have to wait very long until the Project renders, if it renders at all. In this case you can increase the World Step Size to about 60 (!) without losing render quality. If on the other hand you were to define a voxel radius of 10 and used a World Step Size of 60, the result would simply look awful. In addition, you would only see monotone spheres in the sky - not exactly what one would associate with clouds.
The Volume Tracer
PyroCluster is integrated into Cinema 4D and makes extensive use of its available functions. Please read this manual carefully before exploring the amazing world of atmospheric effects.
Follow these steps to create an atmospheric effect in Cinema 4D using PyroCluster:
-
Create an environment object (main menu: Create / Environment / Environment).
-
Create a new PyroCluster VolumeTracer shader ( Material Manager: Create / Material / New PyroCluster Volume-Tracer) Material.
-
Create a new PyroCluster shader (Material Manager: Create / Material / New PyroCluster Material).
-
Assign the VolumeTracer material to the environment object.
-
Assign the PyroCluster material to the particles system
- If you are working with Thinking Particles, assign the PyroCluster material to the TP geometry object (Simulate / Thinking Particles).