Soft Selection
This setting activates the function.
The soft selection will be displayed as a yellow preview, which makes selection easier. The strength setting is displayed via differing yellow tones. The preview can be turned on or off as desired.
If this setting is active, the entire 3D space as defined in the area of the radius will not be displayed. Only a surface-based area in which it is possible to edit detailed parts of on object much easier.
The soft selected elements will behave more like rubber when moved, scaled or rotated if this option is enabled. Rubber mode tends to work best with low Strength values.
This setting turns off the soft selection (when activated). The selection will then only affect the selected elements.
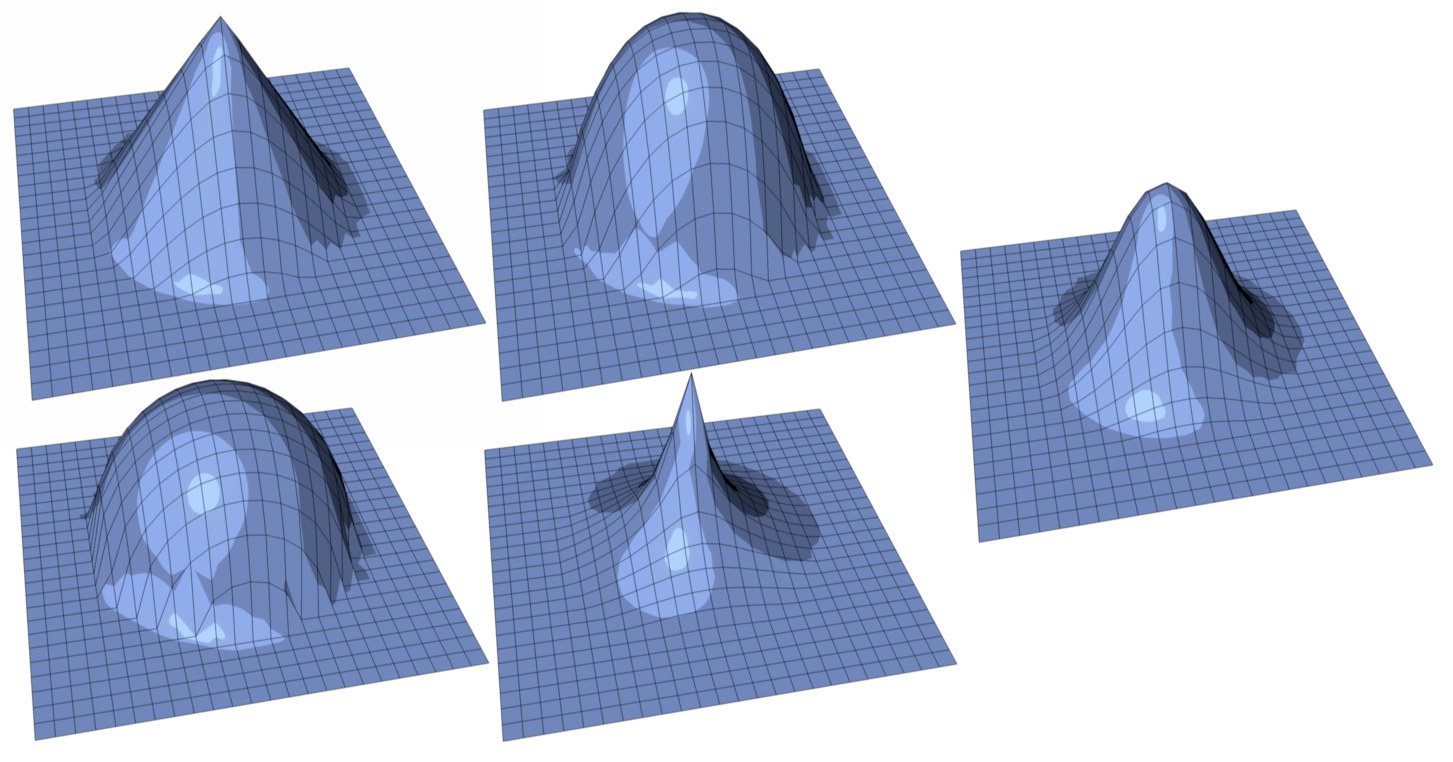
Here you can control how the effect falls off. You can choose from the same modes that are available for the Magnet tool, as well as a new type — Vertex Map — that uses a vertex map to define the falloff.
 Clockwise: Linear, Dome, Bell, Circle and Needle Falloff.
If you have created a Vertex map (see also Set Vertex Weight) you can also define the falloff here. For multiple vertex maps, the respective Vertex Map tag must be selected. Note that Fields can be used in vertex maps and can greatly expand their functionality.
If Spline is defined, the Function Graph can be used to define a falloff curve (more information can be found here).
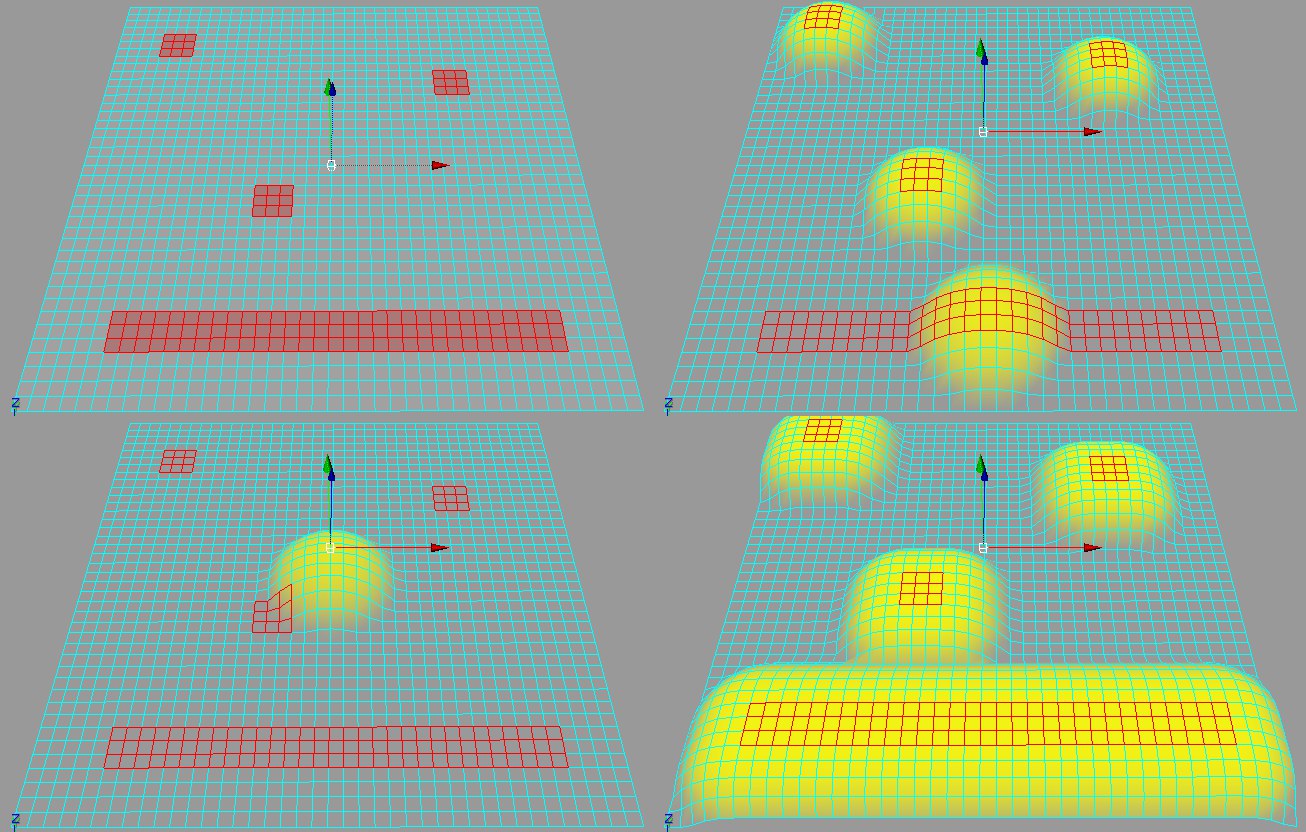
 In clockwise direction starting from top left: the selected surfaces, Group mode, All mode, Center mode.
The Mode defines where the radius starts. Choose from the following:
The radius starts from the center of each selected element group.
The radius starts from the common center of all selections.
The radius starts from the edges of the selection.
Use this setting to define the soft selection’s radius.
Use this setting to define the influence of a given tool on the soft selection.
Use this setting to define how hard or soft the effect of a soft selection should abate within a given radius.