Multiple Diffuse
Multiple
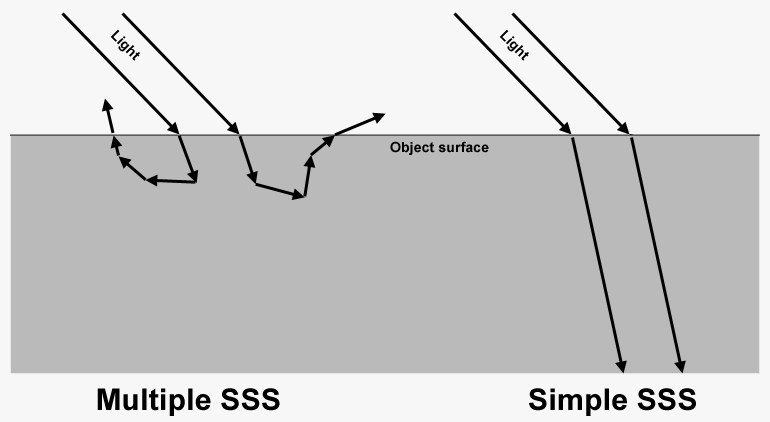 With Multiple SSS, the light rays will be dispersed randomly multiple times (other than the depiction at the left they can also continue on the opposite side or at a completely different location).
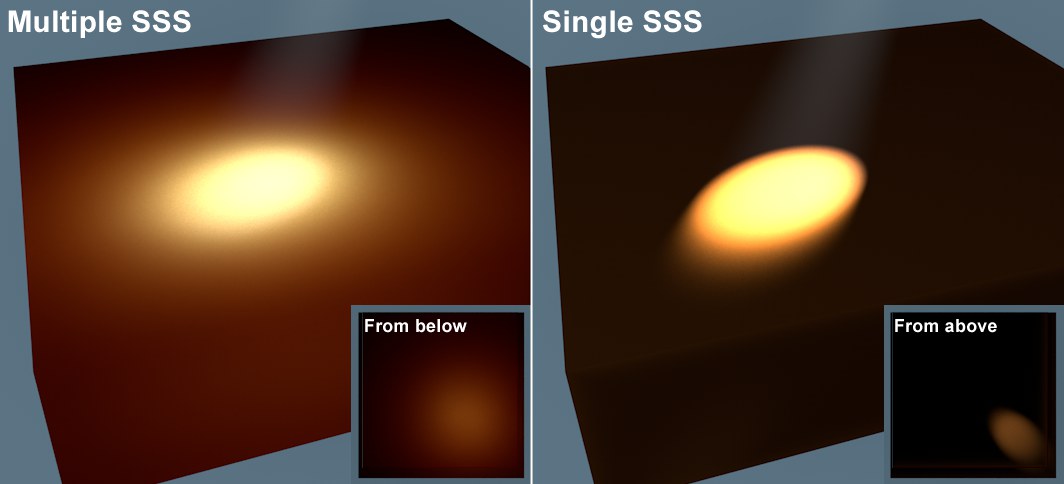 This is how the different SSS methods look.
Cinema 4D offers two methods for calculating SSS:
- Multiple: These settings are located in the SSS’ Multiple tab. Light that falls into an object will be dispersed multiple times until it again reaches the surface at some location if it is not absorbed earlier. The direction from which the light originally comes is irrelevant.
- Single: These settings are located in the SSS’ Single tab. Light that falls into an object will be dispersed once and will continue its journey in a straight line. The direction from which the light originally comes has a major influence on the rendered result. Therefore, Simple SSS requires the use of actual light sources (GI lights will not work).
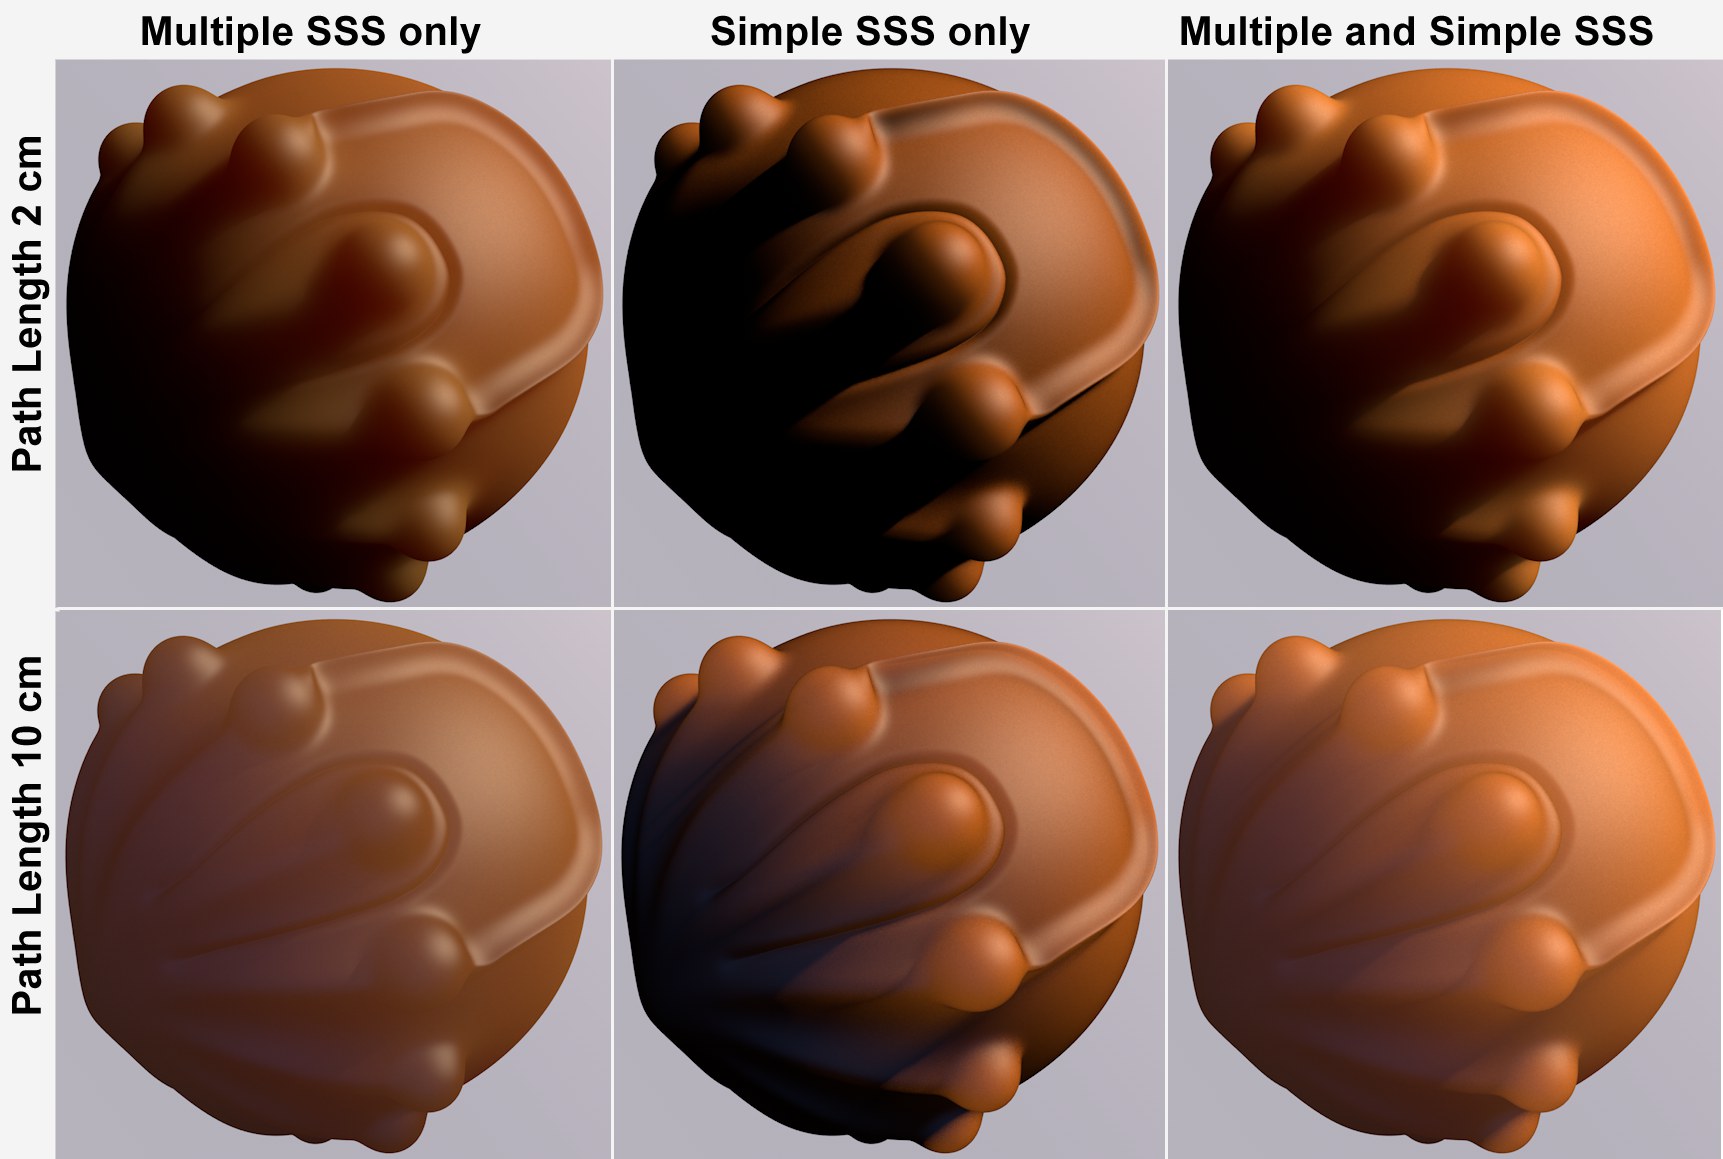
Both methods work independently of each other and can also be combined.
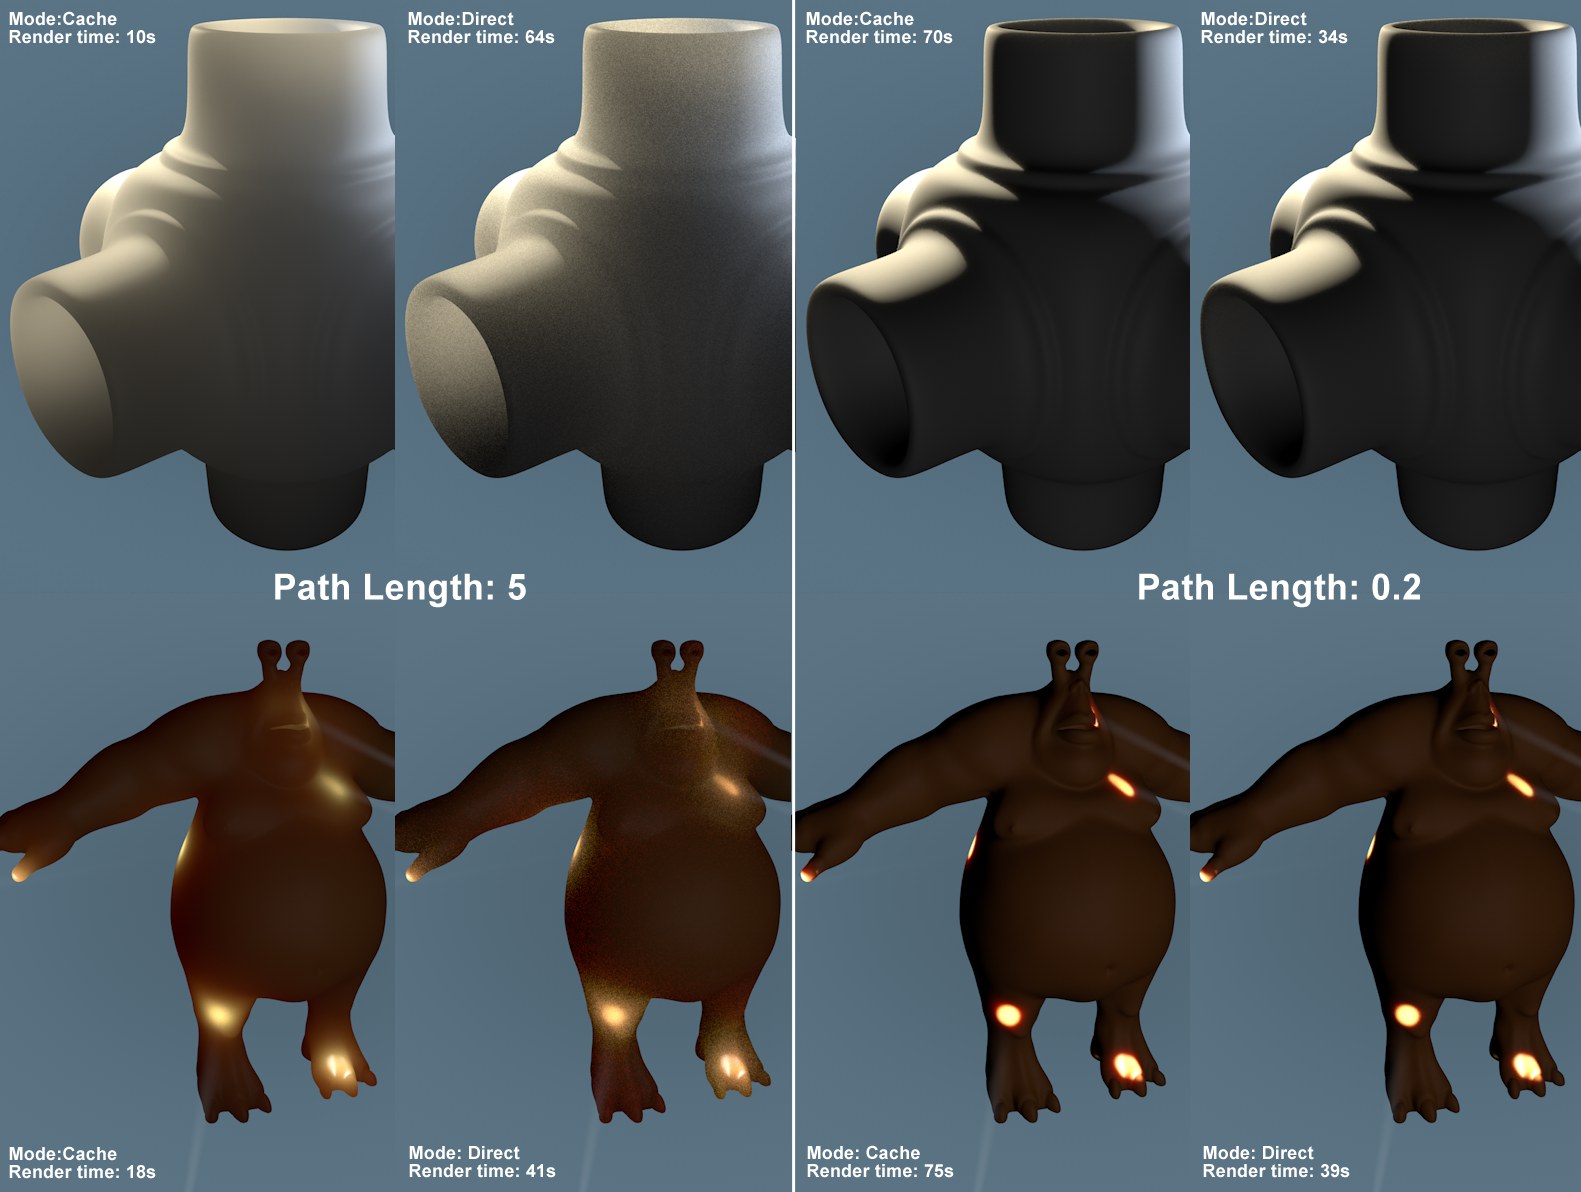 Cache works best with long path lengths, Direct works best with short path lengths.
In short, the Cache function works in two parts: First, numerous points on the object's surface are ascertained that are spread out as uniformly as possible (the Sample Density value defines the density). These will then be cached (which has a positive effect on render speed for animations). In the next step, the light dispersion on each point will be calculated and pooled across the entire surface.
This mode works especially well and quickly for large Path Length because only very few points must be ascertained on the object surface. The memory requirements, however, are greater because the aforementioned caching must take place.
For small and tiny Path Lengths, the Direct Mode (described below) should be tried.
Contrary to Direct, Cache also works with GI.
Furthermore, there is a limit of 1 million points for SSS objects. If this number of points is exceeded, artefacting can occur, especially for short Path Lengths. In this case, the Path Length and/or Smoothing values should be increased.
If an object's point or polygon count changes in the course of an animation, SSS cannot be calculated correctly by the Physical Renderer.
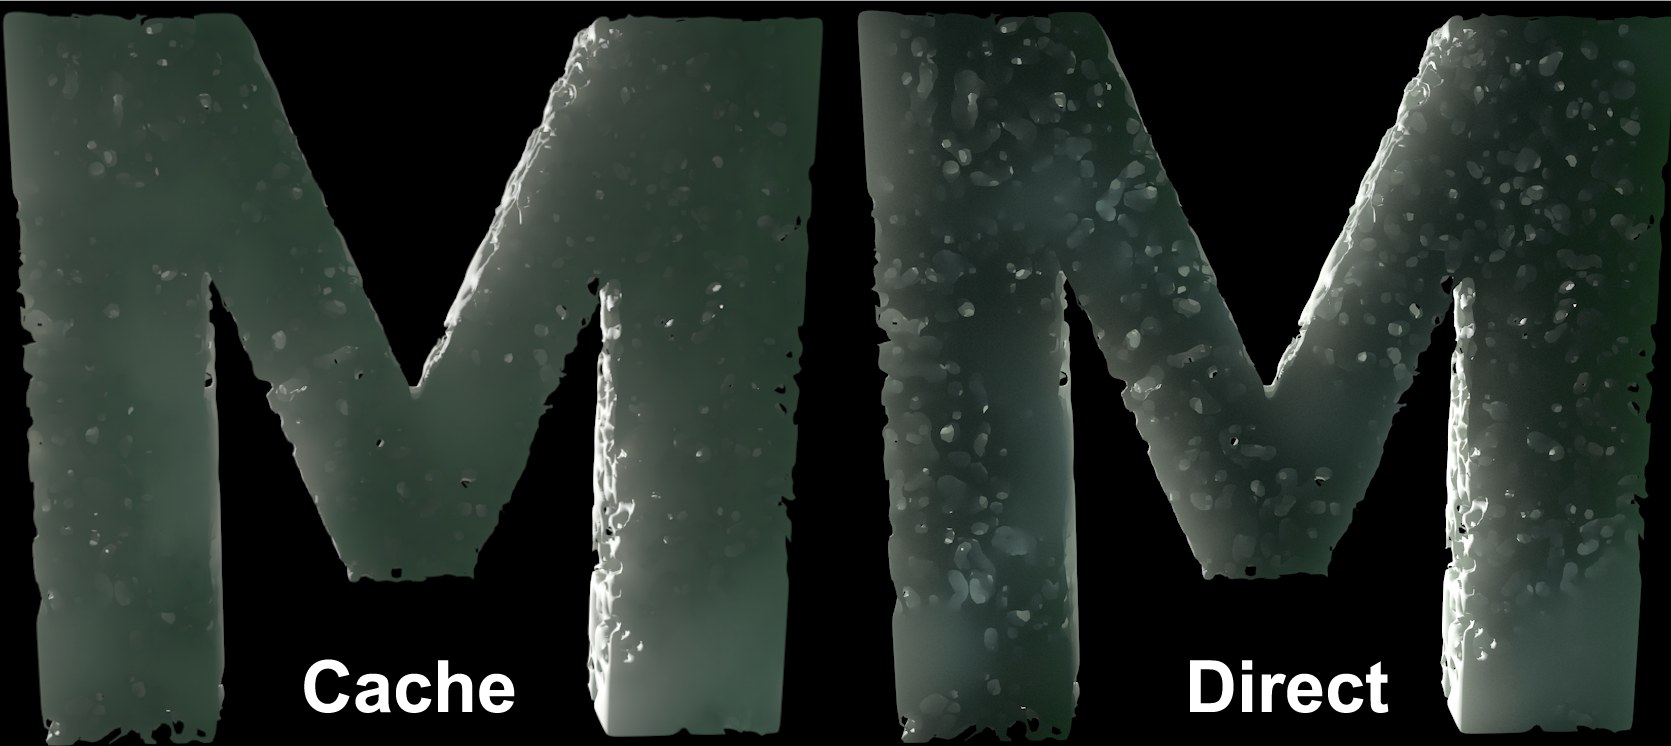 Details were lost in Cache mode; better results can be achieved in Direct mode but with longer render times.
This mode works without caching and is more of a, brute force’ method (similar to the QMC GI's behavior in conjunction with IC mode). This process is straight-forward and illumination will be calculated for each pixel. This works surprisingly well in particular with very short Path Length values (e.g., skin – much faster than the Cache method) but is very slow when used with large Path Length values and will result in a lot of noise being created.
Direct offers the following advantages over Cache:
- The limitations described above do not apply
- Well-suited for use with the Advanced SSS because calculation begins without having to pre-calculate for caching (faster preview mode)
- The calculation is more precise. The Cache method might not display finer details that would appear using the Direct method
- Less memory is required
Enables or disables Multiple SSS (e.g., if only Simple SSS should be used).
Enabling this option will result in faster calculation. We don't want to bore you with technical jargon that average users would find hard to understand. In simple terms: a normal sample density produces a result that can hardly be differentiated from the result if the Fast Evaluation option were disabled. When using Sample Density values of far less than 100% (whereby the quality of the SSS effect will be drastically reduced), enabling the Fast Evaluation option can occasionally lead to improved results.
Otherwise artefacting can definitely occur (including on neighboring SSS materials of different types). If this occurs, disable the Fast Evaluation option.
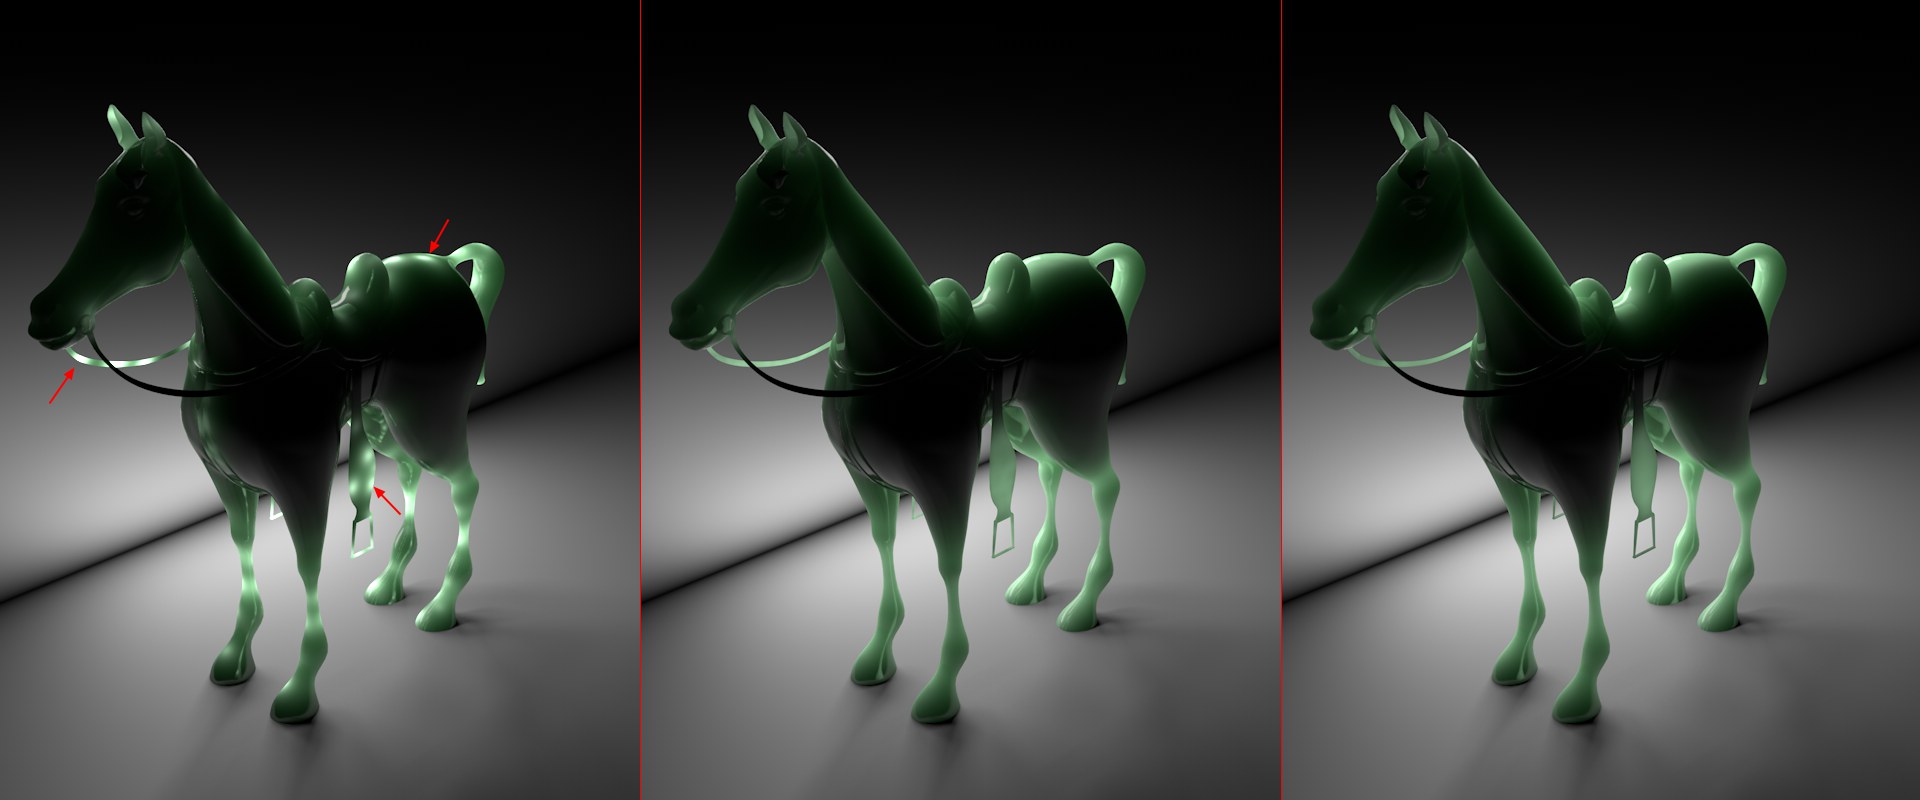 Increasing Sample Density from left to right (10%, 50%, 100%); differences in densities with values between 50% and 100% are barely noticeable.
While SSS is being calculated, several samples evenly spaced across the surface are ascertained and their brightness calculated. In a second step, these samples are calculated across the surface in conjunction with neighboring samples. The more samples, the more precise the result, especially in filigree regions. However, an increase in samples logically leads to an increase in render time and if the Smoothing value is not increased accordingly, values in excess of 100% can produce spotty results.
The default value of 100% will be sufficient in most cases.
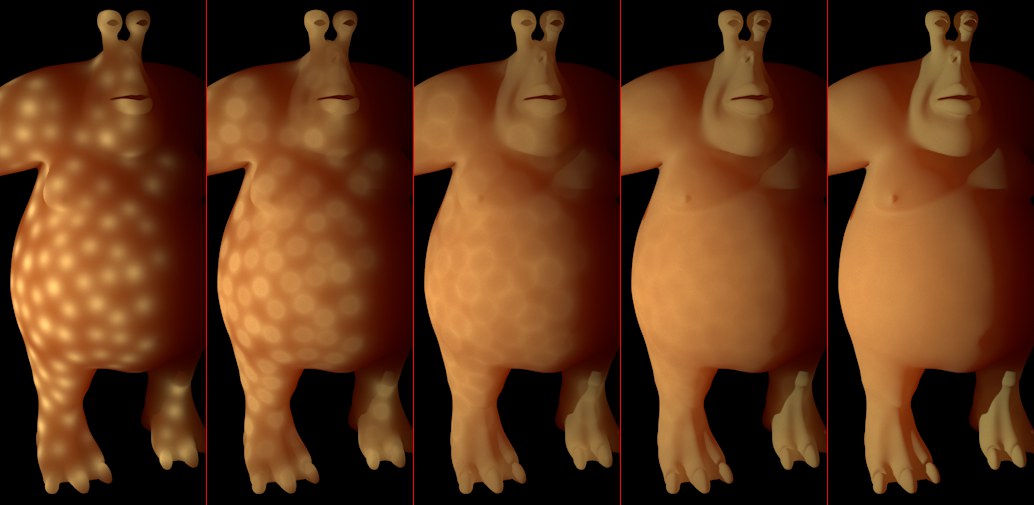 Increasing Smoothing values from left to right.
The Smoothing value is best understood if the Sample Density value is set very low. In this event you will have the result shown above. Normally, if the Sample Density value is high enough you won't have to worry about the Smoothing value because the samples will merge.
Nevertheless, spotty regions can sometimes result. In such an event you can carefully (detail will be lost accordingly) increase the Smoothing value.
 Increasing Threshold values from left to right (with correspondingly decreasing render times); artefacting increases accordingly.
The Threshold value is used to control the quality of samples when they are calculated: the lower the value the more accurate the result, but the longer the render time.
The greater the value the more artefacting that will occur and the less time that will be required for rendering.
If various Path Lengths have been defined for the three primary colors (and ONLY then) will longer render times result in more precise results.
Render artifacts can appear on sharp edges or surfaces that drastically change direction within short distances (i.e., very rugged surfaces). These regions are rendered too brightly. If artefacting occurs, the Minimum Threshold value should be increased (this value has an effect similar to Path Length but, internally, it will be reduced by the smaller Minimum Threshold values). The excess brightness will then be reduced.
Sampling Subdivision[0.00..16.00]
When the Physical Renderer is used, this setting is normally defined globally for the Project in the Edit Render Settings menu using Subsurface Scattering Subdivision (Max). When using the Physical Renderer, enable the Custom Sampling option if you want to define this parameter on a material or object-specific basis and use the Sampling Subdivision value to define with which amount of noise Multiple SSS should be rendered. Higher values will produce higher-quality results (and longer render times) and vice-versa.
When using the standard renderer (which offers no such global setting), sampling can only be defined for the material.
Details regarding this parameter can be found under Subsurface Scattering Subdivision (Max).