Baking
Introduction
Baking allows the rendering of AOVs onto texture maps using a specific UV channel. This can be useful in a variety of scenarios. One of these is "light mapping" where the user renders the diffuse lighting received by a particular object onto a texture and then re-uses the texture during animation rendering instead of having to compute the (potentially slow) diffuse lighting on each frame.
Baking Pros
- Can help increase rendering performance
- Textures can be tweaked by an external image editing program or script for quality or look reasons.
Baking Cons
- Involves some setup effort
- The quality of the baked results depends on the resolution of the texture. Extremely high resolution textures can take a long time to compute.
- When used for light mapping, changes to the lighting due to animated geometry and lights won't be reflected on the baked texture
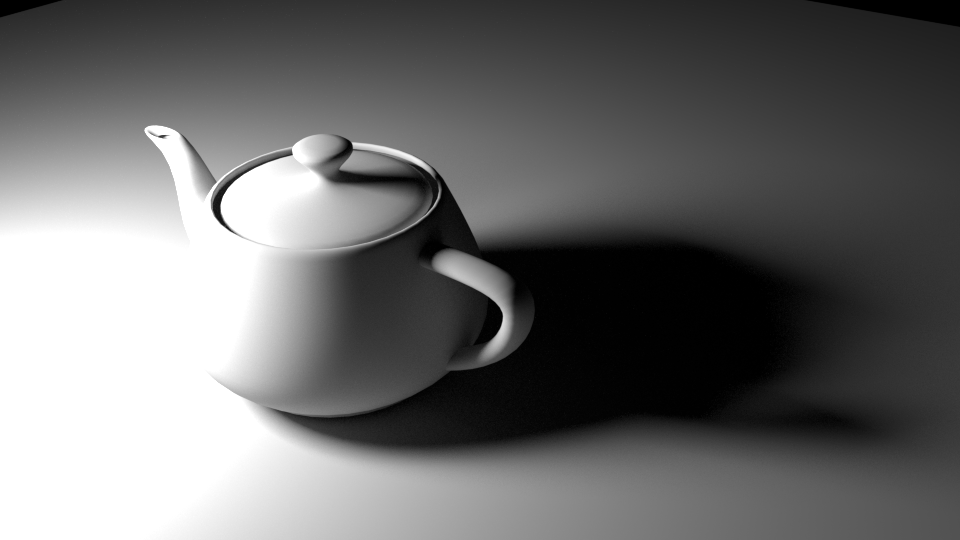
The image below shows a simple light-mapped scene containing a couple of objects. Both the teapot and the floor are using a 512x512 baked TotalDiffuseLightingRaw AOV image.
|
|
|
|---|---|
|
Original scene used to generate the baked lightmap textures. Rendered in 11 seconds. |
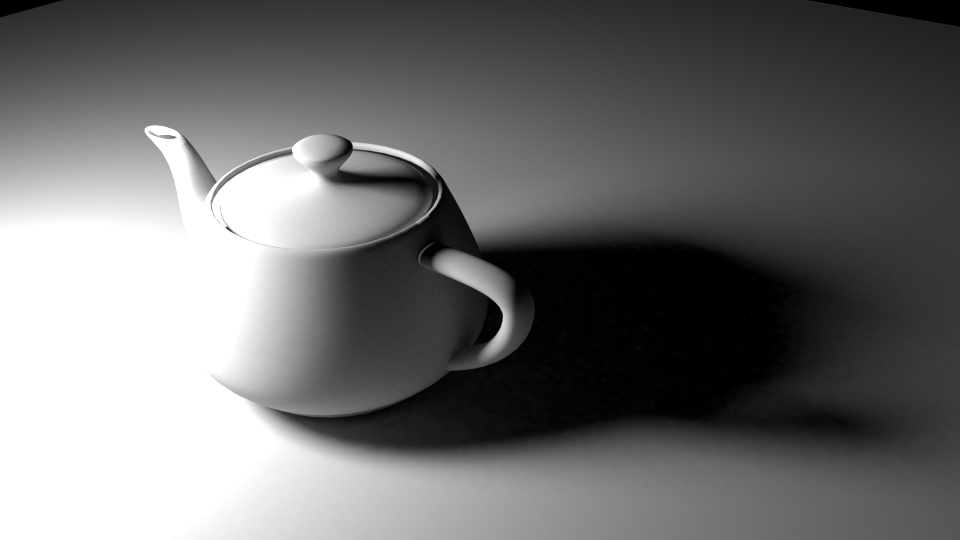
Modified shader graphs to use the lightmap textures. Rendered in 2 seconds. |
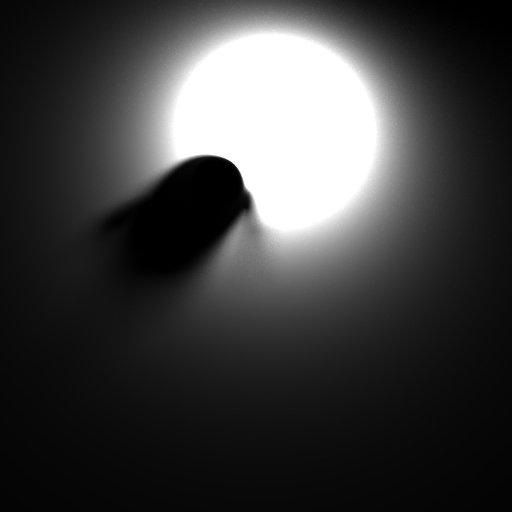
The floor's baked 512x512 image. Please note that the image appears darker because it's shown in linear space.
Using Baking
Generating baked images involves a few main steps:
- Creating an appropriate unwrapped UV channel that will be used by baking
- Creating and configuring one or more BakeSets
- Setting up the AOVs
- Executing the bake
Redshift requires an appropriate UV channel to perform baking. In most 3d apps, there will be an "Automatic UV" or "Unwrap UV" option which will generate an appropriate UV layout for baking. Two important requirements for a baking UV channel is that the UVs should fit in the 0->1 UV range and the different parts of the object should not be overlapping in UV space. The unwrapped UVs generated by most 3d apps already satisfy these criteria.
Creating Bake Sets
3ds Max does not have support for Redshift BakeSets. Instead all of the options are controlled by Max's "Render To Texture" menu, 3ds Max setup is covered in the section below.
Once we have our UV channel, one or more bake sets should be created and configured. Bake sets contain baking settings that can be applied to single object or a group of objects. Each object in the group will get its own baked image.
Finally, Redshift's AOV settings have to be configured to specify which AOVs should be baked as well. For example, if we wanted to bake diffuse lightmaps, we should use the "TotalDiffuseLightingRaw" AOV.
AOV Setup for Baking
3ds Max does rely on AOV setup for baking. Instead all of the options are controlled by Max's "Render To Texture" menu, 3ds Max setup is covered in the section below.
Redshift's baking capabilities rely on the AOV system for rendering out the baked images. Setting up the AOVs for baking is identical to setting them up for a render (camera-based) render.
You can find general information on AOVs here and a short AOV tutorial here.
We advise that users set up a separate render pass/layer (depending on their 3d app's capabilities) to configure the AOVs used for baking, as these might differ to the AOVs required by your main render.
When configuring AOVs for baking, the user has to make a choice regarding the baked image filenames. Since all bake sets rely on the global AOV options (which include filenames), how can this work when the scene contains multiple objects? I.e. how do we prevent the baking of all object in the scene from writing to the same image file?
This depends on the 3d app.
Executing Baking
First start by opening the "Render To Texture" panel in 3ds Max's "Rendering" toolbar menu.
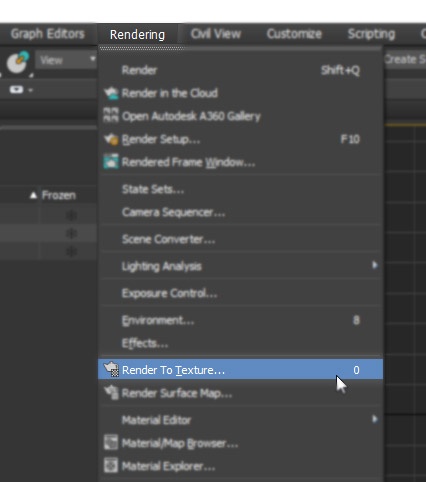
Opening Render To Texture
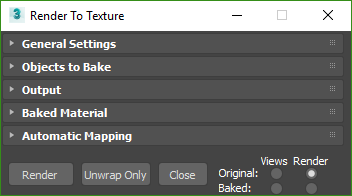
3ds Max Render To Texture panel
In the "General Settings" section you define your baked texture output path. You can also disable the option "Rendered Frame Window" to stop the native 3ds Max framebuffer from popping up during a texture bake as you won't need it.
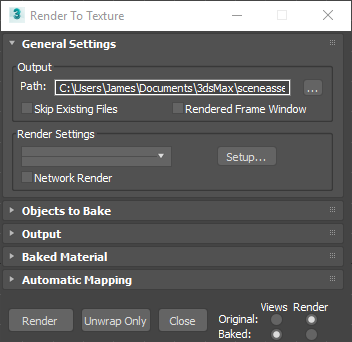
Render To Texture File Output Path
The "Objects to Bake" section lists what objects are going to participate in the texture baking. You can select more than one object and they will be listed separately as depicted in the picture below with "Teapot001" and "Plane001."
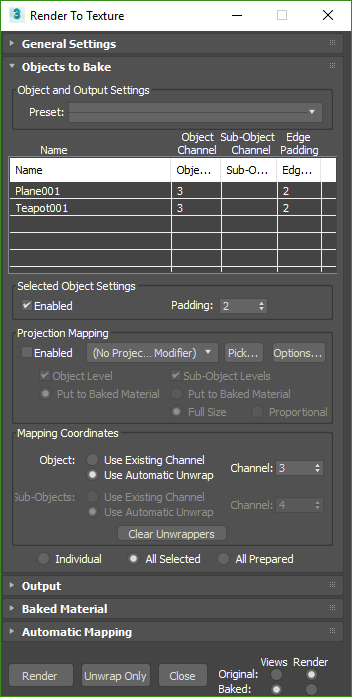
Objects to Bake section with 2 objects selected
By default Max will create its own UVs with the "Use Automatic Unwrap" option under the "Mapping Coordinates" section. If you want to use UVs that have been setup manually ahead of time use the "Use Existing Channel" option like pictured below and specify the correct UV channel with the "Channel" drop down menu to the right.
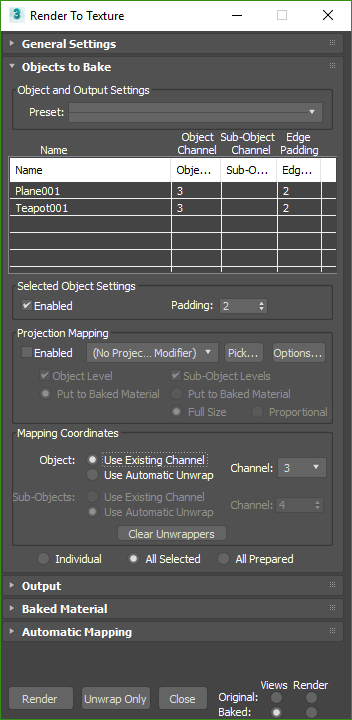
Use Existing Channel UV mapping option
The "Output" section controls what type of lighting information is baked out for your textures.
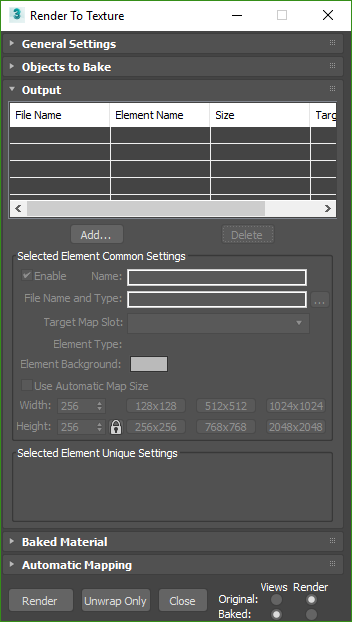
Render To Texture Output section
Click the  button to bring up the "Add Texture Elements" panel and scroll down until you find the relevant Redshift Texture Elements as pictured below:
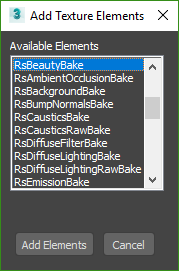
Add Texture Elements panel
You can create multiple Texture Element outputs, each with their own texture output size and options and they will be output at the same time. Below is a picture showing the output of a Redshift Beauty and Redshift Diffuse Lighting texture bake:
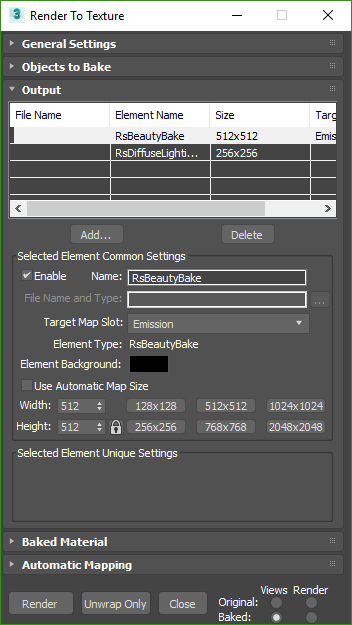
Outputting multiple Redshift Texture Elements
The "Target Map Slot" of the selected element tells 3ds Max where you want the output texture to be connected on the baked material. You can choose from any of the input ports on the Redshift material but in general if you are planning on using the baked element in the scene you will want to use the Emission slot as pictured below:
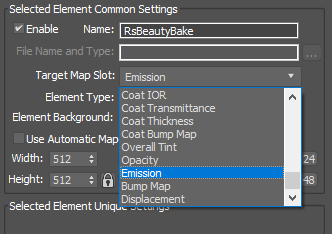
Target Map Slot set to Emission
The "Baked Material" section controls what 3ds Max does with the baked result in your scene.
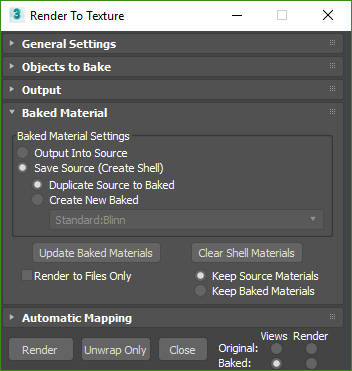
Baked Material section
By default this option is set to "Save Source (Create Shell)," this will create a Shell Material automatically and allow you to control whether the viewport and Redshift render uses the baked material result or the original pre-baking material. An example of this automatic material setup after baking is pictured below:
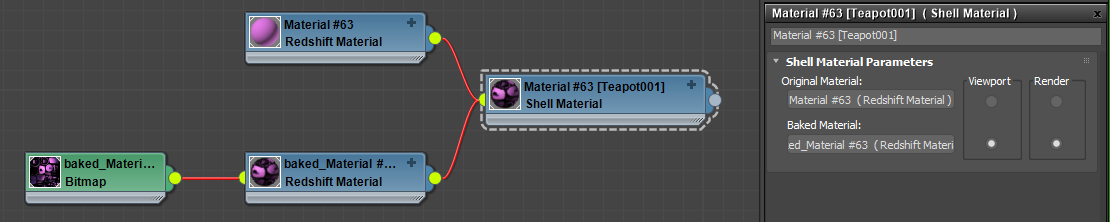
"Save Source (Create Shell)" material setup result with shell material options
When you're ready to bake your textures just hit the  button in the bottom left of the "Render To Texture" panel. This will launch the Redshift Render View and begin rendering and output your textures according to the options set above.
Limitations
The baking system currently doesn't work with the following rendering features:
- Tessellation and displacement. If the baked geometry is tessellated or displaced, visual artifacts will appear on the baked image.
- Point-based techniques such as point-based subsurface scattering, irradiance cache and the irradiance point cloud don't work in conjunction with baked renders. Photons (and, subsequently, caustics) do work.
- Projection mapping is not currently supported.
- high-res to low-res texture baking is not currently supported.
Using Baking for Lightmapping
Here are a few quick steps to generate baked lightmaps similar to the one shown above:
- Create a scene like the one shown above, with two objects
- Create unwrapped UV channels for both objects. Ensure the UV channels are named consistently.
- Select both objects and assign them a bake set on both objects. Ensure the bake set is using the correct UV channel
- Add a "TotalDiffuseLightingRaw" AOV to your scene
- Depending on your 3d app, perform the baking filename steps explained above
- Execute the bake
- Then edit the shader graph as follows:
- Remove any diffuse lighting by making the diffuse color black or the diffuse weight zero
- Connect the baked images to the incandescent (or emission) color ports of your shader and set incandescent (or emission) weight to the same value as your original diffuse weight
- Ensure that, if the image was saved out as an EXR, the gamma in the texture node is set to linear
- The above steps essentially replace the 'real' diffuse lighting with baked diffuse lighting
- If the diffuse port was textured, use a multiplication shader node to multiply the texture with the lightmap before connecting it to the incandescent port (or emission).