Material Conversion
Overview
|
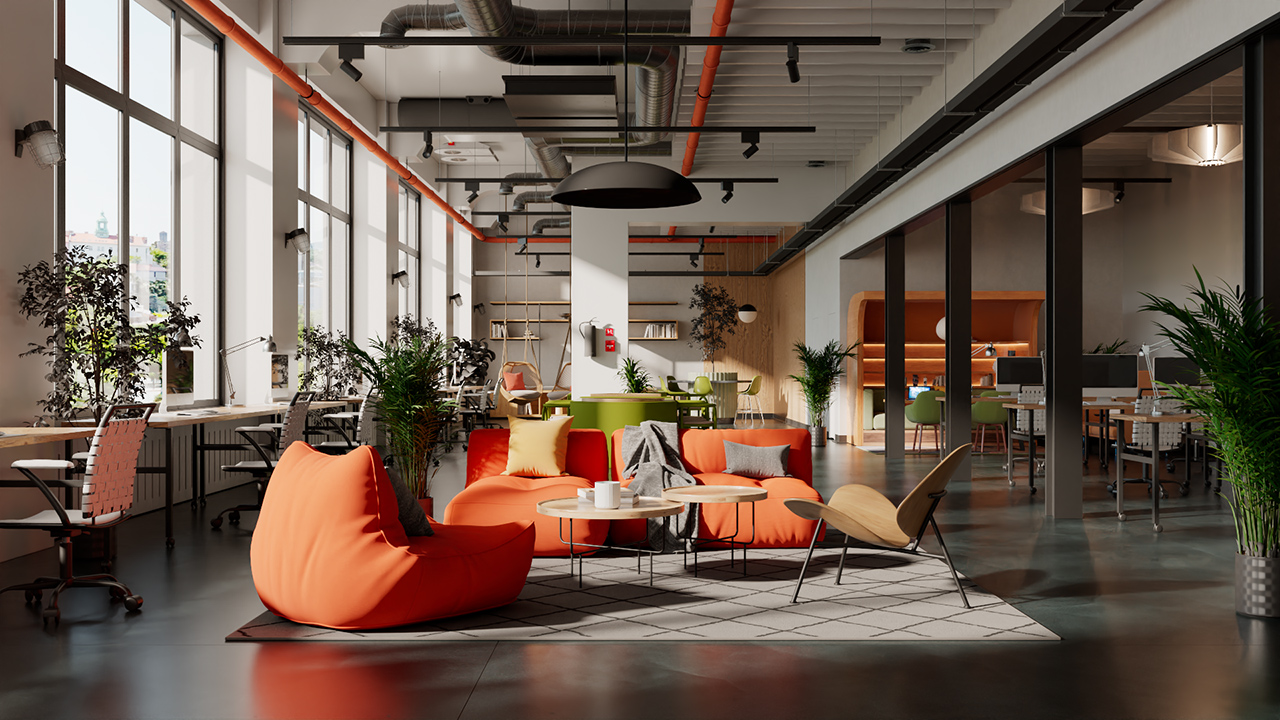
| Scene from Evermotion converted from Corona and rendered in Redshift |
Redshift can convert scenes made in other renderers to a scene using native Redshift materials and lights.
We support conversion of the following:
| Materials | Lights | Texture Maps |
| Standardmaterial | VRayLight | VRayHdri |
| VRayMtl | VRayIES | VRayColor |
| VRayLightMtl | VRaySun | VRayCompTex |
| VRayBlendMtl | CoronaSun | VRayDirt |
| VRay2SidedMtl | CoronaLight | VRayNormalMap |
| VRayOverrideMtl | VRayEdgesTex | |
| VRayCarPaintMtl (basic) | VRaySky | |
| VRayBumpMtl (basic) | VRayTriplanarTex | |
| VRayFastSSS (basic) | VRayGLSLTex (basic) | |
| VRayFastSSS2 | VRaySoftbox (basic) | |
| VRaySkinMtl | VRayUserColor | |
| CoronaPhysicalMtl | VRayUserScalar | |
| CoronaLegacyMtl | VRayColor2Bump | |
| CoronaLightMtl | VRayBump2Normal (basic) | |
| CoronaLayeredMtl | Normal_Bump | |
| CoronaRaySwitchMtl | CoronaAO | |
| CoronaBitmap | ||
| CoronaBumpConverter | ||
| CoronaColor | ||
| CoronaColorCorrect | ||
| CoronaFrontBack | ||
| CoronaMix | ||
| CoronaNormal | ||
| CoronaSky | ||
| CoronaSun | ||
| CoronaRaySwitch | ||
| CoronaRoundEdges | ||
| CoronaWire | ||
| CoronaTriplanar |
Please note, material conversion is unlikely to be perfect. We can't convert nodes that we don't have in Redshift and some scenes may work better than others. After conversion is complete a list of errors may pop-up to draw attention to areas that may need manual attention.
Pay close attention to camera settings like exposure, these may need manual compensation for best results.
How to
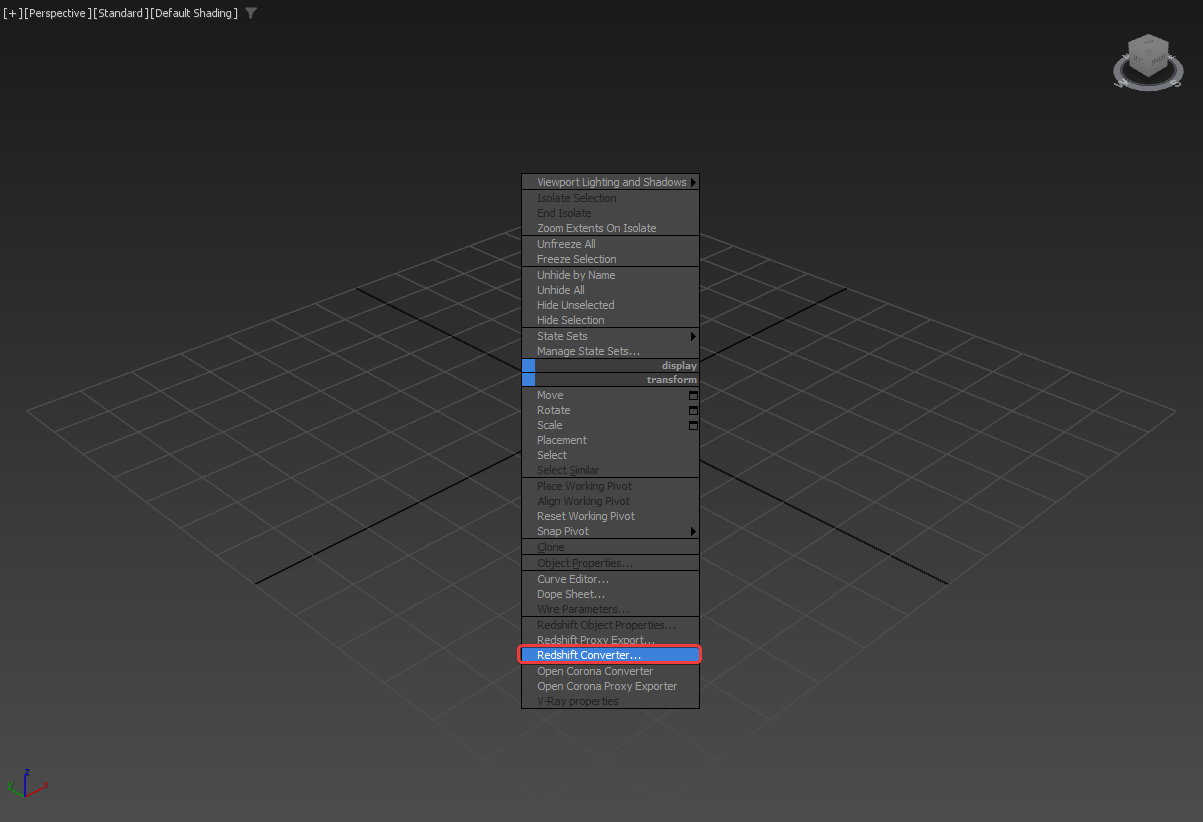
To open the Redshift Converter simply right click in the viewport and select "Redshift Converter"
|
Parameters

|
Material Features
Standard: specular to reflection
Converts a 3ds Max Standard Material to a RS Material. It takes the original specular intensity and glossiness level and uses comparable reflection weights and roughness values in the new Redshift Material.
VRay: adv. VRayBlinn to GGX
When enabled, by default, a table is used to convert a VRay Blinn BRDF to comparable GGX values in the RS Material.
When disabled, the VRay Blinn values are converted 1:1 to the RS Material.
Explicit Glossiness Conversion
When disabled, by default, glossiness is converted to roughness by enabling the "Glossiness to Roughness" options found in the Advanced section of a RS Material.
When enabled, glossiness values are inverted and the advanced settings are untouched. For example, a glossiness of 0.3 becomes a roughness of 0.7.
Convert to RS Material (legacy)
When disabled, by default, all materials are converted to RS Standard Materials.
When enabled, all materials are converted to the legacy RS Material.
General Options
Add prefix to converted mtls
Specify a prefix to add to all converted materials here.
100 fresnel IOR to
Some material conversions can result in an IOR of 100, like a material with fresnel reflections disabled. When enabled, this option sets those materials to use a custom IOR instead that is specified here.
Switch renderer to Redshift
When enabled, after the conversion Redshift is set as the active renderer.
Thorough map search
When enabled, the conversion process does a more thorough search through the scene that may help convert textures that are not connected to a material. For example, a texture connected to the color or opacity of a light. However, this could extend the time it takes to complete the conversion.
Prefer auto colorspace
When disabled, by default, a texture's gamma is used as the Custom Gamma in a converted RS Bitmap.
When enabled, if a texture uses an "Auto" color space or gamma 2.2 then a converted RS Bitmap uses Redshift's "Auto" color space option.
Conversion
Here you can control what is converted using the options listed below. By default all materials, maps, and lights are converted but you can also
- All (materials, maps, lights)
- Only scene materials and maps
- Only scene lights
- Materials of selected objects
- Selected material editor slot
START CONVERSION
Clicking this button starts the material conversion using the options set in the Material Features, General Options, and Conversion sections. Depending on the complexity of the scene, this may take some time.
Tools
The following are helpful standalone tools that can be used to clean up or convert your materials to a more optimal setup.
Reset Material Editor Slots to Redshift Materials
When clicked all material slots in the Compact Material editor are reset to default Redshift Materials.
Show maps in VP
Convert RS Material to RS Standard Material
Converts any RS Materials to RS Standard Materials with the same settings and node structure.
Convert RS Material opacity maps to RS Sprite
This tool can quickly convert a RS Material using an opacity map to a much faster Sprite node setup. See here for more information on the Sprite node.
It performs the following actions:
-
Take any RS Material that uses a bitmap as an Opacity input.
-
Connect the RS Material to a new RS Sprite node.
-
Use the bitmap texture's path as the Sprite node's texture path.
-
Delete the unnecessary bitmap node previously used for opacity.
Convert Bitmap to RS Bitmap
Converts native 3ds Bitmap textures to RS Bitmaps.
Add RS Bump Map to bump slots
Automatically adds a RS Bump Map node where a texture is connected directly to the bump map port.
Works with the RS Standard Material, Material, SSS, and Skin shaders.
Fix normal map gamma
Sets the "Custom Gamma" to 1 for any bitmap connected to a Bump Map set to a normal map mode.