Mesh Lights
Introduction
Area lights in Redshift can have a predefined shape (such as rectangle, disc, cylinder or sphere) or can have their shape defined by a user-specified mesh, in which case the light is referred to as a "mesh light".
Mesh lights can reproduce lighting emitted from complex shapes like a neon sign. While a similar result can be achieved with a combination of incandescent geometry and GI, that can be considerably noisier than mesh lights.
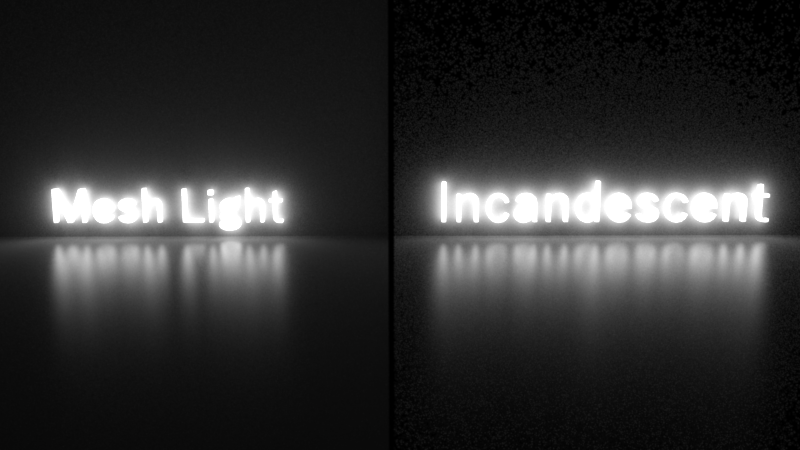
Using mesh lights instead of incandescent geometry can produce less noise, especially on places that are far from the light.
In certain cases, mesh lights can also help optimize rendering times by facilitating the combination of multiple simple lights into fewer mesh lights.
|
|
|
|
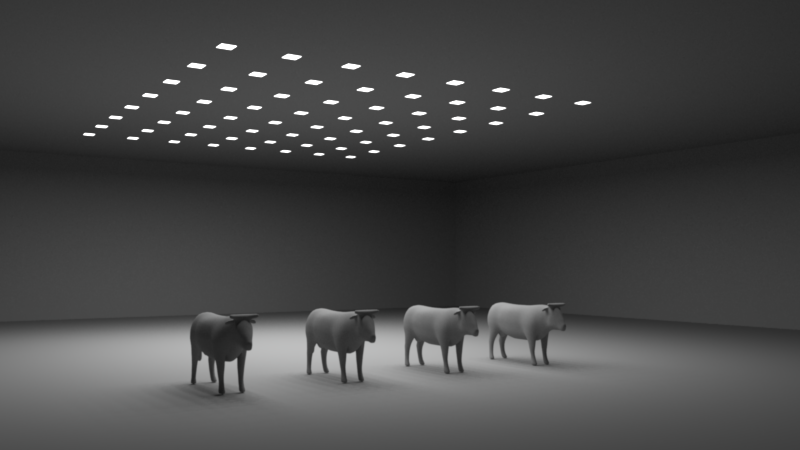
Scene with 64 rectangular area lights. Rendered in 11 seconds |
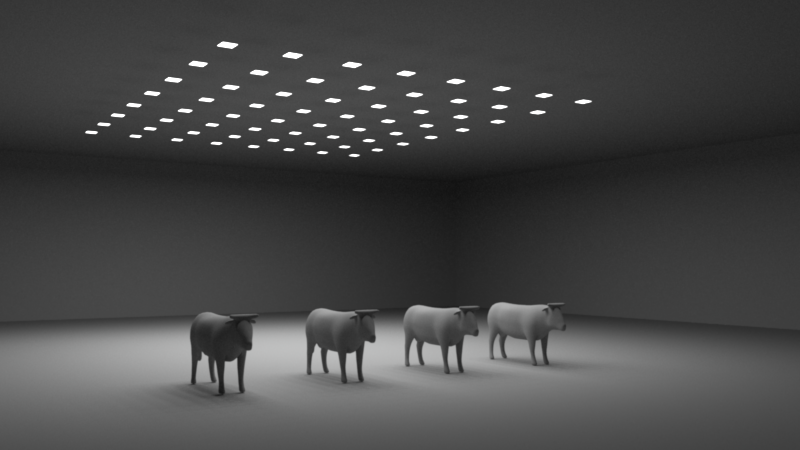
Scene with a single mesh light containing 64 quads. Rendered in 2.8 seconds |
How To Use
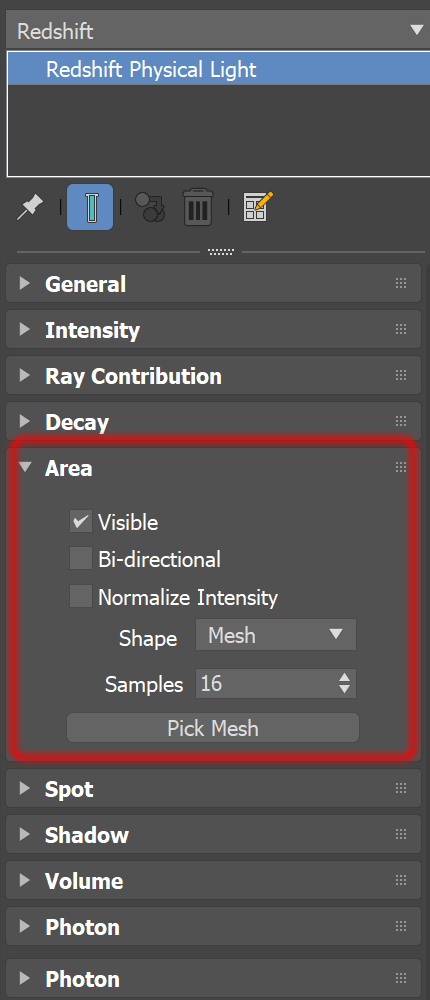
To create a mesh light in Softimage you first have to create a Redshift Physical Light, go to its 'Area' settings and set the 'Shape' type to 'Mesh'.
Then, you can use the object picker to select a mesh in your scene that will define the shape of the light. The mesh light and original mesh are now linked. Modifying the original mesh will modify the shape of the mesh light.
Once you have selected a mesh for your light, please remember to hide that mesh or move it out of the way otherwise it can overlap with the newly created mesh light and produce shadows and other visual artifacts.
Texturing
Just like any area light in Redshift, mesh lights can be textured.
To texture a mesh light, you'll need to ensure that the referenced mesh contains a UV coordinate set.
You can then texture your mesh light just like you'd texture any other area light: by connecting a Texture to the light's Color.
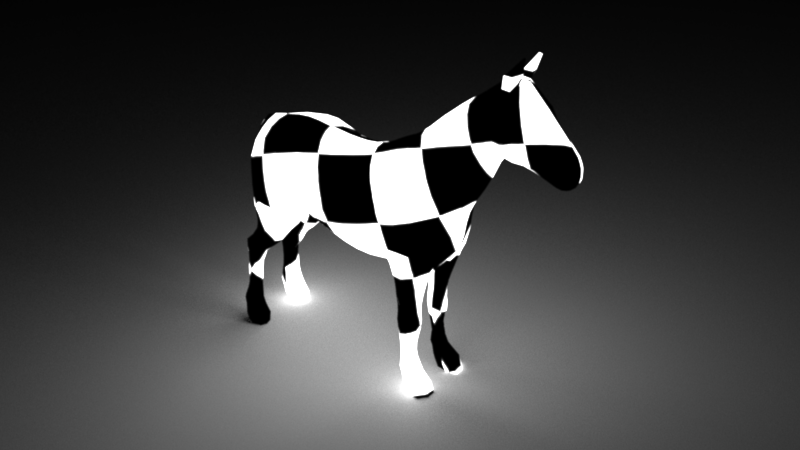
Texturing a mesh light using a simple checkerboard pattern
Noise
Typically, noise originating from a mesh light can be reduced or eliminated by increasing the samples of the light itself. However, for mesh lights to be effective, GI has to also be enabled in the scene and must be using enough samples. Similarly, if the mesh light can be seen through low-gloss reflections or refractions, then the reflection/refraction samples of the material itself might have to be increased.
Please note that this is a special requirement for mesh lights and is not the case with other light types!
For non-mesh-lights, GI doesn't have to be enabled and the number of samples of GI or material reflection/refraction doesn't affect the noise produced by the light!
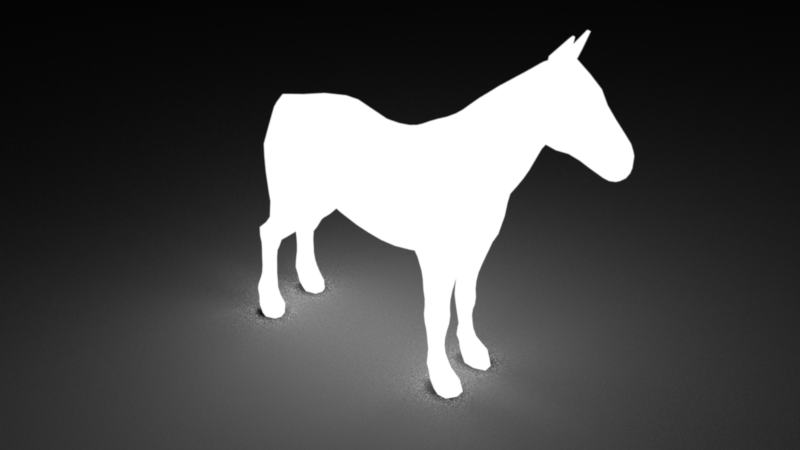
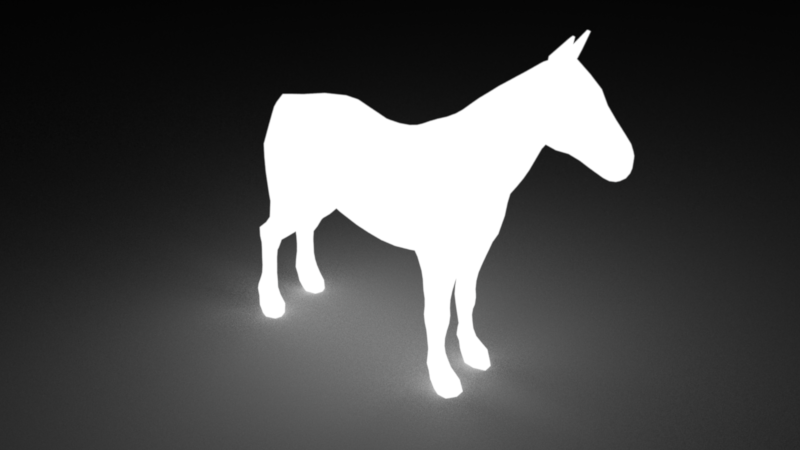
The images below show the type of artifacts that can be seen when GI is disabled.
|
|
|
|
GI disabled. Even though the mesh light is using enough samples, there is still noise and some missing lighting around the hoofs |
With brute-force GI enabled, the artifacts around the hoofs are gone |
Using Mesh Lights To Optimize Many-Light Situations
As shown above, if your scene contains many simple lights, you can use mesh lights to optimize your rendering times. Most renderers can render faster when there are fewer lights in the scene and Redshift is no exception!
Please note, though, that this type of trick can't always be used. If the grouped lights are far away from each other or blocked from each other (because they are, say, in different rooms), then this kind of grouping can introduce significant noise!
Ideally, you should try to group lights that are close to each other. Office lighting (i.e. a grid of overhead panels) or a grid of LED lights are the ideal situations for this type of optimization.